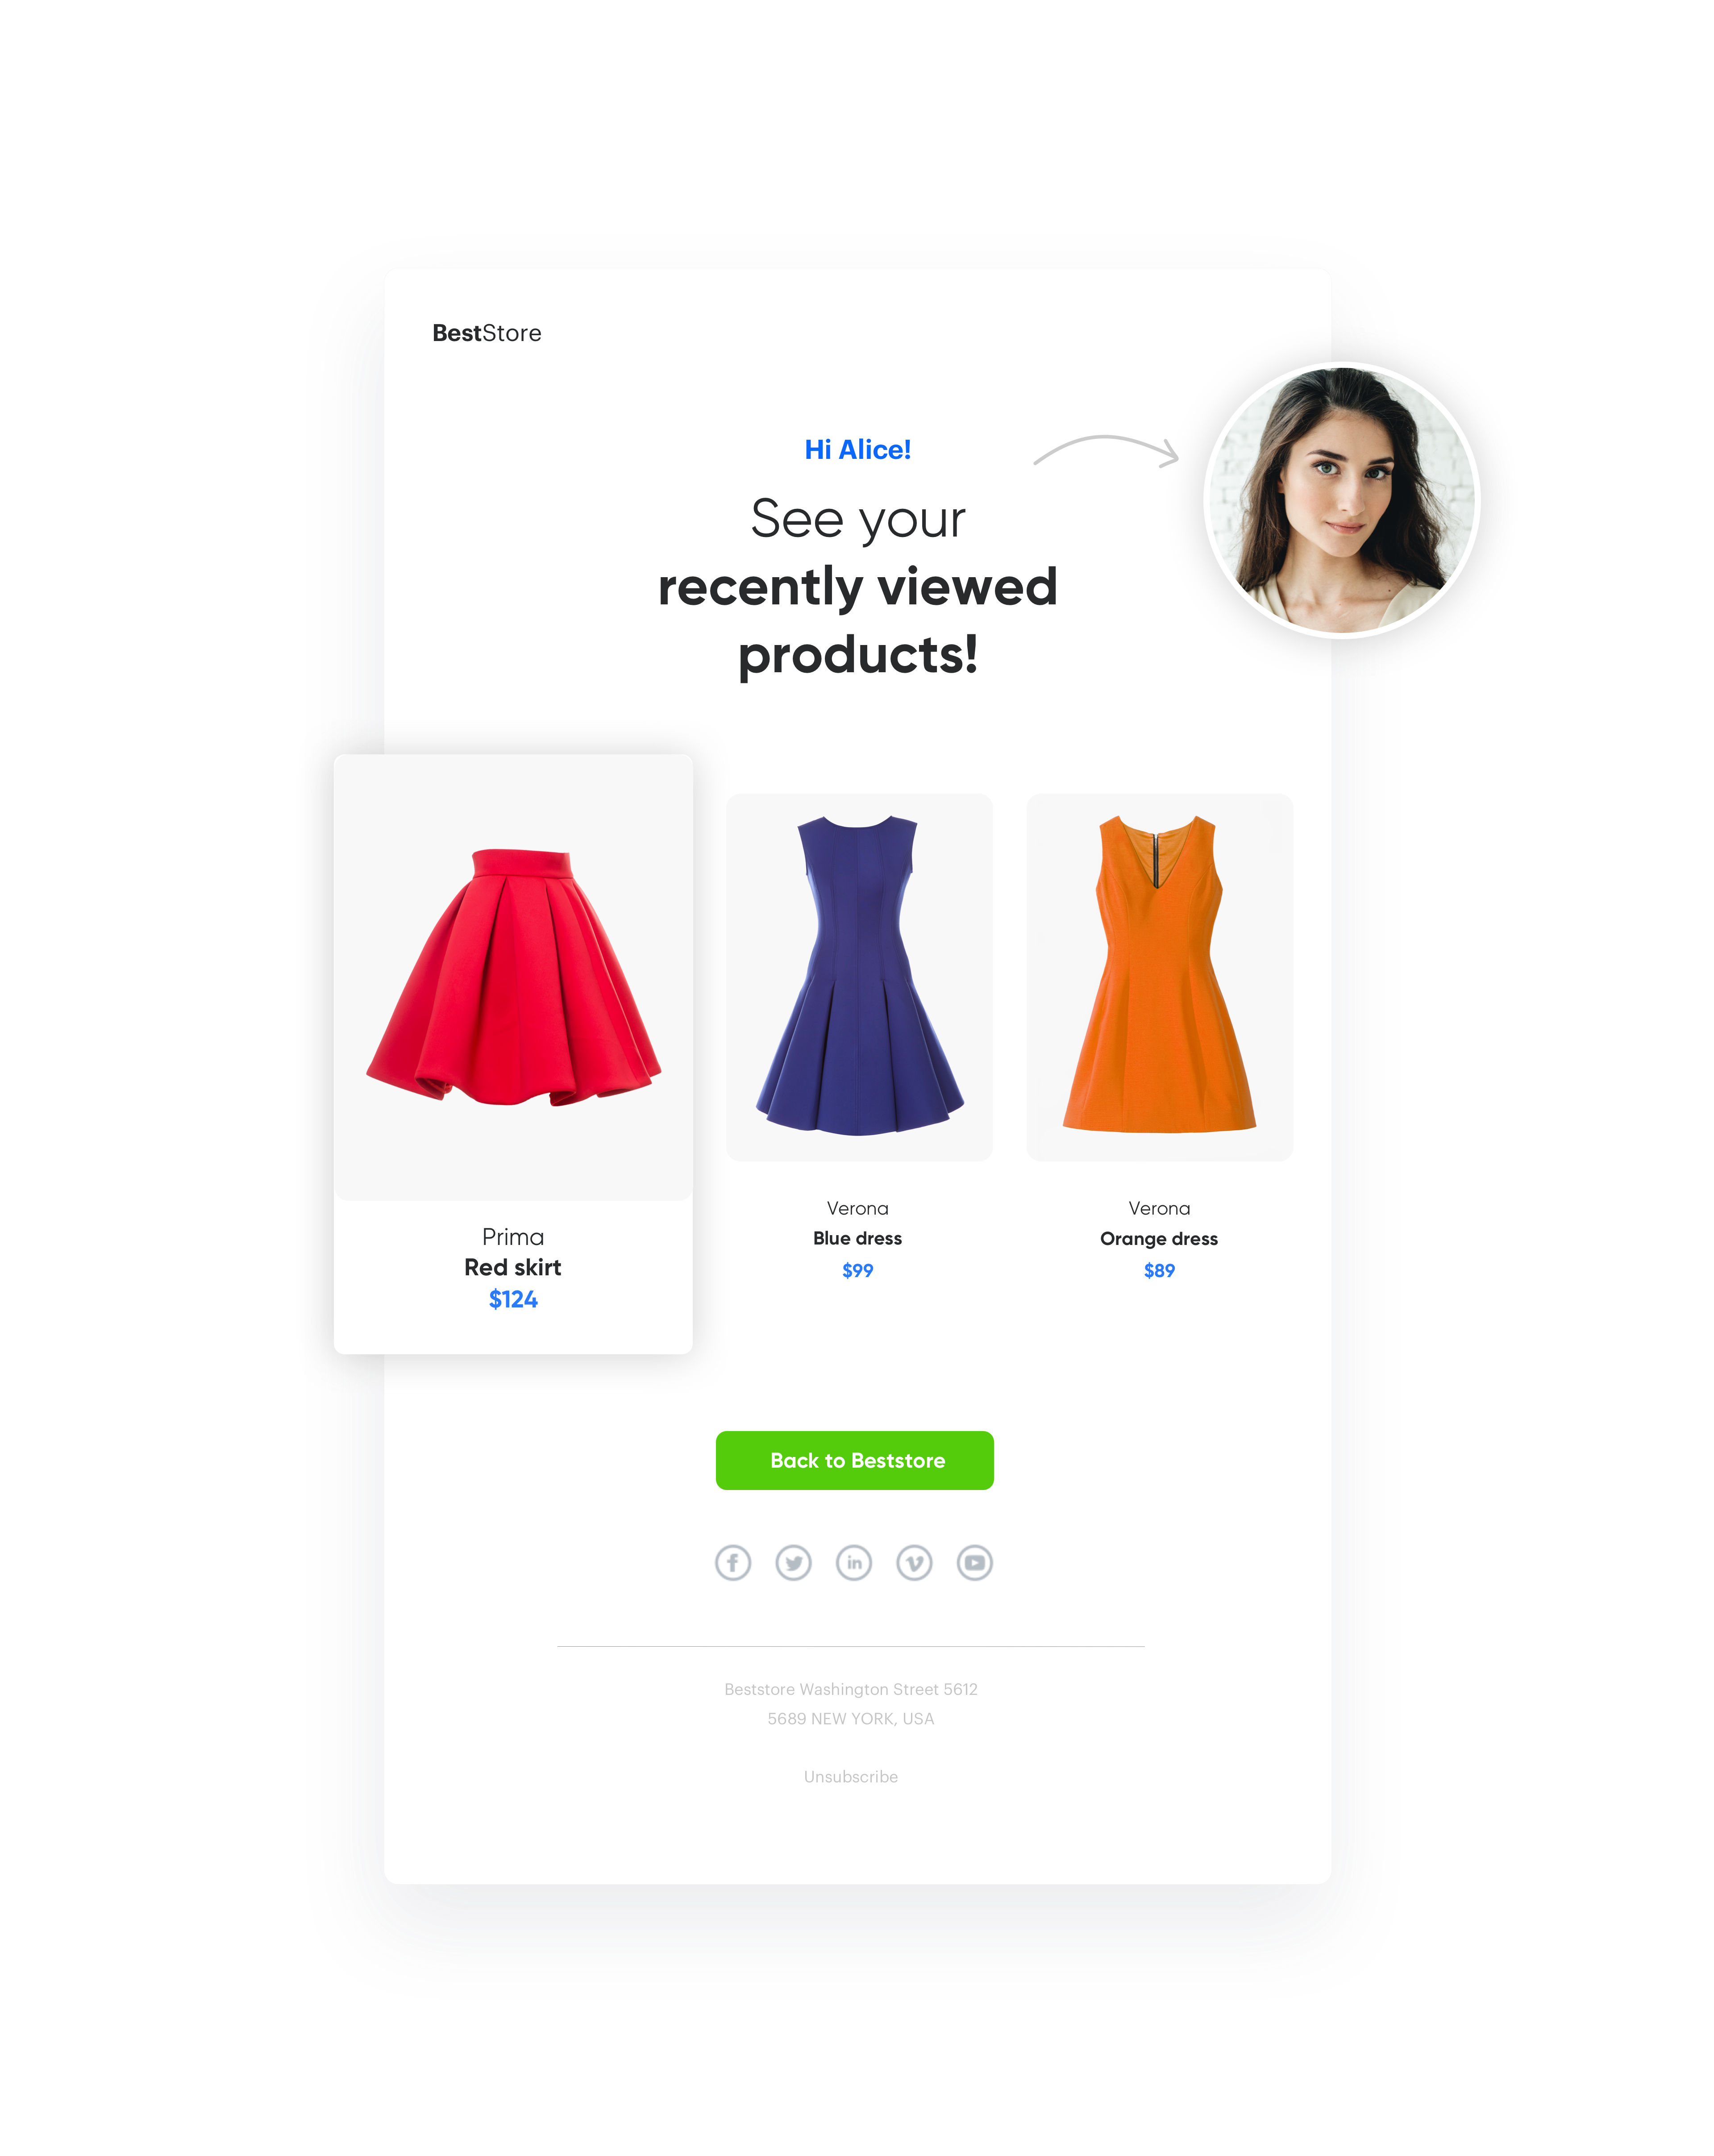
Email with last viewed products
Encourage your customers to buy the products they have looked at and potentially found interesting. Sometimes what they need to finalize the transaction is a reminder of their previous activity.
Use email communication to remind customers about their last-viewed product. If the customers entered the store and viewed many products from your offer but in the end, they did not buy any of them and they left the site, you can wait for the selected period of time (for example, 3 hours) and send an email with pictures of the products they viewed. Sending the email an hour after the customer closes the session, can encourage them to return.
You can also include information about things like free delivery, information about the product.
Example of use - Retail industry
A client from the retail industry (fashion) sent a communication with last seen products to customers who were on the site but did not make a transaction. In this email they could find products that they have recently viewed.
Results
Results from email:
- 3,18% CTR,
- 29,44% CTOR.
Prerequisites
To be able to implement this use case, check out articles:
Process
Creating an email with last viewed products, perform the steps in the following order:
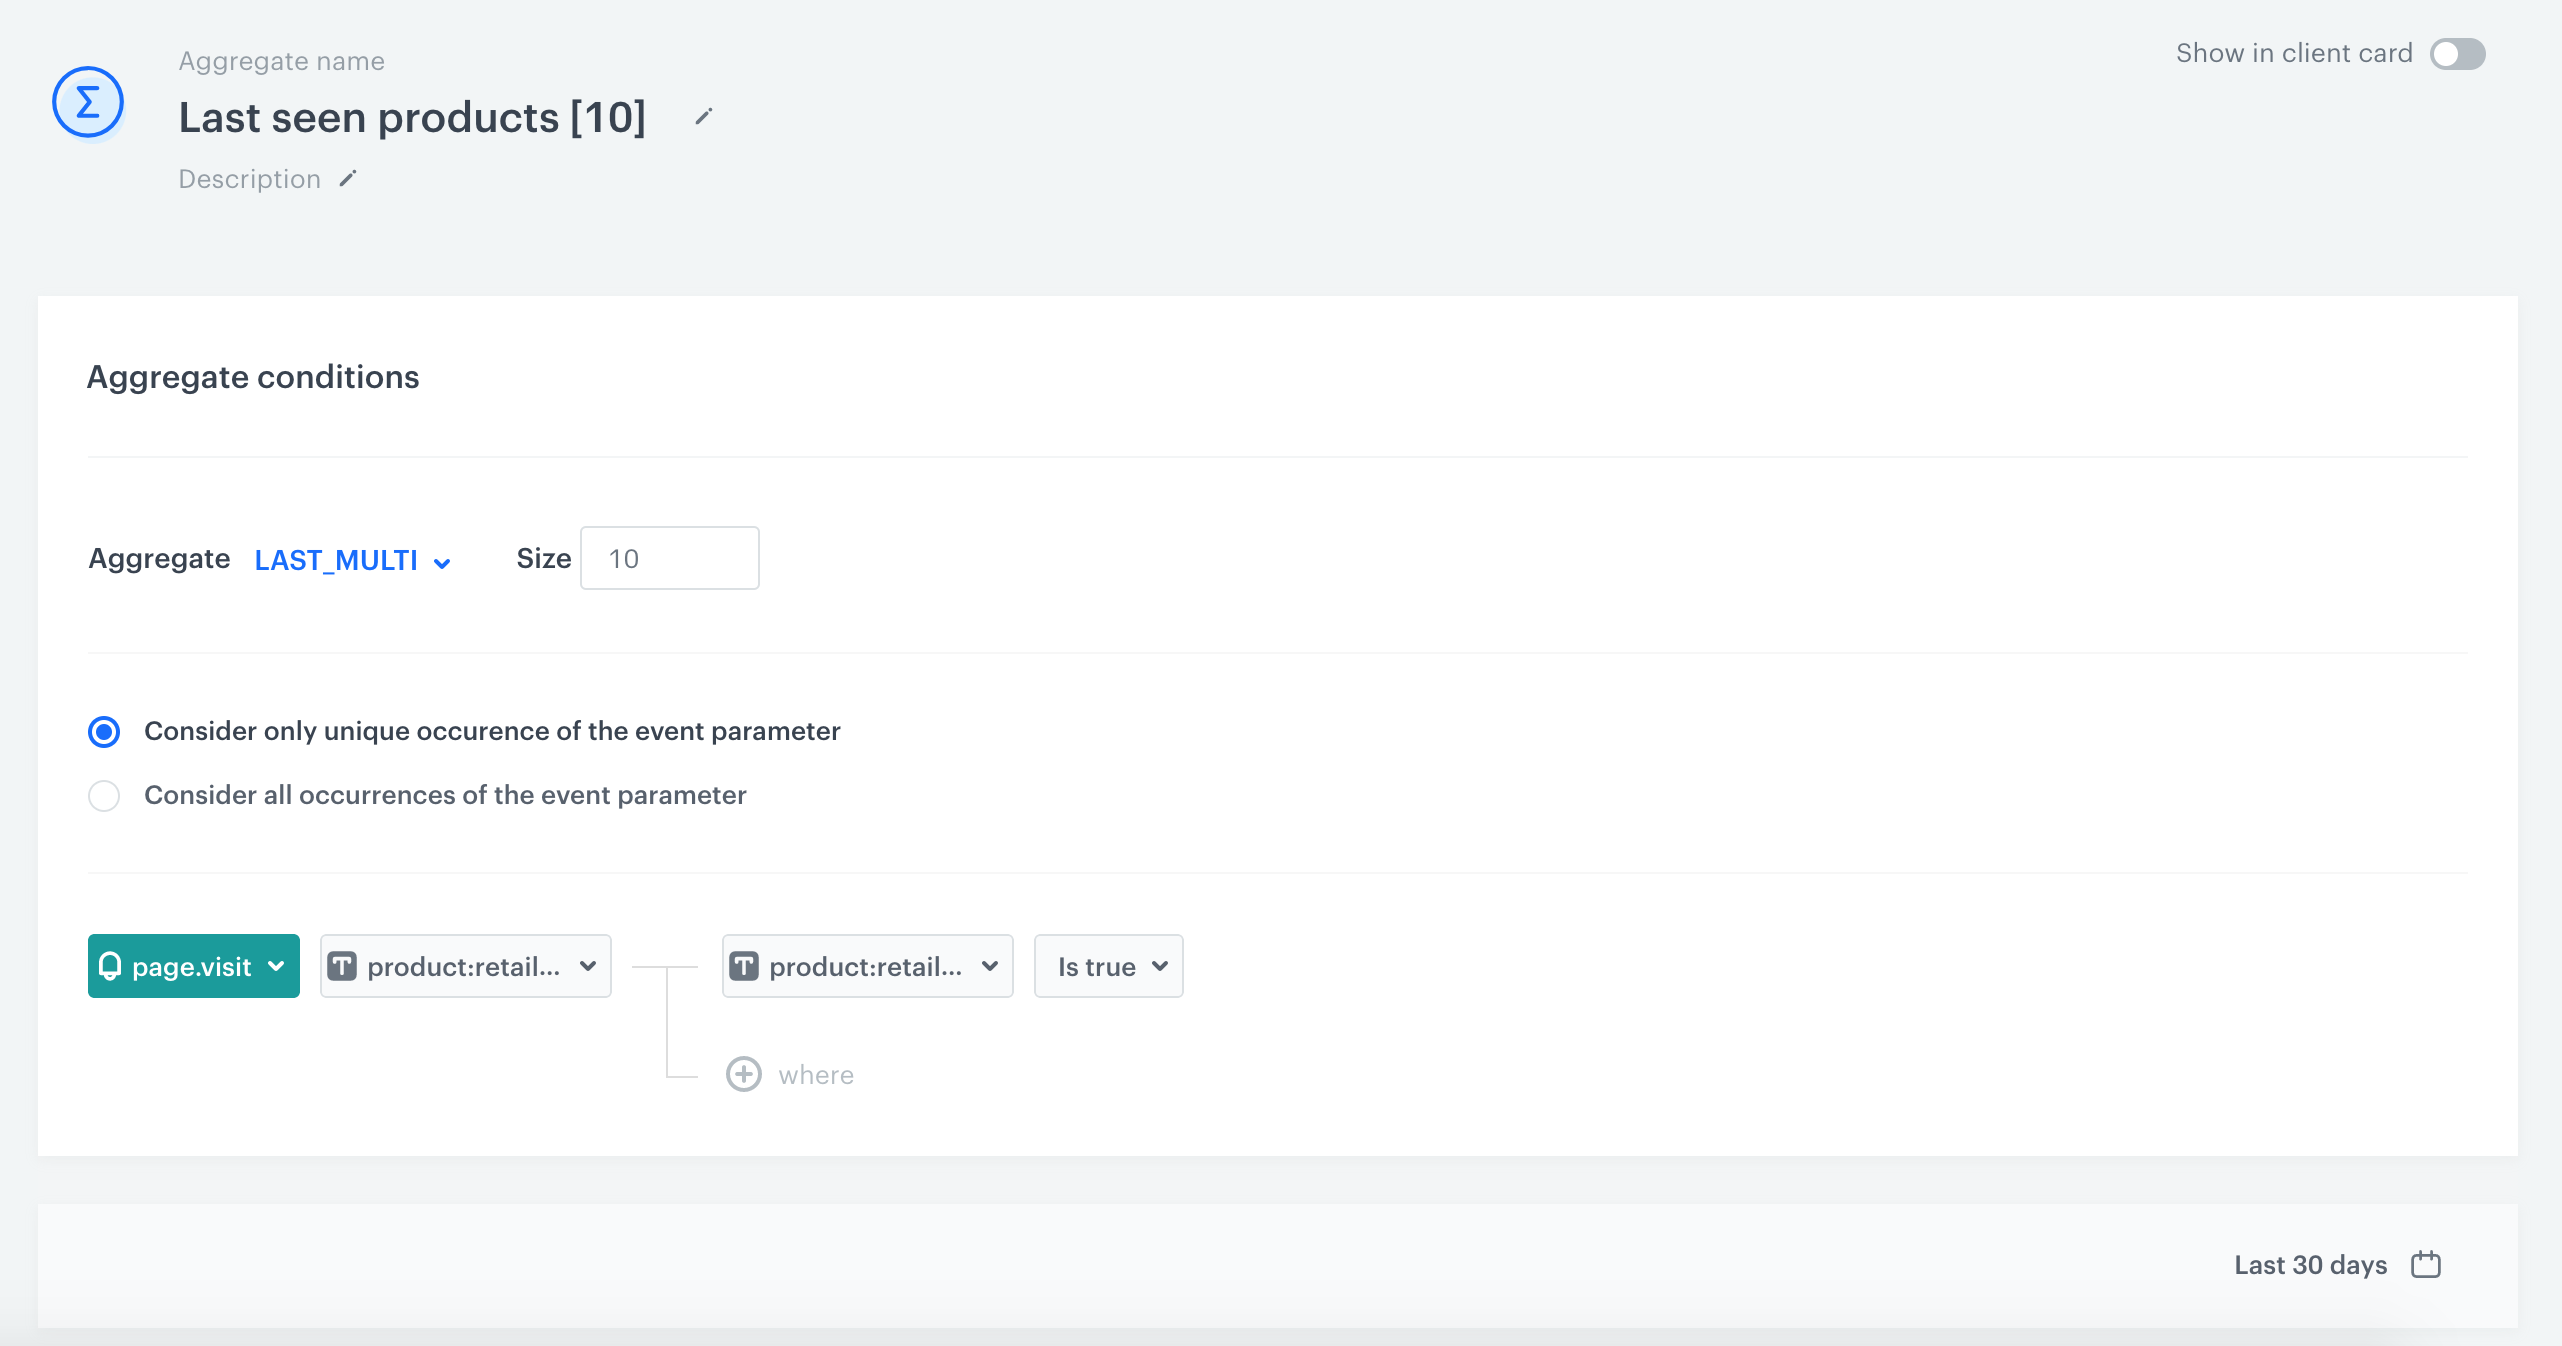
Prepare an aggregate
Build an aggregate which collects the SKUs of recently viewed products.
- As the type of aggregate, select Last Multi.
- In the Size field, enter the number of recent events (for example, 10).
- Select the Consider only unique occurrence of the event parameter option.
- Select the event page visit and the aggregate - in this case it will be the product id, which is stored in the OG tag called retailer_part_no.
Prepare the email template
Prepare an email template and include the ID of the catalog that contains items and the ID of the aggregate you prepared in the previous step. Those two ID will let you display last seen products by an individual customer in the email.
- Go to Communication > Email.
- Click the
 icon.
icon. - To create a new template, click Create new.
- To create a template out of an existing template, click From template.
- Select the template.
- Select the form of template, more information about create template you will find here:
- Drag&drop builder - Create email templates with ready-made components.
- Code editor - Create email templates in CSS and HTML.
Configure automation
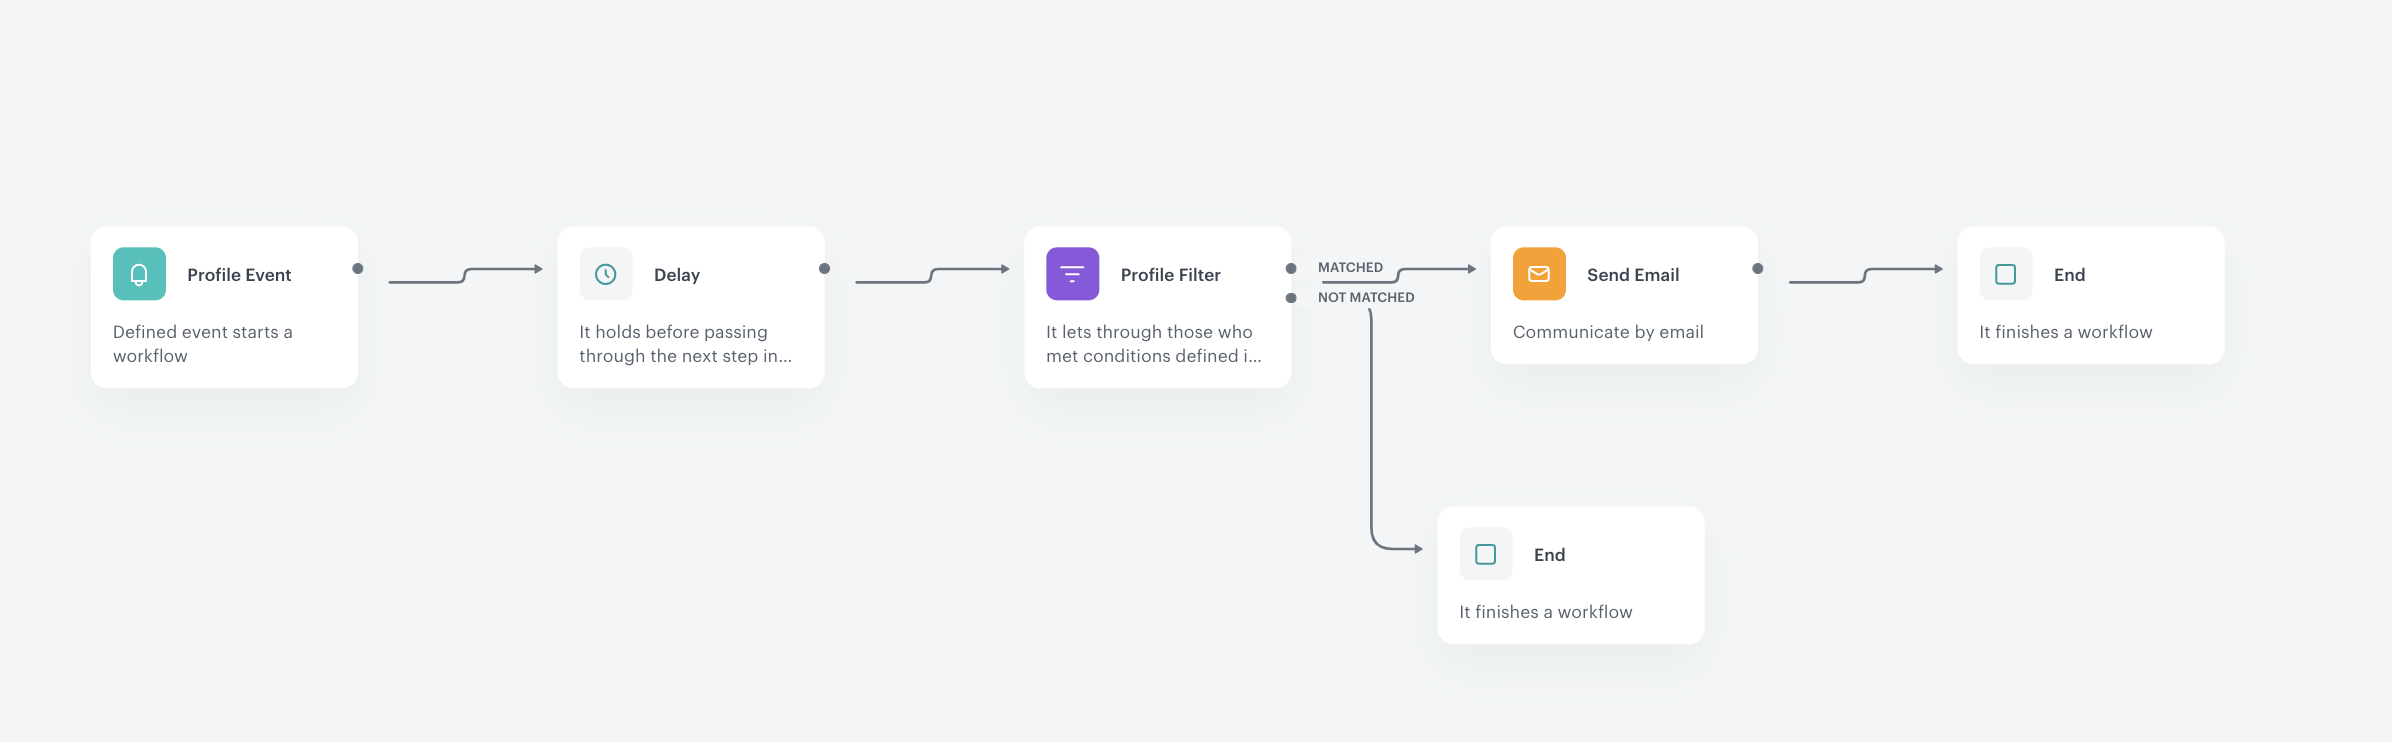
To start sending emails to customers you will have to prepare a workflow, which in basic configuration may look like the one below - let’s take a closer look at each node.
-
Start with the Profile Event trigger and in the settings of the node, select the page.visit event.
-
As the event parameter, select retailer_part_no - this way, the workflow starts only when a customer visits a product page.
Tip: Use “.” in a regular expression to accept a valid value of this parameter (except for null). This way, you know that this event has the retailer_part_no parameter.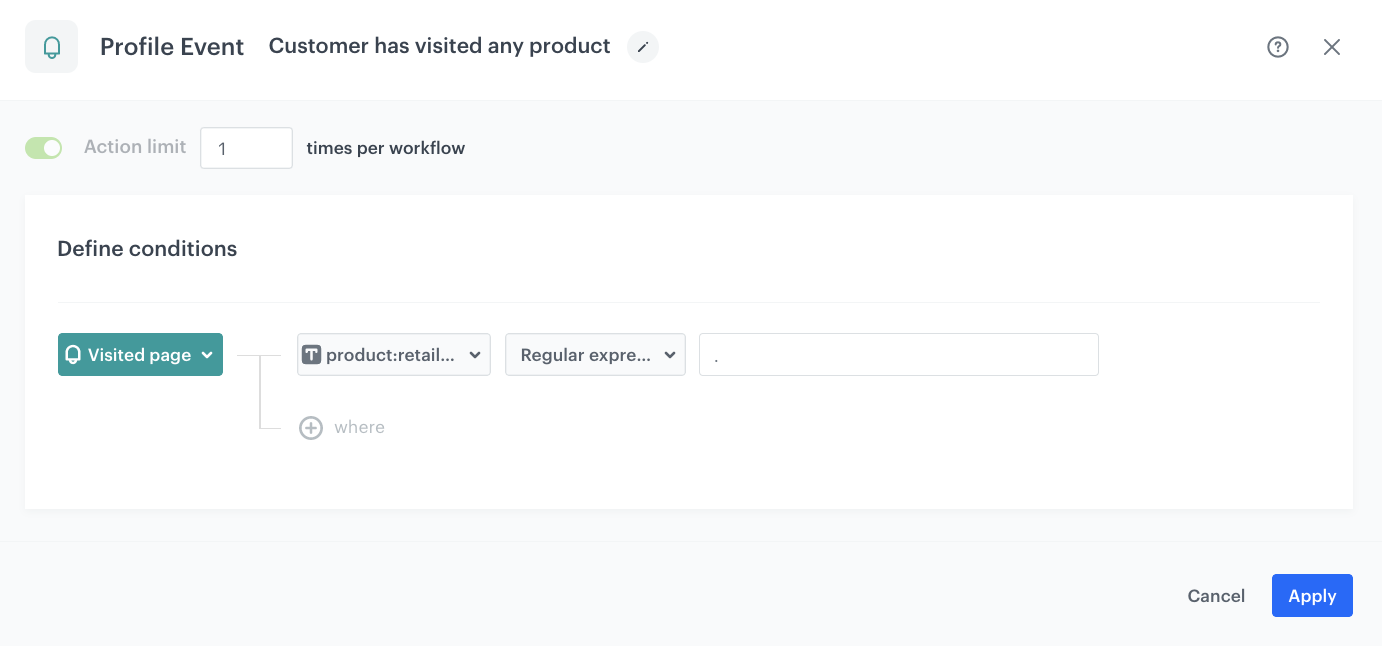
Profile Event -
Add Delay and define the lag between the page visit and sending the message, in our example it is 2 hours.
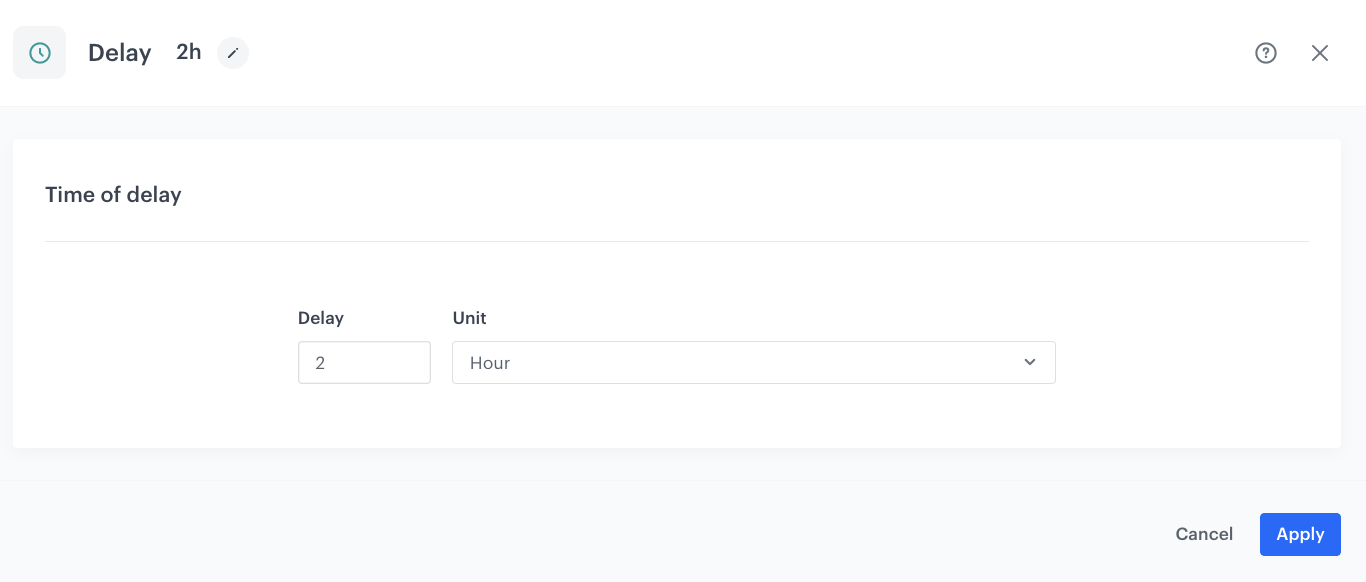
Configuration of the Delay node -
Using the Profile Filter node, exclude users who have made a transaction in the last 2 hours – it’s important to use minutes instead of hours.
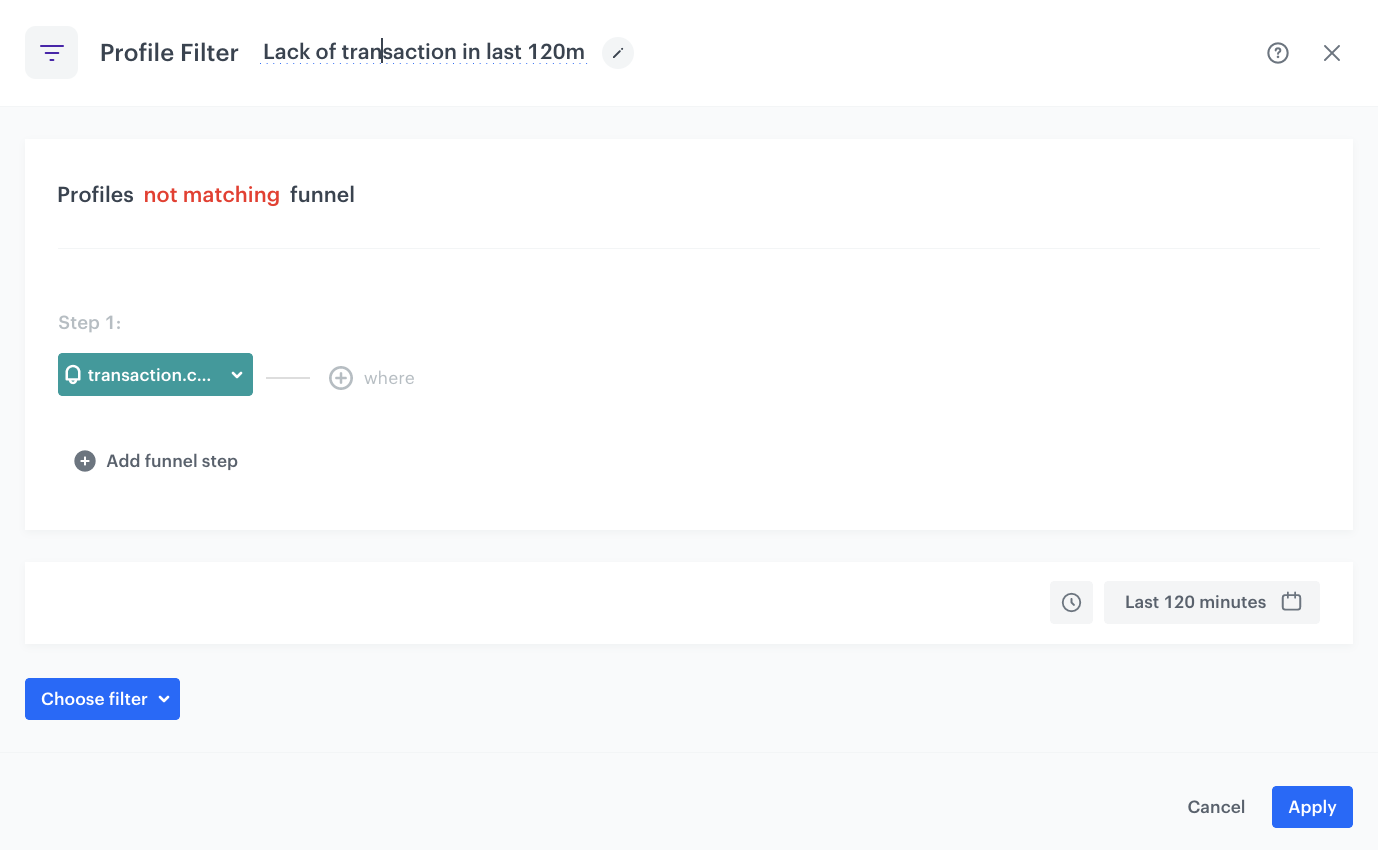
Configuration of the Profile Filter node -
Configure the Send Email node by selecting the appropriate email account, choosing the template that you prepared in the previous step.
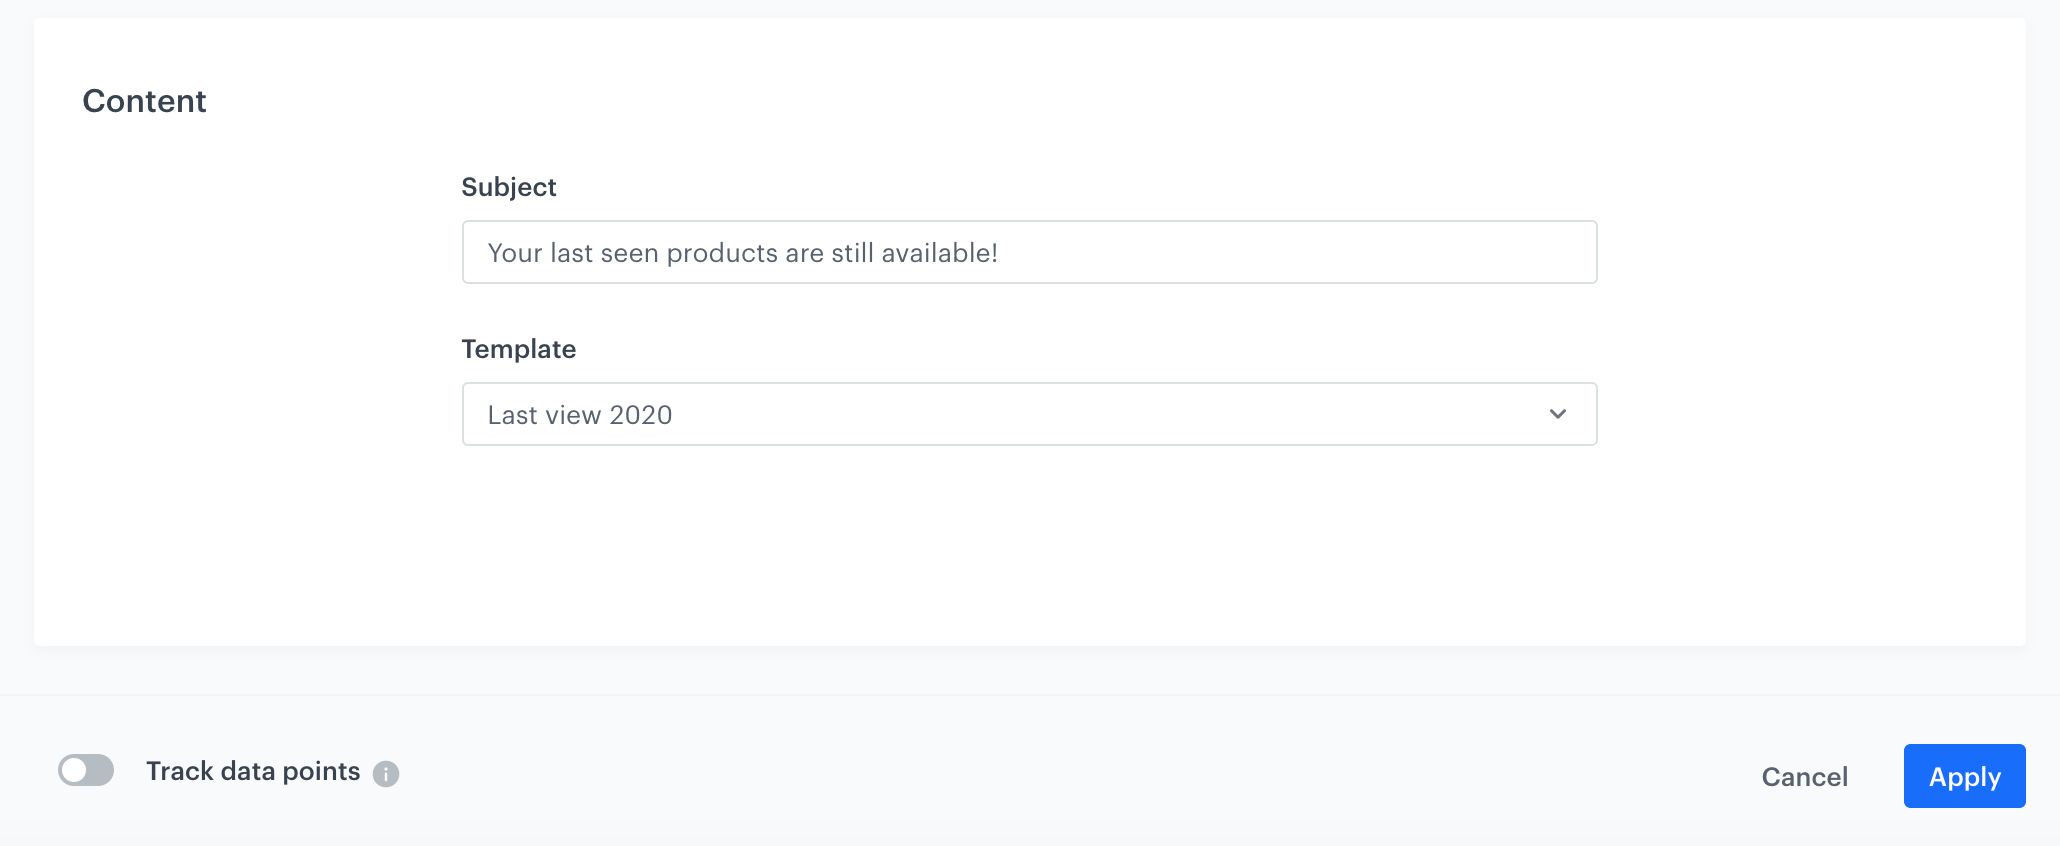
Configuration of the Send Email node -
Prepare the final settings
- Add End nodes where the workflow should finish for users.
- Specify capping (here 1 for 1 day).
- Optionally add titles to each node so the workflow will be more understandable to your colleagues.
- Name the workflow and Save it or Save & Run.