

Email with products from abandoned cart
The most common way that stores reduce abandoned carts is by setting up an automated email sequence. Thanks to the collected database with email addresses, you can easily reach customers and send them messages reminding them about unfinished purchases. The message contains products left by users in the cart, with the goal of “saving” abandoned carts and convicing the customer to make a purchase.

Prerequisites
- Implement a tracking code.
- Import a product feed to Synerise.
You can import your feed following these instructions or you can use Snrs-product-ogTag catalog which is automatically built from product page og tags.
Important:Both options are correct and can be used in this use case to extract and present data about the products. However, we highly recommended using the product feed.
- Product feed is updated more frequently than the OG tag catalog, so the feed uses up-to-date data. The OG catalog is updated when a customer visits the page with the product, in consequence less visited items are rarely updated, so the risk of sending out-of-date product information is higher.
- Product feed contains more information about items than the OG tag catalog.
- When you use the product feed, you use one source of truth, so you minimize the risk of displaying divergent information about your products.
- Implement transaction events.
- Implement cart status event.
- Configure an email account.
- Implement form data tracking.
Process
In this use case, you will go through the following steps:
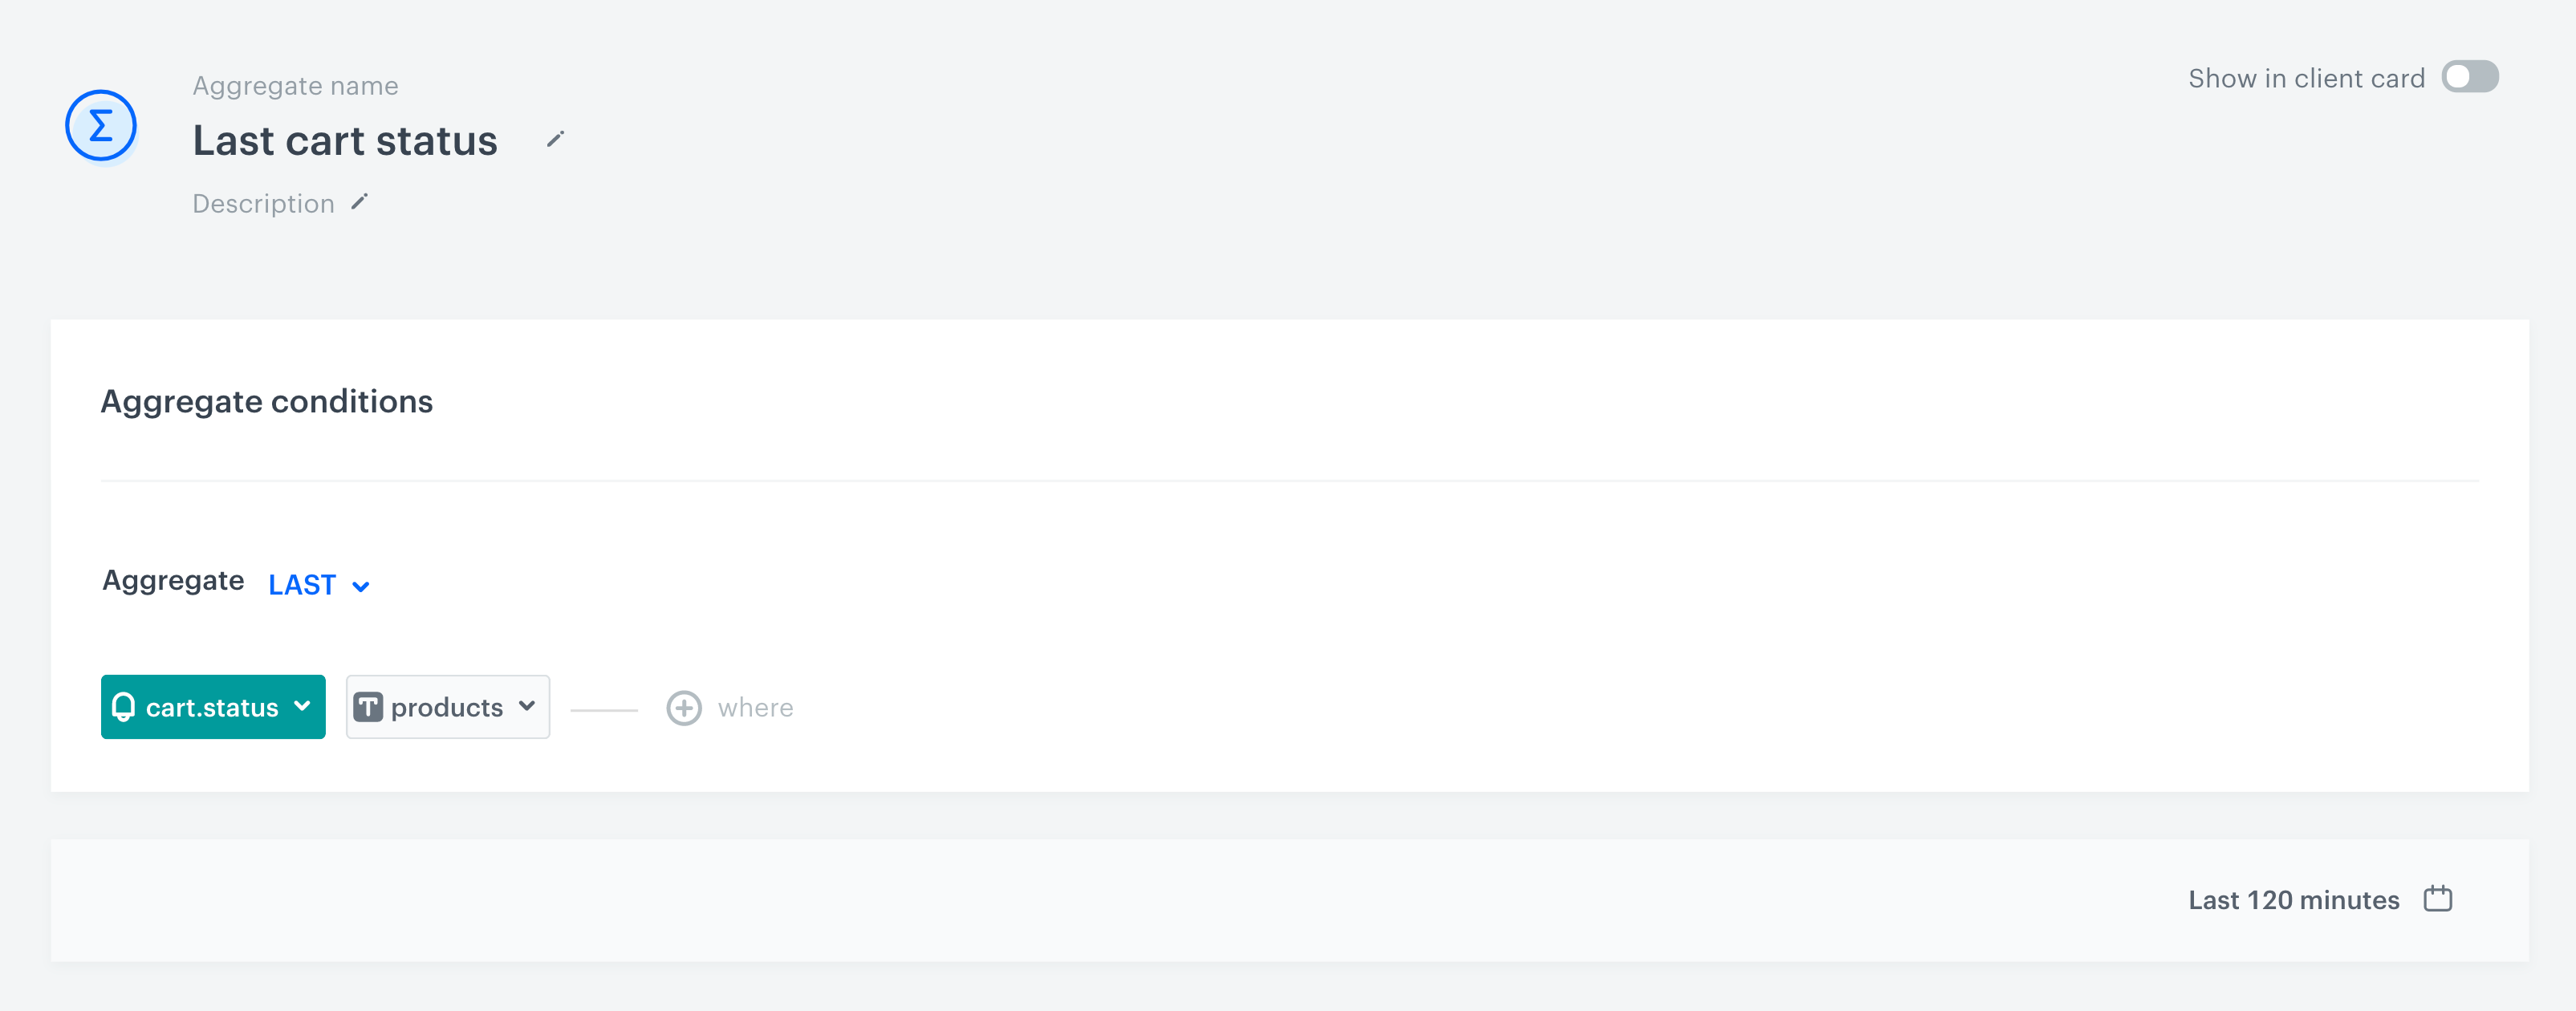
Prepare an aggregate
Create an aggregate that returns the last cart.status event and returns the product parameter from the last 120 minutes. Thanks to this, it will be possible to use in the email data that are labeled as products.
- Go to Analytics > Aggregates > New aggregate.
- Select the Last type.
- From the Choose event dropdown list, select the cart.status event.
- As the event parameter select products.
Prepare an email template
In this part of the procedure, you create an email template that contains items from an abandoned cart.
-
Go to Communication > Email.
-
On the left side of the screen, click Templates.
-
Select Code editor.
-
In the HTML section add the following Jinjava code that contains the items from the abandoned cart.
Click to see the Jinjava code with items from abandoned cart<!-- Opening the tag that retrieves the value from the aggregate prepared in the Prepare an aggregate section in the article--> {% aggregate XXXXXXXXXXX %} for loop below: <!-- In the section {% for r in aggregate_result %} a {% endfor %} there is access to all variables from a given object (products here) - which parameters you add to the template depends on you. -> {% for r in aggregate_result %} next item: <!-- {{ r.brand }} {{ r.category }} {{ r.sku }} - parameters taken from the cart.status event - the sku is key. The use of brand and category is optional--> {{ r.brand }} {{ r.category }} {{ r.sku }} <!-- {% catalog.Snrs-produktu-ogTag(r.sku).og:XXX %} downloads additional data from a catalog built on the basis of og tags - which information about the product you want to add in the template depends on you. If you want to add the product name, photo, link, price in the e-mail - you can take it from the catalog --> {% catalog.Snrs-produktu-ogTag(r.sku).og:image %} {% catalog.Snrs-produktu-ogTag(r.sku).og:title %} {% catalog.Snrs-produktu-ogTag(r.sku).product:price:amount %}{% catalog.Snrs-produktu-ogTag(r.sku).product:price:currency %} {% catalog.Snrs-produktu-ogTag(r.sku).og:url %} {% endfor %} <!-- Closing of the tag that gets the value from the aggregate prepared in point 1 --> {% endaggregate %} -
Use CSS to style the email according to your preferences.
-
Click Save this template > Save as.
-
Enter the name of the template and select the folder in which the template will be saved.
Prepare a workflow
To start sending emails with items from an abandoned cart to customers, prepare a workflow. Optionally, you can add additional nodes, depending on your business needs.
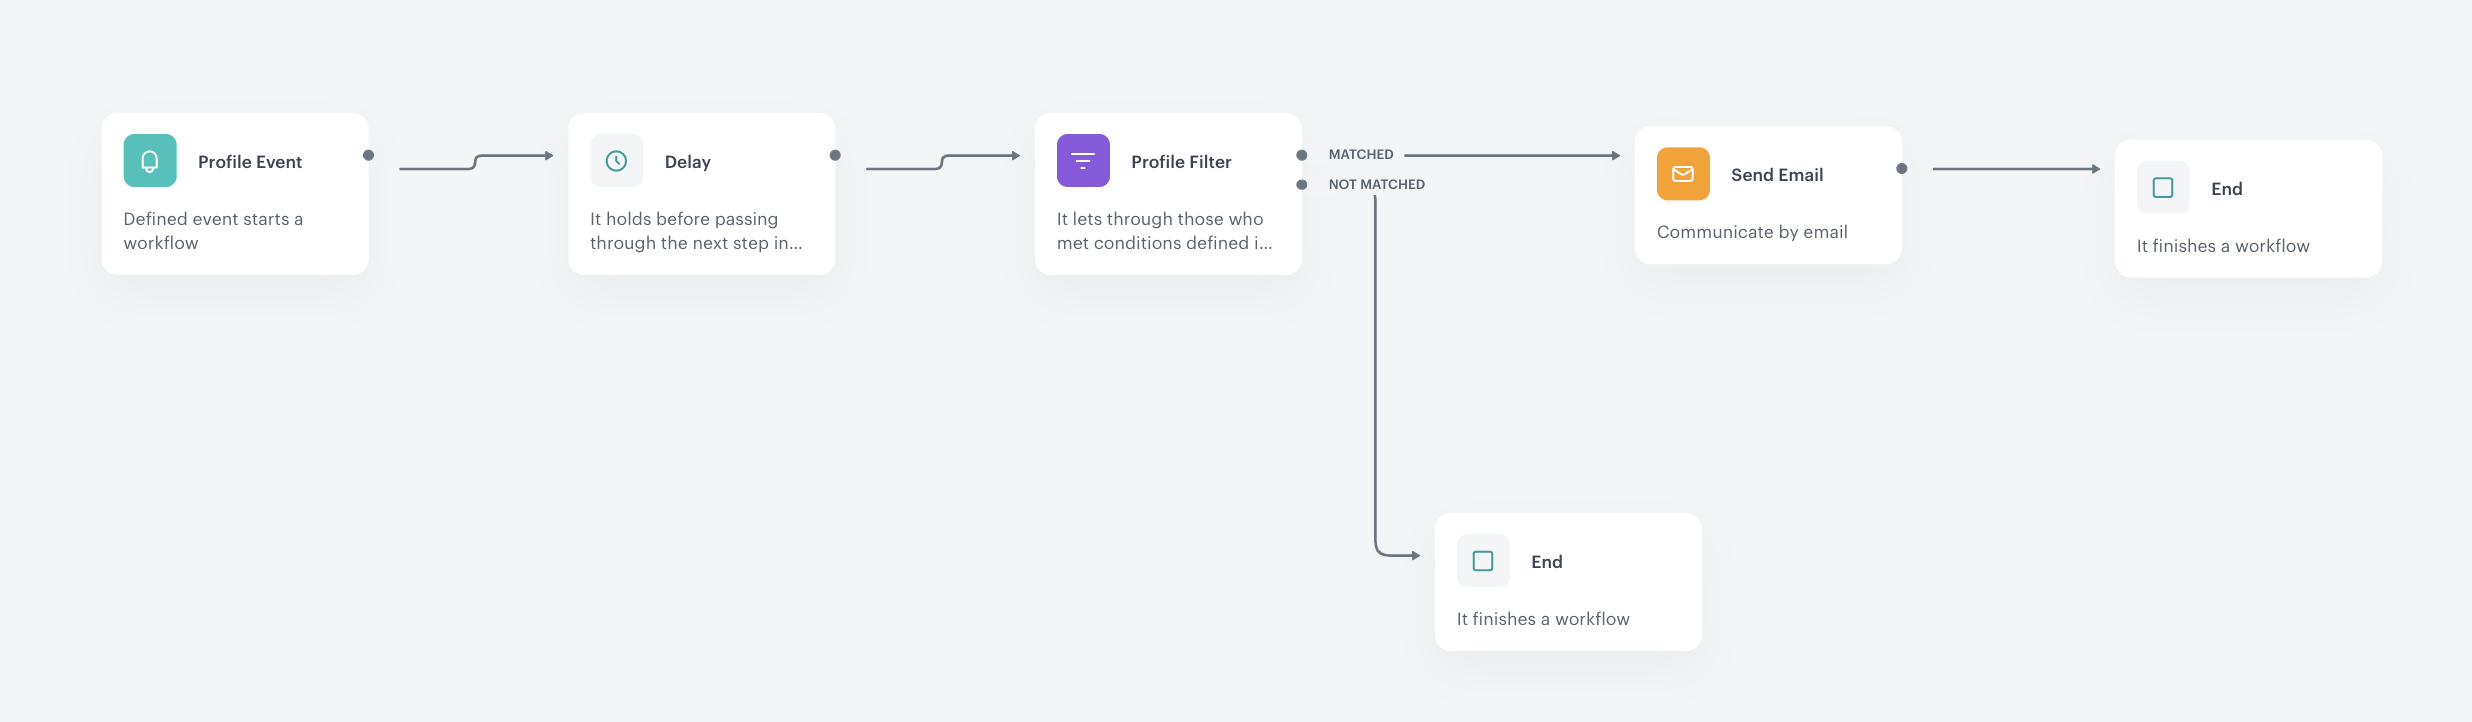
The diagram contains the following nodes:
- Profile Event - the workflow is triggered by the event of adding an item to the cart.
- Delay - before the workflow continues it waits 24 hours.
- Profile Filter - the workflow rejects all customers who made a transaction in the last 24 hours.
- Send Email - the workflow sends the email with items from an abandoned cart to the customers who didn’t finish the purchase.
- Two End nodes:
- one for the not matched path - customers who made the purchase in the last 24 hours end the workflow there.
- one at the end of the diagram - after the email is sent to customers.
-
Go to Automation > Workflows > New worklfow.
-
Enter the name of the worklfow.
-
As the first node, add the Profile Event. In the settings of the node, select the productAddToCart event.
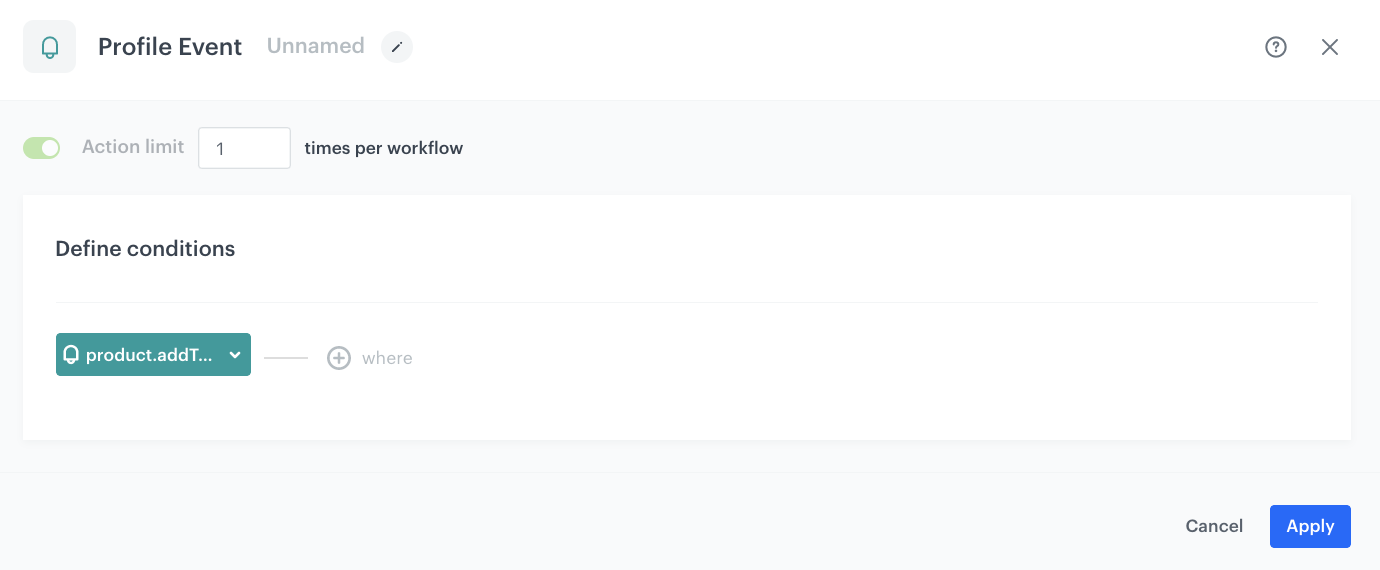
Configuration of the Profile Event node -
As the second node, add Delay. In the configuration of the node, set delay to 24 hours.

Configuration of the Delay node -
As the third node, add Profile Filter. In the settings of the node:
- Select transaction.charge event.
- On the top of the pop-up, click the green matching word.
Result: The word changes to not matching. - Set the date range to the last 1440 minutes.
Important: Use 1440 minutes instead of 1 day – smaller granulation is recommended as in this case 1 day would take the time from current hour till the midnight, so such analysis will not take into consideration all necessary users. - Confirm by clicking Apply.
- Click the plus button on the Profile Filter node.
- Select Send Email.
Result: The Matched path leads to the Send Email node. - Click the plus button on the Profile Filter node.
- Select the End node.
Result: The Not matched path leads to the End node.
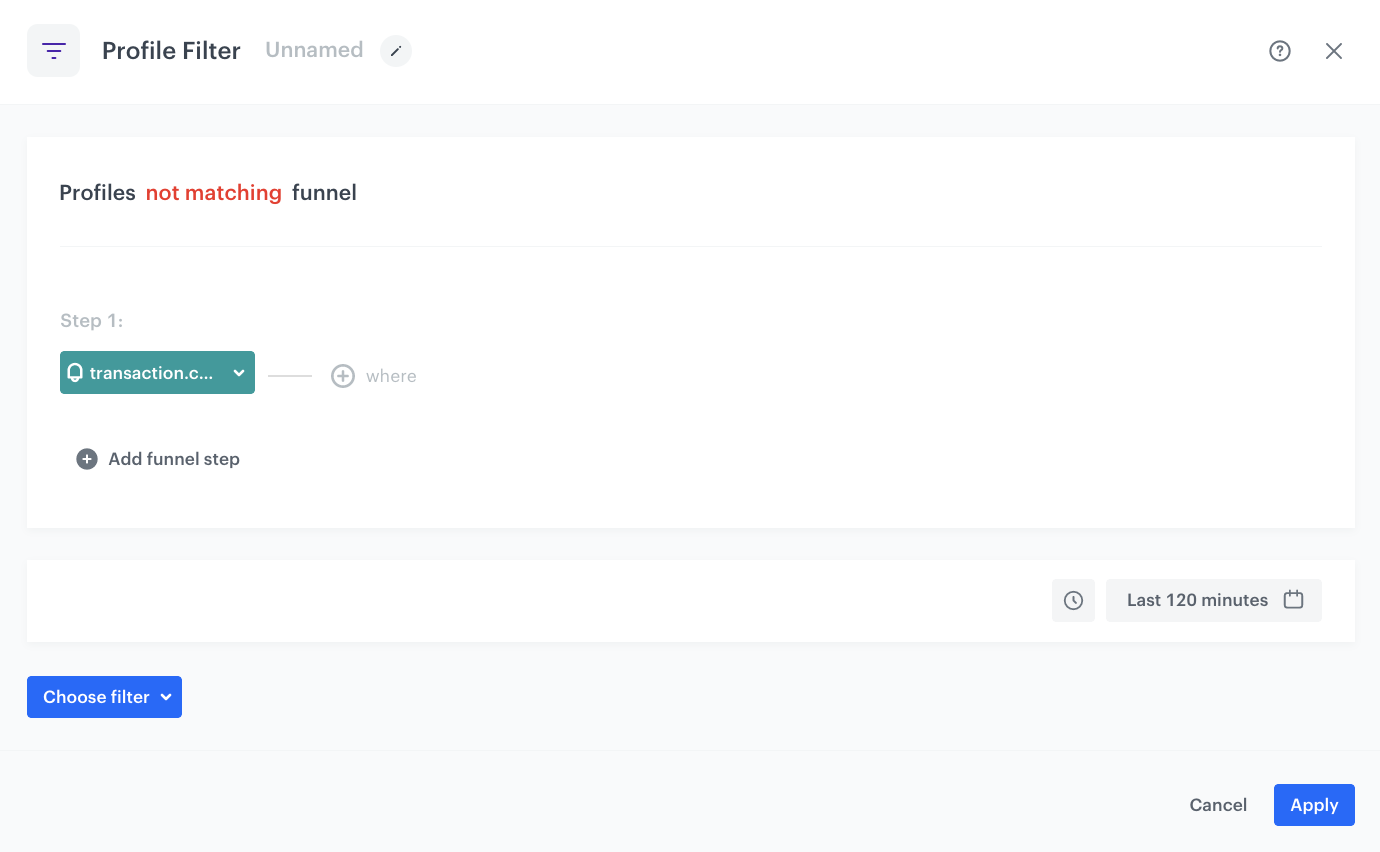
Configuration of the Profile Filter node -
Click the Send Email node. In the settings of the node:
- In the Sender details section, choose the email account from which the email is sent.
- In the Content section, select the template that you prepared in the Prepare an email template section, add the subject of the email and UTM parameters.
- In the UTM & URL parameters section, define the UTM parameters for the email.
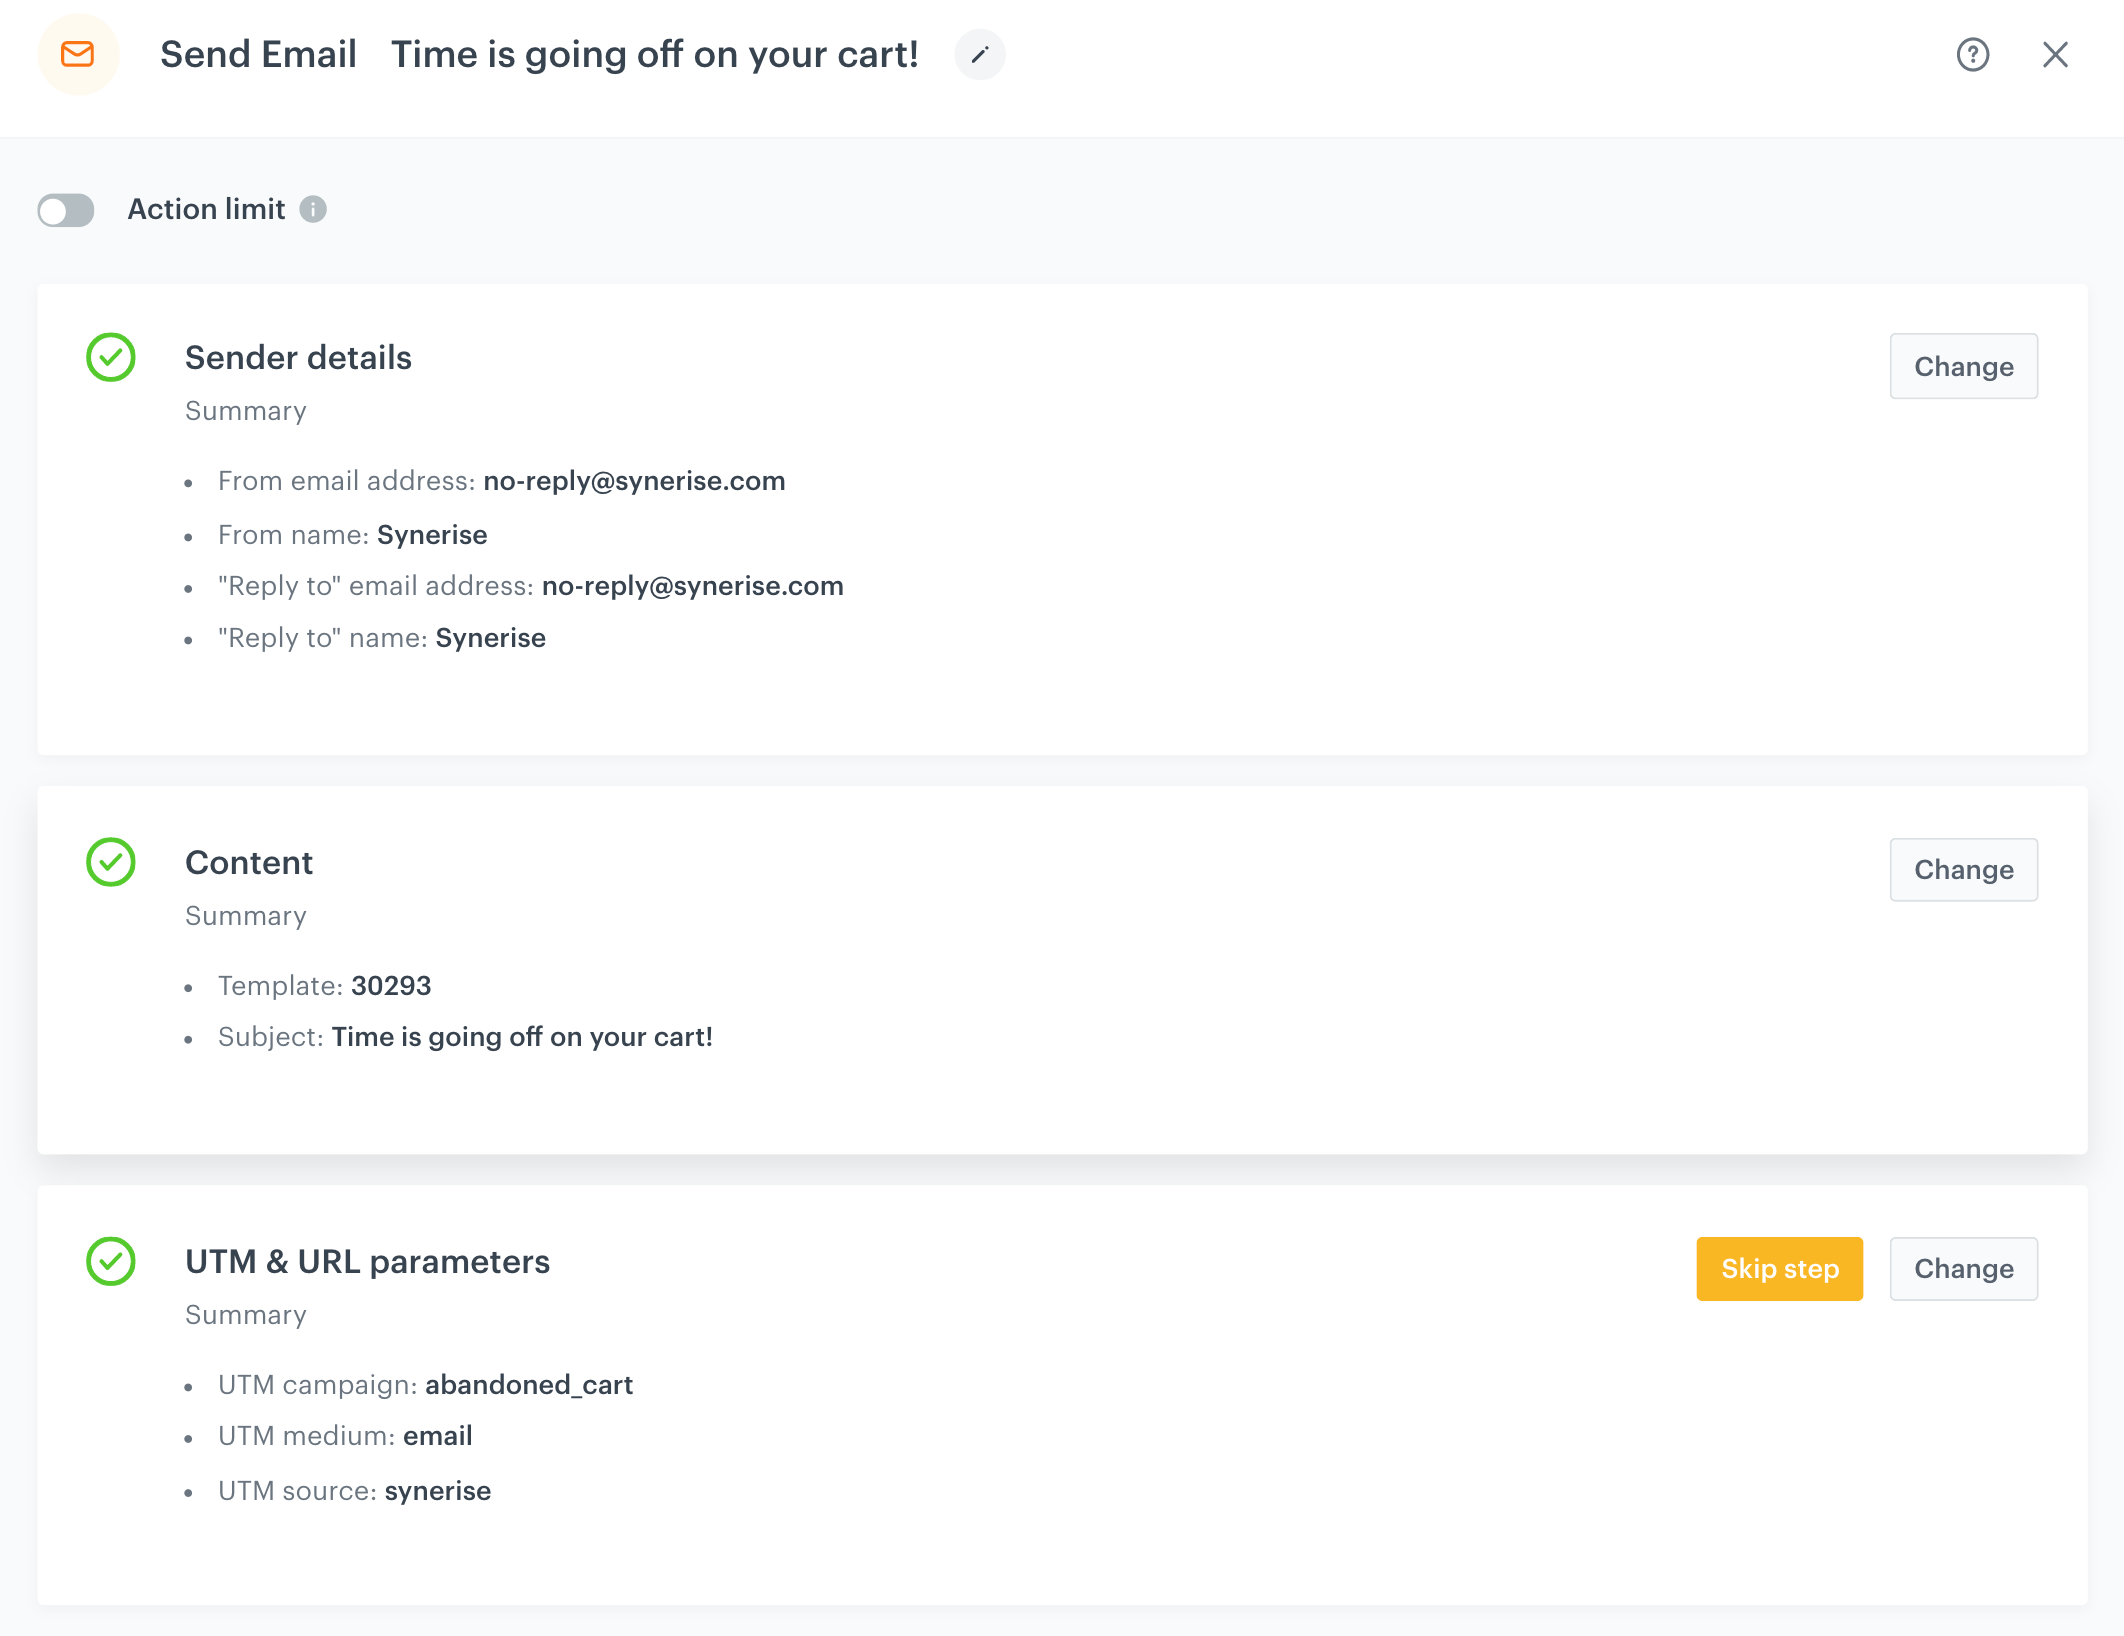
Send Configuration of the Send Email node -
After the Send Email node, add the End node.
-
Configure the final settings:
- Define capping - 1 for 1 day.
- Optionally, add titles to each node so the workflow will be more understandable to your colleagues.
- To save it as a draft, click Save it or activate by clicking Save & Run.
Check the use case set up on the Synerise Demo workspace
You can check the configuration of all steps directly in the Synerise Demo workspace:
If you don’t have access to the Synerise Demo workspace, please leave your contact details in this form and our representative will contact you shortly.