Recommend similar items through email based on customer’s browsing history
Predefined HTML blocks for email templates can help businesses create professional and visually appealing emails without having to start from scratch. These blocks combine the advantages of two builders - drag & drop, thanks to which you can easily adjust the appearance of the email to your needs, customize with your brand colors, fonts, and images, and at the same time enrich emails with dynamic elements such as recommended products. The configuration of dynamic elements is easy as it only involves selecting appropriate object (such as analysis or recommendation) responsible for the the logic of choosing products. Ultimately, this can drive conversions, boost sales, and enhance customer loyalty.
This use case describes the process of creating a personalized recommendation of items which are similar to those seen recently by the customer. Later this recommendation is sent through an email to customers who did not make any transaction in the last 30 days. Showing products similar to those they recently viewed might encourage undecided customers to make a purchase.
This use case provides you with an instruction how to use a ready-made html block that can be used 1:1 in a business scenario.
Prerequisites
- Implement a tracking code into your website.
- Configure AI engine.
- Configure an item catalog for recommendations. Enable similar items recommendations.
- Implement the transaction events using SDK or API.
- Configure a sender account.
Process
In this use case, you will go through the following steps:
- Create an aggregate returning the ID of the last visited product, it will be used in the template configuration.
- Prepare an AI recommendation, it will be used in the template configuration.
- Prepare an email template with the predefined HTML block.
- Create a workflow.
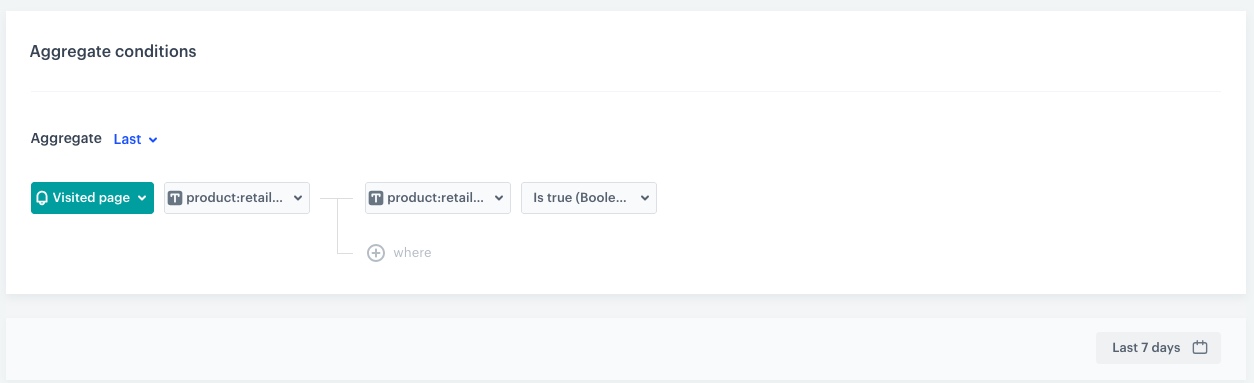
Create an aggregate
In this part of the process, create an aggregate that returns the ID of the last product a customer had visited. The recently viewed product itself will not display in the template, but will serve as a context for recommendations.
- Go to
 Analytics > Aggregates > New aggregate.
 - Enter the name of the aggregate.
- As the type of the aggregate, select Last.
- From the Choose event dropdown list, select the Visited page event.
- As the event parameter, select product:retailer_part_no.
- Click the + where button.
- From the Choose parameter dropdown list, select the product:retailer_part_no parameter.
- From the Choose operator dropdown list, select Is true (Boolean).
- Using the date picker in the lower-right corner, set the time range to Last 7 days. Confirm your choice with the Apply button.
- Click Save.
Prepare an AI recommendation
In this part of the process, you will configure a similar items recommendation which will be later used in the email template. You can use a different recommendation type according to your business needs.
- Go to
 Communication > Recommendations > Add recommendation.
 - Enter the name of the recommendation (it is only visible on the list of recommendations).
- In the Type & source section, click Define.
- From the Catalog dropdown list, select an item feed.
- In the Type section, choose the Similar items recommendation type.
- Confirm the settings by clicking Apply.
- In the Items section, click Define.
- Click Add slot.
- Define the minimum and maximum number of items that will be recommended to the customer in each slot.
- Optionally, define Static filters and Elastic filters.
- Confirm by clicking Apply.
- Optionally, you can define the Boosting factors and settings in the Additional settings section.
- In the right upper corner, click Save.
Prepare an email template
In this part of the process, create an email template. You can use a predefined template or create your own template from scratch. In this case, we will use a predefined template. You will also use a specific HTML block which will let you configure the section with context recommendations in an easy way. In the configuration, we will use the aggregate and recommendation created in the previous steps.
- Go to Communication > Email.
- On the left pane, click Templates and from the list of template folders, select Predefined simple templates.
- Select any template that mostly fits the campaign assumptions.
Result: You are redirected to the code editor. - Edit the template according to your needs.
Add the HTML block
- From the Content section, select HTML block. Drag and drop the block to the chosen place in your template.
- Click the Configure button.
- Choose the Predefined blocks folder where you will find the list of all predefined templates. In this case, choose the Context recommendation 2.
Note: You can edit the template in two ways, by editing the code of the template in the HTML tab and/or by filling out the form in the Config tab. In this use case, we will use the capabilities of the predefined Config tab.
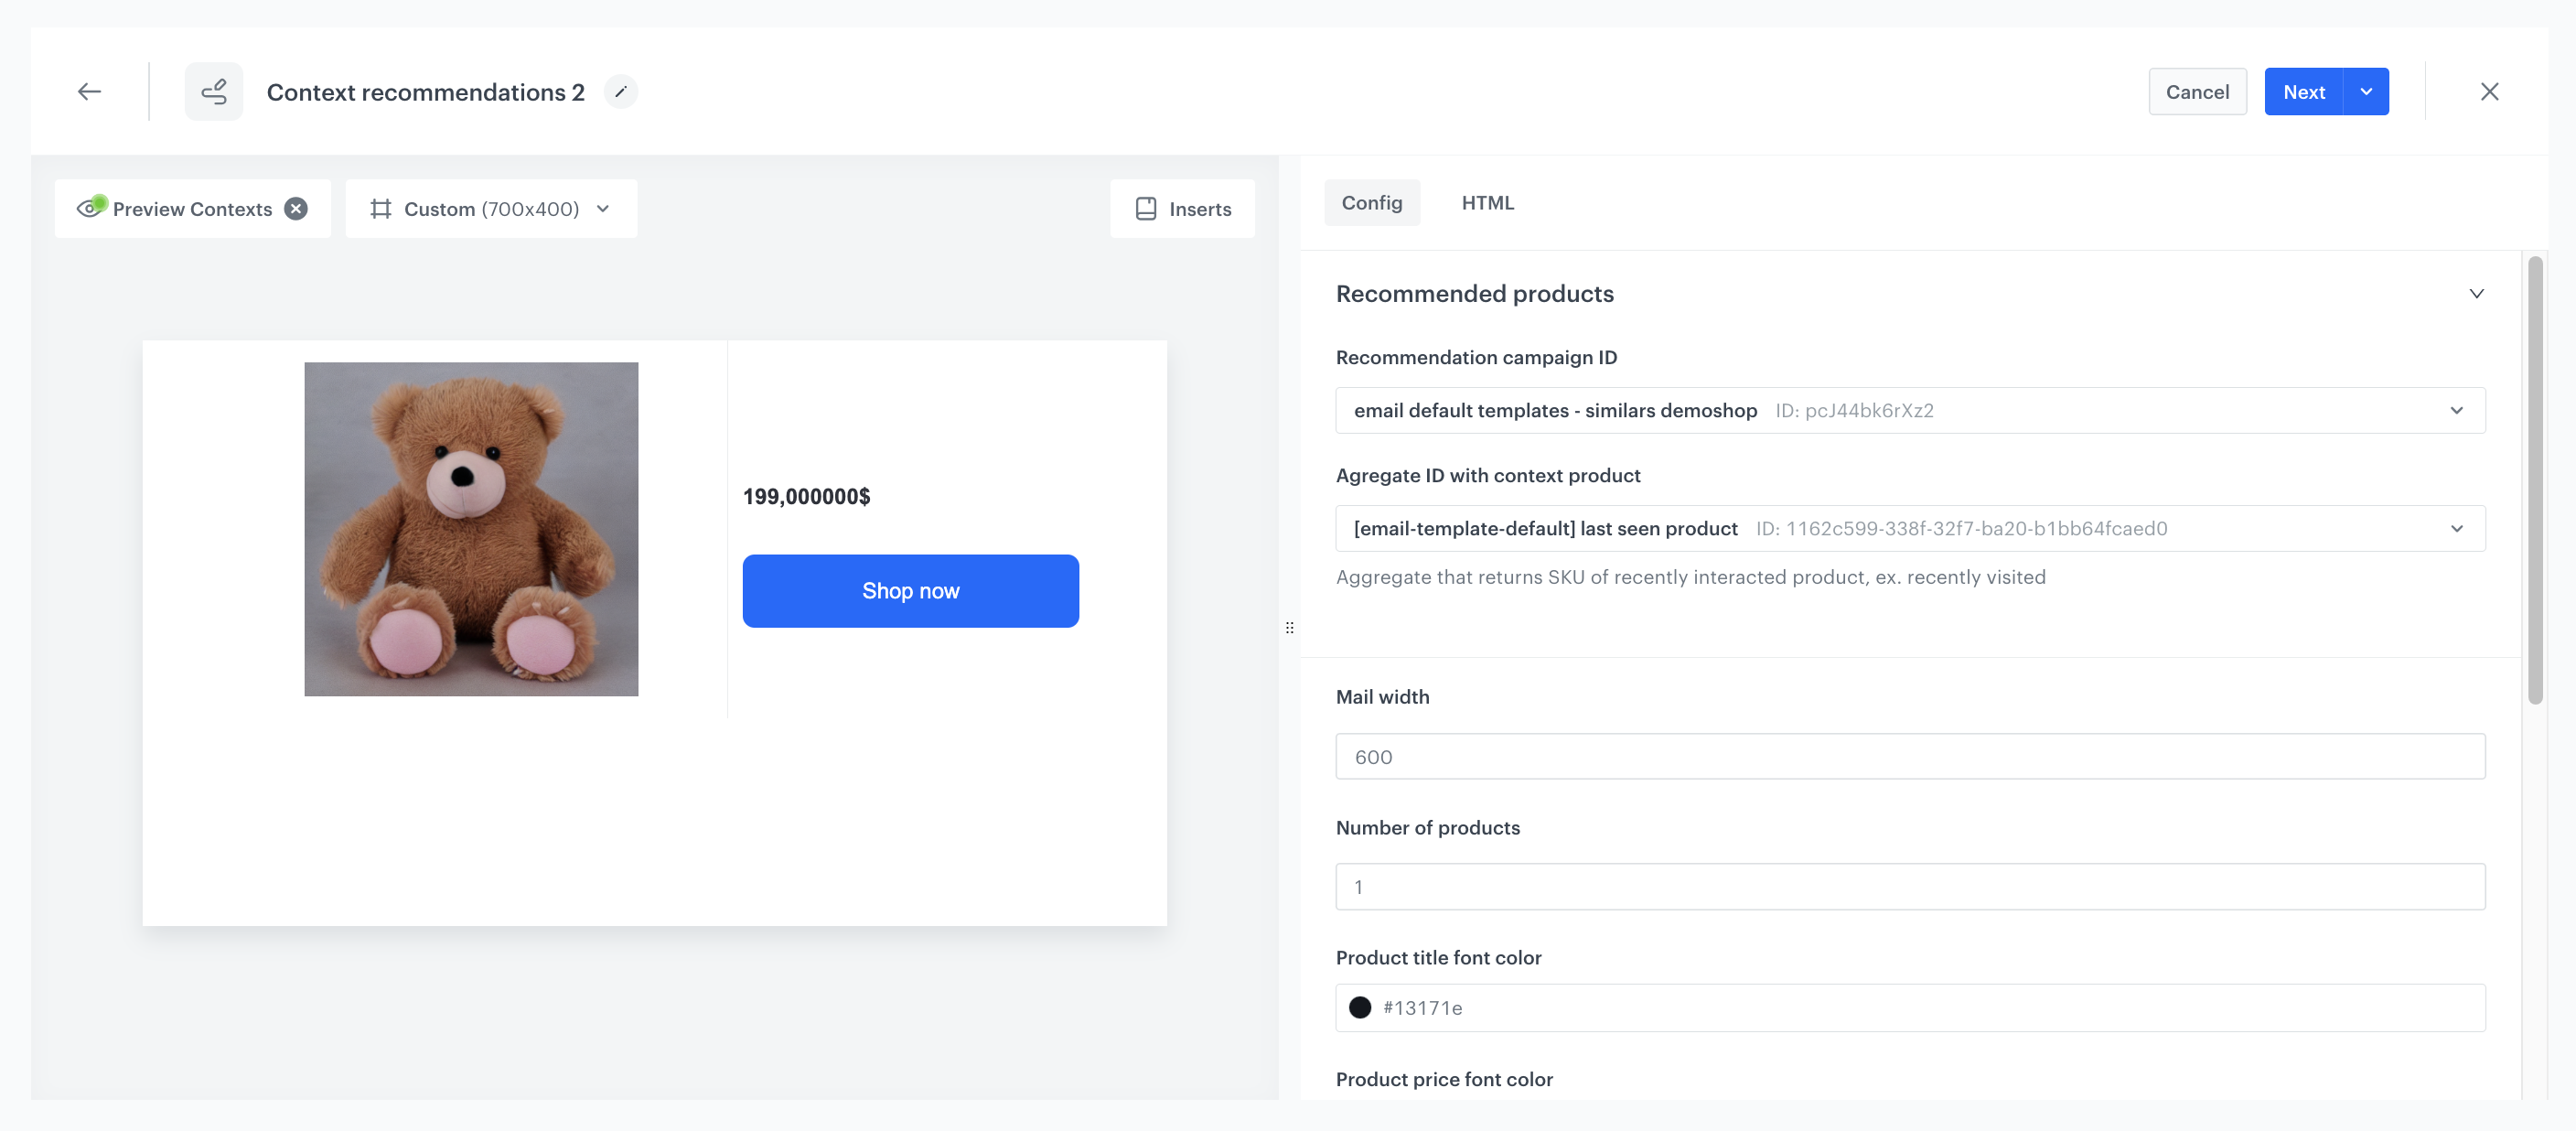
Edit the form in the Config tab
The form in the Config tab is already filled with default values. You can keep them or change them to fit your business needs.
-
In the Recommended products section:
- From the Recommendation campaign ID dropdown list, select the recommendation you prepared in the previous step. You can find it by typing its name or ID in the search box.
- From the Agregate ID with context product dropdown list, select the aggregate you created in the previous step. You can find it by typing its name or ID in the search box.
-
In the section below, you have the option to customize email width, number of products, title, price and sale price font color of the product, gap height (height between information about the product and CTA button), background and font color of the button as well as its border radius and text.
Html block configuration -
After you make changes to the template, you can check the preview.
- On the upper left side, click the Preview Contexts button.
- Enter the ID of a customer.
- Click Apply.
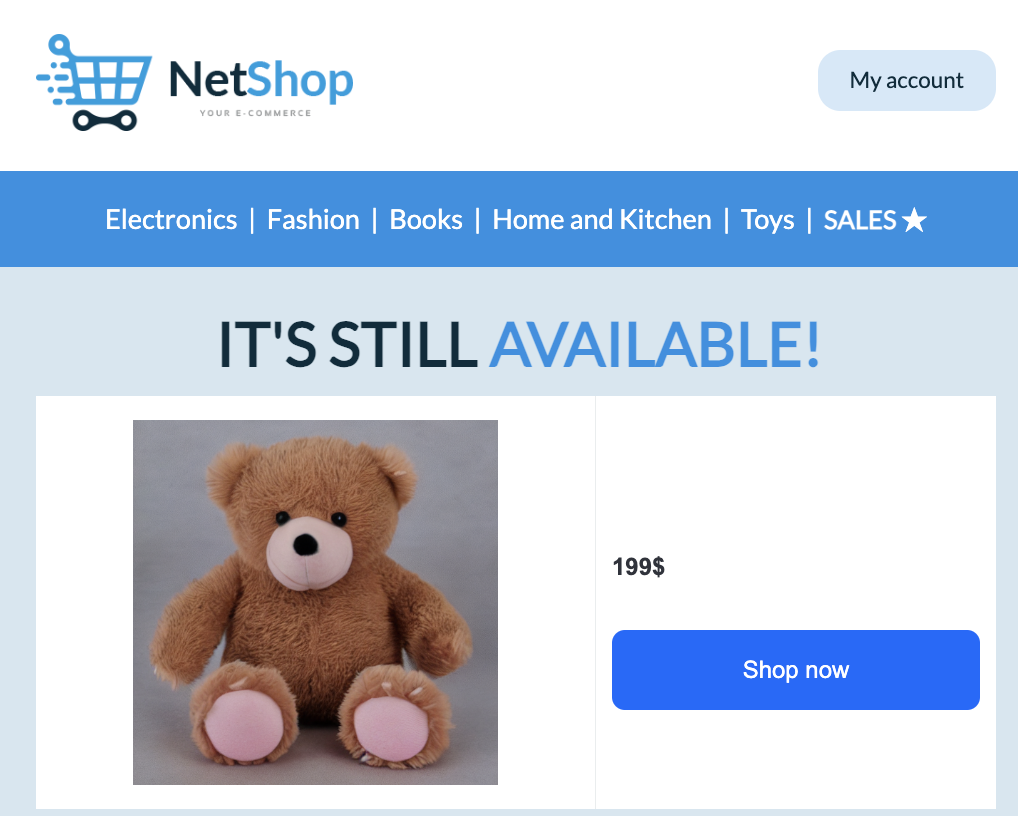
Html block preview -
If the block is ready, click Next on the upper right side to proceed, or click the arrow next, and from the dropdown select Save as. If you want to save the block, on the pop-up:
- In the Template name field, enter the name of the template.
- From the Template folder dropdown list, select the folder where the template will be saved.
- Confirm by clicking Save.
Save the email template
- If the template is ready, click the arrow next to Use in communication in the upper right corner, and from the dropdown select Save as.
- On the pop-up:
- In the Template name field, enter the name of the template.
- From the Template folder dropdown list, select the folder where the template will be saved.
- Confirm by clicking Save.
Create a workflow
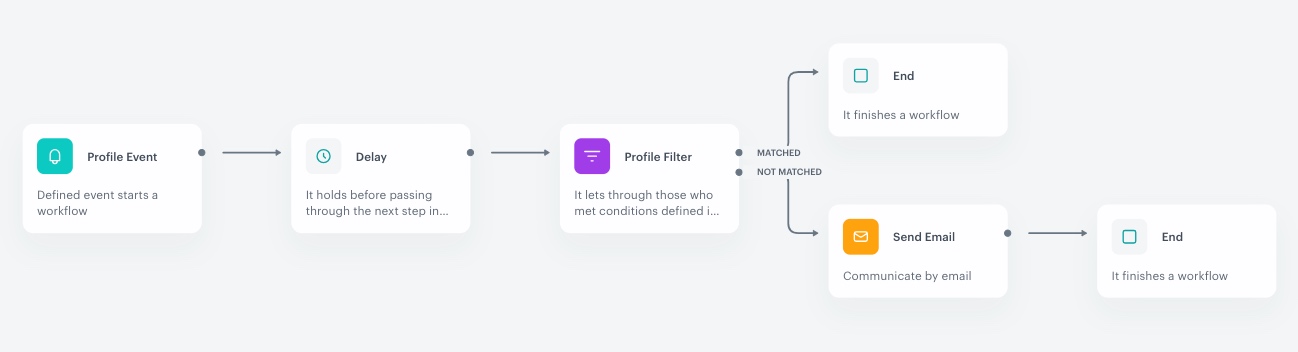
In this part of the process, you will create the workflow which sends emails with recommendations of products similar to those last seen by a customer. The workflow is triggered when the customer finishes their session on the site. The email will be sent maximum once a month to customers who didn’t make a purchase in the last 30 days.
- Go to
 Automation > Workflows > New workflow.
 - Enter the name of the workflow.
Define the Profile Event trigger node
At this stage, we will configure the conditions that launch the workflow. As a trigger, we will use the session.end event.
- As the first node of the workflow, add Profile Event. In the configuration of the node:
- From the Choose event dropdown menu, choose the session.end event.
- Confirm by clicking Apply.
Define the delay
Add the Delay node to define the lag between the session.end event and sending an email with a product recommendation to a customer. In this example it is 1 hour.
- Add the Delay node, in the configuration of the node:
- In the Delay field, enter
1. - From the Unit dropdown, choose Hour.
- Confirm by clicking Apply.
- In the Delay field, enter
Define the Profile Filter node
As the next step, add the Profile Filter node, which checks if the customer made a transaction in the last 30 days. If the customer has not made a transaction, we will send them an email with recommendations, and if they have, then the workflow ends.
- Add the Profile Filter node.
- From the Choose filter dropdown list, select the transaction.charge event.
- Using the date picker in the lower-right corner, set the time range to Custom> Last 30 days. Confirm your choice with the Apply button.
- Click Apply.
Configure the Send Email node
- To the Not matched path, add the Send Email node. In the node settings:
- In the Sender details section, choose the email account from which the email will be sent.
- In the Content section, type the Subject and from the Template dropdown, select the template you prepared in the previous step.
- In the UTM & URL parameters section, you can define the UTM parameters added to the links included in the email.
- In the Additional parameters section, you can optionally assign parameters, which will be added to every event generated by this communication.
- Click Apply.
Add the finishing nodes and set capping
- Add the End nodes after Send Email node and to the Matched path after the Profile Filter node.
- In the upper right corner, click Set Capping and define the limit of workflows a profile can start:
- Set Limit to 1.
- Set Time to 30 days.
- Confirm by clicking Apply.
- In the upper right corner, click Save & Run.
Check the use case set up on the Synerise Demo workspace
You can check the configuration of each step directly in our Synerise Demo workspace:
If you don’t have access to the Synerise Demo workspace, please leave your contact details in this form, and our representative will contact you shortly.