You can use Jinjava in Automation to provide context or work with parameters.
Important: Segmentation, expression, and aggregate definitions are cached for 20 minutes after a node with the analysis is activated in a journey.
When another journey in the Automation requests a result of the same analysis in that period, the cached definition is used to calculate the results. This means that if you edit a segmentation, aggregate, or expression used in an Automation, it takes 20 minutes for the new version to start being used in journeys.
This includes definitions of segmentations, expressions, and aggregates nested in other analyses and used in Inserts.
Profile attributes in automation can be retrieved in two ways:
using the {{ customer.attribute }} syntax.
If the attribute does not exist, an empty string is used in its place.
If the attribute name contains special characters, use {{ customer['attribute'] }}
using the {% customer attribute %} syntax.
If the attribute does not exist, the insert isn’t rendered and the node isn’t processed (for example, an event isn’t generated, a webhook request isn’t made).
This syntax does not allow special characters in attribute names.
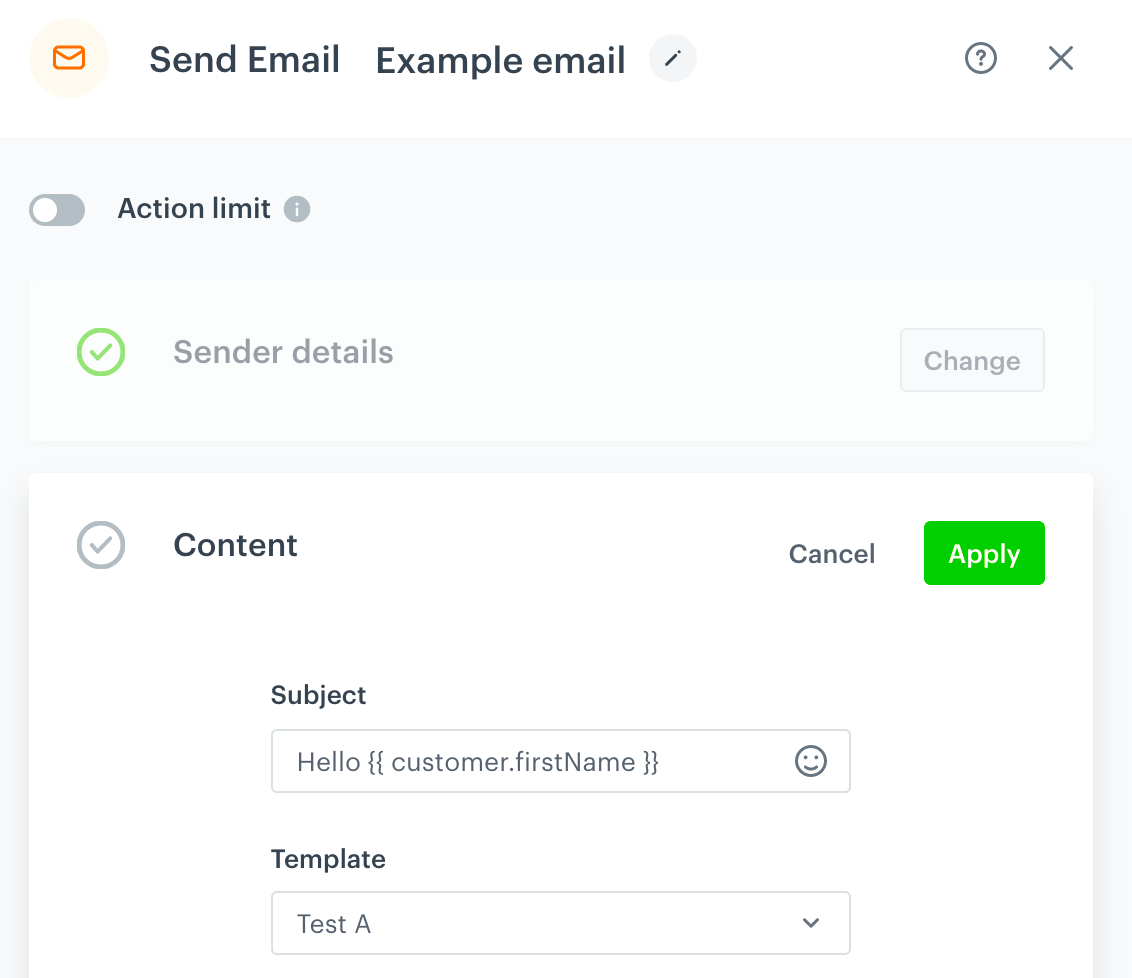
A Send Email node with the profiles's first name in the subject
Event parameters
Event parameters store additional information, such as og:tags. Some of them are required, but you can also create custom parameters. When you use the syntax below, the parameters are retrieved from the event that is the current context.
Syntax: {{ event.<parameter> }}
If the property name contains special characters, use {{ event['<parameter>'] }}
You can use dot notation to access properties nested in objects.
The context is the most recent Trigger or Event Filter node.
You can change the event context within a workflow by putting an Event Filter before the node that includes a reference to an event parameter.
Context switch example
If you want to include an outgoing integration node and use parameters from the response:
Add an outgoing integration (webhook) node.
After that node, add an Event Filter node:
Set up the filter to wait for a period of time.
This is to avoid getting a profile stuck in a workflow if the webhook does not respond or returns an error.
As the event to filter by, use webhook.response.
Add a condition to the webhook.response: the name attribute of the event must be the same as of the node with the outgoing integration.
This is to allow the profile to have more than one journey active at a time, with different webhooks being used.
An example workflow with a context switch
Result: After this node, the context changes to the webhook.response event.
Insert an action node that uses a param from the webhook response by using {{ event.params.param }}.
You can ignore the default context and refer to parameters of a specific Trigger or Event Filter node.
Syntax: {{ automationPathSteps['nodeName'].event.params.paramName }}
If the param name contains special characters, use {{ automationPathSteps['nodeName'].event.params['paramName'] }}
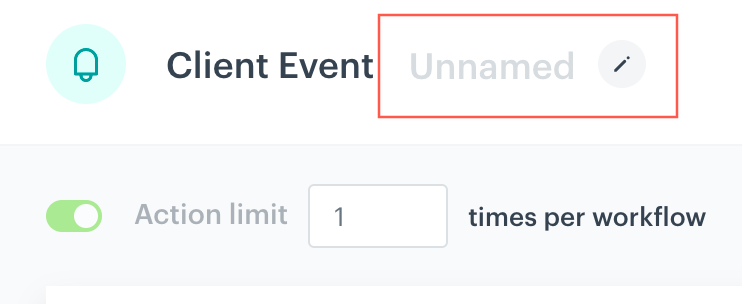
The name of the node must be unique and cannot contain any special characters. The name is entered here:
Location of the node name field in an example Profile Event Trigger
Tip: You can use this way of referring to params in Schema Builder and communication templates included in an automation workflow.
Aggregates
If an aggregate includes dynamic values (for example, from an expression or another aggregate), you must create an expression from that aggregate and refer to it in the automation using the expression tag.
Note: It is recommended to use event parameters and profile attributes instead of aggregates/expressions, if possible. For example, if you want to send an email with a satisfaction survey after a profile makes a transaction, it is better to trigger the automation with that transaction and use its ID as a param than to retrieve the ID using an aggregate that points to the latest transaction.
Managing parameters with schemas
If you use an outgoing integration in the workflow, that integration must use a schema. The schema dictates the kind of data that must be provided to the outgoing integration.
You can fill in the fields in the integration with variables from the profile/event context, but also with other data available using Jinjava, such as aggregate or expression results.
Using schemas and outgoing integrations is more convenient than manually entering the payload with variables in a node definition, especially in webhooks that are re-used often, have large payloads, or many variables in the payload.
Syntax: {% context fieldId %}
fieldId is the unique ID of the field, not the label used as the name of the column on the UI.
Important: The domain of an outgoing integration cannot be a variable.
Example
The following example is a POST webhook that updates a profile’s name in an external database.
Create a schema for profile data. One of the fields is the profile’s ID in an external database, the other is the profile’s name.
Example schema. The fieldIds are external-id and customer-name (not shown in the screenshot).
Note: This schema doesn’t need to store any records. In this example, it is used only to define the data from a profile that must be entered in a webhook.
Create an outgoing integration that uses the external ID in the URL and includes the updated profile’s name in the payload.
An outgoing webhook with a variable in the URL. The profile's name is used in the payload, not visible in the screenshot.
Example payload:
{
    "newName": "{% context customer-name %}"
}
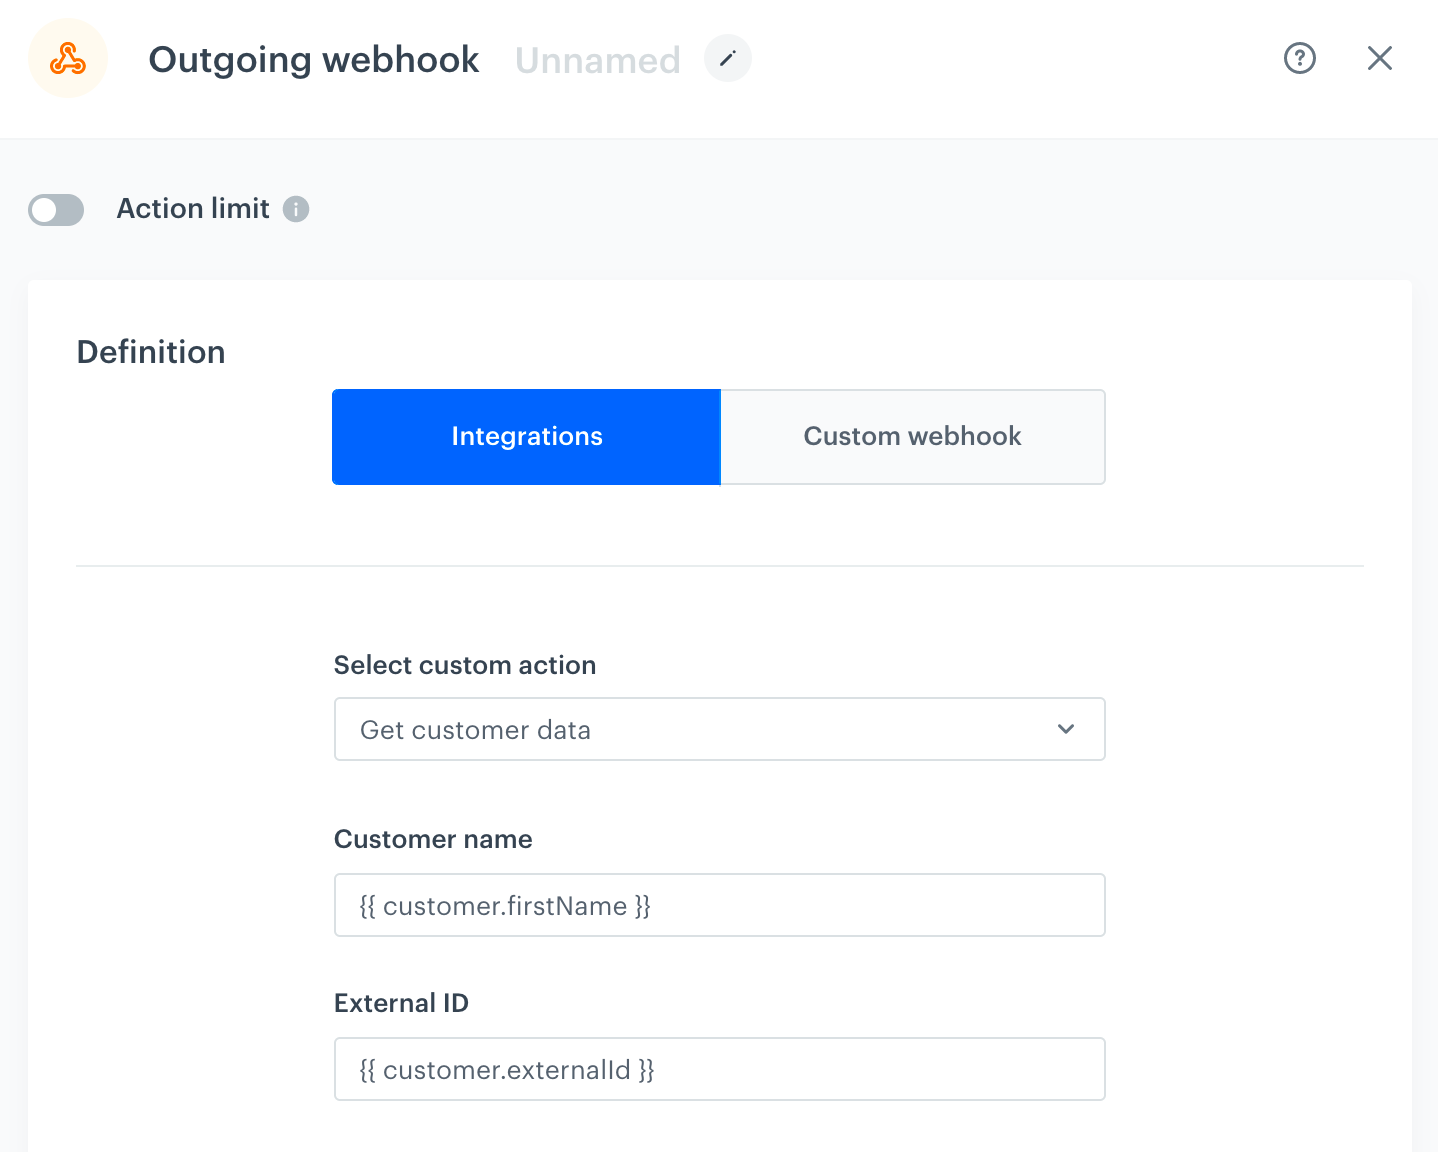
Use the outgoing integration in an automation workflow. You can now use the context of the workflow to fill in the data in the webhook.
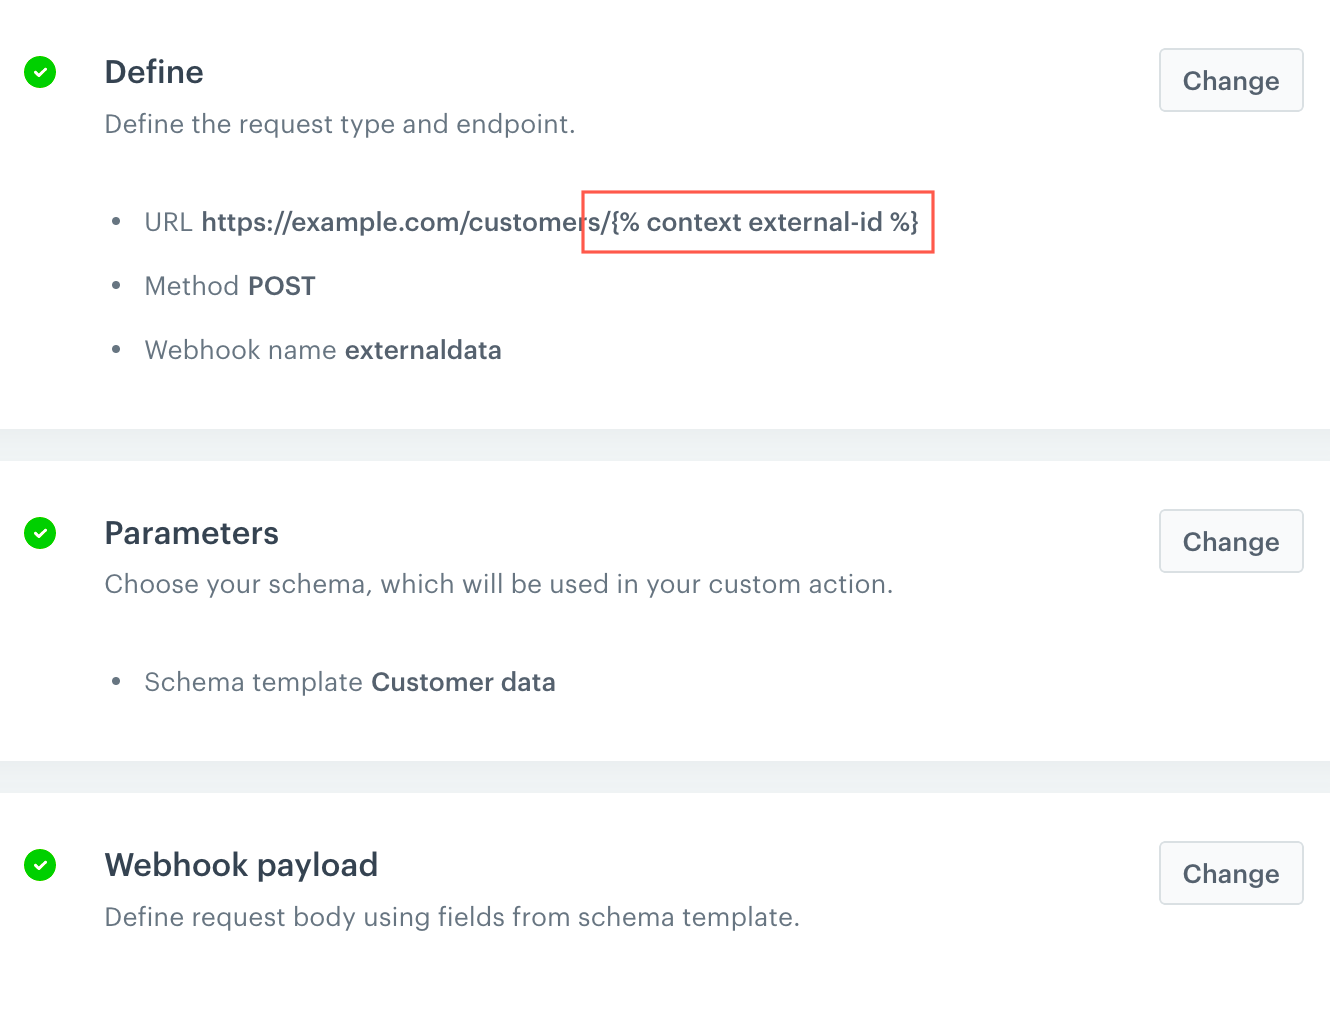
The integration from step 2 is used in this outgoing webhook node. The data to fill in the schema (and then to be used in the webhook's URL and payload) is retrieved from the profile who is the context of the workflow.
Result:
For a profile whose externalId attribute is lue42, the node makes a request to https://example.com/customers/lue42, and the firstName attribute is included in the payload.
Workflow metadata
You can insert properties of workflow and the current step (a step is the occurrence of a profile entering a node in the progress of a workflow).
Syntax:
{{currentStep.PROPERTYNAME}}
The available property names are:
Property
Description
journeyId
The unique ID of the workflow where this step occurred
actionId
Unique ID of this step (NOT the unique ID of a node. Steps only exist when the profile progresses through a workflow, and their IDs are different for each workflow)
businessProfileId
Workspace ID
diagramId
ID of the workflow definition
clientId
ID of the profile
clientUUID
UUID of the profile (may change, for example due to switching devices or browsers)
You can use the insert in:
Request URL
Query parameters
Request headers
Request body
Login or password (in the Basic access authorization method)
Example:
You use automation to send data to an external system with Outgoing Integrations.
You add a deduplicationKey header and set the value to {{currentStep.journeyId}}.
This inserts the unique ID of the journey into the header.
Your external system can use journeyId to recognize requests from the same workflow and perform deduplication.
Audience node syntax limitations
" is forbidden as it will be misinterpreted by Jinja, use ' instead
If you want to use the IN operator in the conditions to check if a string occurs in an array, you must join the array by using join('","'), for example: