Creating segmentations
Create a group of customers that share the same features. Later, you can use this segmentation as a target for your marketing activities.
When another journey in the Automation requests a result of the same analysis in that period, the cached definition is used to calculate the results. This means that if you edit a segmentation, aggregate, or expression used in an Automation, it takes 20 minutes for the new version to start being used in journeys.
This includes definitions of segmentations, expressions, and aggregates nested in other analyses and used in Inserts.
Requirements
- You need to have customers on your contact list in Profiles. You can either acquire them by website tracking or you can import them.
- Or you can implement a tracking code into your website.
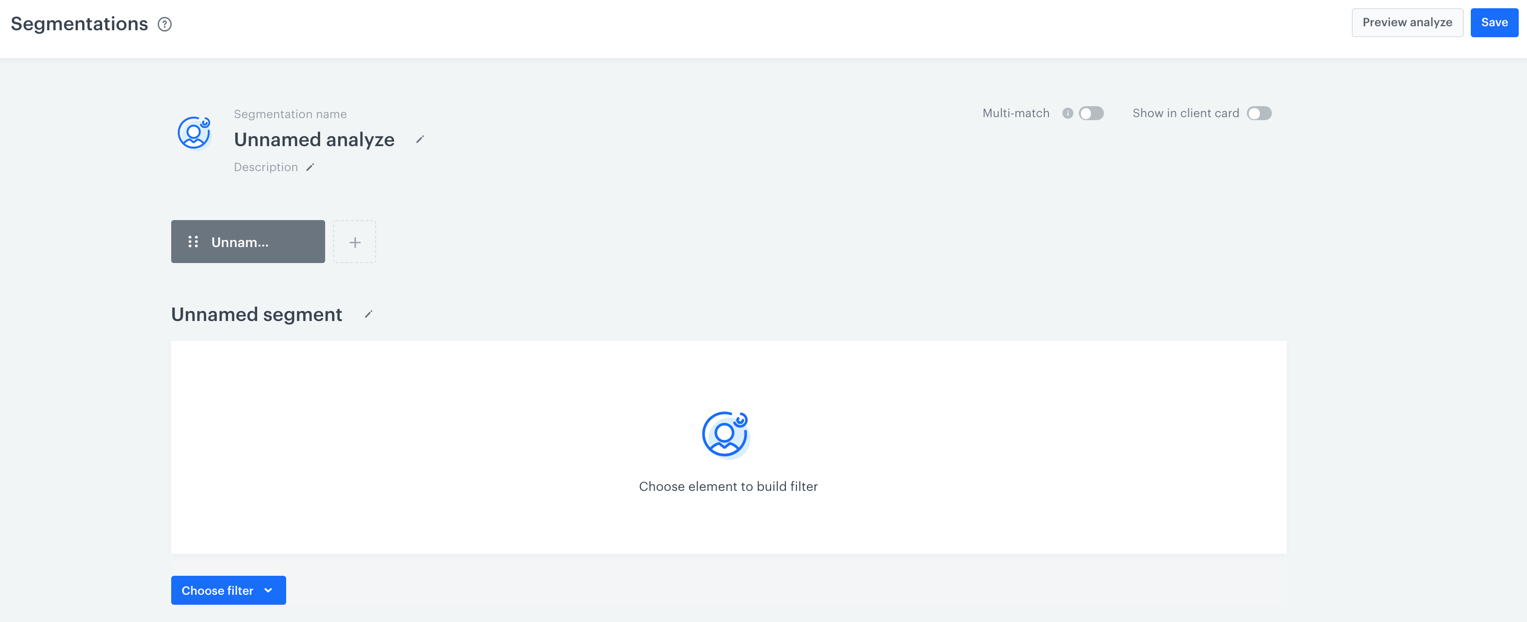
Creating a segmentation
-
Go to
 Analytics > Segmentations > Create new.
 -
Enter the name of the segmentation.
-
Optionally, to help other users with identifying the purpose of the segmentation, you can add a description.
-
To add the first step to the segmentation, click the Choose filters button.
-
From the list, select the event on the basis of which you want to build a segmentation. Customers who performed the activity that triggers the event will be included in the segmentation.
Note: Apart from events, you can use other elements, such as profile attributes.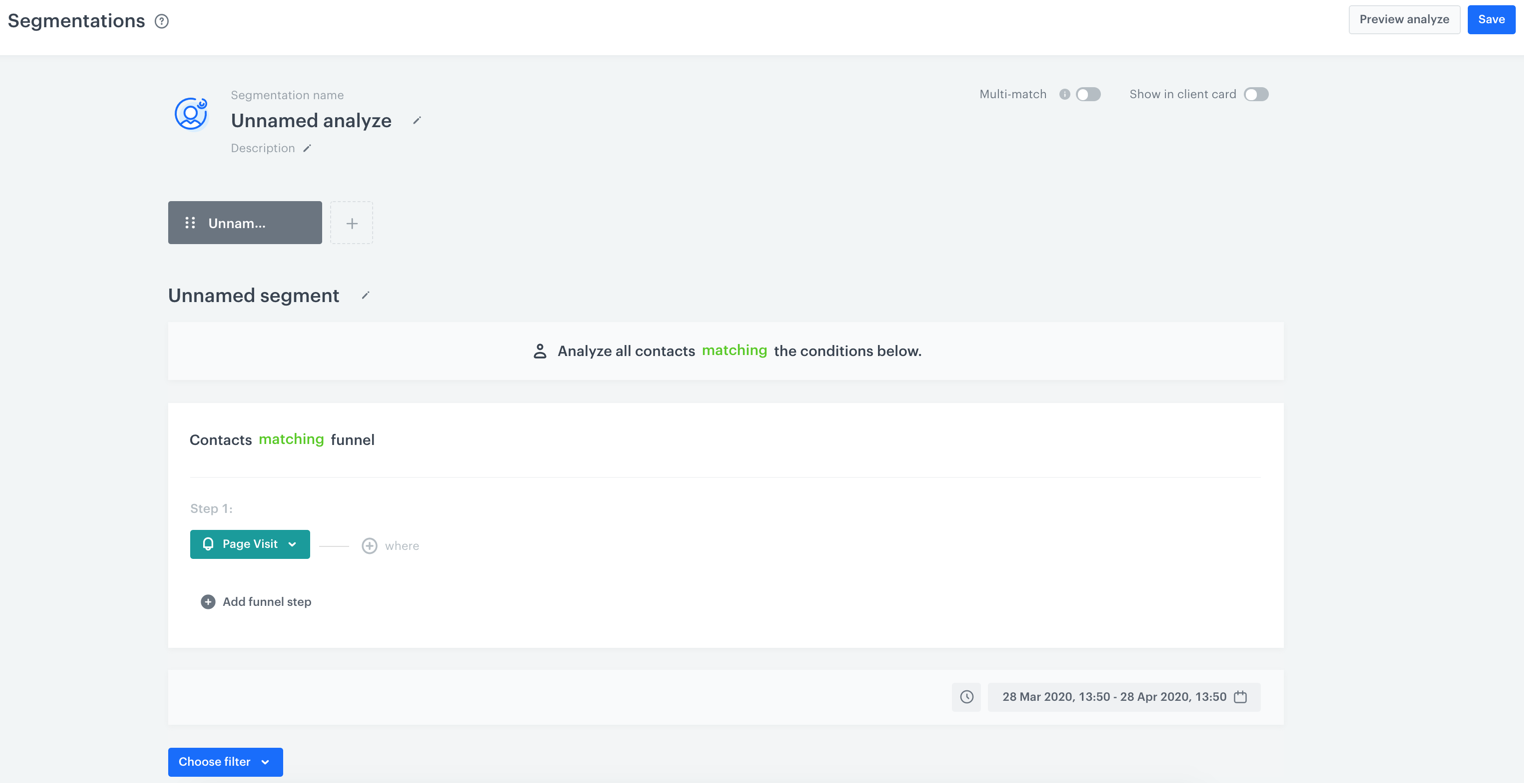
-
If you want to specify the event parameters, click the + where button. This way you can narrow your analysis to only particular occurrences of a type of event
-
To add more substeps to the segmentation, click the + Add funnel step button.
Note: The order of steps is important. The customers are counted in the segmentation when they perform a sequence of steps within the time specified in the step 10. You can change the order of steps by dragging and dropping them. -
To add another step, click the Choose filter button and repeat the steps in points 5 and 6.
-
To define the dependency between the main steps, choose either the OR or AND operator.
- OR - Only one main step needs to be performed.
- AND - All main steps need to be performed.
Important: The order of the logic operators matters. The right side of the last operator is one operand and everything on the left side of the last operator is treated as the other operand. Analyze the following examples. You can read more about the logic in segmentations here.Example
This analysis shows the division of 8 customers who have been assigned with particular tags between 2 segmentations.- Segmentation 1: Customers labeled with the following tags:
CHIorNYandLA. This means that in order to be part of the segment a customer needs to be tagged withLA, and simultaneously be tagged withCHI, orNY, or bothCHIandNY. - Segmentation 2: Customers labeled with the following tags:
CHIandNYorLA. This means that in order to be part of the segment a customer needs to either be tagged with onlyLAor they need to be tagged withCHIandNYsimultaneously (and theLAtag doesn’t matter in this case).
List of customers:
1. LA x  x
2. LA NY x
3. LA NY CHI
4. x  NY x
5. x  NY CHI
6. x  x  CHI
7. LA x  CHI
8. x  x  x
Results:
- Customer 1 - Segmentation 2
- Customer 2 - Segmentation 1
- Customer 3 - Segmentation 1 and 2
- Customer 4 - None
- Customer 5 - Segmentation 2
- Customer 6 - None
- Customer 7 - Segmentation 1
- Customer 8 - None
-
To set the time needed to complete all steps in the segmentation, click the clock icon. Only when a customer performs a required order within the specified time, they will be included in the segmentation.
-
To determine the time range from which the data will be analyzed, click the calendar icon. Confirm your choice with the Apply button.
-
You can create another segmentation by clicking the
 button. Then, repeat the steps from 1 to 11.
By default, when a segmentation consists of more than one sub-segmentations, customers who fall into the first, they are not included in the rest of sub-segmentations although they fit the conditions. This configuration is changeable by the Multi-match option.Explanation and examplesEvery segmentation can be divided into sub-segments. Let’s assume that you have got a segment A, which includes customers that made a purchase in the past month. You want to compare different time intervals within this month in terms of the number of people making transactions: last day, last 7 days, last 14 days, and so on.
If 100 customers made a transaction in the past 30 days, but 20 of them made the transaction multiple times and the last one was today, they’ll be shown in the first sub-segment only.
If they were included in more than one sub-segment, the whole segment would show that more than 100 people made a transaction in the past 30 days.
To make the visualization and calculation more consistent, you can use the Multi-match option that allows you to create a segment that can be used in such cases. The multi-match option, if enabled, changes the way sub-segments are calculated, and customers shown in the first sub-segment are shown also in next segments if they match the conditions. If you divide the segment of people who made a transaction in the past 30 days, and divide it into subsegments: today, last 7 days, 14 days, 30 days, enabled multi-match will show 100 people in the last subsegment - and disabled only the ones that didn’t make the transaction in past 14 days.Multi-match segments cannot be used for targeting and communication.
-
To include a customer in more than one sub-segmentation, if the customer met conditions, switch the Multi-match toggle on.
Tip: If you want your new segmentation to be visible in the profile card of the customers who belong to this segment, switch the Show in Profiles option on. -
To complete the process, click the Save button. When you save the segmentation, you can find it on the list of segmentations under the given name.