Reusing event context from preceding nodes
While defining the settings of a node, you can use data (event parameters) received in the preceding nodes in a diagram. This enables inserting dynamic values (for example, a customer’s name or ID) in the input of the following nodes in a workflow or a request in a webhook. Such reuse in workflows is called the event context.
How it works
The context of an event is kept in the {{ event.params }} Jinjava variable. This variable contains all parameters of the event from the preceding node (either Profile Event (a trigger) and/or Event Filter (a condition)).
At the beginning of the workflow, {{ event.params }} holds the context of an event from the trigger, it can be kept throughout the whole workflow and can be referred to at any moment unless the workflow contains a Event Filter (which is the only node that changes the context). Then, {{ event.params }} takes over the event context from the Event Filter node. You also have the possibility to refer to event context from any trigger or Event Filter in the workflow.

You can refer to the event parameters in two ways:
In the workflow presented in Figure 1:
- in the Send Email node, you can refer to the parameters of the
page.visitevent from the trigger by using the following example parameters:{{ event.params.uri }},{{ event.params.browser }}. - in the Generate Event node you can refer to the
product.addToCartevent from the Event Filter node by using the following example parameters:{{ event.params.sku }},{{ event.params.source }}
Requirements:
- The node to which you want to refer must be named.
- The name of the node must be unique (only in the workflow).
Formula:
Use {{ automationPathSteps['Node name1'].event.params.uri }}, where:
Node name1is a unique node nameNote: Spaces and diacritical marks allowed.event.params.uriis the name of the event parameter (in this example it’s URI).
In the workflow presented in Figure 1, in the Generate Event node, you can refer to the event parameters from :
- Profile Event using
{{ automationPathSteps['Node name1'].event.params.uri }} - Event Filter using
{{ automationPathSteps['Node name2'].event.params.uri }}.
When to use it
When a workflow contains nodes (building elements) that are based on events: Profile Event and Event Filter.
Tips and tricks
- You can put a parameter name in square brackets:
{{ event.params['example'] }}. It is helpful when a parameter name contains special characters, like inog:urlor$orderStatus, the Jinjava formula for these parameters is as follows:{{ event.params['og:url'] }}and{{ event.params['$orderStatus'] }}. - You can use
{{ event.params }}in Schema builder and in the message templates sent from the Automation module as well. - It is a good practice to use
{{ event.params }}wherever you can instead of using aggregates, filters, and any other elements that require a call to the database. - If you want to set
{{ event.params }}as a variable in your Jinjava code, you must omit the brackets:{{ }}.
Example:
{% set foo = event.params.example %}Example of use

The example presents a workflow that is triggered by a particular customer activity (event), as a result a webhook is sent to the external tool, the Synerise system waits until it gets the response from the tool. If so, the customer attribute is updated with information received through the webhook response.
Select a trigger
- Add the Profile Event node.
- Click the node twice and select the event.
- Confirm by clicking Apply.
Result: The selected event launches a workflow. - Click the plus icon on the node.
Send a webhook to an external tool
- From the dropdown list, select Outgoing Integration.
- Click the node twice and define the settings of the node.
Tip: Read more about Outgoing Integration. - In the upper right corner of the pop-up, select the Custom tab.
- Select the authentication method.
- Define the webhook configuration settings according to the instructions in the “Fill out the configuration form” section.
- Confirm by clicking Apply.
Result: Right after the event occurrence defined in the trigger node, a webhook is sent to the external tool.
Check if the response is received
- On the Outgoing Integration node, click the plus icon.
- From the dropdown list, select Event Filter.
- Click the Event Filter node.
- From the Choose event dropdown list, select
webhook.response.
Webhook response selected - Confirm by clicking Apply.
Result: When the workflow launches and the webhook is sent, the system checks if a webhook response is received (thewebhook.responseevent is visible on the customer’s card in Profiles). If so, the customer continues the workflow.
Modify customer data with info received from response
- Click the plus icon on the Event Filter node.
- From the dropdown list, select the Update Profile node.
- Click the node.
- Select the customer attribute to be modified.
- Select the Change option.
Result: A field appears. - In the field, enter:
{{event.params['response_parameter_name']}}(replaceparameter_namewith the actual name of the parameter).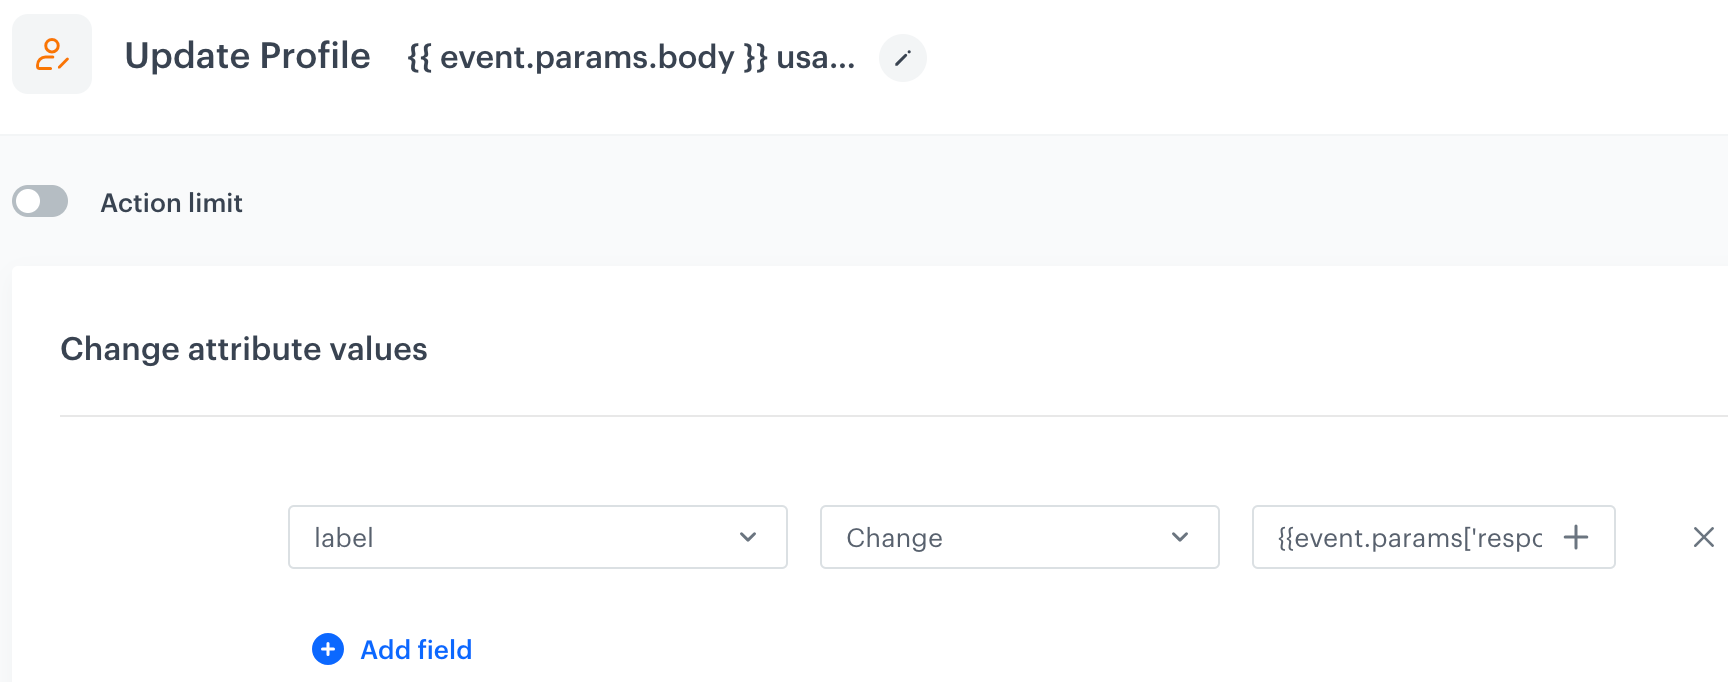
Event context used in Update Profile - Confirm by clicking Apply.
- Click the plus button on the Update Profile node.
- Select End.