Delay node
In order to hold a workflow up for some time before it continues to the next nodes, you can use the Delay node.
When can you use it
-
In profile-oriented scenarios. For example, in an abandoned cart scenario, the workflow is delayed for some time after a product is added to a cart. When the delay period passes, the system checks if a purchase was made. If not, the system sends a reminder email with the products from the abandoned cart.
Important: The maximum time limit a profile can spend in the Delay node is 60 days. If your workflow contains more than 1 Delay node, the total time in all Delay nodes cannot exceed 60 days. -
In the workflows triggered by the Business Event and Scheduled Run nodes which require delays in some parts of the scenario.
WARNING: If you use the Delay node in the workflows that are triggered by a request from an external service (“Business Event” node), new requests will be rejected until the delay period is over.
Delay possibilities
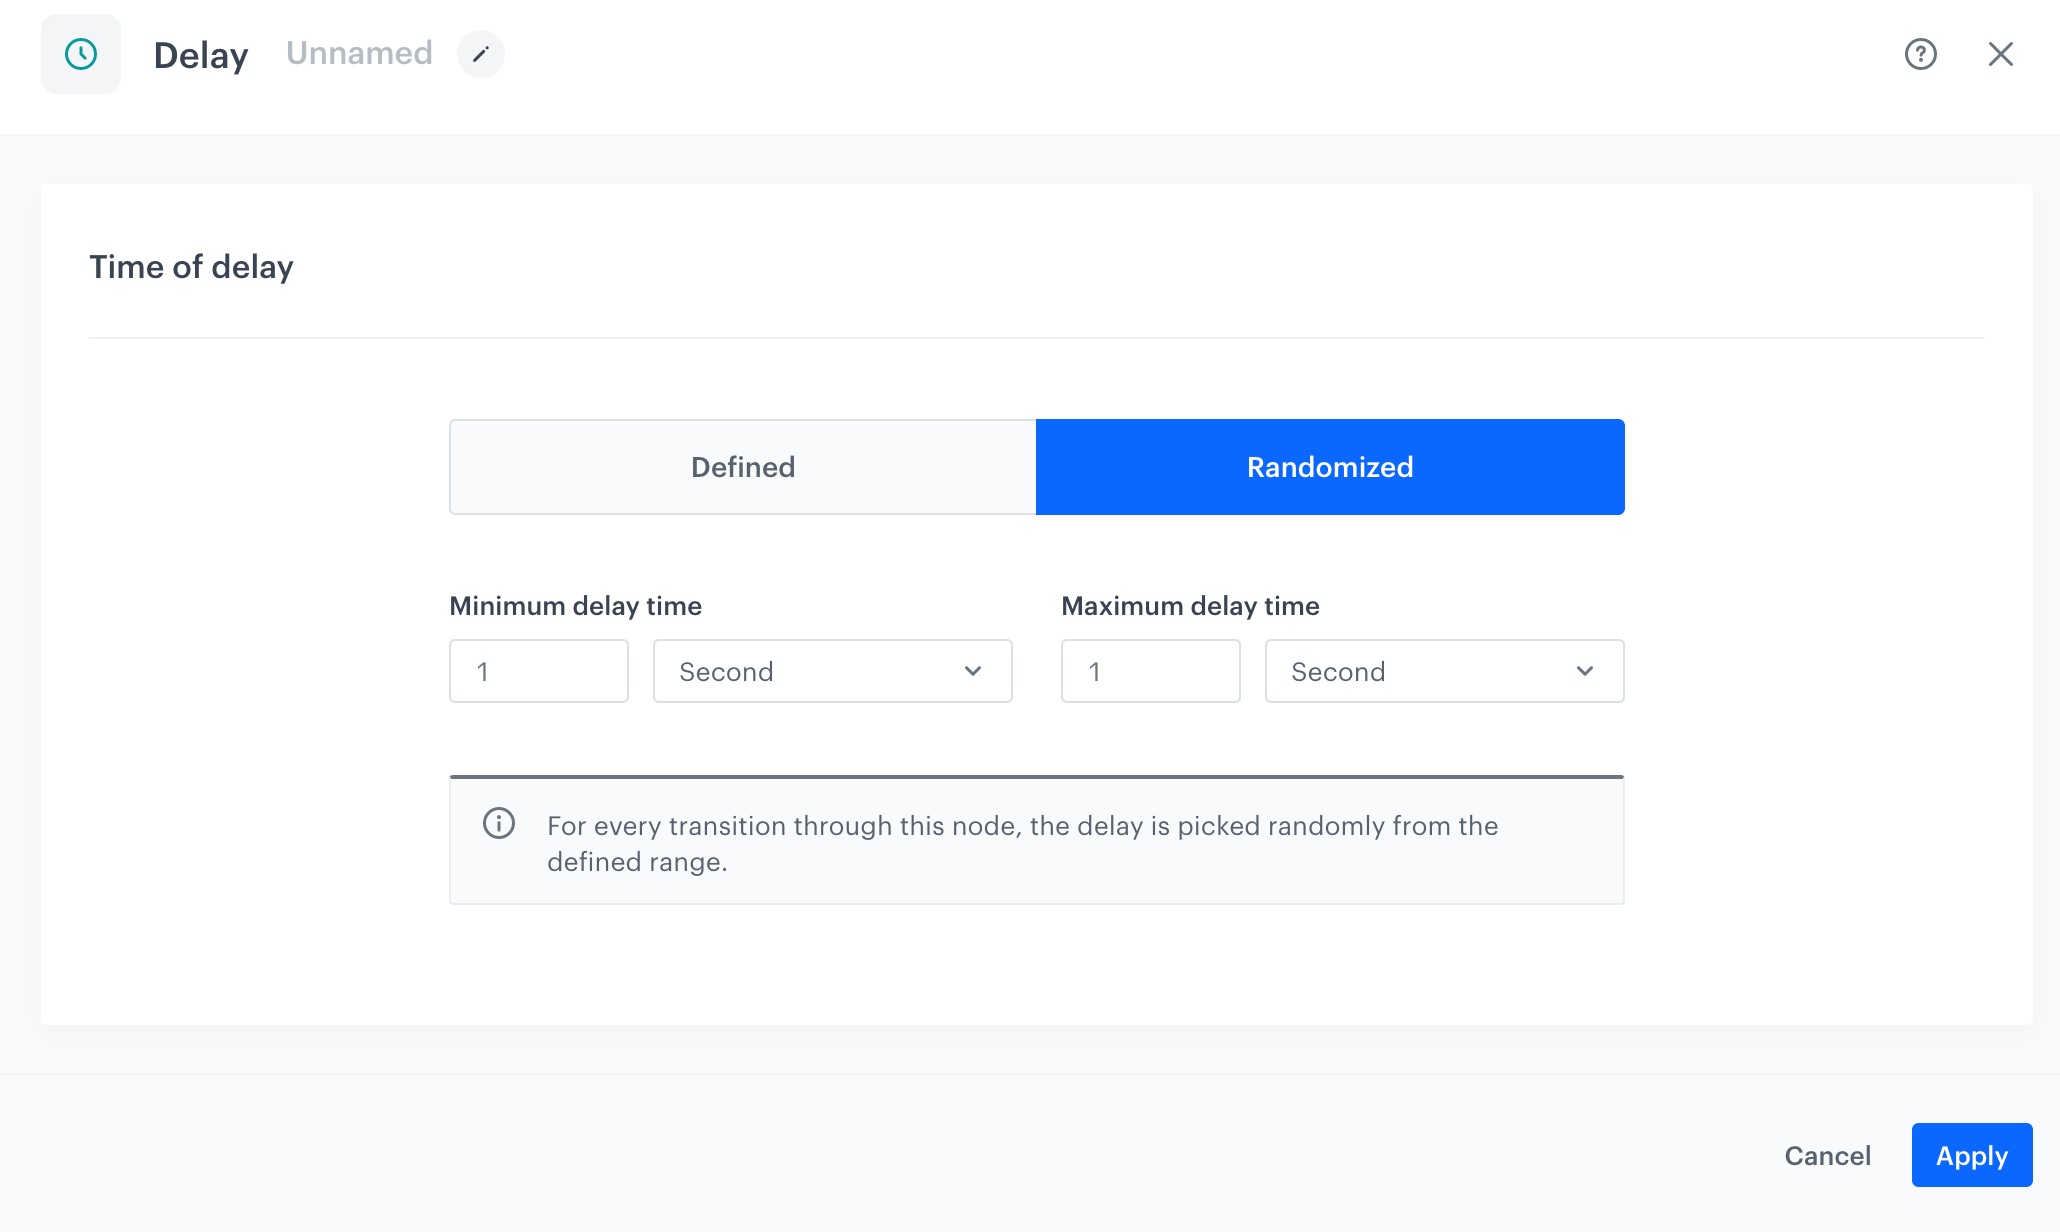
During the node configuration, you can use two delay options:
- Defined allows you to set a universal delay period for each passage of every profile in the workflow. Every time a profile passes through the Delay node, the delay period is the same.
- Randomized allows you to choose a range. Every time a profile passes through the node, a delay is randomized from that range. Even if the same profile goes through the workflow several times, a new delay is randomized every time.
Node configuration
-
Click THEN on the node after which you want to have the Delay node.
Result: A dropdown list opens. -
From the dropdown list, select Delay.
-
Click the node.
Result: A pop-up opens. -
Select one of two tabs:
- Defined - If you want to set a universal delay period for each passage of every profile in the workflow, select this tab.
- Randomized - If you want to randomize the time of delay for each passage of every profile, select this tab. Even if the same profile goes through the workflow several times, a new delay is randomized every time.
-
Perform the steps according to the tab you selected in the previous step:
- In the Delay field, enter the value of delay time.
- From the Unit dropdown list, select the time unit.
The Delay node configuration -
To confirm the settings, click Apply.
Example of use
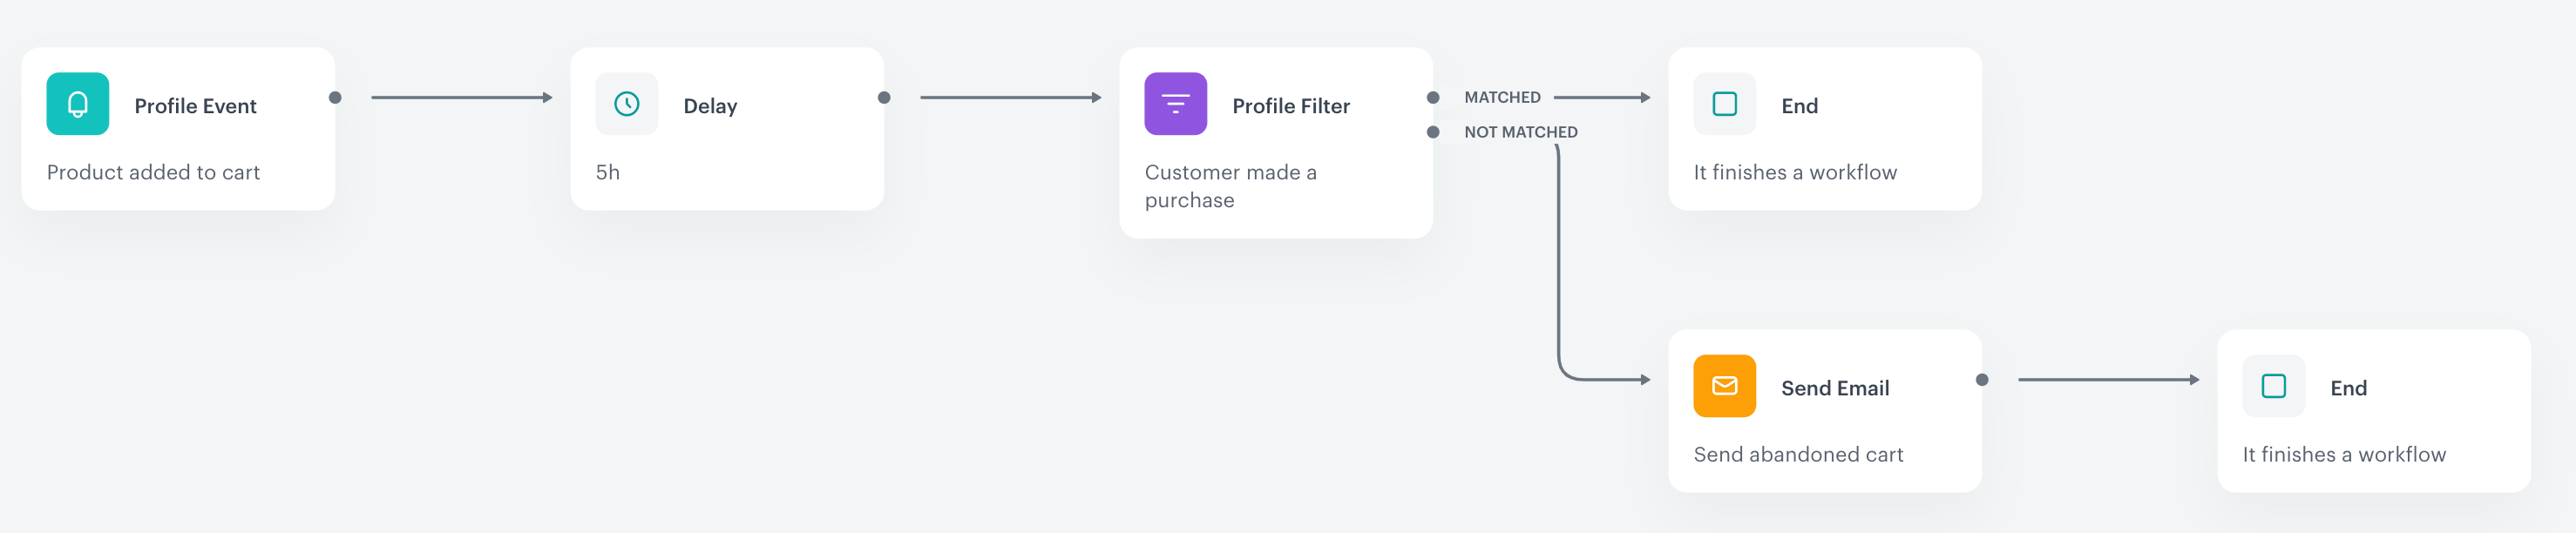
This workflow sends an email containing products added to the cart as a result of not purchasing them.
- It starts with the Profile Event trigger node. In the settings of the trigger, select the
product.addToCartevent. - As the next step of the workflow, add the Delay node and set it to 5 hours.
- Add the Profile Filter node and create a segmentation which checks whether the customer made a purchase while being on hold for 5 hours.
- If a customer didn’t make a purchase, the system sends emails with products from the cart. If a customer did buy the products, they won’t continue the workflow.
- When the email is sent, the workflow is completed.