"Send an event" node
The “Send an event” to Google Analytics (v4) node facilitates sending events from Synerise to Google Analytics.
Prerequisites
- Create an API secret in your Google Analytics panel. To create a new secret, navigate to Admin > Data Streams > {stream name} > Measurement Protocol > Create.
- Get the measurement ID associated with a stream in your Google Analytics panel. Navigate to Admin > Data Streams > {stream name} > Measurement ID.
- Enable saving Google Analytics ID in profiles
Node configuration
In this part of the process, you can create a workflow that contains the Send an event node. This node allows you to send an event to Google Analytics with the data defined in this node. In the settings of the integration, you will use the value of cid attribute as a customer identifier.
If you haven’t saved Google Analytics IDs in profiles, see Getting the customer ID from Google Analytics
- Click the node.
- Click Select connection.
- From the dropdown list, select the connection.
If you haven’t established a connection yet, see Create a connection.
Create a connection
To allow the data exchange, establish the connection between Synerise and Google Analytics.
- At the bottom of the Select connection dropdown list, click Add connection.
- In the Measurement ID field, enter the ID you retrieved as a part of prerequisites.
- In the API secret field, enter the API secret you created as a part of prerequisites.
- Click Next.
- In the Connection name field, enter the name for the access token you generated.
- Click Apply.
Result: A connection is created and selected.
Define the integration settings
In this step, fill in the form that allows you to send an event from Synerise to Google Analytics.
- In the Customer ID field, enter
{{ customer['cid'] }}. This way, you will retrieve the value of thecidattribute. - In the Event name field, enter the name of the event you want to send to Google Analytics.
- You don’t have to use an existing event.
- We recommend using the event nomenclature consistent with the Synerise events (such as
page.visit,message.send, and so on). - The event you send within this node won’t be added to the list of events in Synerise.
- In the Event parameters field, enter parameters of the event in the form of the JSON object.
Tip: Refer to the Google Analytics documentation for the event requirements. - Confirm the settings by clicking Apply.
Getting the customer ID from Google Analytics
To send events from Synerise to Google Analytics, you must use the customer identifier generated by Google Analytics. It is stored on the website in the _ga cookie. You need to retrieve this ID from the cookie and save it as a custom attribute (cid) of a Synerise profile.
You can do this by using dynamic content as a tag manager. You don’t have to prepare a template, you can use the predefined template that already contains the Javascript code that sets the cookie value as the value of the cid attribute in Synerise. The instruction below describes how to use this template.
- In Synerise, go to Communication > Dynamic content > Create new.
- As the dynamic content type, select Insert object.
- In the Audience section, leave the settings at default (Everyone).
- Confirm by clicking Apply.
- In the Content section:
- Leave the content type at Simple message.
- Set the CSS selector to Before (in div).
- In the text field, enter
.snrs-modal-wrapper - Click Create message.
- Select the folder with predefined script templates.
- Select the Map Google Analytics ID to….
- In the Config tab, leave the values in the form at default.
When the Google Analytics ID is matched with the customer, theform.submitevent will be sent with theformTypeparameter set to the value defined in the formType of event field (GA-ID-matched).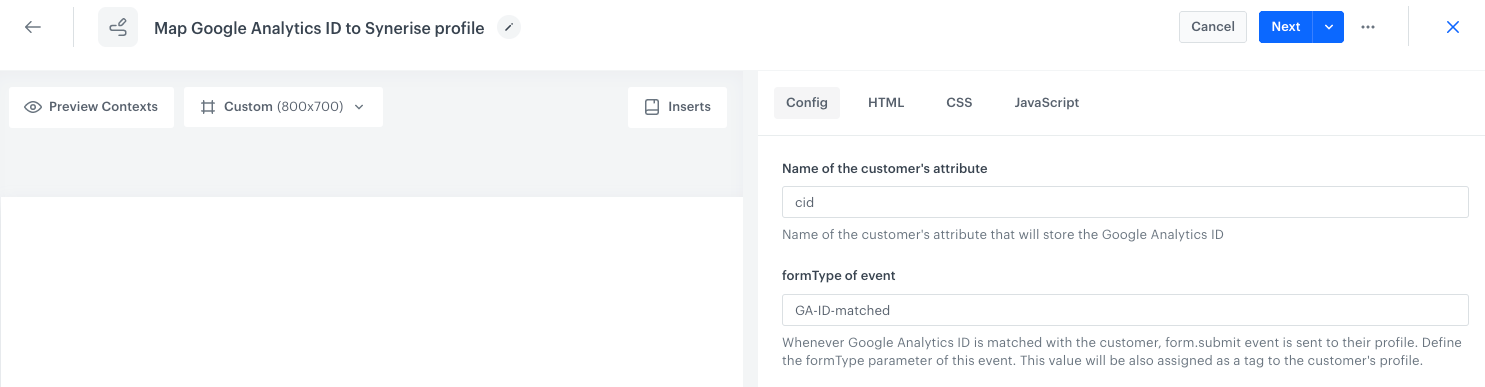
The form in the predefined template - Click Next.
Result: You leave the dynamic content builder and go back to the dynamic content settings. - Confirm by clicking Apply.
- In the Schedule section:
- Select Display immediately.
- Expand Advanced options.
- Select Display every hour every day.
- Confirm by clicking Apply.
- In the Display settings section:
- Leave Triggers at default (On landing).
- Leave Pages at default (All pages).
- Set Frequency to Once per visit.
- Leave Stop display at default (Never).
- In Devices, select desktop and mobile.
- Leave View count capacity empty.
- Confirm by clicking Apply.
- In the UTM & URL parameters section, click Skip this step.
- In the top right corner, click Activate.
Results: A tag is initialized on all pages for all users (both recognized and unrecognized). It retrieves the current value of the_gacookie and sets its identifier value as thecidattribute.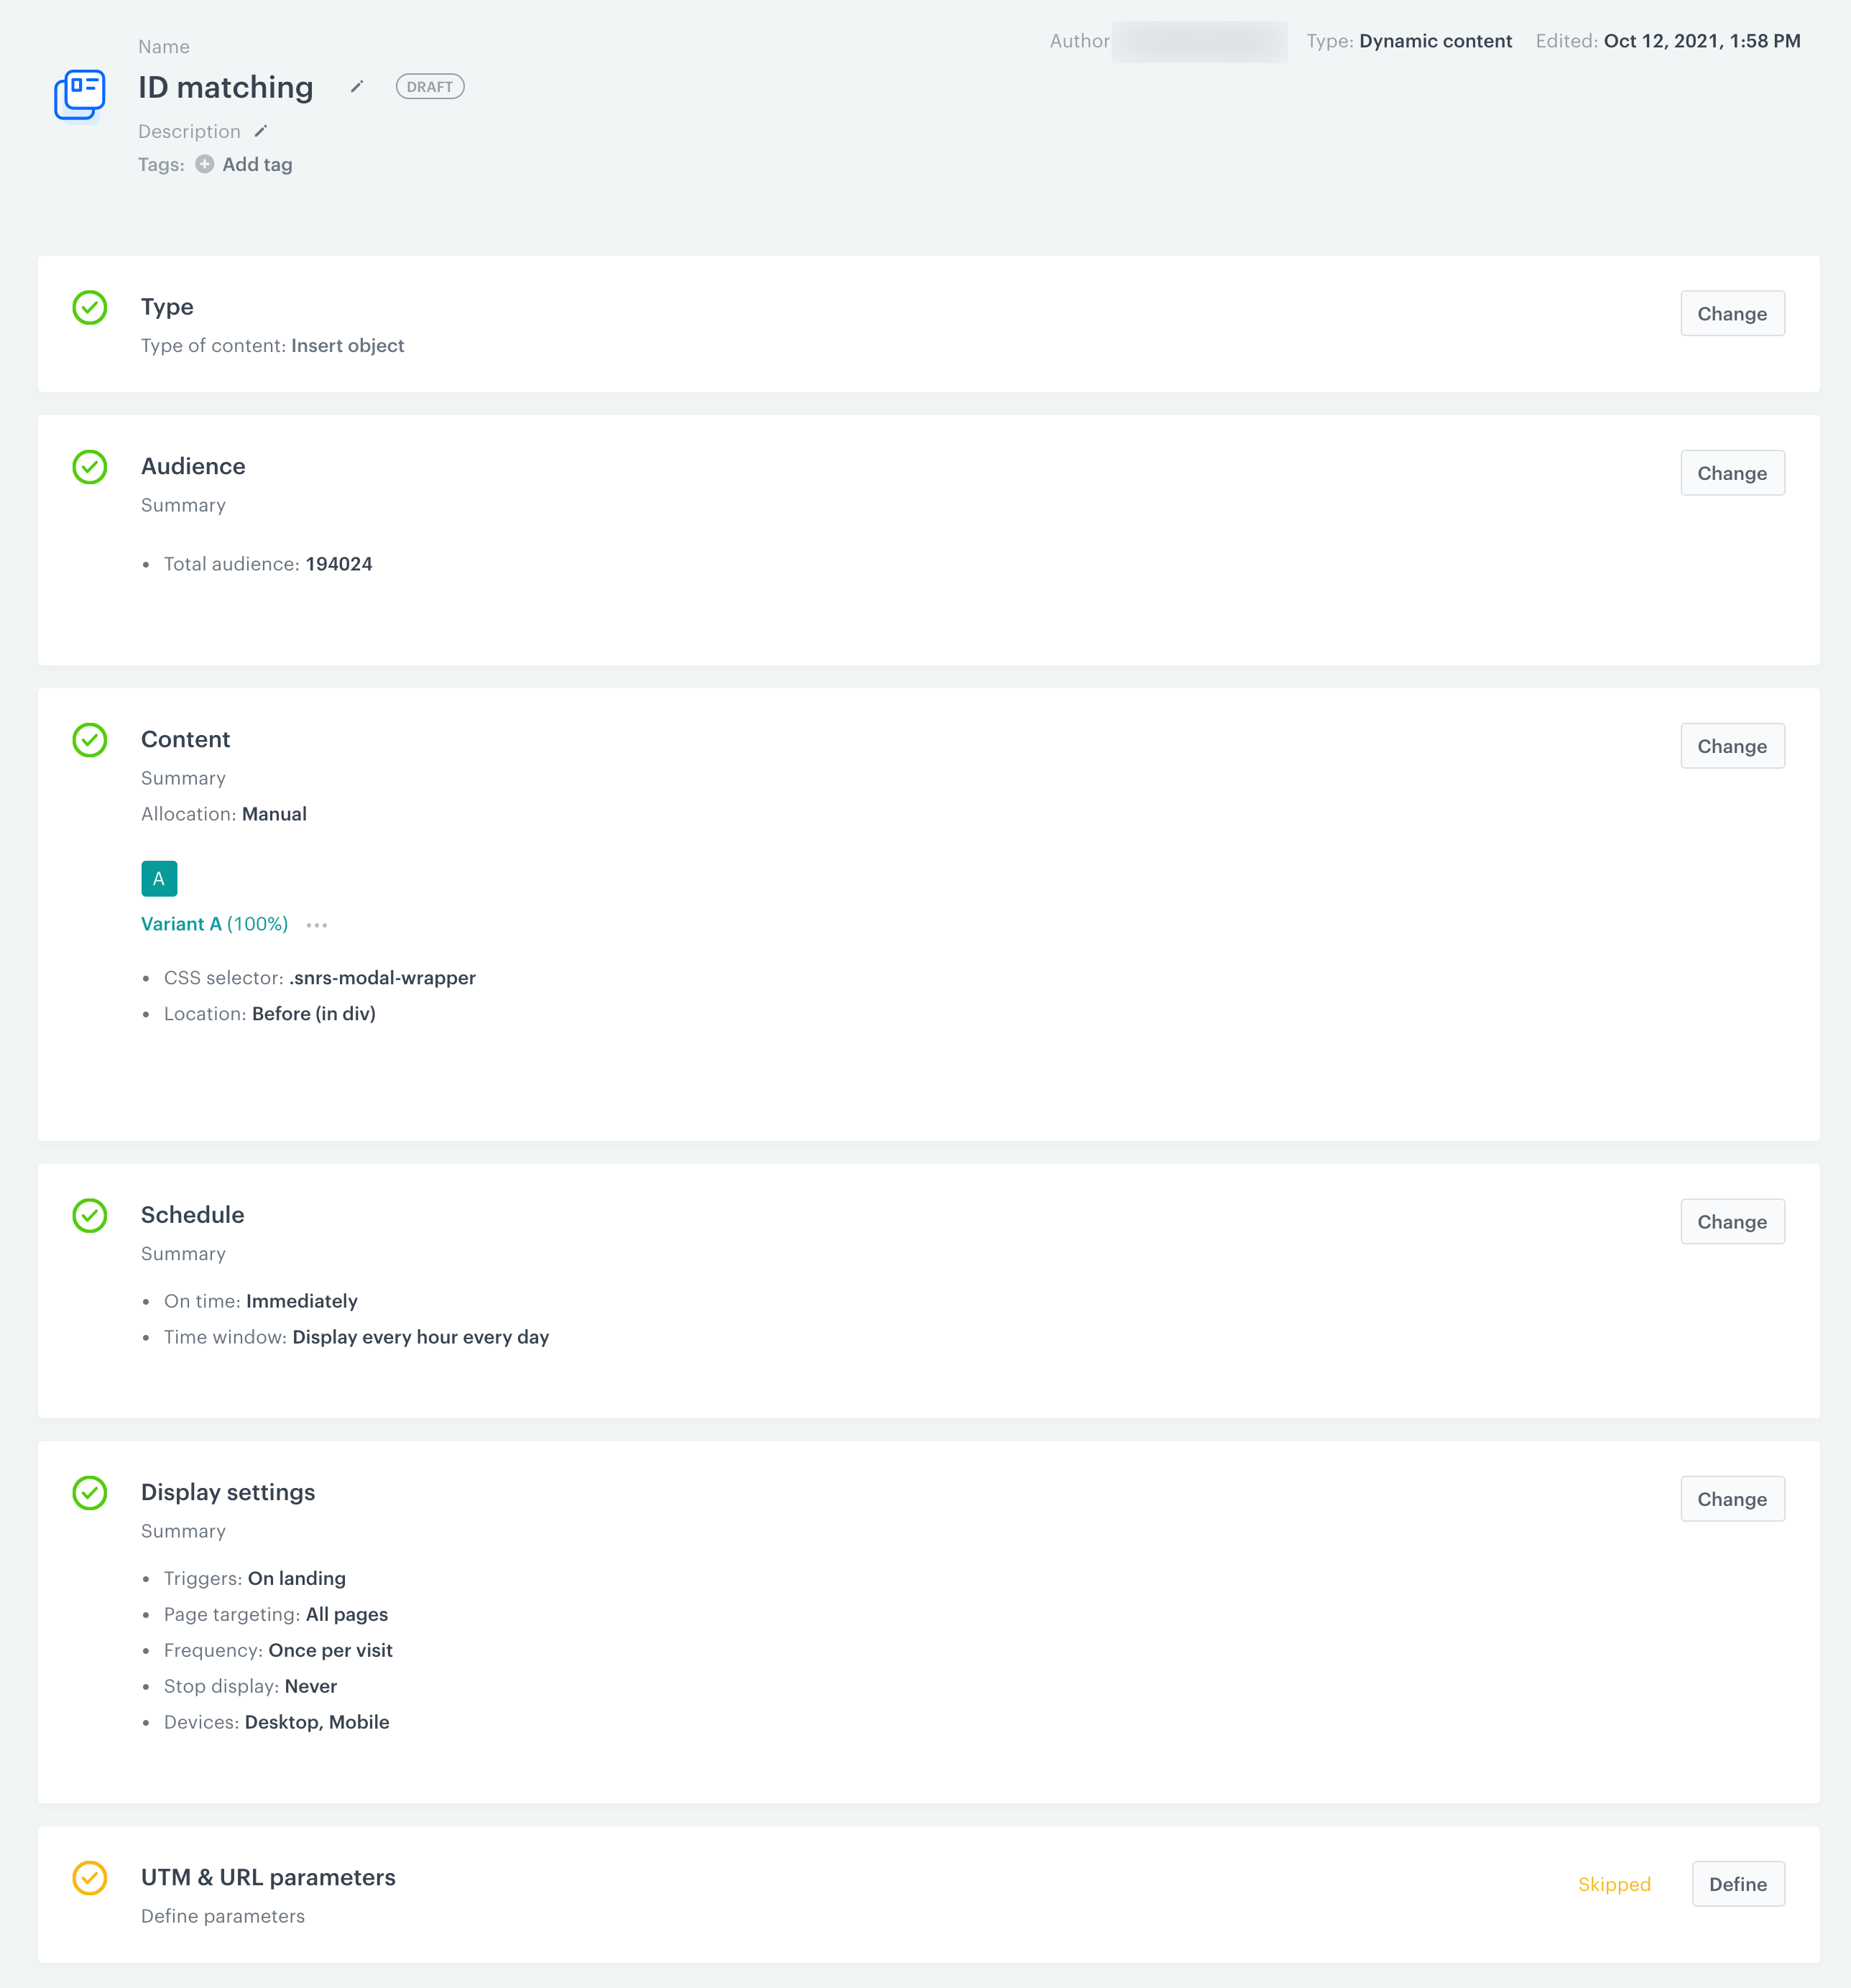
The dynamic content configuration of the matching pixel
Example of use
For example of use, refer to the use case that describes sending the score of RFM analysis to Google Analytics.