Outgoing integration
The Outgoing integration module lets you integrate Synerise with any external service. Thanks to the possibility of building HTTP requests and supplementing them with customer attributes or data calculated by the Analytics module, you can synchronize data by sending them out of Synerise. You can create a reusable and single-use integrations to be used in the workflows.
Creating single-use integration
If you only need to configure a webhook to integrate with an external source for a specific workflow, we recommend using this approach. In such cases, in the Outgoing integration node fill out the configuration form on the Custom tab according to the instructions in the documentation of this node.
Creating reusable integration
To create a reusable webhook which can be used in the Outgoing integration node in multiple workflows, start with creating a schema template using the Schema Builder feature. With this feature, you will create a predefined form (schema template) that will contain fields required for the integration.
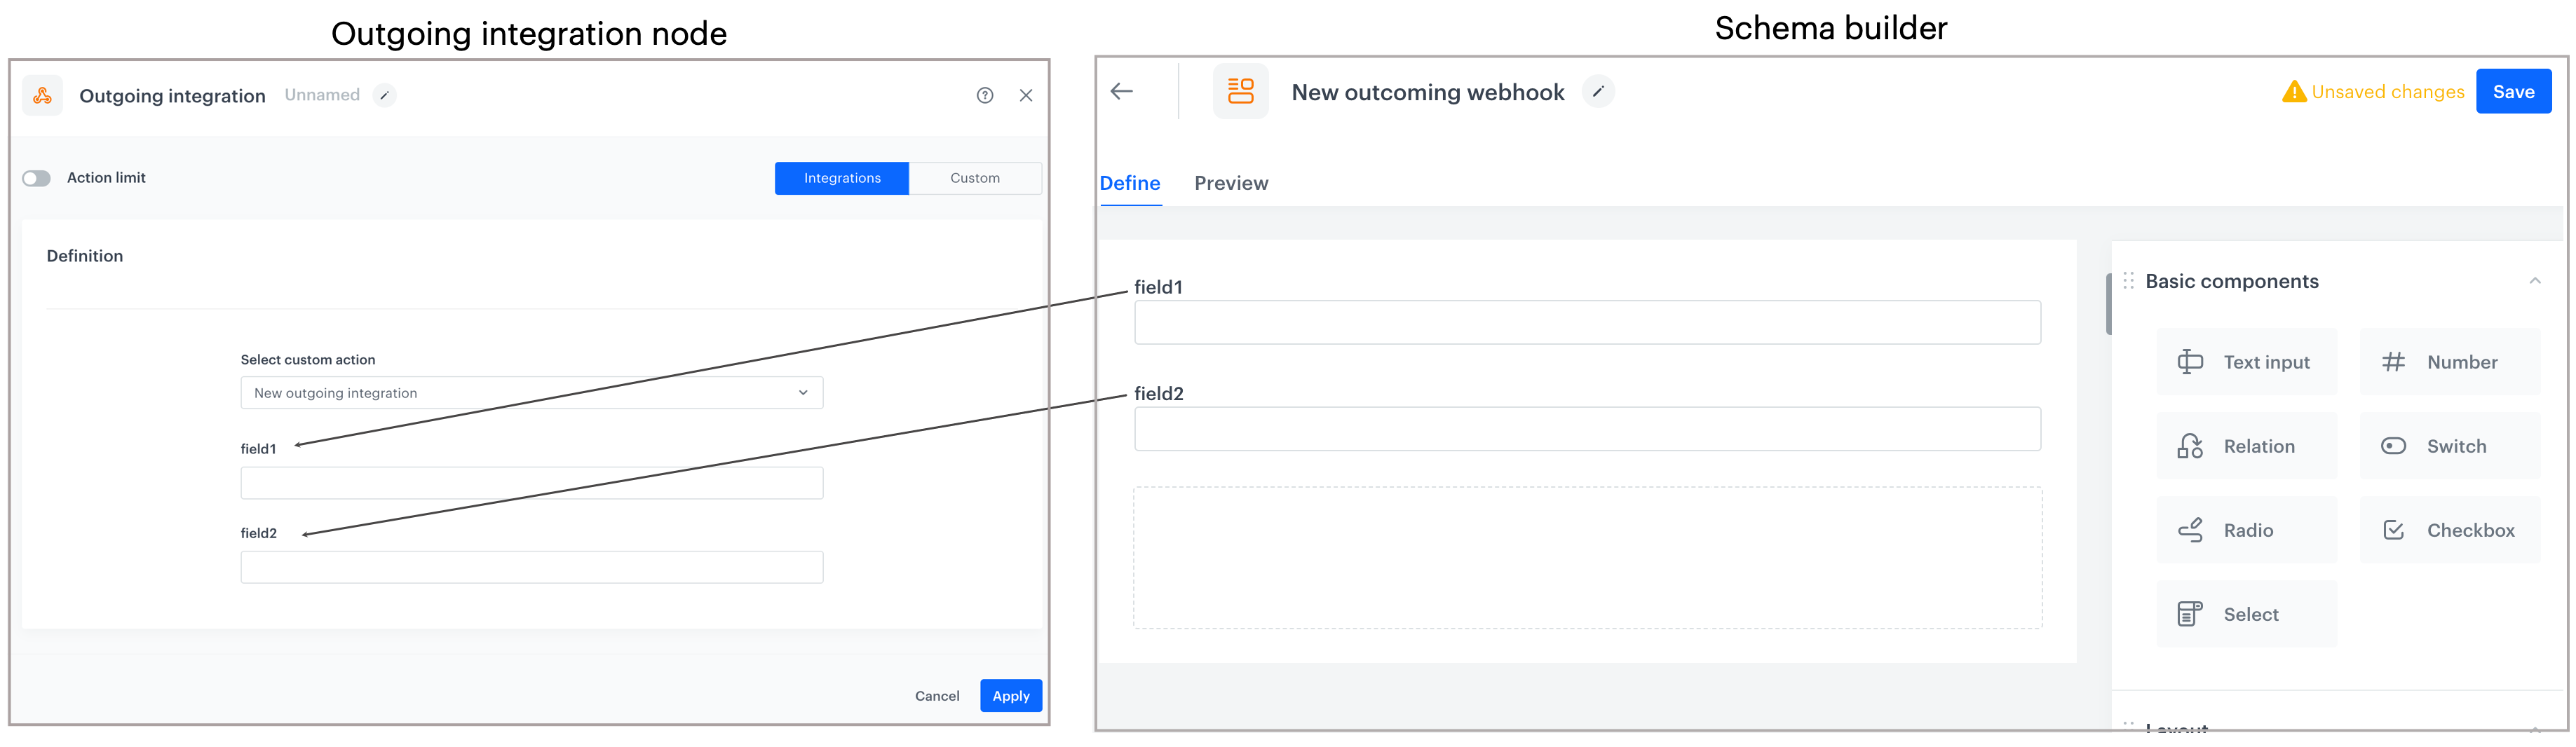
Using a schema template simplifies the configuration of the Outgoing integration node by allowing you to fill out fields defined in the template instead of having to define the HTTP method, endpoint, authorization, and request body from scratch every time.
You can fill in the fields with variables from the profile/event context, but also with other data available using Jinjava, such as aggregate or expression results. You can find more information in the Managing parameters with schema section.
The following use cases offer practical examples of combining schemas and outgoing integrations:
Create a schema template
- Go to Data Management > Schema Builder > New schema.
- Create a schema with the fields that are required by the integration you will create in the further steps. Follow the instructions available in the Schema builder documentation.
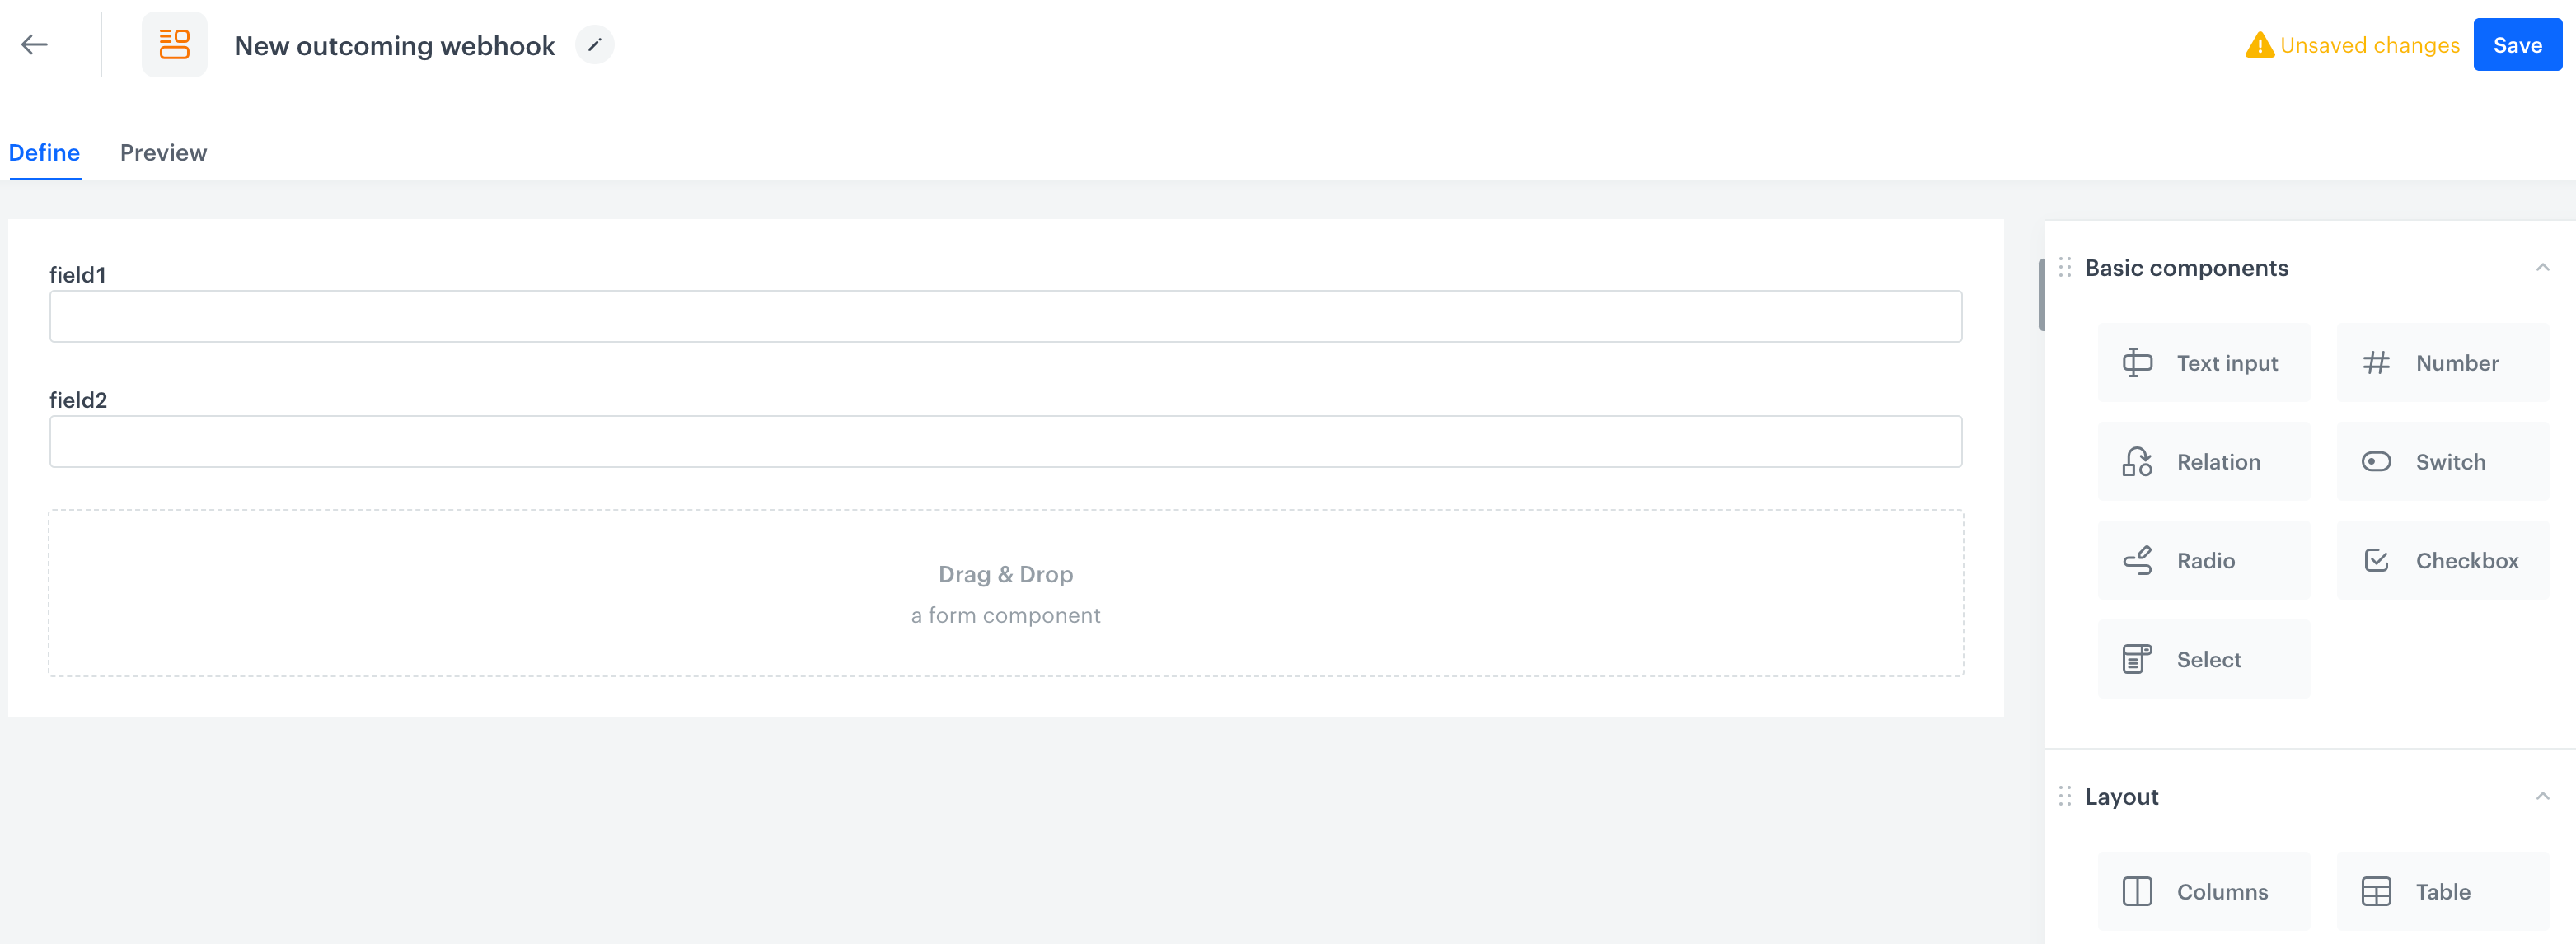
Example schema template
Publish a reusable integration
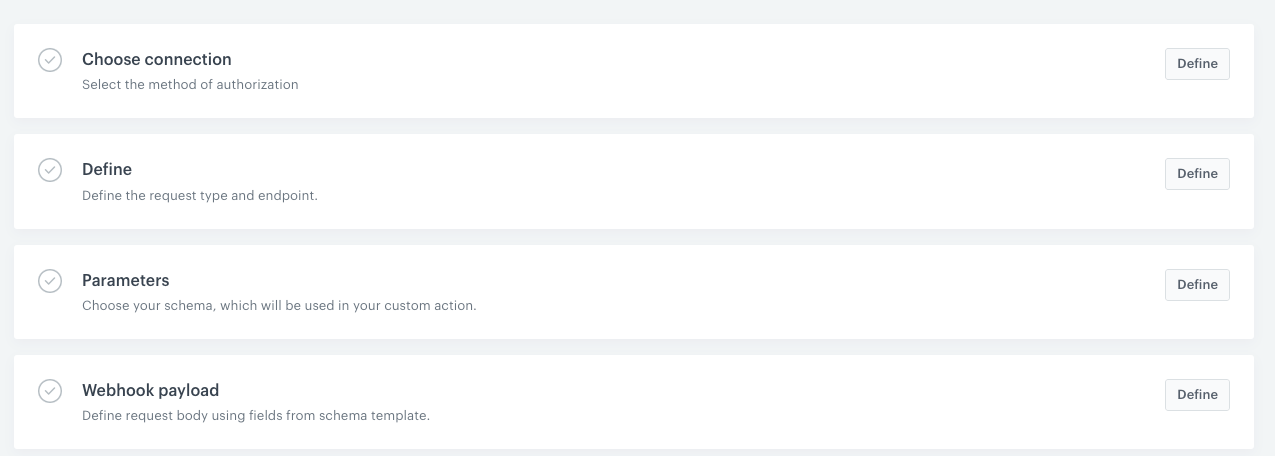
Define the connection
In this part of the process, you define the authentication method and providing the information required to establish a connection.
- Go to
 Automation > Outgoing.
 - In the upper-right corner of the screen, click New integration.
- In the upper-left corner of the screen, enter a name for the integration.
- In the Choose connection, click Define.
- Select one of the authentication methods:
- No authentication - No authentication is required.
- Password - Authentication is based on a log-in and a password to a resource.
Click here to see the instructions
- Click Select connection.
- If the connection you want to use is in the list, select it and proceed to Defining endpoint.
- If the connection list is empty or you don’t see a connection you need to use:
- At the bottom of the dropdown list, click Add connection.
- In the Connection name field, enter the name of your connection (it’s visible only on the Select connection dropdown list).
- In the Login field, enter a log-in.
- In the Password field, enter the password.
- Click Save.
The connection you created can be used later in other nodes and workflows.
- If the connection list is empty or you don’t see a connection you need to use:
- Token - This method allows you to authenticate by a token.
Click here to see the instructions
- Click Select connection.
- If the connection you want to use is in the list, select it and proceed to Defining endpoint.
- If the connection list is empty or you don’t see a connection you need to use:
- At the bottom of the dropdown list, click Add connection.
- In the Connection name field, enter the name of your connection (it’s visible only on the Select connection dropdown list).
- In the Token field, enter a token.
- Click Save.
The connection you created can be used later in other nodes and workflows.
- If the connection list is empty or you don’t see a connection you need to use:
- API key - This method is especially useful to the users who use Synerise REST API. When you choose this authorization method, from the dropdown list, you can select an API key with the required permissions. This way, the requests to Synerise API are executed by this integration and a JWT is not required as it is generated while sending requests and attached to the request.
Click here to see the instructions- Click Select connection.
- If the connection you want to use is in the list, select it and proceed to Defining endpoint.
- If the connection list is empty or you don’t see a connection you need to use:
- At the bottom of the dropdown list, click Add connection.
- In the Connection name field, enter the name of your connection (it’s visible only on the Select connection dropdown list).
- In the API key field, paste the API key.
- Click Save.
The connection you created can be used later in other nodes and workflows.
- If the connection list is empty or you don’t see a connection you need to use:
Define the endpoint
In this part of the process, select the HTTP method and define the endpoint to which you will send a request from Synerise. Additionally, you can define the name of the event which will be generated when the Outgoing integration node is triggered.
- In the Define section, click Define.
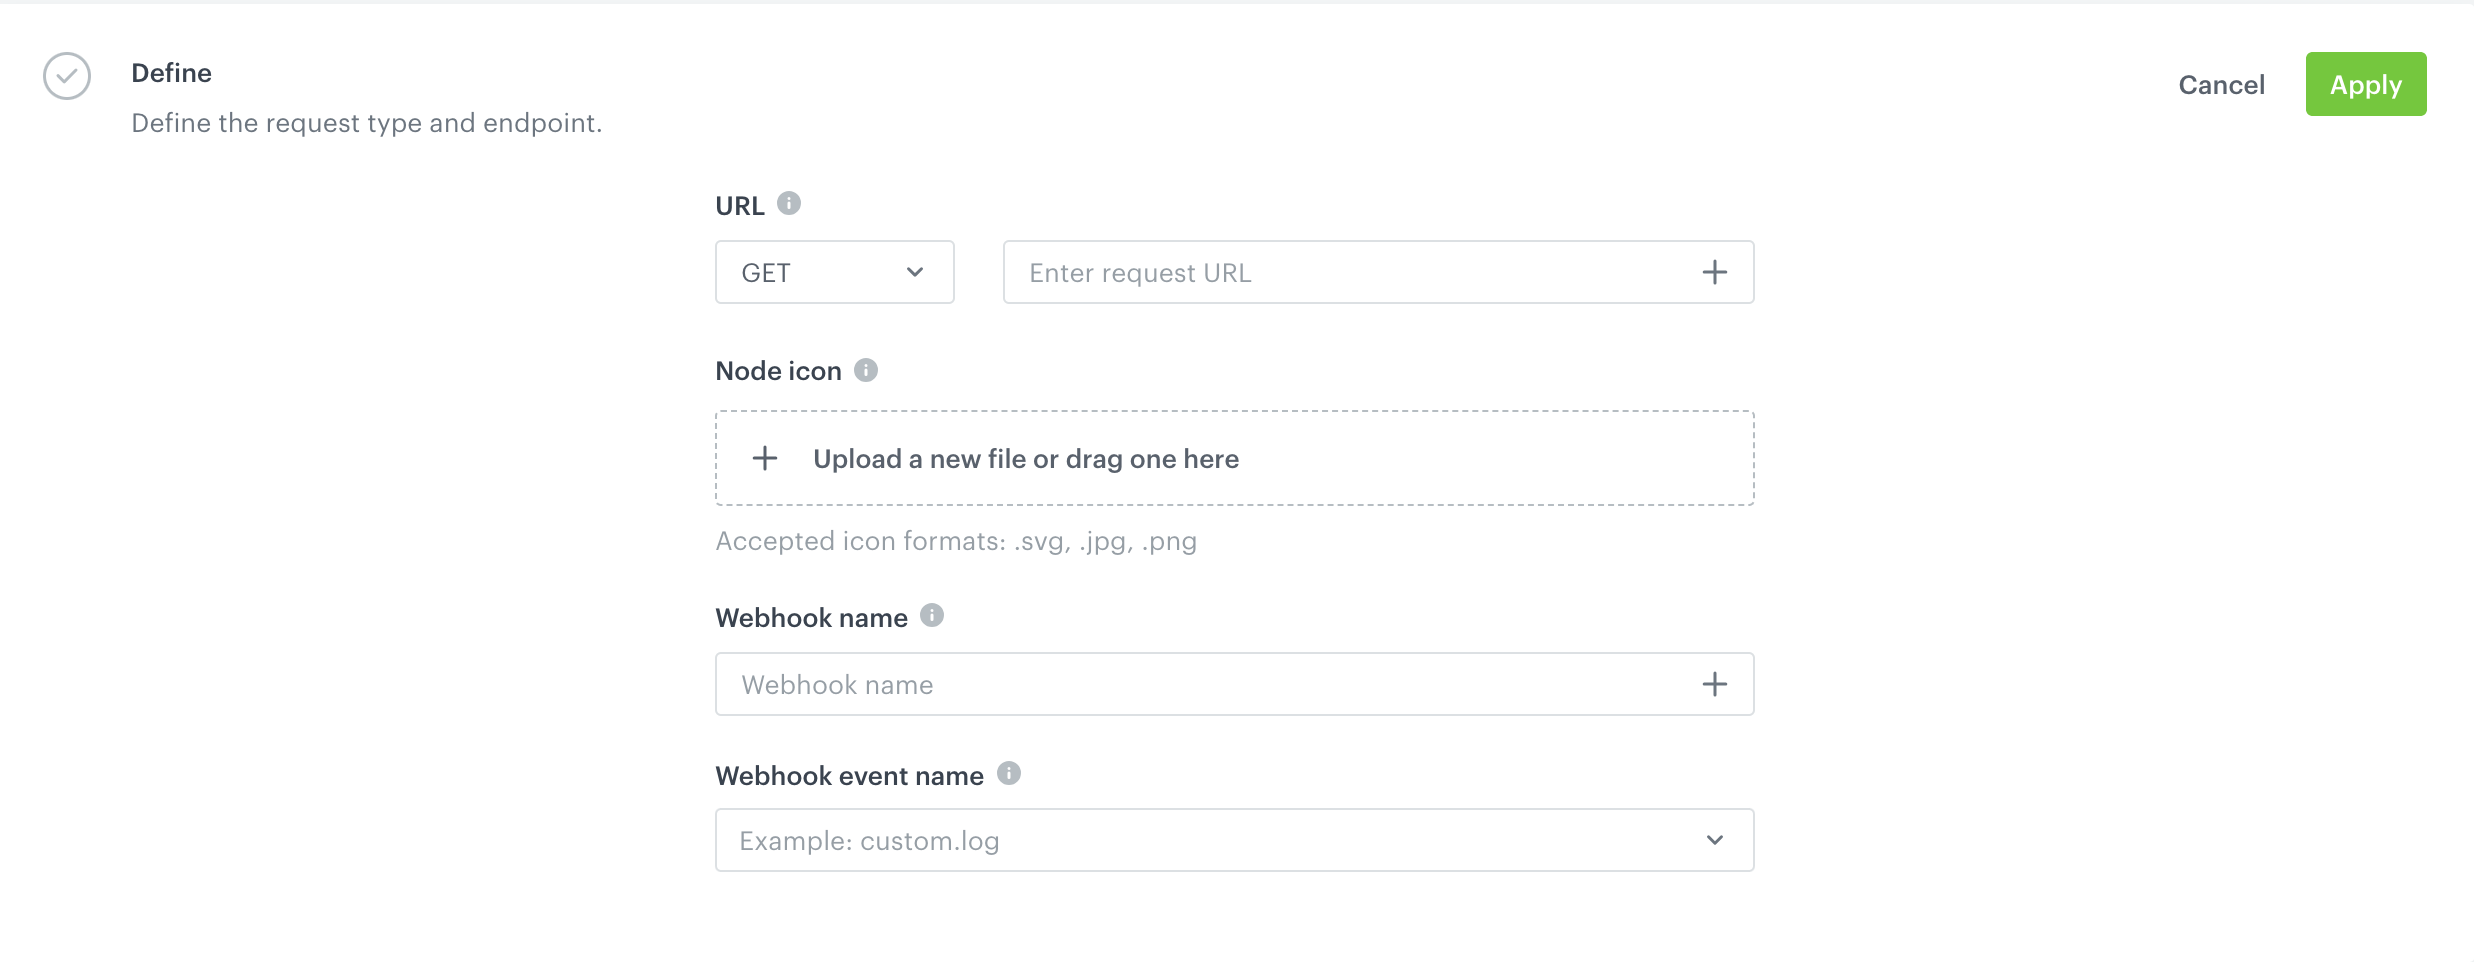
Outgoing integration creation page - From the URL drop-down list, select an HTTP method.
- In the URI address field, enter the endpoint.
The URI can contain inserts.WARNING: This field doesn’t allow the endpoints defined as IPs (for example,51.145.180.18). You can only use endpoints that contain a domain (for example,https://example.com) - Optional: Upload an icon for the node.
- In the Webhook name field, enter the value that will be displayed in the
nameparameter of the event which will be generated when a request from this node will be executed. - Optional: In the Webhook event name field, you can do the following:
- from the dropdown list, you can select the name of the event (event action) that will be generated when a request from this node will be executed.
- at the bottom of the dropdown list, you can create a new event using the Create new event option.
Result: A pop-up appears. Fill out the configuration form on the pop-up, according to instructions in step 3 in the Adding event definitions - in the Web application section. - you can leave the field blank, then the action defaults to webhook.response.
- Click Apply.
Select the schema template
In this part of the process, select the schema template described created in this part of the process.

- In the Parameters section, click Define.
- From the Schema template drop-down list, select a schema created earlier in this part of the process.
- Click Apply.
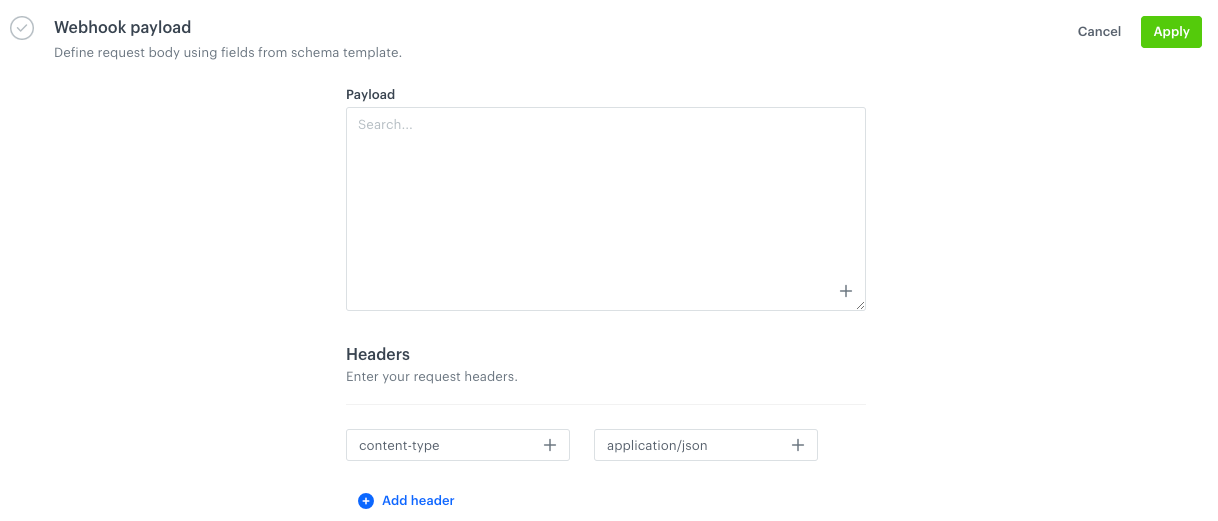
Enter the request body
In this part of the process, enter a body that contains all parameters which you will send in a request.
-
In the Webhook payload section, click Define.
-
In the Payload text box, enter the JSON payload schema.
This JSON schema can include inserts. By filling out fields with dynamic data using Jinjava as described in the Managing parameters with schemas section, the request body will be as follows:{ "field1": "{% context field1 %}", "field2": "{% context field2 %}" } -
In the Headers sub section, add headers in the following way:
- In the Key field, enter the header name.
- In the Value field, enter the header value.
The key and value can contain inserts. - If you want to add more headers, click Add header.
-
Click Apply.
-
In the upper-right corner, click Save & publish.