"Send a template message" node
WhatsApp lets you easily send many message types to your customers. By combining it with the capabilities of Synerise, you can send message templates (business-initiated conversations) which are personalized based on the information about your customers collected in Synerise.
Before you start working with this integration, get familiar with:
Prerequisites
- Create an account in Meta for Developers
- Send a test message
- Add the sender’s phone number
- Generate a permanent token
- Create a message template
- Make sure that the recipients’ profiles in Synerise contain phone numbers in the format supported by WhatsApp.
Examples of supported formats:+1-212-345-6789+1 (212) 345-6789+1 212 345 6789+1 (212) 345 6789Tip:- If your audience profiles in Synerise have phone numbers in a format that’s not supported by WhatsApp, you can transform them and import back to Synerise. You can read this use case to get the idea how to do it.
- If your audience profiles lack of phone numbers, you can import them by uploading a file with phone numbers or import it from SFTP.
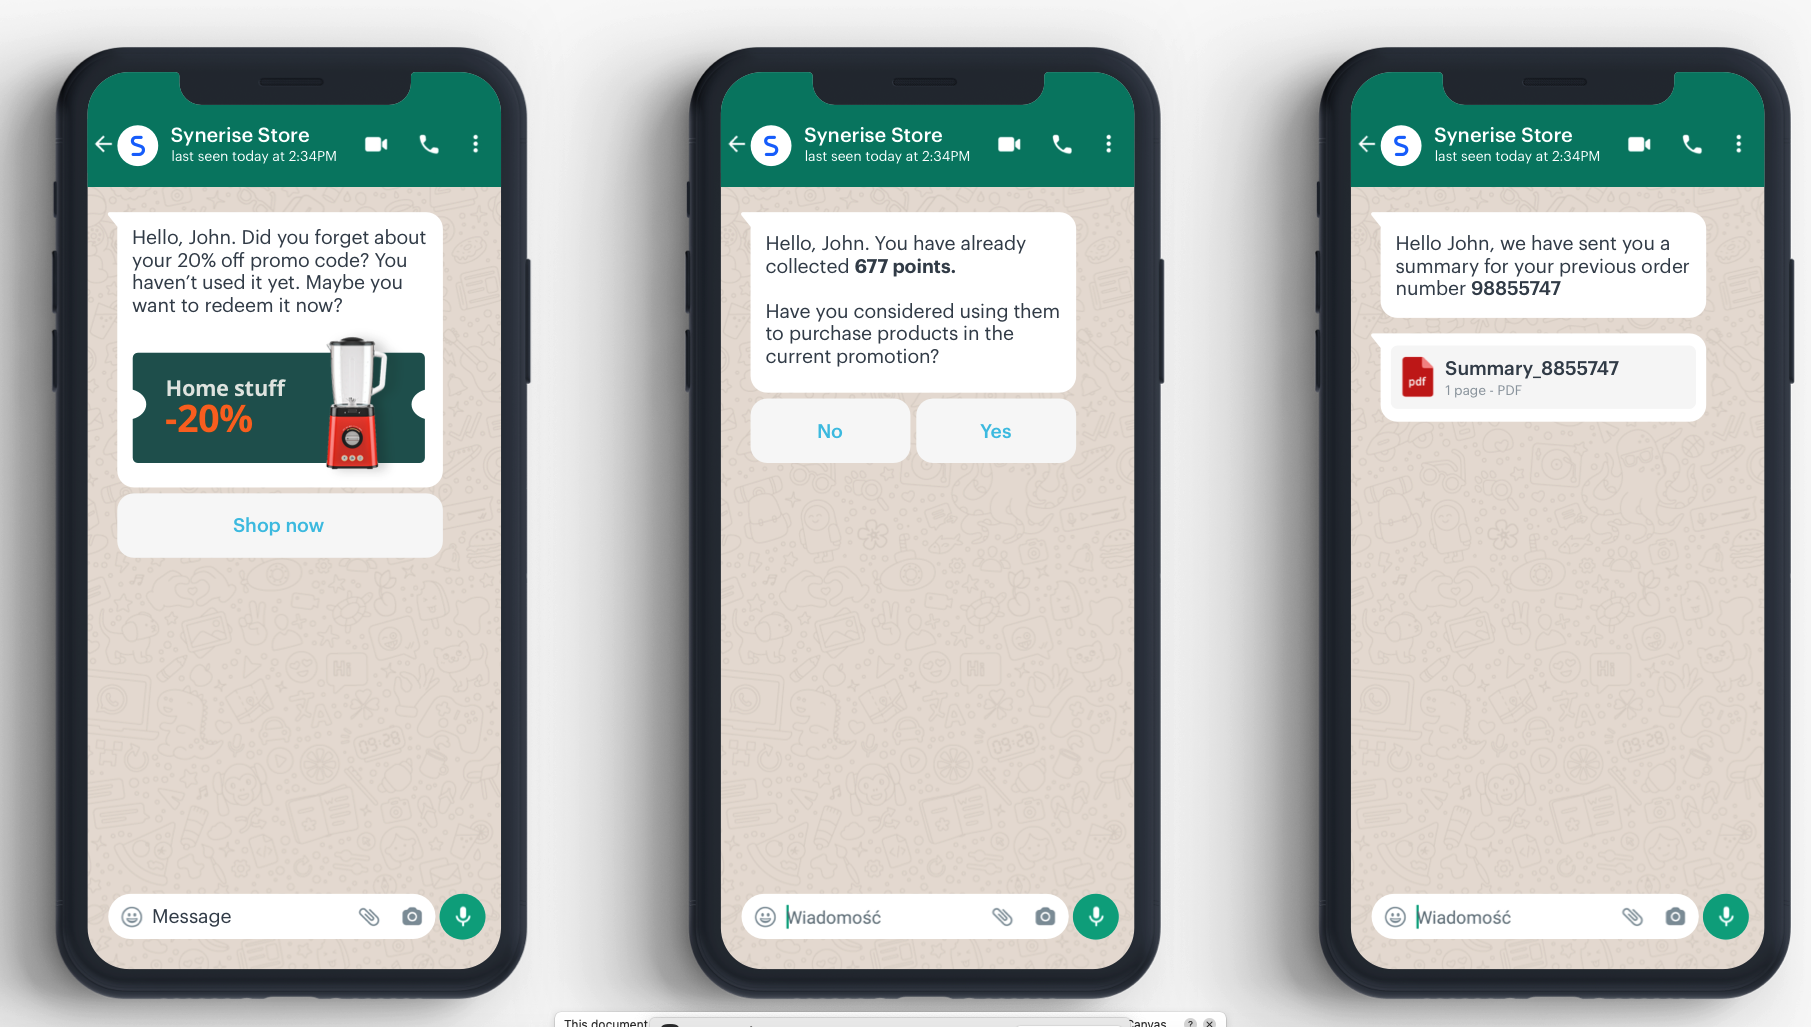
What is a template message?
Message templates are used to initiate conversations with your customers. You can send it when a customer has not sent you a message in 24 hours or more, or to those who have not initiated a conversation with you. Such a message is created in the Meta portal, which means you don’t have to build any template in Synerise. In the configuration of the Send template message node, you only need the name of the template created in Meta.
How to personalize a message?
Dynamic elements are pieces of information available in your workspace in Synerise that let you make your message personalized, such as customer’s name, size, number of loyalty points collected, name of the last purchased product, and so on.
To append dynamic values to the message:
- Create a message template in the Meta portal. In the body of the message, mark places where the dynamic elements will be added in the following way:
Hello, {{1}}! You have already collected {{2}} points, have you considered using them to purchase products in the current promotion?
Where{{1}}and{{2}}are markers that will be replaced with the dynamic values. This step will be done in Synerise.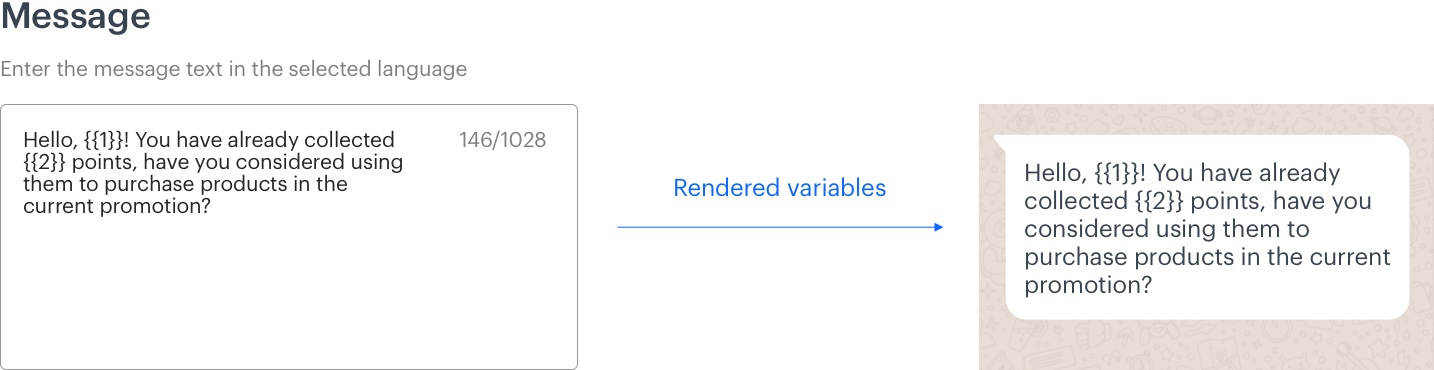
Creating template in the Meta portal. {{1}} and {{2}} are variables for which values will be defined in Synerise - In the configuration of the Send a template message node:
- In the Message template field, enter the name of the message template you created in the Meta portal.
- In the Message components field, insert the body that contains the dynamic values in the order defined in the message template. For example:
[
  {
    "type": "body",
    "parameters": [
      {
        "type": "text",
        "text": "{% customer firstname %}"
      },
      {
        "type": "text",
        "text": "{% expression %} 4085025a-313e-4a63-a6b4-d19820853912 {% endexpression %}"
      }
    ]
  }
]
where:
- The value of the
{% customer firstname %}insert is used as the value of{{1}}, so the name of a customer can be displayed in the message. - The value of the
{% expression %} 4085025a-313e-4a63-a6b4-d19820853912 {% endexpression %}insert is used as the value of{{2}}. In this example, the expression returns the number of loyalty points.
How to add images to your message?
You can add images to your message. Before that, you must upload them to a public server or to Synerise, so in the body of the message, you can make reference to a source where you keep images.
- Create a message template in the Meta portal. In the body of the message, mark places where you want to add an image. For example:
Hello! Have you seen our latest promotion? {{1}}
Where{{1}}will be replaced with the reference to a source where you keep the image. This step will be done in Synerise.
Tip: For further information on creating a template with an image in WhatsApp, refer to the documentation. - In the configuration of the Send a template message node:
- In the Message template field, enter the name of the message template you created in the Meta portal.
- In the Message components field, insert the body that contains links to the source where the images are kept in the order defined in the message template. For example:
{
   "type":"header",
   "parameters":[
      {
         "type":"image",
         "image":{
            "link":"https://example.com"
         }
      }
   ]
}
What is the allowed phone number format for recipients?
Here are examples of supported phone number formats:
+1-212-345-6789+1 (212) 345-6789+1 212 345 6789+1 (212) 345 6789
Node configuration
- Click WhatsApp > Send message template.
- Click Select connection.
- From the dropdown list, select the connection.
- If no connections are available or you want to create a new one, see Create a connection.
- If you selected an existing connection, proceed to defining the integration settings.
Create a connection
To allow the data exchange, establish a connection between Synerise and WhatsApp.
- At the bottom of the Select connection dropdown list, click Add connection.
- In the Permanent access token field, enter the token you generated as a part of prerequisites.
- In the Connection name field, enter the name of the connection.
It’s used to find the connection on the list. - Click Apply.
Result: A connection is created and selected.
Define the integration settings
In this step, fill in the form that allows you to send a message template from Synerise to your customers.
- In the Sender ID field, enter the phone number ID from which the message will be sent.
You can find more information about phone number ID here. - In the Receiver field, enter the phone number of the customer who will receive this message.
We recommend using the{% customer phone %}insert, which inserts the phone number of an individual customer who goes through this node. - In the Message template field, enter the name of the message template created in the Meta portal.
- From the Language code dropdown list, select the language used in the message.
In the Meta portal, you can create one template and create multiple language versions for it. In this field, you must declare the language version of your message. Remember to select an existing language version of your message. - Only if your message contains dynamic values: In the Message components field, enter the contents of your message.
An example is shown in Personalizing….
For more details and an explanation of all features, see Facebook documentation. In the cURL examples shown in Facebook documentation, the value of the the
componentsproperty is the part you need to enter in Message components.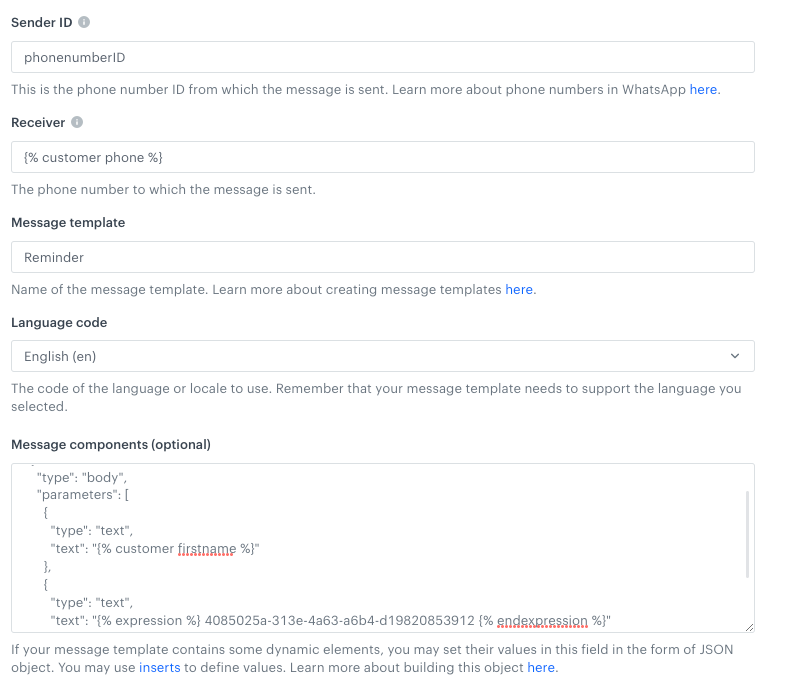
Filled in configuration form - Click Apply.