Creating web push
After configuring the web push module and the dynamic content that displays the agreement form, you are ready to create and send a web push. In this process, the main steps are: defining the recipients of the notification, selecting a template, and scheduling the web push notification.
Requirements
You must be granted a set of user permissions that allow access to Communication module and performing actions with regard to messages.
Creating web push notifications
- Go to
 Communication > Web Push > Create new.
 - Enter the name of the notification (this name is visible only on the list of the web push notifications).
Select recipients
-
To define recipients, in the Audience section, click Define.
- To select all customers (with the web push marketing agreement on) you have in your database, select the Everyone tab.
- To select an existing group of customers, select the Segment tab and select the groups. If you select more than one, the customer must belong to at least one of them
- To define a new group of customers, select the New audience tab and follow the procedure described here.
Important: Regardless of the way of selecting the audience, the system limits the audience to those who have agreed to web push marketing.Advanced options - explanation- Batch delivery - It prevents sending web push notifications to all recipients at once.
When to use it? When there is a risk that sending all of messages at once will result in excessive traffic on your website or the target audience is so large that the messaging provider might not be able to process all messages at once. - Enable control group - It creates a subgroup of the recipients who won’t receive any web push notification variant.
When to use it? When you send one or several variants of web push (A/B testing). When a customer is assigned to their control group, the information is available in their Profiles card as an event. - Include audience changes - Available only for scheduled web push notifications. It recalculates the number of recipients right before sending the notification. By default, the size of the customer segment chosen for the notification is the same as in the moment of sending, even if the number of customers in the chosen segment changed between creating the notification and sending. When to use it? When the size of the segments of customers selected as the audience of the notification can change dynamically.
- Ignore limits - If you want to make sure that this message is sent to a customer, even it exceeds the global limit of this type of messages for a single customer per day (more information is available here), enable the Ignore limits toggle. You may apply it to system messages such as a transaction confirmation, notifications about order delays, and so on.
-
Confirm the selection by clicking Apply.
How to check the number of customers who will receive web push?A customer receives a web push notification only if they agreed to receive such notifications (through an agreement form) and they must have an active token. To verify the number of customers who will receive the notification, perform the following steps:
- Create a segmentation.
- In the first condition, use a
receive_webpush_messagesattribute set totrue. - In the second condition, use a
has_webpush_deviceattribute set totrue. - Define the dependency between two conditions as
AND. - Click Save and check the preview.
Select a template
- To select the web push template or create a new one, in the Content section, click Define.
- Click Create message.
Result: You are redirected to the template library. - To create:
- a message from scratch, click New template.
Tip: The procedure of creating a web push template from scratch is described here.
- a message based on an existing template, select a template from the list.
- Find the folder the template is saved in.
- Click the folder.
- Select the template.
- If needed, make changes to the template.
- If the service approval is disabled for your workspace, click Next.
- If the service approval is enabled and you made changes to the template:
- The system uses the approved version of the template if you proceed.
- You can send the template for approval once again.
- a message from scratch, click New template.
- To add more variants of the notification, click the
 icon.
icon. - Perform actions described in step 3.
- Confirm by clicking Apply.
Schedule the notification
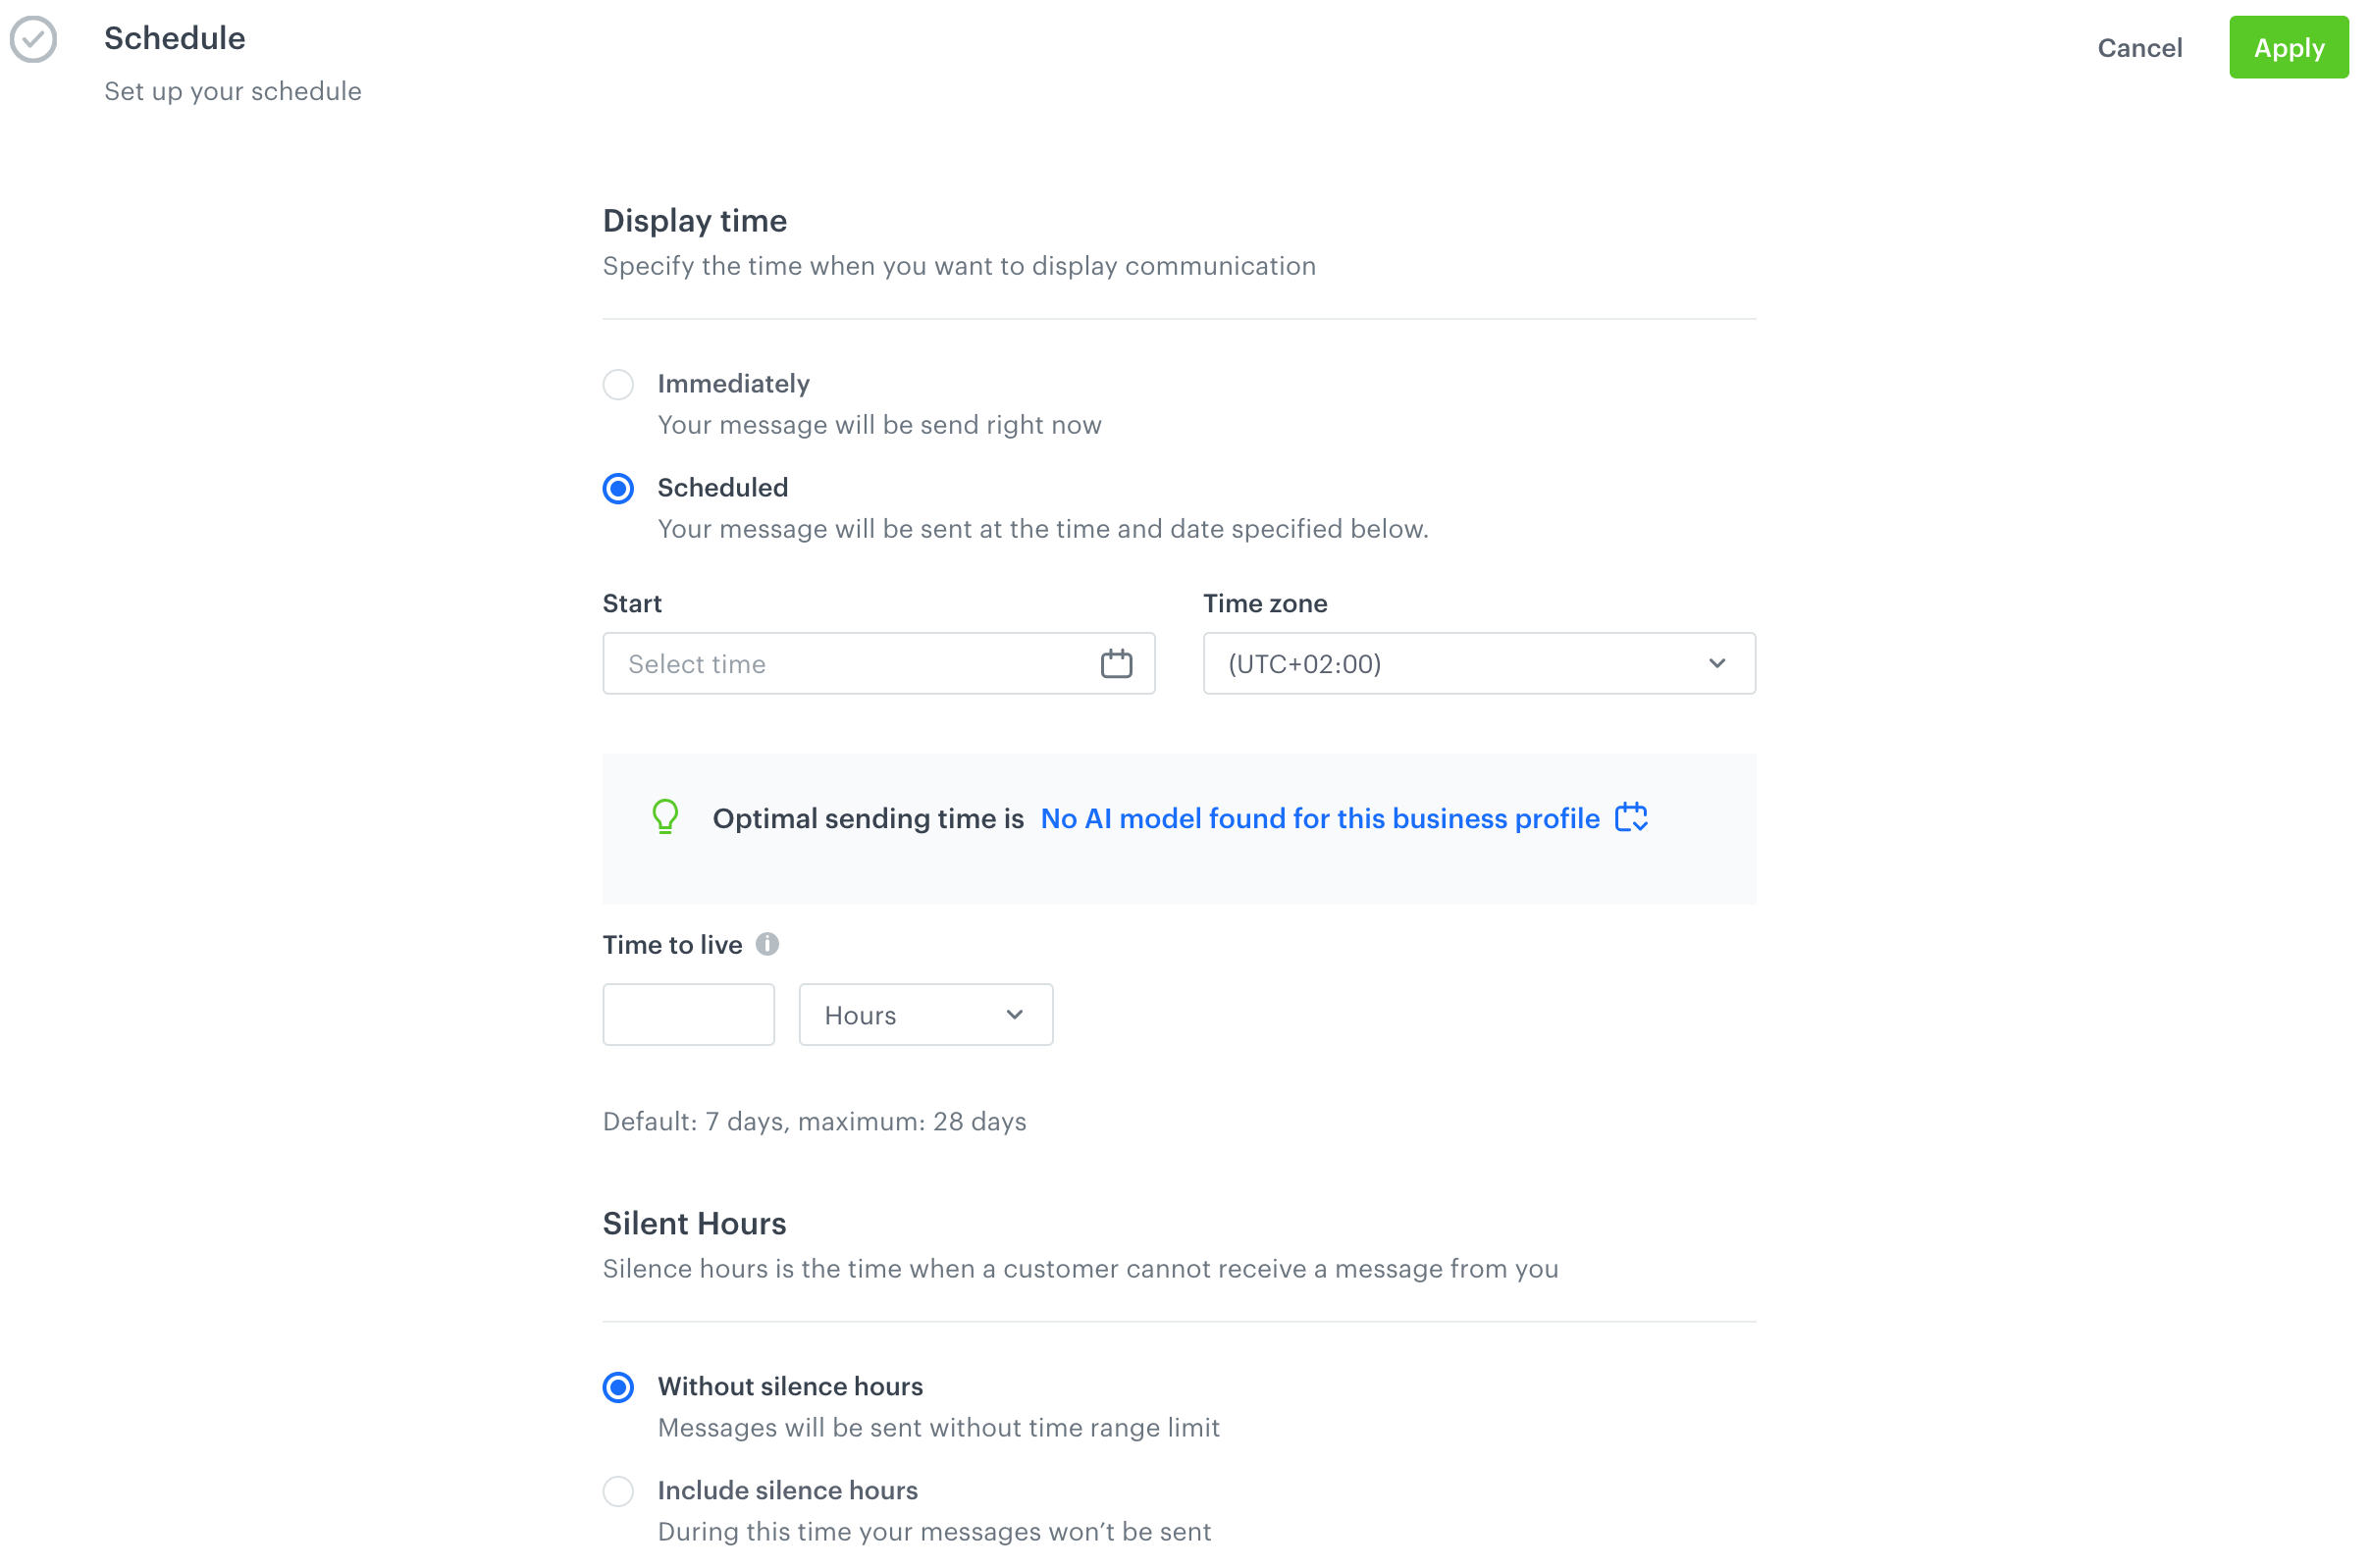
- To define when the web push is sent to your customers, in the Schedule section, click Define.
- You can choose from two options:
- To send your notification after clicking the Send button on the upper right corner, use the Immediately option.
To plan a message to be sent at a future date, use the Scheduled option. Set the start time and the time zone.
Synerise performs best with real-time data. This is why you can’t schedule a message for more than 10 days in the future.
To select the best time of sending the message, take a look at the suggestion from the AI engine that calculates the best time (for all recipients). If time optimization is disabled, click here to learn more how to enable it and use it.
- In Time to live, define the time after which the notification expires. The notification is only shown to customers whose browsers are running (also in the background) within this time range.
- Select the Silence Hours setting:
-
Without silence hours - The communication can be processed and sent out to the recipients at any time during the day.
-
Include silence hours - With this option, you can set a time of day when the communication can’t be sent:
- In the From field, select when the silence hours start.
- In the To field, select when the silence hours end.
The period can’t be longer than 12 hours.
When a message can’t be sent due to silence hours, awebpush.skippedevent is generated.
Important:- When silence hours are enabled, the Discard messages option is always enabled. This means that messages blocked by silence hours are discarded entirely. The discarded messages are not sent when silence hours end.
- If the Start time of the schedule is in the silence hours, you can’t apply the settings.
- If communication is scheduled for sending just before silence hours (for example, silence hours start at 22:00 and sending is scheduled at 21:59:59), the communication may be processed, sent, and logged in the events a short time after the silence hours start.
-
- To save the changes, click Apply.
Define UTM parameters
- Optionally, you can add UTM parameters. In the UTM & URL parameters section, click Define.
- Fill in the UTM campaign, UTM medium, UTM source, UTM term, and UTM content fields.
- Confirm by clicking Apply.
Adding custom parameters
You can add up to 10 parameters which will be added to every event generated by this communication. Their values are the same for every event in the communication. You can use this, for example, to create a common parameter for events from different types of communication that belong to one marketing campaign.
The list below contains the events to which additional parameters are added:
weppush.sendweppush.notSentwebpush.clickwebpush.cappingwebpush.mismatchSenderIdwebpush.invalidRegistrationIdwebpush.notRegisteredwebpush.controlGroup
-
To define the custom event parameters, in the Additional parameters section, click Define.
-
Click Add parameter.
-
In the Parameter field, enter the name of the parameter.
The following parameters cannot be sent:modifiedByapiKeyeventUUIDiptimebusinessProfileIdcorrelationIdclientIduuid
-
In the Value field, enter the parameter value.
The value is always sent as a string when the event’s JSON payload is generated. The maximum length of the string is 230 characters.WARNING: Dynamic values are not supported in the Parameter and Value fields. -
If you want to add more parameters, click Add parameter, and repeat steps 3-4.
Result: the parameters will be added to all events listed above with the values you entered. This is an example event saved in the database. The custom parameterseasonis located in theparamsobject:{ "action": ... ... "params": { "clientId": 1111111111, "season": "autumn", "campaignName": "Back to school", "time": 1662392318050, "title": "Have you prepared for coming back to school?", "businessProfileId": "xxx" } } -
Confirm the settings by clicking Apply.
Send the notification
- To send the web push, click Send. Depending on your choice in the Schedule section, the web push will be sent immediately or at a selected date.
- To save the web push as a draft, click Finish later.
FAQ
You can find answers to the most frequently asked questions here. If you experience any issues while creating or sending emails, you can try to detect and remove the cause of the issues on your own by following the guides in our troubleshooting.