Two-step agreement form
While implementing web push notifications, it is crucial to facilitate a process that allows a visitor to your website to explicitly express their consent to receiving these notifications. For this reason, in addition to a browser form, we recommend creating an additional visual layer that requires interaction from the visitor because this ensures you that the visitor is aware of and accepts receiving these notifications.
This article describes how to create a two-step agreement in the form of a dynamic content that will be displayed on your website. The process of creating the form involves:
- using ready-made web push agreement templates that can be edited in the simplified configuration form. These templates already contain the scripts that invoke the dynamic content form and agreement form from the browser.
- the possibility to preview the dynamic content on the target website.
Benefits
- You will follow the browser policy.
- You will prevent being blocked by the anti-spam functions.
- You will improve user engagement and retention.
- You will be compliant with GDPR.
Visitor perspective
When a visitor whose web push agreement is disabled enters a website, a dynamic content form appears. The visitor can give or decline a permission to receiving web push notifications.
An agreement form from the browser appears.
- When a visitor declines or closes the browser form, then their web push agreement state doesn’t change (disabled).
- When a visitor agrees, then their web push agreement state changes to enabled. The
profile.updatedevent appears on the activity list of the visitor.
A pop-up window is closed. The web push agreement attribute doesn’t change (disabled).
Requirements
- Implement a tracking code to your website.
- You must be granted user permissions that allow accessing the Communication module, creating and executing actions.
Creating the agreement form
- Go to
 Communication > Dynamic content > Create new.
 - Select Insert object.
Select the recipients
-
In the Audience section, click Add info.
-
Select the New audience tab.
-
Click Define conditions.
Result: A pop-up appears. -
Click Choose filter.
-
From the dropdown list, select receive_webpush_messages.
Tip: This attribute is available after completing web push configuration. -
Click the Choose operator.
-
Select the
 tab.
tab. -
Select Is false.

Selected group of recipients -
Confirm the settings on the pop-up by clicking Apply.
-
-
Confirm the settings in the Audience section by clicking Apply.
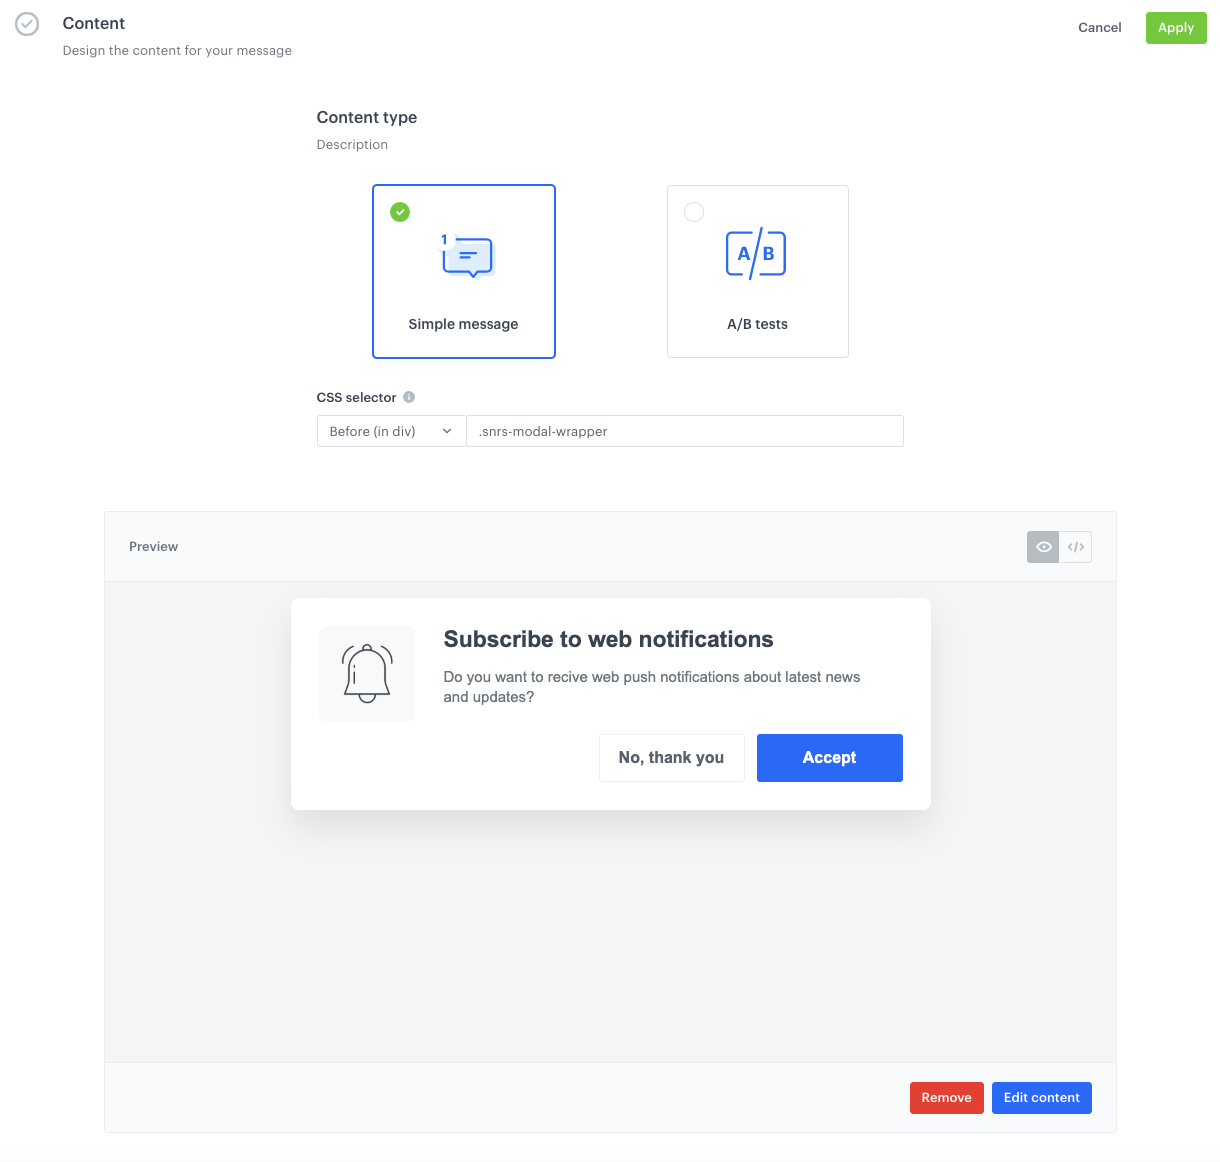
Prepare the pop-up window
- In the Content section, click Add info.
- Leave Simple message at default.
- In CSS selector:
- Select After (in div)
- In the field, enter
.snrs-modal-wrapper
- Click Create message.
- Select the Insert object templates.
- Select either
Gather web push agreement 1orGather web push agreement 2.
The difference between them is only visual and both can be edited in the simplified configuration form.
Result: A dynamic content template builder appears. - Configure the settings in the Config tab.
Click to expand the form description of Gather web push agreement 1
- Environment mode - This option lets you display the preview of the template in the wizard. From the dropdown list, select one of the following options:
- Development - This option is reserved only for template editing mode, its selection enables the preview of the template in the editor.
- Production - This option must be selected when the template is finished and ready to be published. It’s important to select this option before publishing, so the form will not display if the browser won’t be able to process it.
- Is open? - In this field, you can define whether a pop-up opens automatically. If not, clicking an icon invokes the agreement form.
- Alignment - In this field, define the alignment of the pop-up on the website.
- Title - In this field, enter the title that displays in the header of the pop-up.
- Image - In this field, you can enter the URL of the image that will be used in the pop-up.
- Button - In this field, enter the text on the confirmation button.
- Primary color - Use color picker to define the color of the confirmation button.
Click to expand the form description of Gather web push agreement 2- Environment mode - This option lets you display the preview of the template in the wizard. From the dropdown list, select one of the following options:
- Development - This option is reserved only for template editing mode, its selection enables the preview of the template in the editor.
- Production - This option must be selected when the template is finished and ready to be published. It’s important to select this option before publishing, so the form will not display if the browser won’t be able to process it.
- Two steps window agreement everywhere - Enable this option to display two-step agreement form in every browser. If this option is disabled, browsers based on the Chromium engine will only display the native web push consent window.
- Image - In this field, you can enter the URL of the image that will be used in the pop-up.
- Title - In this field, enter the title that displays in the header of the pop-up.
- Description - In this field, enter the main text that displays on the pop-up.
- Plain button - In this field, enter the text on the decline button.
- Accept button - In this field, enter the text on the confirmation button.
- Prime color - Use color picker to define the color of the confirmation button.
- Environment mode - This option lets you display the preview of the template in the wizard. From the dropdown list, select one of the following options:
- If you want to define or edit more parameters of the pop-up, you can do so in the HTML, CSS, and JavaScript tabs.
Note: Learn more about editing a ready-made template.
- You can use the live preview option to preview the dynamic content on the target website.
Important: Once template editing is finished, in the Environment mode field set the value to Production. This option prevents displaying the form when the browser cannot process it. - Click Next.
Configured Content section - Confirm the settings in the section by clicking Apply.
Schedule the display
- In the Schedule section, to define when you want to start displaying the agreement form, click Add info.
- You can choose:
- Immediate and continuous display by clicking Display immediately.
WARNING: At the end of the process you must activate the dynamic content anyway.
- Future date by clicking Scheduled.
- In the Start field, define the start date.
- In the End field, define the end date.
- Select the time zone.
- Immediate and continuous display by clicking Display immediately.
- Confirm your choices by clicking Apply.
Important: After dynamic content is activated, wait several minutes for the content to be loaded.
Set delay time
- In the Display settings section, click Define.
- Leave the Triggers at default (on landing).
- Optionally, you can adjust the Advanced settings.
Tip: You can find explanation of the options in Advanced settings here.
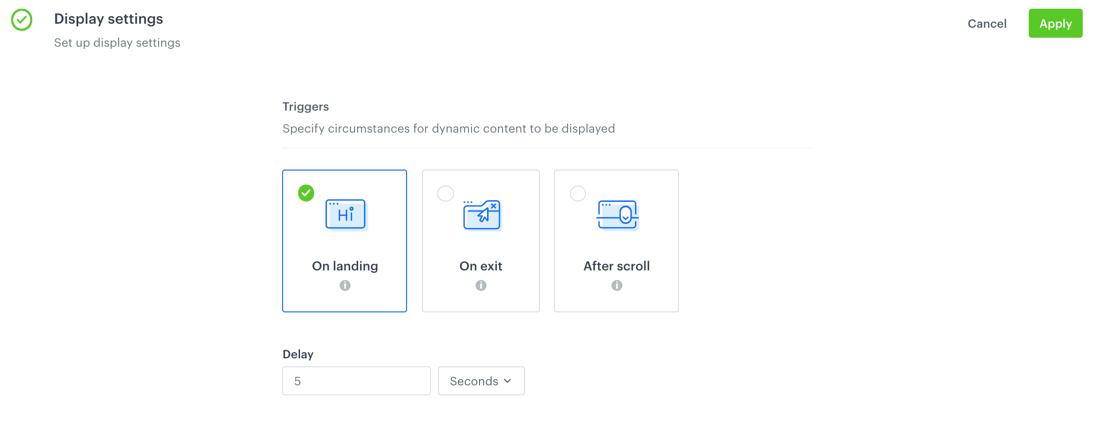
Configured Display settings section - Confirm by clicking Apply.
Activate the form
In the right upper corner, click Activate. The form will appear on the website according to the settings defined. You can proceed to creating a web push notification.