Configuring sender accounts
In order to send emails from Synerise, you must create a sender account. For starters, there is always a default sender account that is suitable for sending an email for several recipients for test purposes.
The process requires the following actions:
- Outside Synerise:
- Create an email account within a domain.
- Add DNS entries.
- If you don’t have your own SMTP, decide which one to choose (Synerise offers two options).
Tip: Simple Mail Transfer Protocol (SMTP) is responsible for moving your emails on and across IP networks that are typically only used for sending messages to a mail server for relaying. It’s an internet standard for email transmission and it works closely with Mail Transfer Agent to send your emails to the right email inboxes.
- Inside Synerise application:
Setting up and email account
Create an inbox within any domain.
Add DNS to your domain
It is your responsibility to make sure the domain you use is safe and protected by adding the DNS entries which ensure satisfying email deliverability.
WHY? These entries allow mail clients to verify that you are the real sender of the message. Messages with those headers may be blocked or treated as spam. This is a widely accepted standard.
Before moving on to the further parts of the article, get to know the terms header from and envelope from. Header from (1) is an email address from which an email is sent, whereas envelope from (2) indicates a domain from which the email is sent (it can be a domain of a bulk mailing vendor or third party affiliates).

There are three types of entries which must be added in the given order:
SPF
Sender Policy Framework (SPF) must be added regardless of using a shared or your own SMTP. It is considered to be the standard of authorization. The recipient’s mail server checks whether the sender’s IP is authorized to send emails with a domain in envelope from. The list of the allowed IP addresses is included in the domain’s DNS record.
If you are not sure about the region your EmailLabs sub-account belongs to, contact the Synerise support. Then, follow the procedure with regard to SPF configuration at the links below:
- for European region:
- for non-European region:
DKIM
Domain Keys Identified Mail (DKIM) is:
- recommended when you use your own SMTP
- required if you want to comply with the Gmail and Yahoo! authentication requirements (as of February, 2024)
An element of the email is encrypted with a private key. The other key, which is public, is contained within the domain an email is sent from. The recipient’s mail server matches the public key with the private one. If the keys match, the email is verified as genuine.
The links below redirect to the instructions on adding the standard DKIM keys. If you want to comply with Gmail and Yahoo! authorization restrictions, add the standard keys and generate custom DKIM for your domain.
If you are not sure about the region your EmailLabs sub-account belongs to, contact the Synerise support. Then, follow the procedure with regard to DKIM configuration at the links below:
- for European region
- for non-European region
Compliance with Gmail and Yahoo! authorization restrictions
From February 2024, Gmail and Yahoo will implement new authentication requirements that enforce usage of:
- standard DKIM keys
- custom DKIM for your domain
- reinforced DMARC.
How to generate custom DKIM for your domain?
- You can generate it on your provider’s account.
- If you use EmailLabs as an SMTP provider which isn’t a sub-account of Synerise’s main account, you can generate keys in Admin > Sender Authorization
- If you have a sub-account of Synerise’s main account in EmailLabs, to generate the keys, contact Synerise support.
I only have standard DKIM keys but I want to comply with Yahoo! and Gmail restrictions
- If you use a provider other than EmailLabs: Consult the documentation of your SMTP provider to check how to generate custom DKIM for your domain.
- If you use EmailLabs: generate custom DKIM keys in Admin > Sender Authorization, add the key and the standard keys to your DNS.
- If you use EmailLabs (a sub-account of Synerise’s main account), contact Synerise support.
DMARC
Domain-based Message Authentication (DMARC) is recommended when you use your own SMTP. Based on the two previous entries (at least one of them must exist), it verifies the domain. To be compliant with Gmail and Yahoo! authorization standards as of February, 2024, it is necessary to implement DMARC.
For users of EmailLabs (sub-account of Synerise's main account)
If you are not sure about the region your EmailLabs sub-account belongs to, contact the Synerise support. Then, follow the procedure with regard to DMARC configuration at the links below:
- for European region:
- for non-European region:
Select SMTP providers in Synerise
Synerise offers the following SMTP options:
- Synerise SMTP email provider
- No further requirements
- Recommended only for testing purposes.
- Not recommended for the production environment because:
- It is shared with other users - if a user who uses this SMTP is denylisted, it may also affect you.
- No possibility of retrieving details of single emails
- The structure of IP addresses is not prepared for sending regular emails
- EmailLabs (as a sub-account of Synerise’s main account)
Synerise requests a paid sub-account on behalf of the user (contact Synerise support before). The infrastructure of such sub-account is customized to meet the user’s demands. It involves gradual preparation of IP addresses for sending large number of emails, otherwise sending many messages in a short time from the same IP may trigger anti-spam mechanisms.Important: You can create an account in EmailLabs independently from Synerise. Then, you have access to your hosting provider panel. In the other case (as a sub-account), you don’t have access to it.- Prepare the following data for Synerise:
- shipping address (domain),
- maximum number of emails you send in a single delivery,
- maximum number of emails you send in one month,
- the structure of recipients domains (the percentage distribution of the email domains of recipients, for example gmail.com, yahoo.com, mail.com, and so on).
- Prepare the following data for Synerise:
- Integration with Freshmail
If you have an account in Freshmail, you can integrate it with Synerise by entering the API key. - Integration with ExpertSender If you have an account in Expert, you can integrate it with Synerise by entering the API key.
- Integration with SendGrid If you have an account in SendGrid, you can integrate it with Synerise by selecting a security level, port number, and entering the API key.
Configure SMTP in Synerise
-
Go to
 Settings > Apps & Services.
 -
Select the procedure for the SMTP variant you currently use:
For users who use EmailLabs or their own SMTP- Click SMTP Servers.
Result: The list of fields appears. - On the bottom of the list, click Add new account.
- In the My server field, enter the name of the server (it will be visible only on the list above the fields and on the list of SMTP providers while selecting the Mail provider in Email Accounts section).
- In the Host field, enter the address of the host.
- From the Security dropdown list, select the security level.
- If you use an Email Labs sub-account, select TSL and enter
587as the port number. - If you use any other provider, select SSL.
- If you use an Email Labs sub-account, select TSL and enter
- Fill in the fields: Port number, User name, and Password with data obtained in one of the following ways:
- If you use an Email Labs sub-account, contact Synerise Support.
- If you use any other provider, find the data in the provider’s administration panel. For details, refer to the provider’s documentation.
- Proceed to step 1 in the Configure a sender account section.
For users who use Synerise SMTPIf you use the Synerise SMTP solution (in the application called as Synerise mail provider), skip this part and proceed straight to Configure a sender account section.
For users who use ExpertSender or FreshmailImportant: Freshmail integration will be completed soon.- On the list of Integrations, click the ExpertSender sender integration.
Result: The API Key field appears. - Enter the API key which you can find on your ExpertSender account.
- Switch the toggle on.
- Click Save.
- Proceed to step 1 in the Configure a sender account section.
For users who use SendGrid- On the list of Integrations, click the SendGrid sender integration.
Result: The form expands. - From the Security level dropdown list, select one of the following options:
- No security
- SSL
- TSL
- In the Port number field, enter the number of the port you will use. If you’re not sure which port you use, refer to the SendGrid documentation.
- In the API key field, enter the API key.
To learn about creating an API key in SendGrid, click here. - Proceed to step 1 in the Configure a sender account section.
- Click SMTP Servers.
Configure a sender account

- Go to Settings > Email Accounts.
- Click Add account.
- In the Account name field, enter the name of the account (it will be visible only on the list of sending accounts).
- In the From (email) field, enter the email address from which emails are sent.
- In the From (name) field, enter the name of the sender that is displayed in the recipient’s inbox.
- In the Reply to (email) field, enter the email address to which responses to newsletters will be delivered.
- In the Reply to (display name) field, enter the name of the sender of email address to which responses are delivered.
- Optionally, in the Resignation link field, enter the resignation link. If you enter a URL here, a visit to this website by a customer results in changing the status of email marketing agreement to opt-out.
Important: This field is optional. While creating email templates, you will be required to add a resignation link.
- In the Mail provider section, select one of the three options:
- To use the default Synerise email provider, select Send using Synerise mail provider.
- To use your own SMTP server (including Email Labs sub-account), select Send using your own SMTP server.
- From the Choose your SMTP server dropdown, select the SMTP server.
- To use ExpertSender as a email provider, select Send using the ExpertSender server.
- Confirm the settings by clicking Save.
Result: A confirmation email is sent to the email address in the From(email) field.
Confirm the sender account
Go to your inbox and click the link in the confirmation email.
Result: The account is confirmed and can send messages. On the list of accounts, its status changes from Awaiting confirmation to Confirmed.
Track hardbounces and softbounces
You can receive information about the bounces in the form of events. Based on these events, you can prepare statistics or exclude the email addresses from which you received a bounce message by defining conditions in a segmentation.
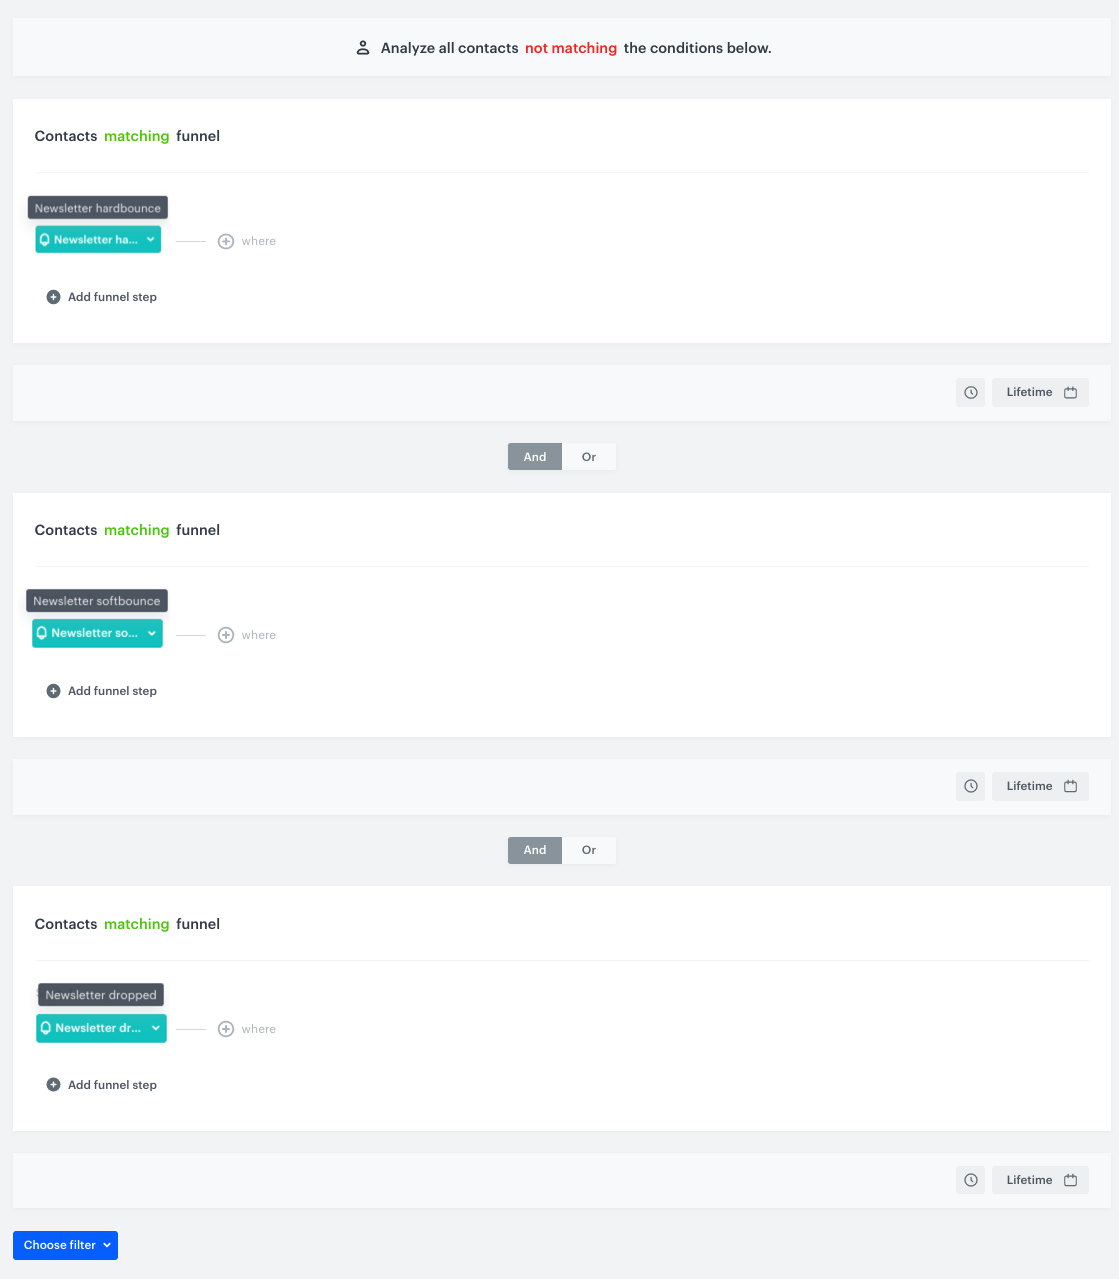
The list of events:
| Event name | Description |
|---|---|
| newsletter.hardbounce | The event is generated when the email is not delivered because an email address is invalid or the recipient blocked receiving emails. |
| newsletter.softbounce | The event is generated when the email is not delivered due to an overloaded inbox, server error, or email size. |
| newsletter.spambounce | The event is generated when the recipient’s email server recognized the message as potential spam. The email is rejected and not saved, even in the spam folder. |
| newsletter.dropped | The event is generated when the email is not delivered due to putting the email address from which the email is sent on the black list. |
To receive these events, you must perform the actions described below:
If you use Synerise SMTP, you don’t have to do anything.
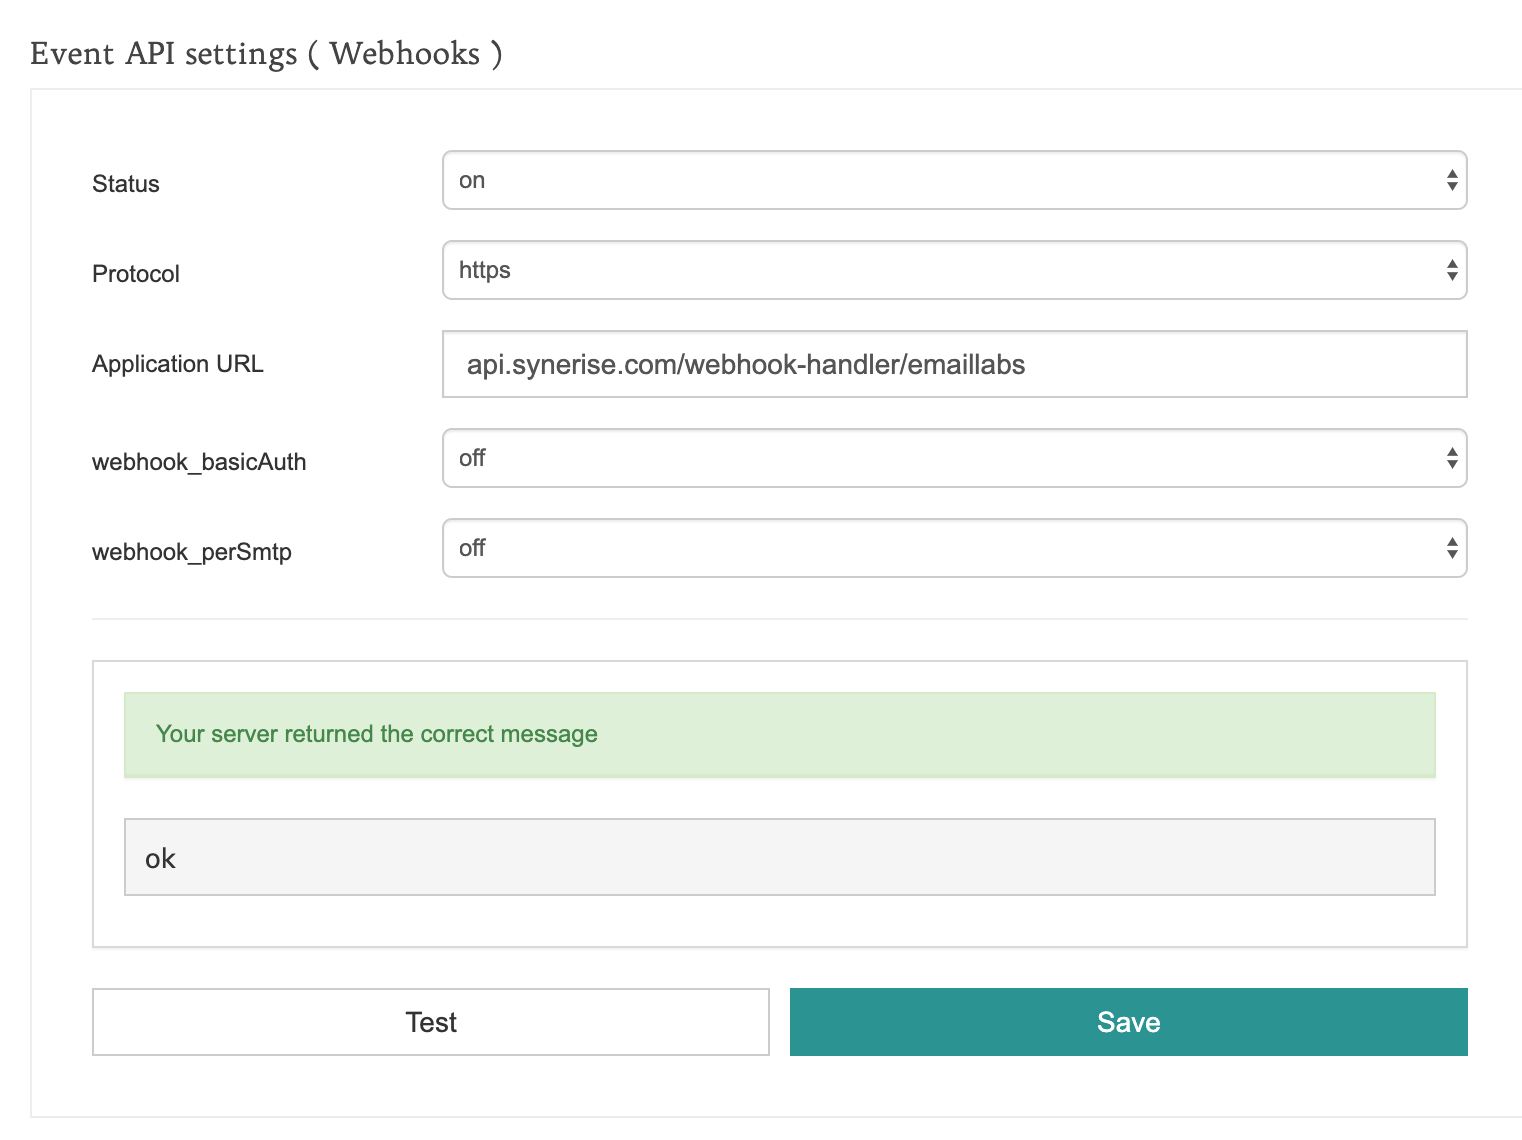
- Go to the Emaillabs panel.
- Go to Event API settings
- Configure the form as presented in the screen above.
- Status set to on.
- Protocol set to https.
- Set Application URL:
https://{SYNERISE_API_BASE_PATH}/webhook-handler/emaillabs - webhook_basicAuth set to off.
- webhook_perSmtp set to off.
- Contact Synerise support and provide the following information:
- API Key
- Secret key
- The name of the Emaillabs panel
- After the configuration, perform the test in the Emaillabs panel. If the configuration is correct, the test returns the success message.
After performing the procedure below, Synerise will receive events included in the table below, except newsletter.softbounce.
- In your SendGrid account, perform the Enable the Signed Event Webhook procedure.
- Provide the key to the Synerise support.
- In your SendGrid account, proceed to Settings > Mail Settings > Event webhook.
- In the HTTP POST URL field, enter
https://{SYNERISE_API_BASE_PATH}/webhook-handler/sendgrid.Depending on the cloud where your workspace is hosted, replace{SYNERISE_API_BASE_PATH}with:https://api.synerise.comfor Microsoft Azurehttps://api.geb.synerise.comfor Google Cloud Platform
- Select Event notifications.
- Select dropped, bounced, and spam reports. These are the only possible options.
- Save the settings.
Check in the provider’s documentation, as the procedure and credentials required may differ for each provider.