Creating promotions for entire basket
Promotions let you prepare customized, special offers for your customers. This particular promotion lets you reduce the value of the whole shopping cart if its value matches the fixed price limit.
Requirements
- Import a product feed into Synerise.
- Import a list of stores to the Catalogs module.
- If you want to limit the promotion to customers with a certain loyalty score, verify with your administrator that loyalty points are being calculated.
- If you want to use promotion tags, the tags must be in a
promotion-type folder.
Promotion statuses
When you create a promotion in Synerise user interface, it gets a status which describes the progress of a promotion campaign:
- Draft - The promotion isn’t published.
- Published - The promotion has been published and the system automatically assigns the promotion to the customers who meet its conditions.
- Hidden - The promotion is published, but it is not visible in the channels it’s distributed through.

Procedure
For your reading convenience, the procedure is divided into sections according to the UI.
You must complete all of the sections.
If you want to save a draft for later completion, click the Finish later button in the upper-right corner of the page. You can do this at any point of the procedure.
Creating a new promotion
- Go to
 Communication > Promotions.
 - In the upper-right corner of the page, click Add promotion.
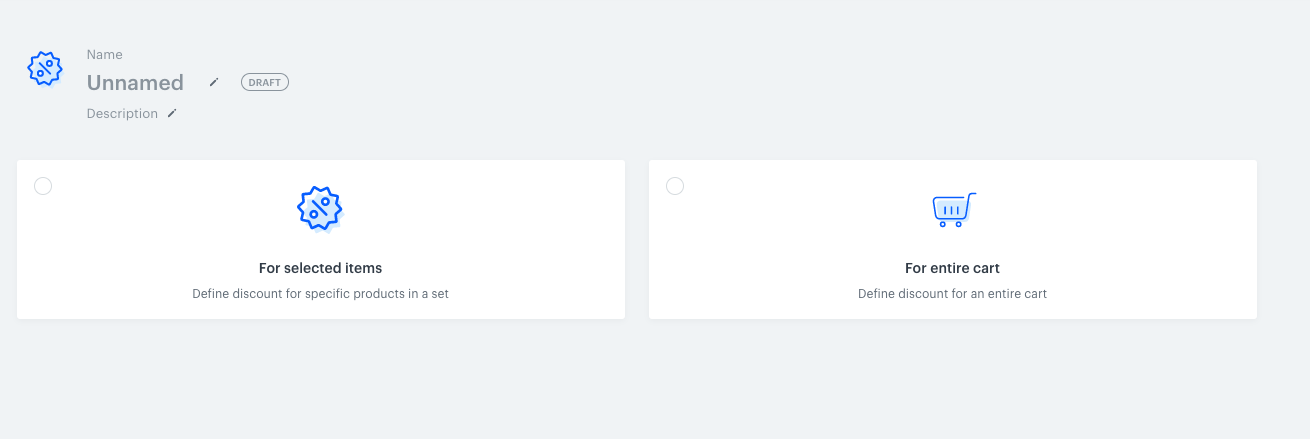
Selection of the promotion scope - Enter a name for the promotion.
- To inform other users about the purpose of the promotion, enter a description.
- Select the For entire basket option.
Result: The default settings are applied to the promotion.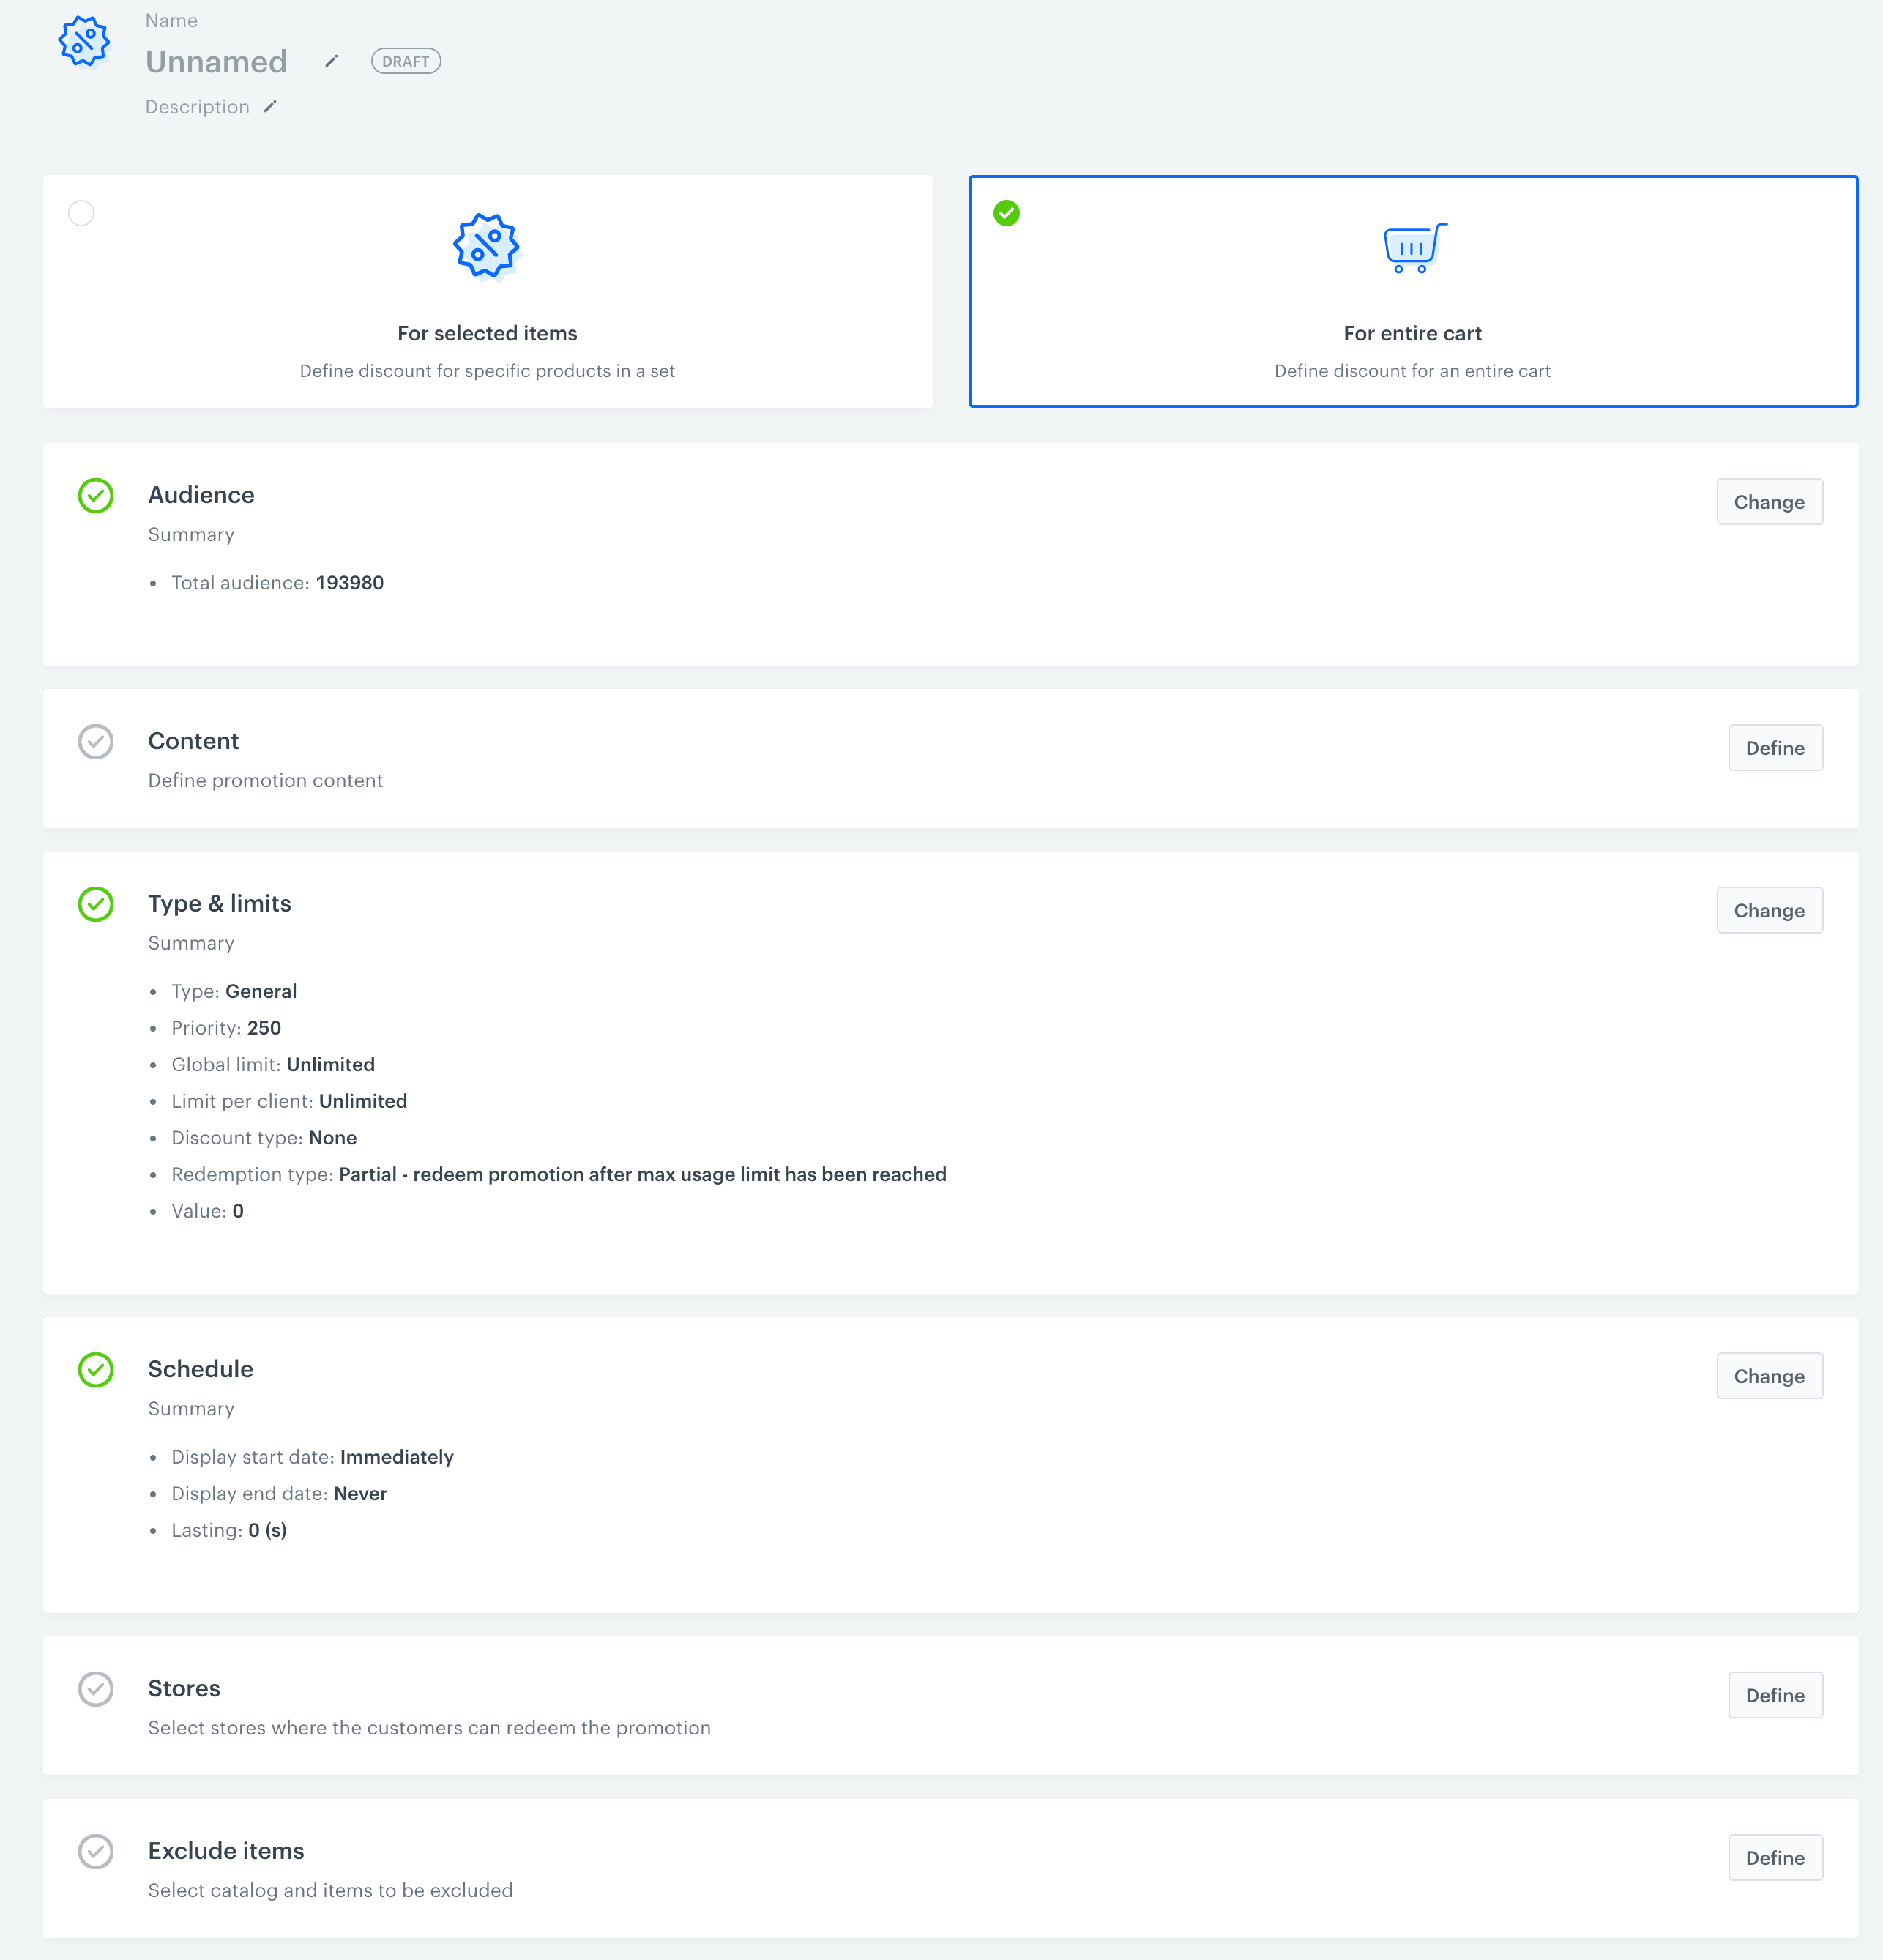
A blank promotion
Audience
Select an audience for the promotion by performing one of the following actions:
- If you want to create a promotion for everyone (default setting), no actions are required.
- If you want to create a promotion for one or more customer segments:
- In the Audience section, click Change.
- Select Segment.
- Click the Select segment button.
- In the pop-up that opens, select the checkboxes of the segments that you want to include.
- Click Apply.
The pop-up closes. - Click Apply.
Content
- In the Content section, click Define.
- Optional: Modify the default promotion code.
The default code is unique. If you enter a new code, it must be unique too.Important: The promotion with the same ID must be created in POS only if Synerise acts as Loyalty engine or Loyalty engine & Content Management System. More information is available here. - In the Price field, enter
0. This field is deprecated. - In the Price before discount field, enter the price that will be displayed as the original price.
- In the Display name field, enter a customer-visible name for the promotion.
- In the Description field, enter a customer-visible description for the promotion.
- Add thumbnails in one of the following ways:
- If you want to add thumbnails from the database, click Media manager and choose a file from the list that opens.
- If you want to upload a file, drag and drop the file to the Thumbnails field or click browse and choose a file from your local storage.
- Add images in one of the following ways:
- If you want to add thumbnails from the database, click Media manager and choose a file from the list that opens.
- If you want to upload a file, drag and drop the file to the Images field or click browse and choose a file from your local storage.
- To add tags to the promotion, click Add tag and choose a tag.
- To add JSON code with advanced params, click Advanced options and paste the JSON code into the text box that appears.
- Click Apply.
Type & limits
-
In the Type & limits section, click Change.
-
From the Type drop-down list, select the promotion type.
- General promotions are available to all customers.
- Custom promotions are a category that has no special requirements. You can use this category, for example, to store promotions shown in a particular place in your application.
- Members only promotions are available to customers who joined a loyalty program.
- Handbill promotions can be selected by the AI promotion engine for a customer.
-
Enter a priority for the promotion.
Priority defines the order of display in the customer’s view. 1 is the highest priority. If two or more promotions applicable to a customer have the same priority, the order of display is determined by the AI engine. -
Choose the promotion logic:
- For promotions that can only be redeemed once per activation, choose Single.
- For promotions that can be redeemed a defined number of times, choose Multibuy.
-
In the Global limit field, enter how many times the promotion can be redeemed in total across the whole customer base.
-
In the Limit per profile field, enter how many times the promotion can be activated.
Single promotions can be redeemed once per activation. Multibuy promotions can be redeemed many times per activation. -
Multibuy only: In the Number of usage per activation field, enter the number of times the promotion can be redeemed per activation.
-
In the Cart section, define the price range which qualifies the shopping cart to get a discount.
-
From the Discount type drop-down list, select one of the following discount types:
- Percentage sets the discount amount as a percentage of the original price.
Example: if the original price is 1.00 USD and Value is20, the final price is 0.80 USD. - Amount sets a fixed discount amount to subtract from the original price.
- In the Value field, enter a value for the type selected in Discount type.
- From the Redemption type dropdown, select whether the promotion is redeemed after one or more usages.
- Click Apply.
Schedule
- In the Schedule section, click Change.
- In the Display time sub-section, choose when the promotion becomes visible to customers.
Important: A promotion must be published to be visible. Publishing the promotion is the last step in this procedure, after all the settings are made. “Immediately” means “immediately after publishing”.
- Scheduled promotions only: Set the time when the promotion is visible to customers by picking dates in the Start and End fields.
- In the Activity time sub-section, define the time when the promotion can be activated:
- If you want the time to be the same as the visibility time, select the Same as display time checkbox.
- If you want to set a date range, pick the dates in the Start and End fields.
- In the Lasting field, enter the time (in seconds) that a promotion remains redeemable after it is activated.
0is interpreted asinfinity. - Click Apply.
Stores
- In the Stores section, click Define.
- From the Select stores drop-down list, select a catalog of stores.
- Choose a set of stores:
- If you want to apply the promotion to all stores in the catalog, select the Entire catalog radio button.
- If you want to apply the promotion to particular stores from the catalog:
- Click Select stores.
- In the pop-up that opens, select the checkboxes of the stores where you want to apply the promotion.
- Click Apply.
The pop-up closes.
- Click Apply.
Saving a draft or publishing
- If you want to publish the promotion, click Publish.
Result: If the schedule was set to “Immediately”, the promotion becomes visible after you click Publish. If it was scheduled for a date, it becomes visible at that date. - If you want to save the promotion as a draft or return a published promotion to draft status, click Finish later.