Managing promotions
You can perform operations on existing promotions.

Editing promotions
WARNING:
- If you edit a promotion that is already in progress, the new data does not apply to customers who activated the promotion before your changes.
- If you click Finish later while working on a published promotion, it returns to draft status.
- Go to
 Communication > Promotions.
 - On the list of promotions, find a promotion and click its name.
- Edit the settings in the same way as when creating a promotion.
Importing promotions
Full instructions are available here
Publishing promotions
When you click the Finish later button, the promotion becomes an unpublished draft. To apply the promotion, it must be published.
- Go to Communication > Promotions.
- On the list of promotions, find the promotion and click its name.
- Ensure that the settings are correct.
- In the upper-right corner of the screen, click Publish.
Result: If the schedule was set to “Immediately”, the promotion becomes visible after you click Publish. If it was scheduled for a date, it becomes visible at that date.
Hiding promotions
After a promotion is published, you can hide it from customer view without returning it to draft status.
- Go to Communication > Promotions.
- On the list of promotions, locate the promotion you want to hide.
- Hover your mouse over the “Published” status icon.
The icon becomes the Hide promotion button.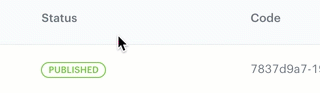
Enabling the Hide promotion button - Click the Hide promotion button.
Result: The promotion becomes invisible to the customers.
Duplicating promotions
- Go to Communication > Promotions.
- On the list of promotions, find the promotion and click
 .
. - In the list that opens, click Duplicate.
Result: An exact duplicate of the promotion is created. It has the same name as the original promotion. The code is generated automatically and unique.
Creating filters
Filters on the list of promotions serve two purposes:
- To find a particular promotion or group of promotions on the list of promotions.
- To be able to assign multiple sets of promotions to customers in personalized promotions (handbills).
- Go to > Promotions
- On the right side of the screen, click the
 icon.
icon.
Result: The icon changes into Define filter button. - Click Define filter.
Result: A pop-up is shown. - To define the conditions of the filter, click Choose filter.
- From the dropdown list, select a predefined parameter.
- By using operators, you can define the type of value of the parameter.
Result: A text field shows up (except for the Boolean operator). - Enter the value of the parameter.
- To add more conditions, click Choose filter and repeat steps from 5-7.
- Define the dependency between the conditions by selecting one of logical operators (
ANDorOR). - To save the filter, click Save filter.
- Enter the name of the filter.
- To only save the filter, click Save.
- To save the filter and filter out promotions on the list, click Save and Apply.
Result: The filter is available in the folder
 - To filter out the items on the list of promotions, click Apply.
Deleting promotions
WARNING: Deleting a promotion is irreversible.
- Go to Communication > Promotions.
- On the list of promotions, find the promotion and click .
- In the list that opens, click Delete.
Result: The promotion is deleted from the system.