Creating screen views
Select documents to be displayed in the mobile application for the defined audience.
Requirements
A complete list of requirements is available in this article.
Creating a screen view
-
Go to
 Communication > Screen views > Create screen view.
 -
Enter the name of the screen view.
-
To define the recipients of your screen view, in the Audience section, click the Define button. You can choose the audience in the following ways:
- You can select all mobile application users to be the audience of your screen view by clicking the Everyone option.
- You can choose segmentations of your customers by clicking the Segment button.
- You can choose the recipients of your screen view from scratch by clicking the New audience option.
-
Confirm your choice by clicking the Apply button.
Important: If the audience of the screen view is more than one segmentation and one of the segmentation returns0results, then the whole audience is0. In such circumstances, such a screen view will not be visible when active. -
To create the content of your screen view, in the Content section click the Define button.
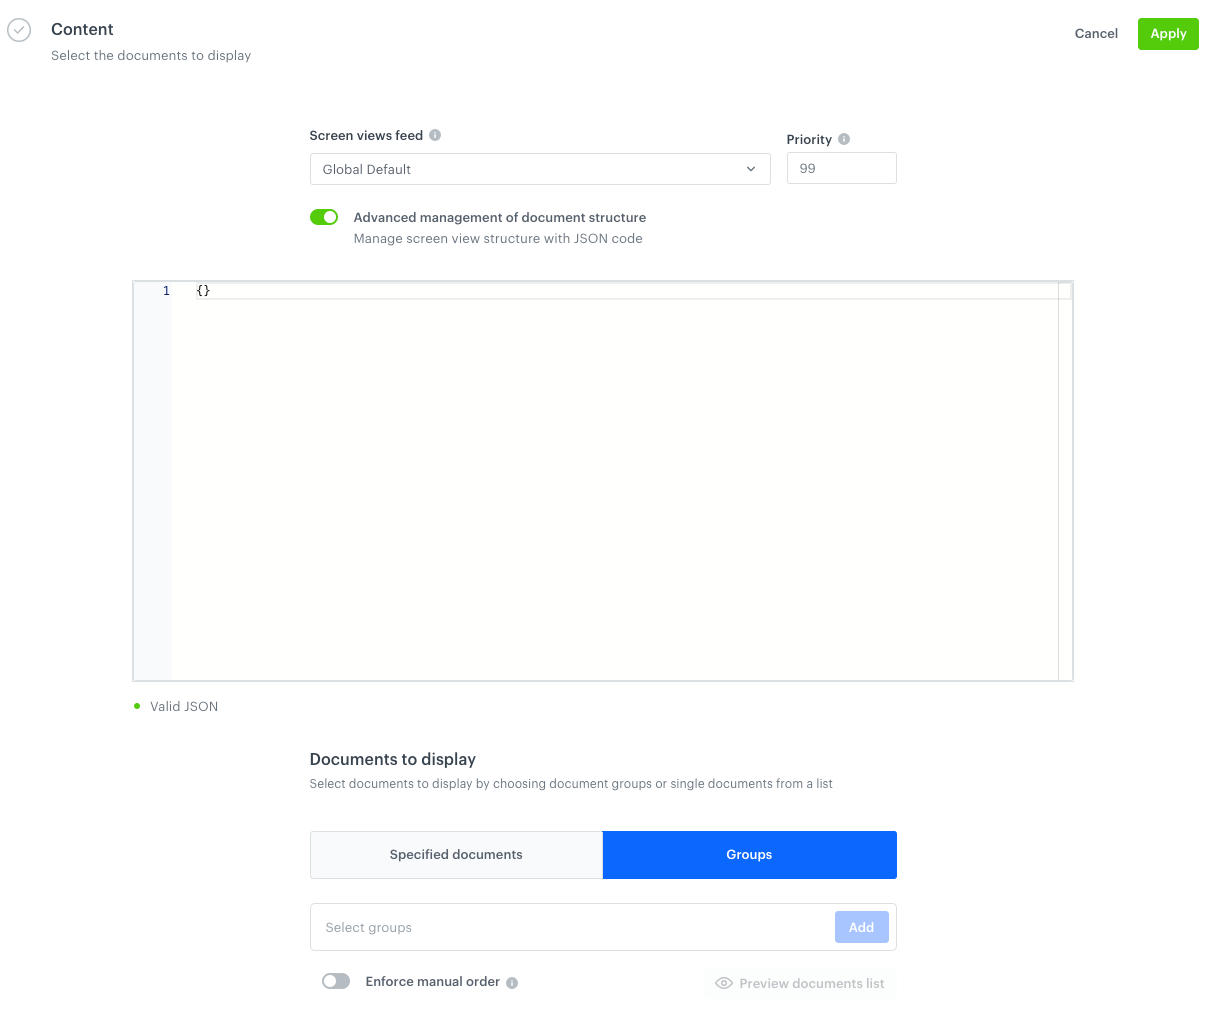
A blank Content section in the Screen view form - From the Screen views feed dropdown feed, select a feed to which a screen view will be assigned. If needed, you can create a new screen view feed:
- Click Add screen views feed.
- On the pop-up, in the Feed name field, enter the name of the feed. It will be only visible in the Screen views feed dropdown.
- In the Slug field, enter a unique identifier of this screen views feed. While retrieving screen views to a dedicated space in your mobile application, you will use this slug to display all screen views assigned to a particular feed.
Note: We recommend following this slug name convention:
your-slug-name. Special characters and white spaces are unsupported. - Confirm by clicking Apply.
- In the Priority field, define the order in which a screen view will be displayed. Use numbers from 1 to 99, where 1 is the highest.
- If you want to extend the structure of a screen view campaign besides including the documents you select, enable the Advanced management of document structure option.
- In the text editor, enter the structure of documents you want to include.
It must contain the{% screenviewcollection %}tag which inserts all documents you select in the Documents to display section. This tag is included by default, but you can move it when changing the JSON structure.
You can also use the{% document <slug> %}tag to refer to a single document.
Other inserts can be used too. Example structure of the screen view:{ "content": { "collection": "{% screenviewcollection %}", "document": "{% document currentpromotions %}", "yourCustomParameter": "string" } }
- In the text editor, enter the structure of documents you want to include.
- From the Screen views feed dropdown feed, select a feed to which a screen view will be assigned. If needed, you can create a new screen view feed:
-
If you want to add add documents to your screen view campaign, add them in one of the following ways:
- By picking individual documents in the Specified documents tab.
- Click the field.
- From the dropdown list, select one or more documents.
- Confirm your choice by clicking Add.
The order of documents is defined by the order defined on the interface. More details is available in the Order of displaying documents in a screen view section.
- By picking all documents assigned to a specific group in the Groups tab.
- Click the Group tab.
- Click the field.
- From the dropdown list, select one or more groups.
- Confirm your choice by clicking Add.
- To define the order of documents:
- By default the order of documents in a screen view is defined be the priority settings of each documents, regardless of the group they belong to.
- To enable enforcing manual ordering of the documents, enable the Enforce manual order option. You can define the order of document groups, however, the order of documents within the groups are still defined by documents priority.
More details is available in the Order of displaying documents in a screen view section.
- By picking individual documents in the Specified documents tab.
-
Confirm by clicking Apply.
-
In the Schedule section, click Define.
- To display the screen view immediately after the activation, click the Run immediately section.
- To schedule the display of the screen view at a future date, click Scheduled.
- For both options, you can set time windows (the Set time windows option) during which the content of the screen view will be visible in the mobile application.
-
Confirm the settings in the Schedule section.
-
To publish the screen view, in the upper right corner, click Activate.
You may want to know
Order of displaying documents in a screen view
While creating screen views, you can define the order of displaying documents:
- For the documents selected single-handedly (the Specified documents tab):
The order of displaying documents is defined only manually - drag and drop documents in the preferred order. The priority settings of each document is overridden.Click here to see example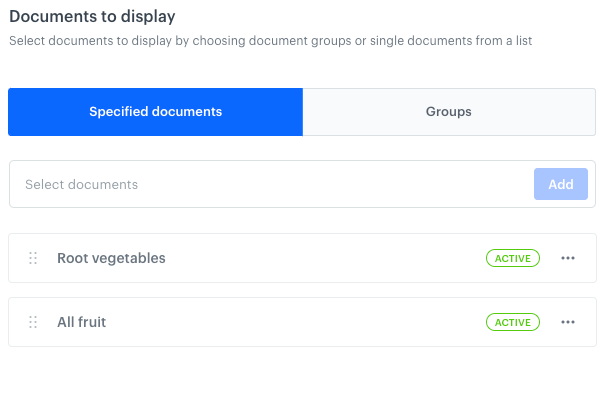
Single documents selected for a screen view campaign In the example on the screen above, the order of displaying documents will be as presented on the UI, which means the
Root vegetablesdocument will be presented first. - For the groups of documents (the Groups tab):
- By default, the order of the documents selected this way is defined on the basis of priority of documents. This means that division into groups is overridden and the documents are displayed according to their priority settings.
Click here to see example
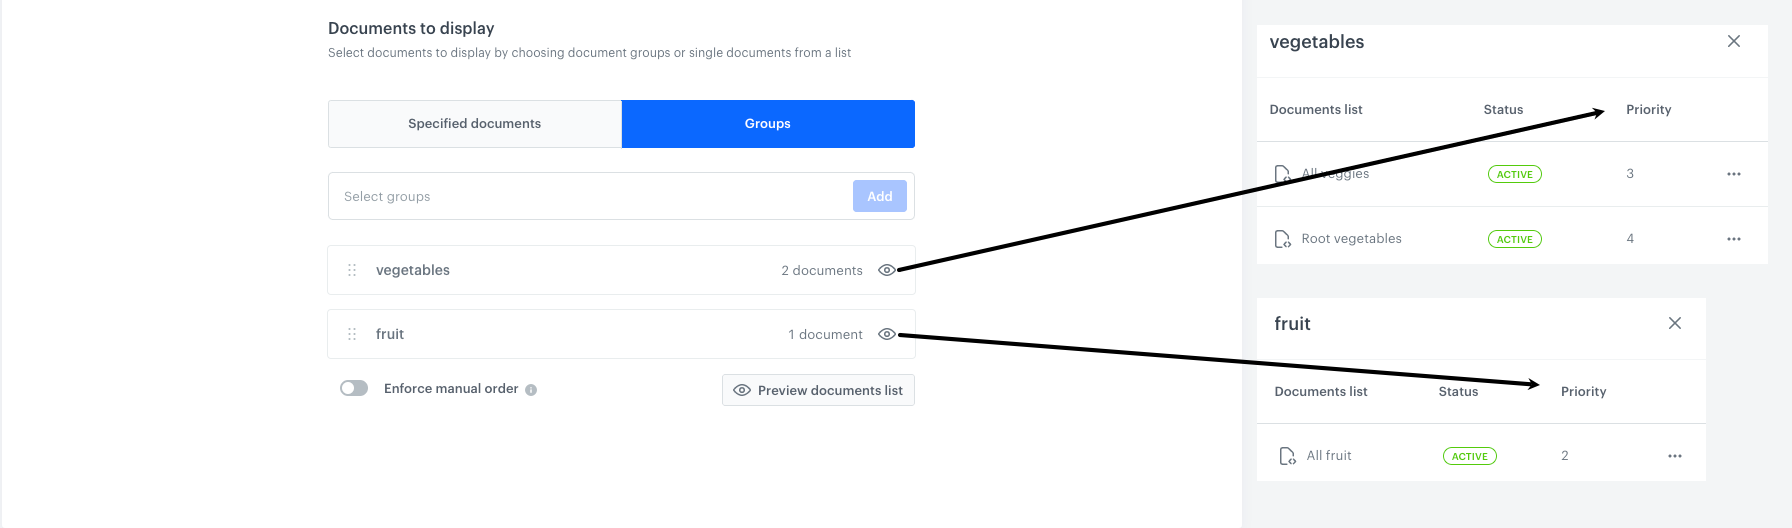
Two groups of documents selected for a screen view campaign with display according to priority In the example on the screen above, the order of displaying documents will be as follows:
All fruitdocument (priority 2)All veggiesdocument (priority 3)Root vegetablesdocument (priority 4)
- By enabling the Enforce manual order option, you define the order of document groups, however, the documents within the groups will be shown according to document priority.
Click here to see example
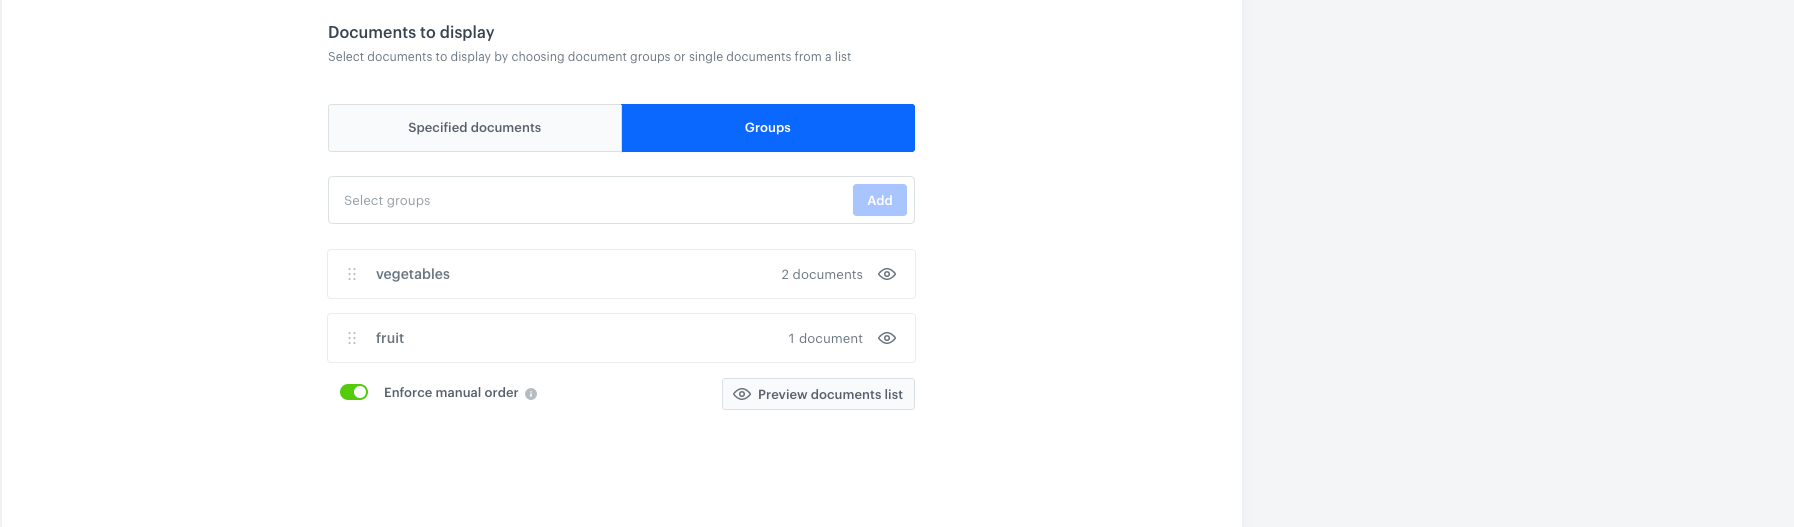
Two groups of documents selected for a screen view campaign and enforcing manual order option is enabled In the example on the screen above, the order of displaying documents will be as follows:
All veggiesdocument (priority 3)Root vegetablesdocument (priority 4)All fruitdocument (priority 2)
- By default, the order of the documents selected this way is defined on the basis of priority of documents. This means that division into groups is overridden and the documents are displayed according to their priority settings.
Conflicts
Screen views with the same priority
| Audience conditions | Outcome |
|---|---|
| The same | In such case, if a profile meets the conditions of the screen views, the screen view with the latest creation date will be displayed. |
| Various | - If a profile meets the conditions of one screen view, this screen view will be displayed - If a profile meets the conditions of both screen views, the screen view with the latest creation date will be displayed |

Documents with the same priority
| Audience conditions | Outcome |
|---|---|
| The same | In such case, if a profile meets the audience conditions of documents, the document with the latest creation date will be displayed. |
| Various | In such case, the choice of the document to be displayed for each profile will be different: - If a profile meets the conditions of at least one document, this document will be displayed - If a profile meets the conditions of both documents, the document with the latest creation date will be displayed |

A document in a screen view whose audience conditions are mutually exclusive with screen view audience
The document will not be displayed in a screen view.
Finished, paused or draft document in an active screen view
The document will not be displayed in a screen view.
Screen view audience vs document audience
For screen view campaigns:
- you can select up to 20 documents whose audience is one segmentation or more.
- you can’t select a document which contains documents whose audience is other than Everyone.
- if the screen view audience and the audience of documents selected in the screen view is mutually exclusive, then the document won’t be displayed in a screen view
Screen view schedule vs document schedule
The screen view campaign displays only active documents.
- When a screen view contains the documents which are no longer active or are scheduled at the future date, they won’t be displayed in a screen view.
- When a screen view expires and the documents in this screen view are still active, you can still fetch those documents directly from the database by using the API.
How does deleting documents affect screen view campaigns?
When deleting a document, you will get a warning if it’s used in a screen view campaign. If you delete such a document, it will no longer be displayed in the campaign.