List of profiles
The profle list contains a list of companies and profiles (for example, a customer can be a profile). The list is filterable and searchable.
The list below contains all actions you can perform on the list of profiles:
Prerequisites
To perform actions on the profile list, you must import or add your profiles/companies first.
Adding profiles
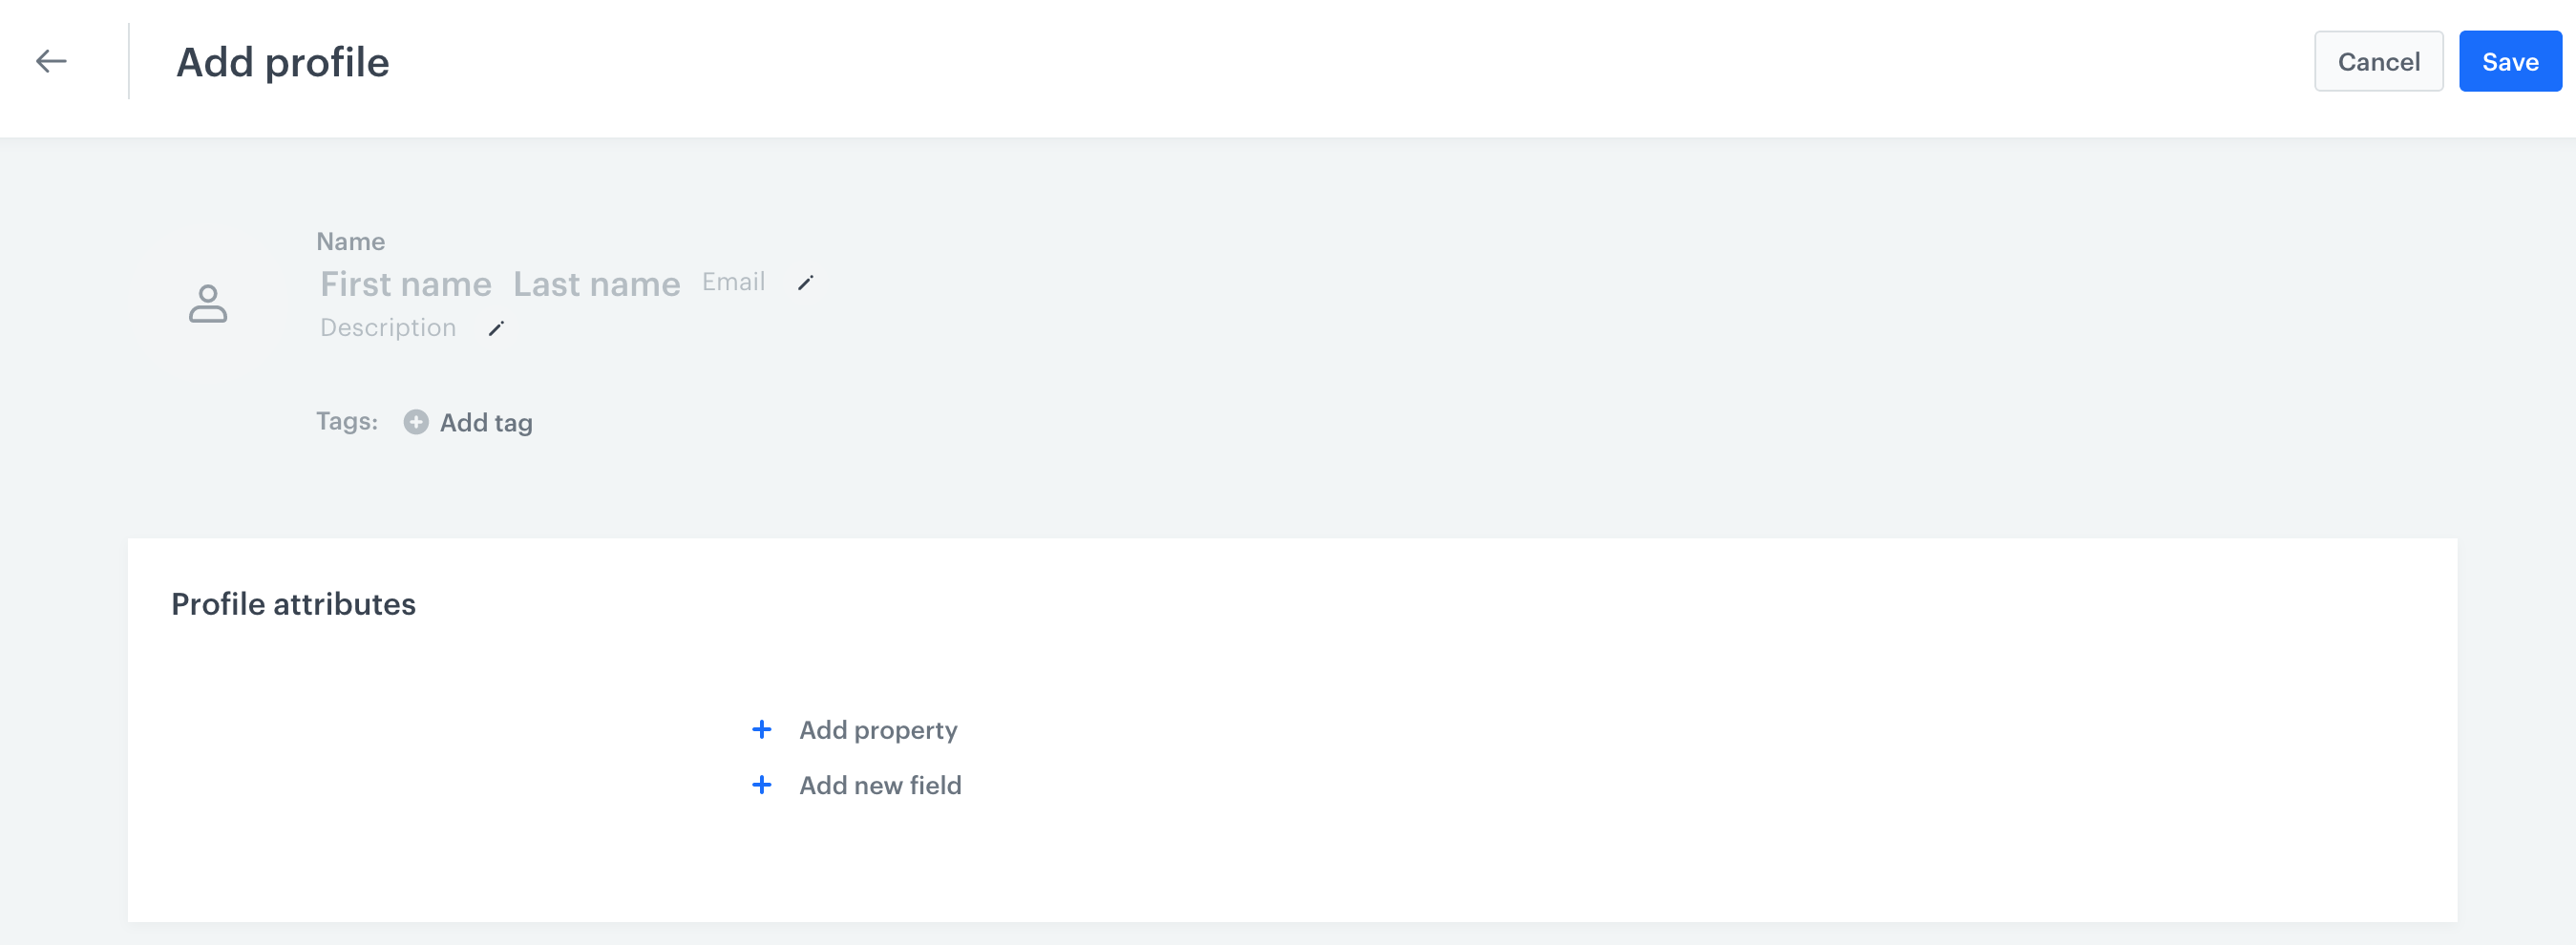
You can add a new profile to your database manually.
- Go to
 .
. - At the top of the list, click Add new.
- From the dropdown list, select Profile.
- Fill in the required fields:
- email address,
- first name,
- last name
- Optionally, you can add attributes (properties) to the person you add:
- Click Add property.
- From the dropdown list, from the properties available in your workspace, select the name of the property.
- In the Value text field, enter the value of the property (for example,
New Yorkfor theCityproperty). - To add more properties, click Add property.
Defining properties
-
Optionally, you can define new properties.
- Click New property.
- In the Source parameter field, enter the name of the parameter as sent by the SDKs/API.
- In the Property name field, enter a human-readable label for display in the Synerise portal.
- Optionally, in the Description field, you can add an explanation about the purpose of this property.
- From the Property type dropdown list, select the format of the property value as sent by the SDKs/API.
- Confirm by clicking Save.
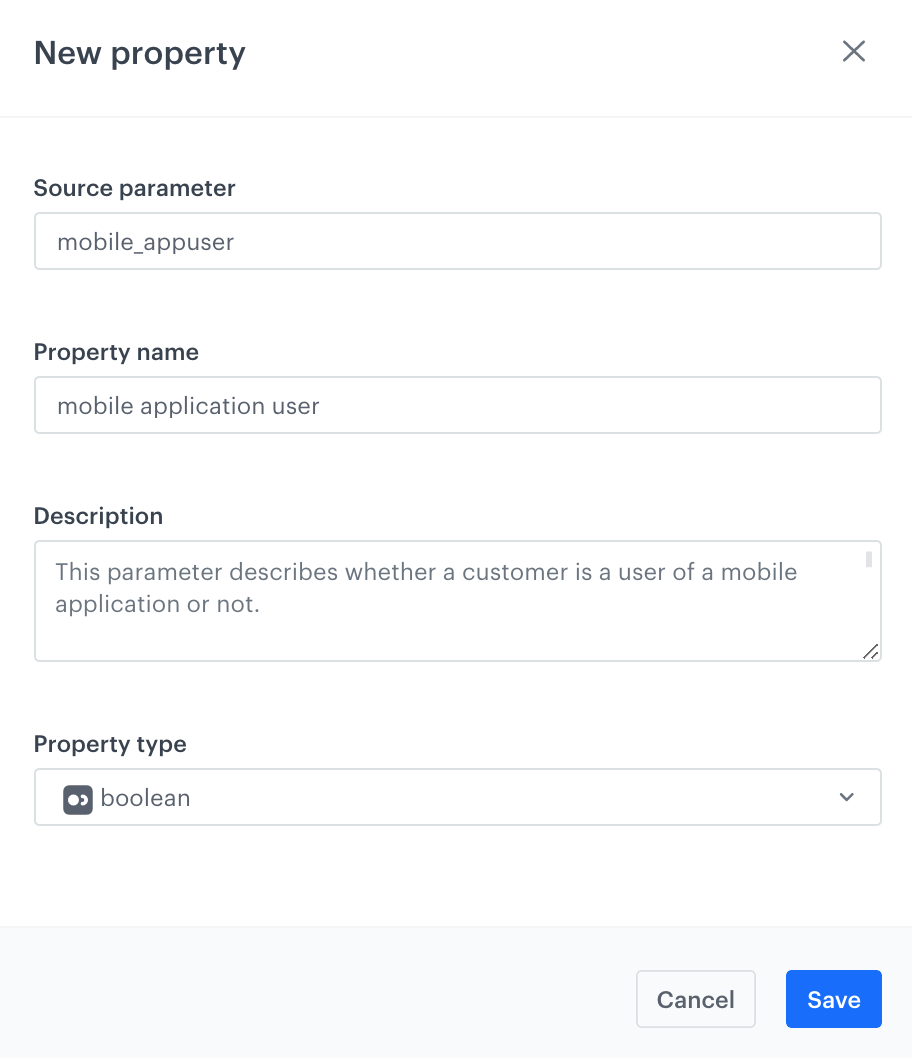
Adding a new property
Result: The property is available in Data Management > Params Manager.
-
To save a new profile, click Save.
Adding companies
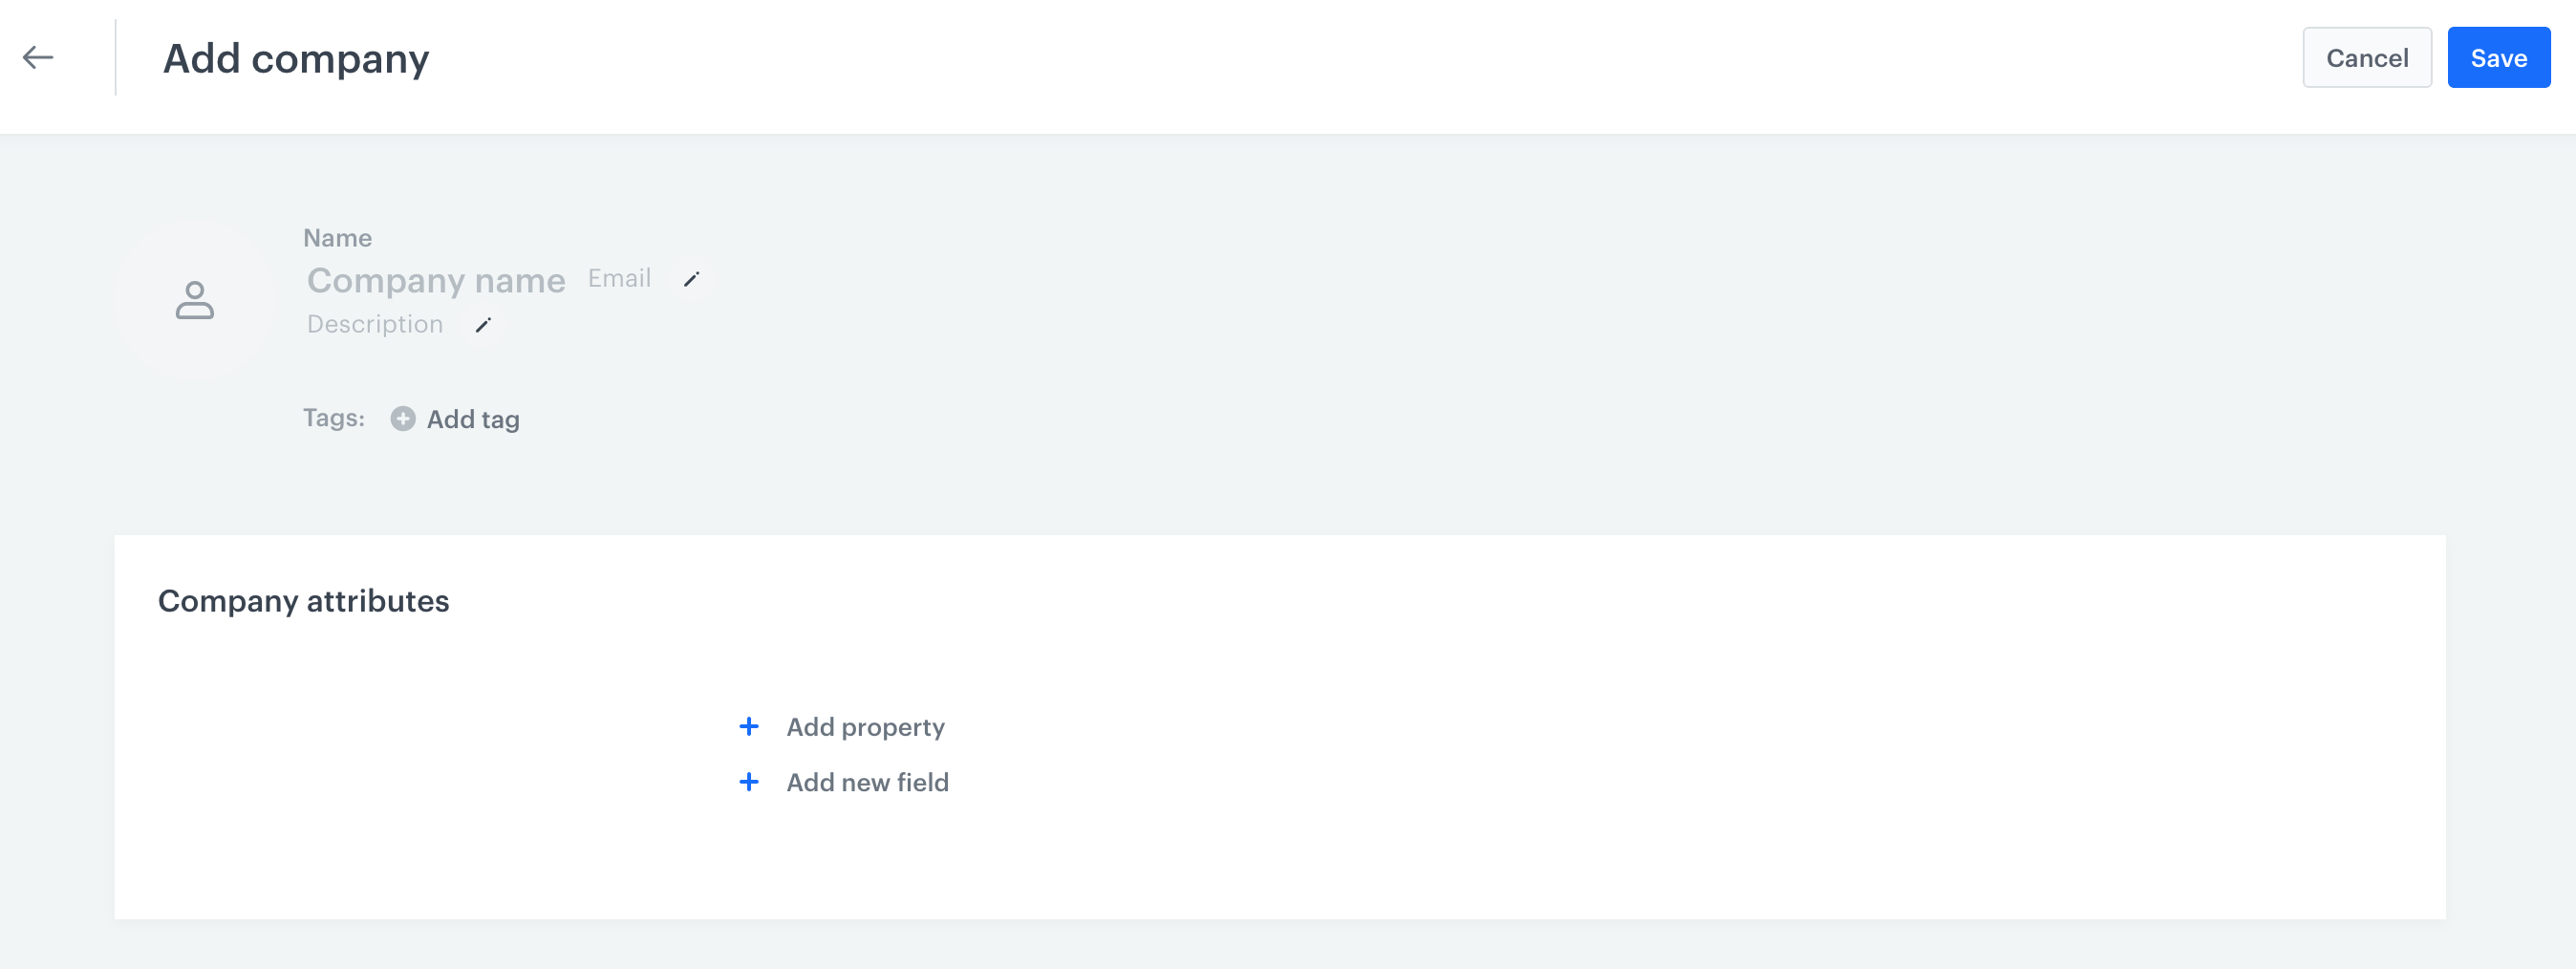
- Go to .
- At the top of the list, click Add new.
- From the dropdown list, select Company.
- Fill in the required fields:
- email address,
- company name
- Optionally, you can add attributes (properties) to the company you add.
- Click Add property.
- From the dropdown list, from the properties available in your workspace, select the name of the property.
- In the Value text field, enter the value of the property (for example,
New Yorkfor theCity). - To add more properties, click Add property.
Defining properties
- Optionally, you can add new properties.
-
Click New property.
-
In the Source parameter field, enter the name of the parameter as it is sent by the SDKs/API.
-
In the Property name field, enter a human-readable label for display in the Synerise portal.
-
Optionally, in the Description field, you can add an explanation about the purpose of this property.
-
From the Property type dropdown list, select the format of the property value as sent by the SDKs/API.
-
Confirm by clicking Save.
Adding a new property -
The property is available in Data Management > Params Manager.
-
- To save a new company, click Save.
Editing and deleting profiles
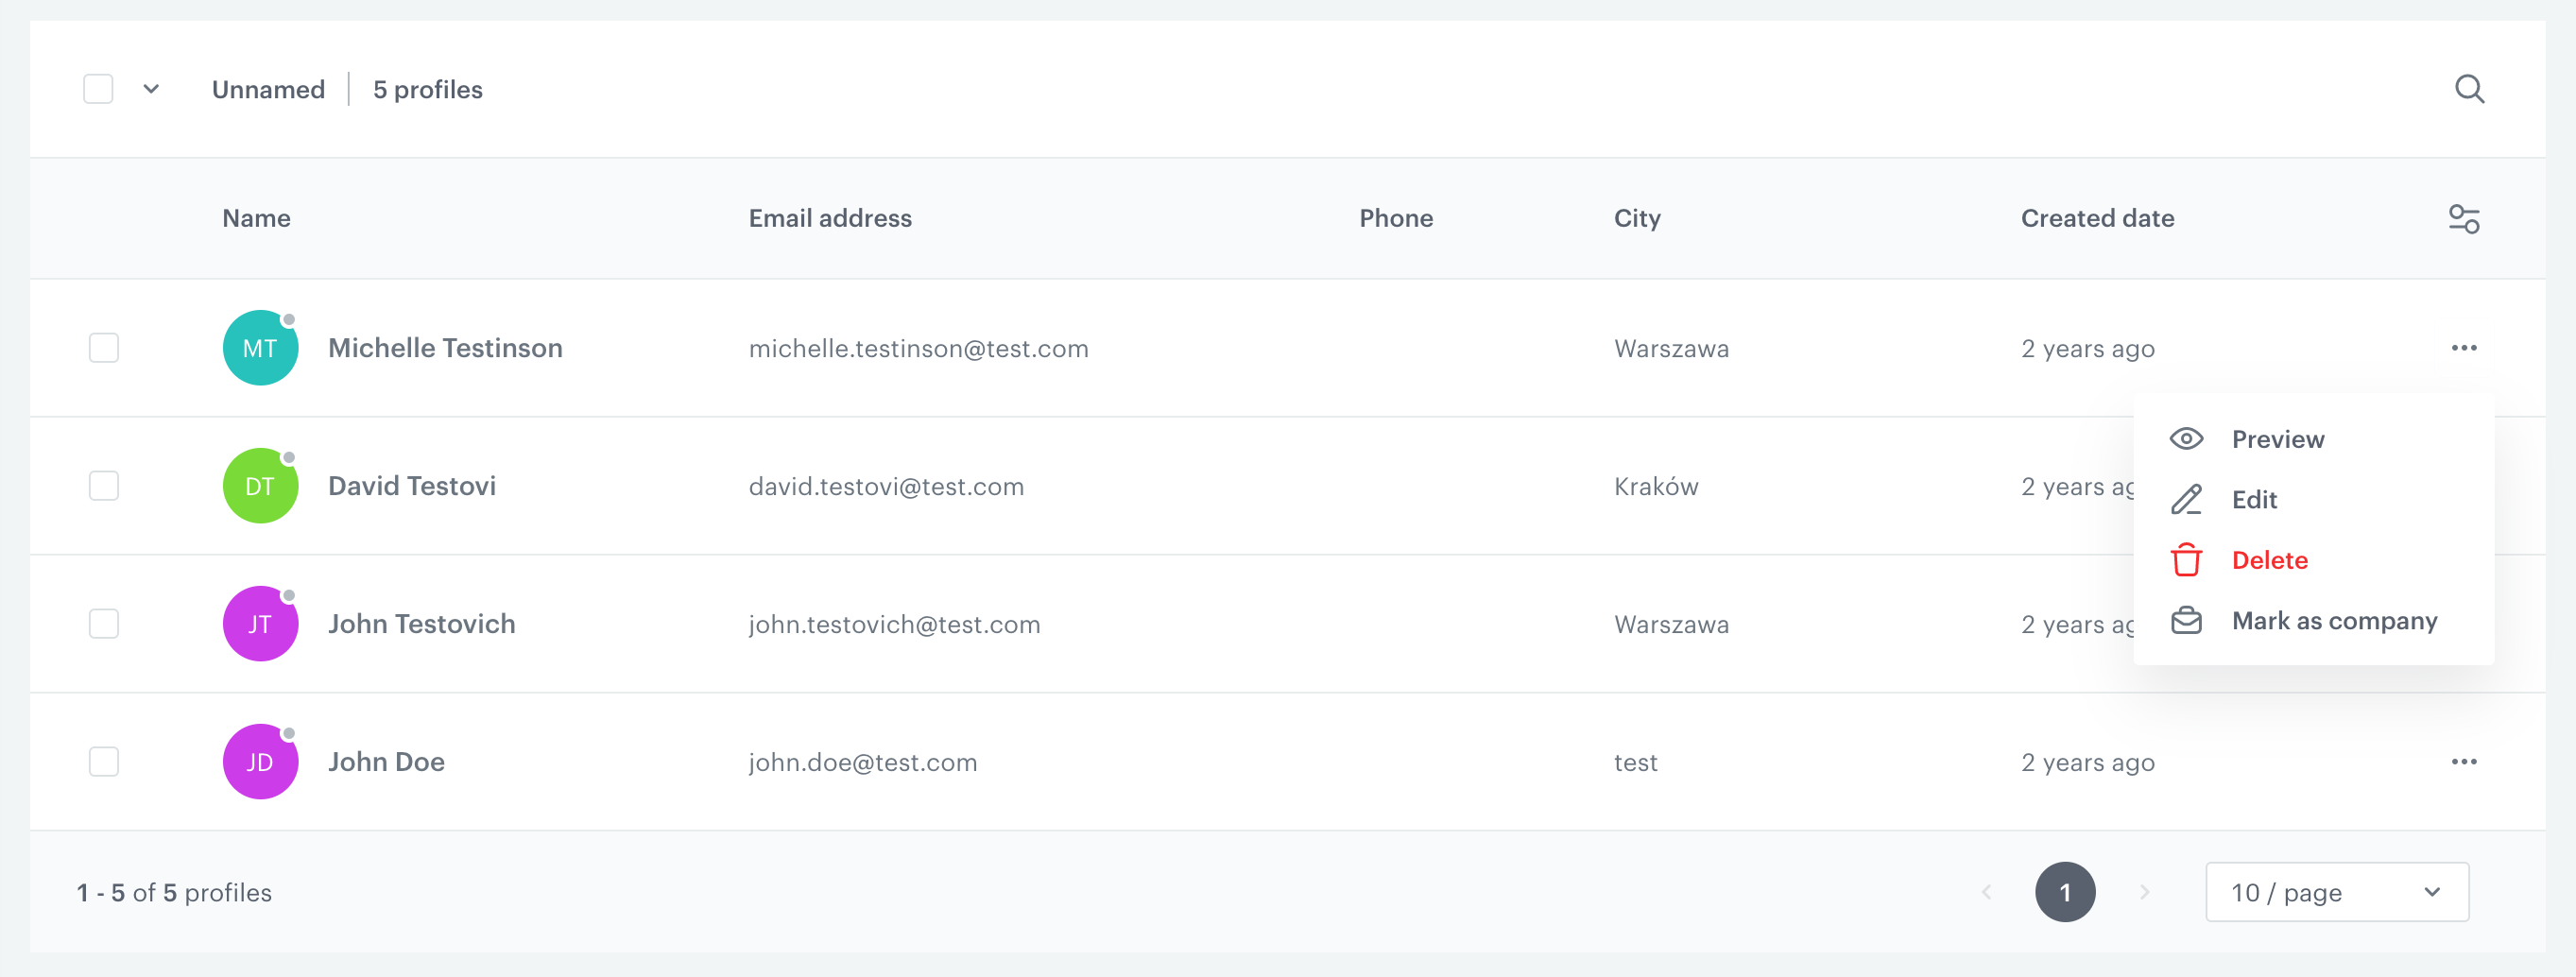
- Go to
- Next to the item on the list, click
 .
. - From the dropdown list, select the action.
- Preview - Redirects you to the preview of the profile
- Edit - Allows you to add/modify properties.
- Delete - Removes a profile from your workspace.
WARNING: Removal is permanent.
- Mark as company - Changes the type of the profile to company (this is one-way change).
Searching for profiles
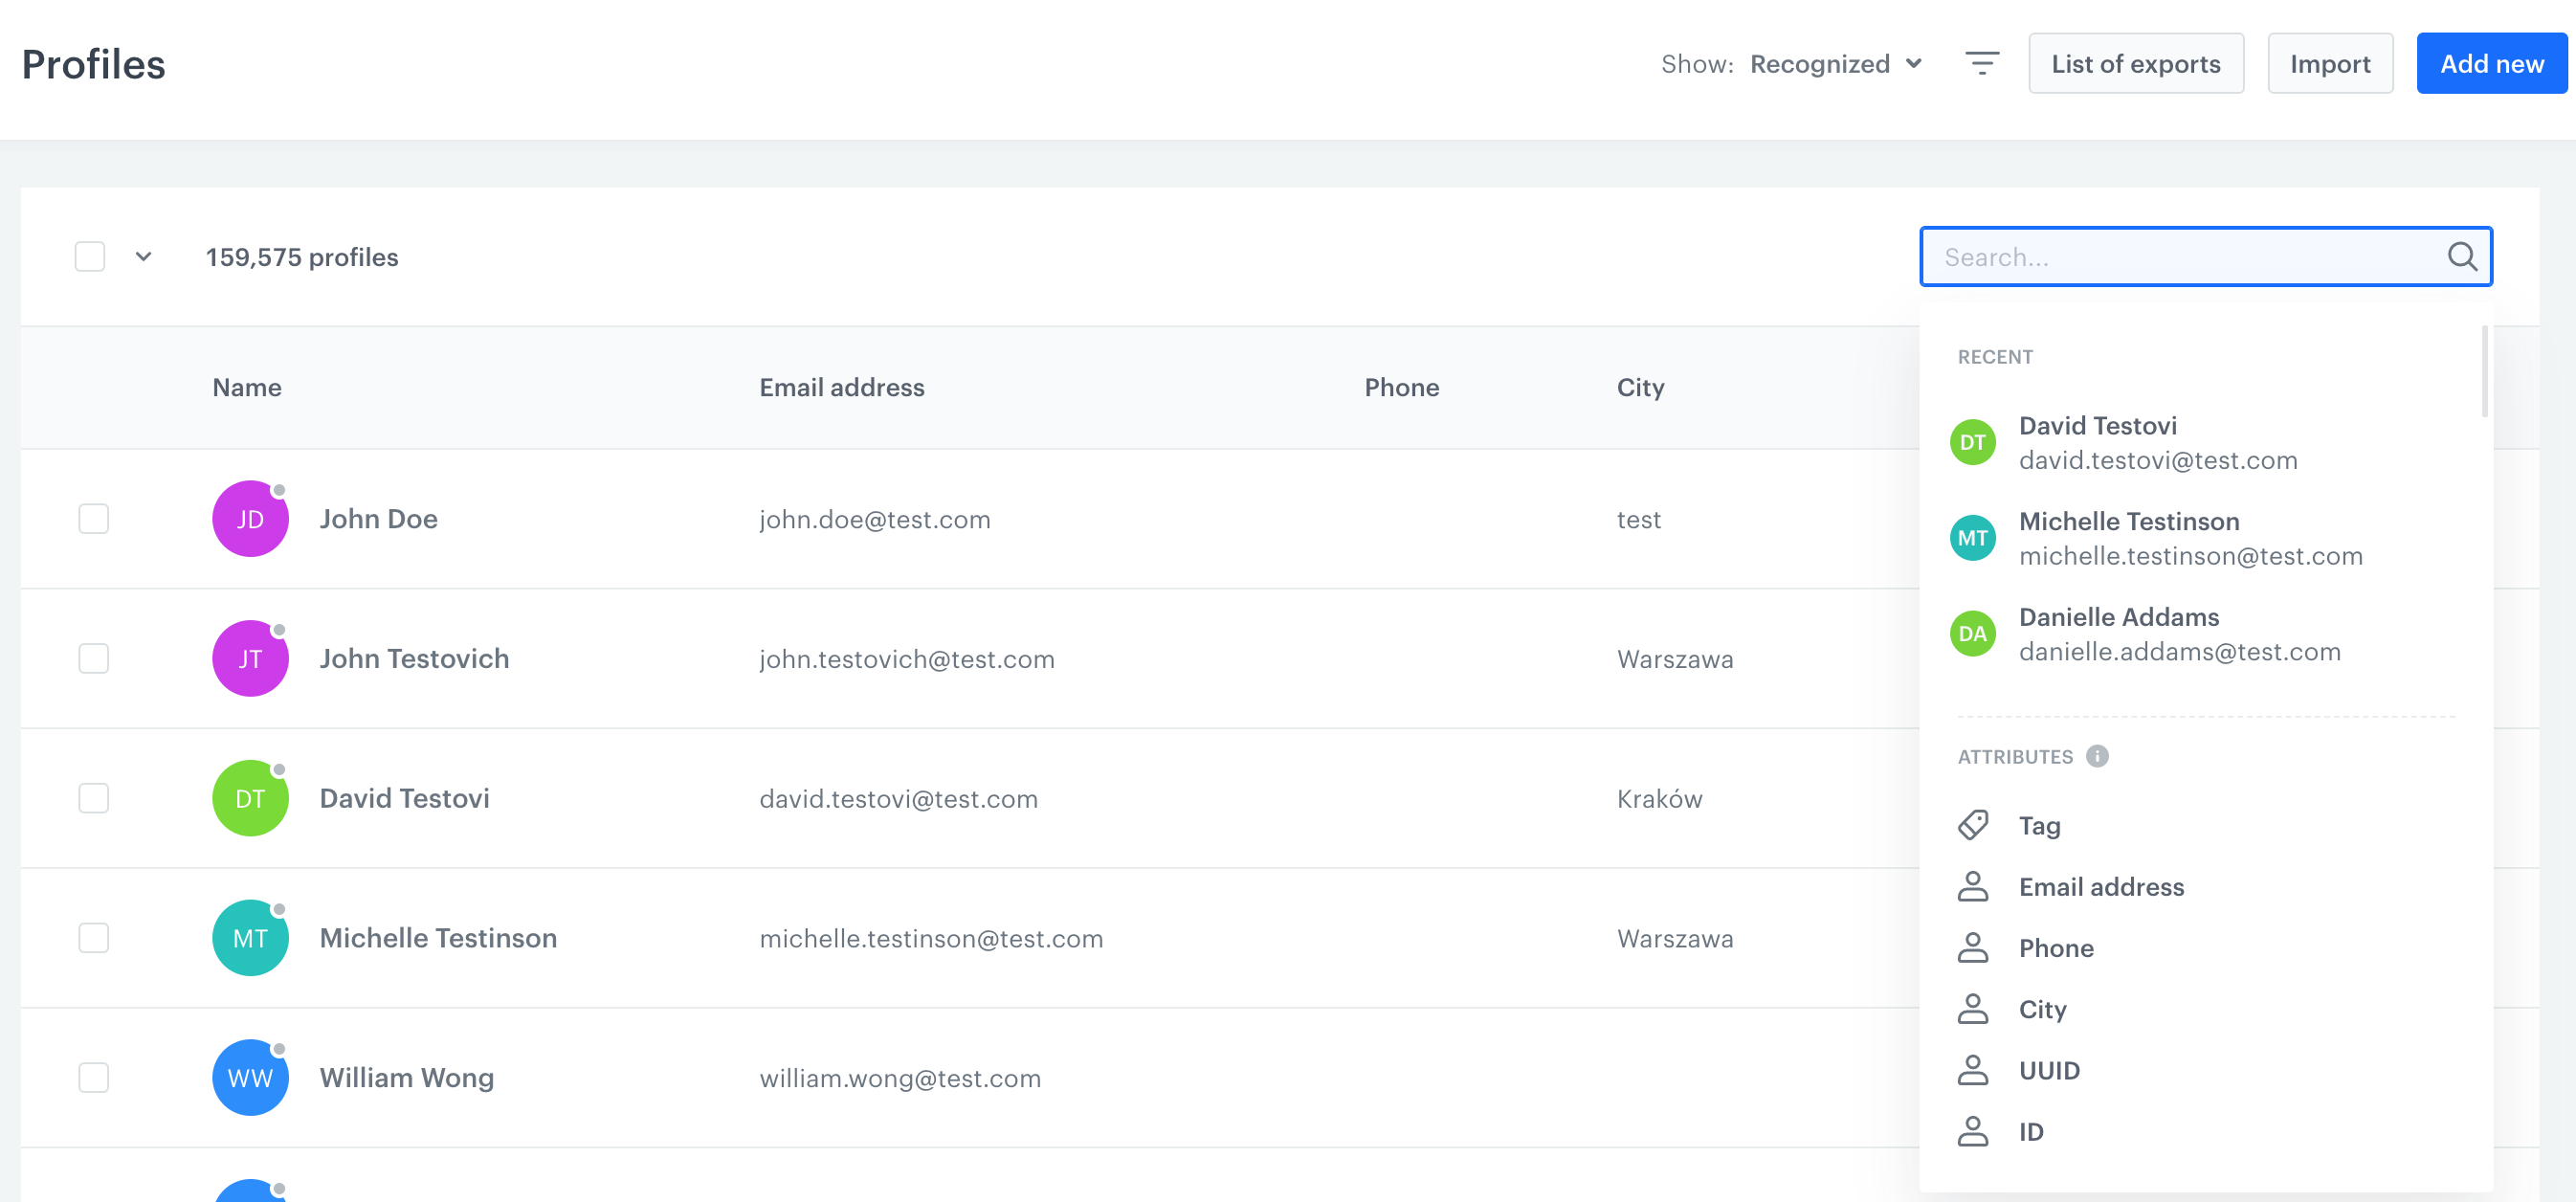
You can search for a specifc person or company by using their attibutes such as name, email, phone number, city, UUID, ID, or a tag assigned to the person.
- Click the search box.
Result: You will see a list of recent searches below. - Below the recent queries, you get the list of attributes you can use to search.
Filtering profiles
You can filter the items on the list in two ways:
- by displaying recognized, unrecognized, or all profiles
- by preparing a segmentation - this way you can use any attribute or event to filter out a group of people/companies who share the same quality.
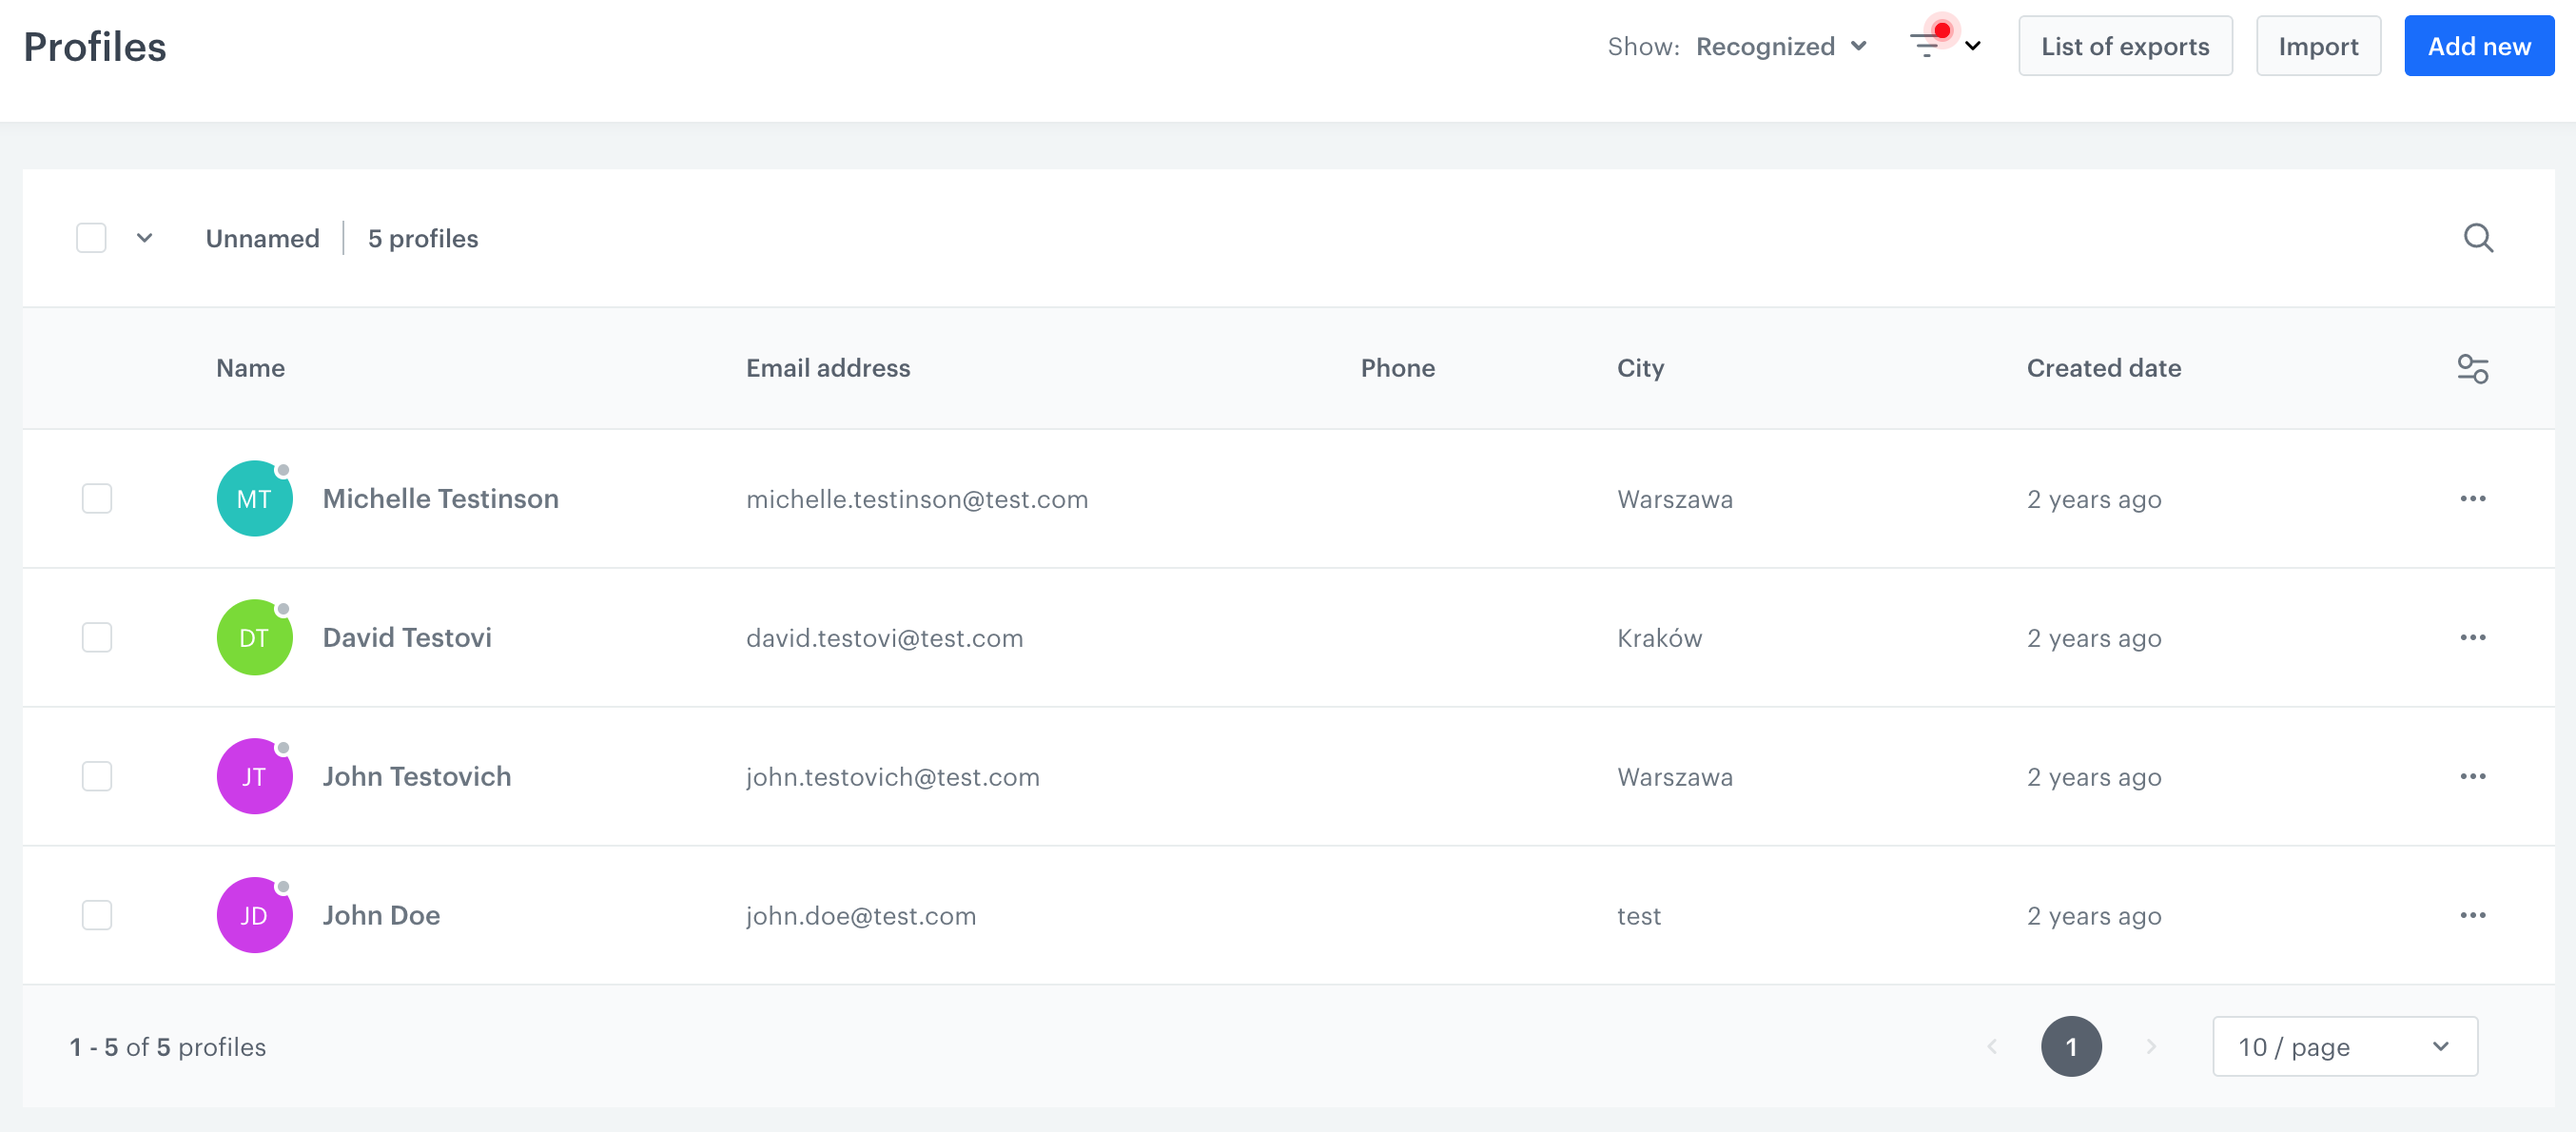
- Go to
- At the top of the page, click Recognized.

Filtering out customers who visited a website last month - Select an option.
-
Go to
-
At the top of the page, click
 .
. -
Click the Choose filter button.
-
Define the conditions by selecting events and/or attributes.
-
To narrow down the scope of data, you can use the date filters.
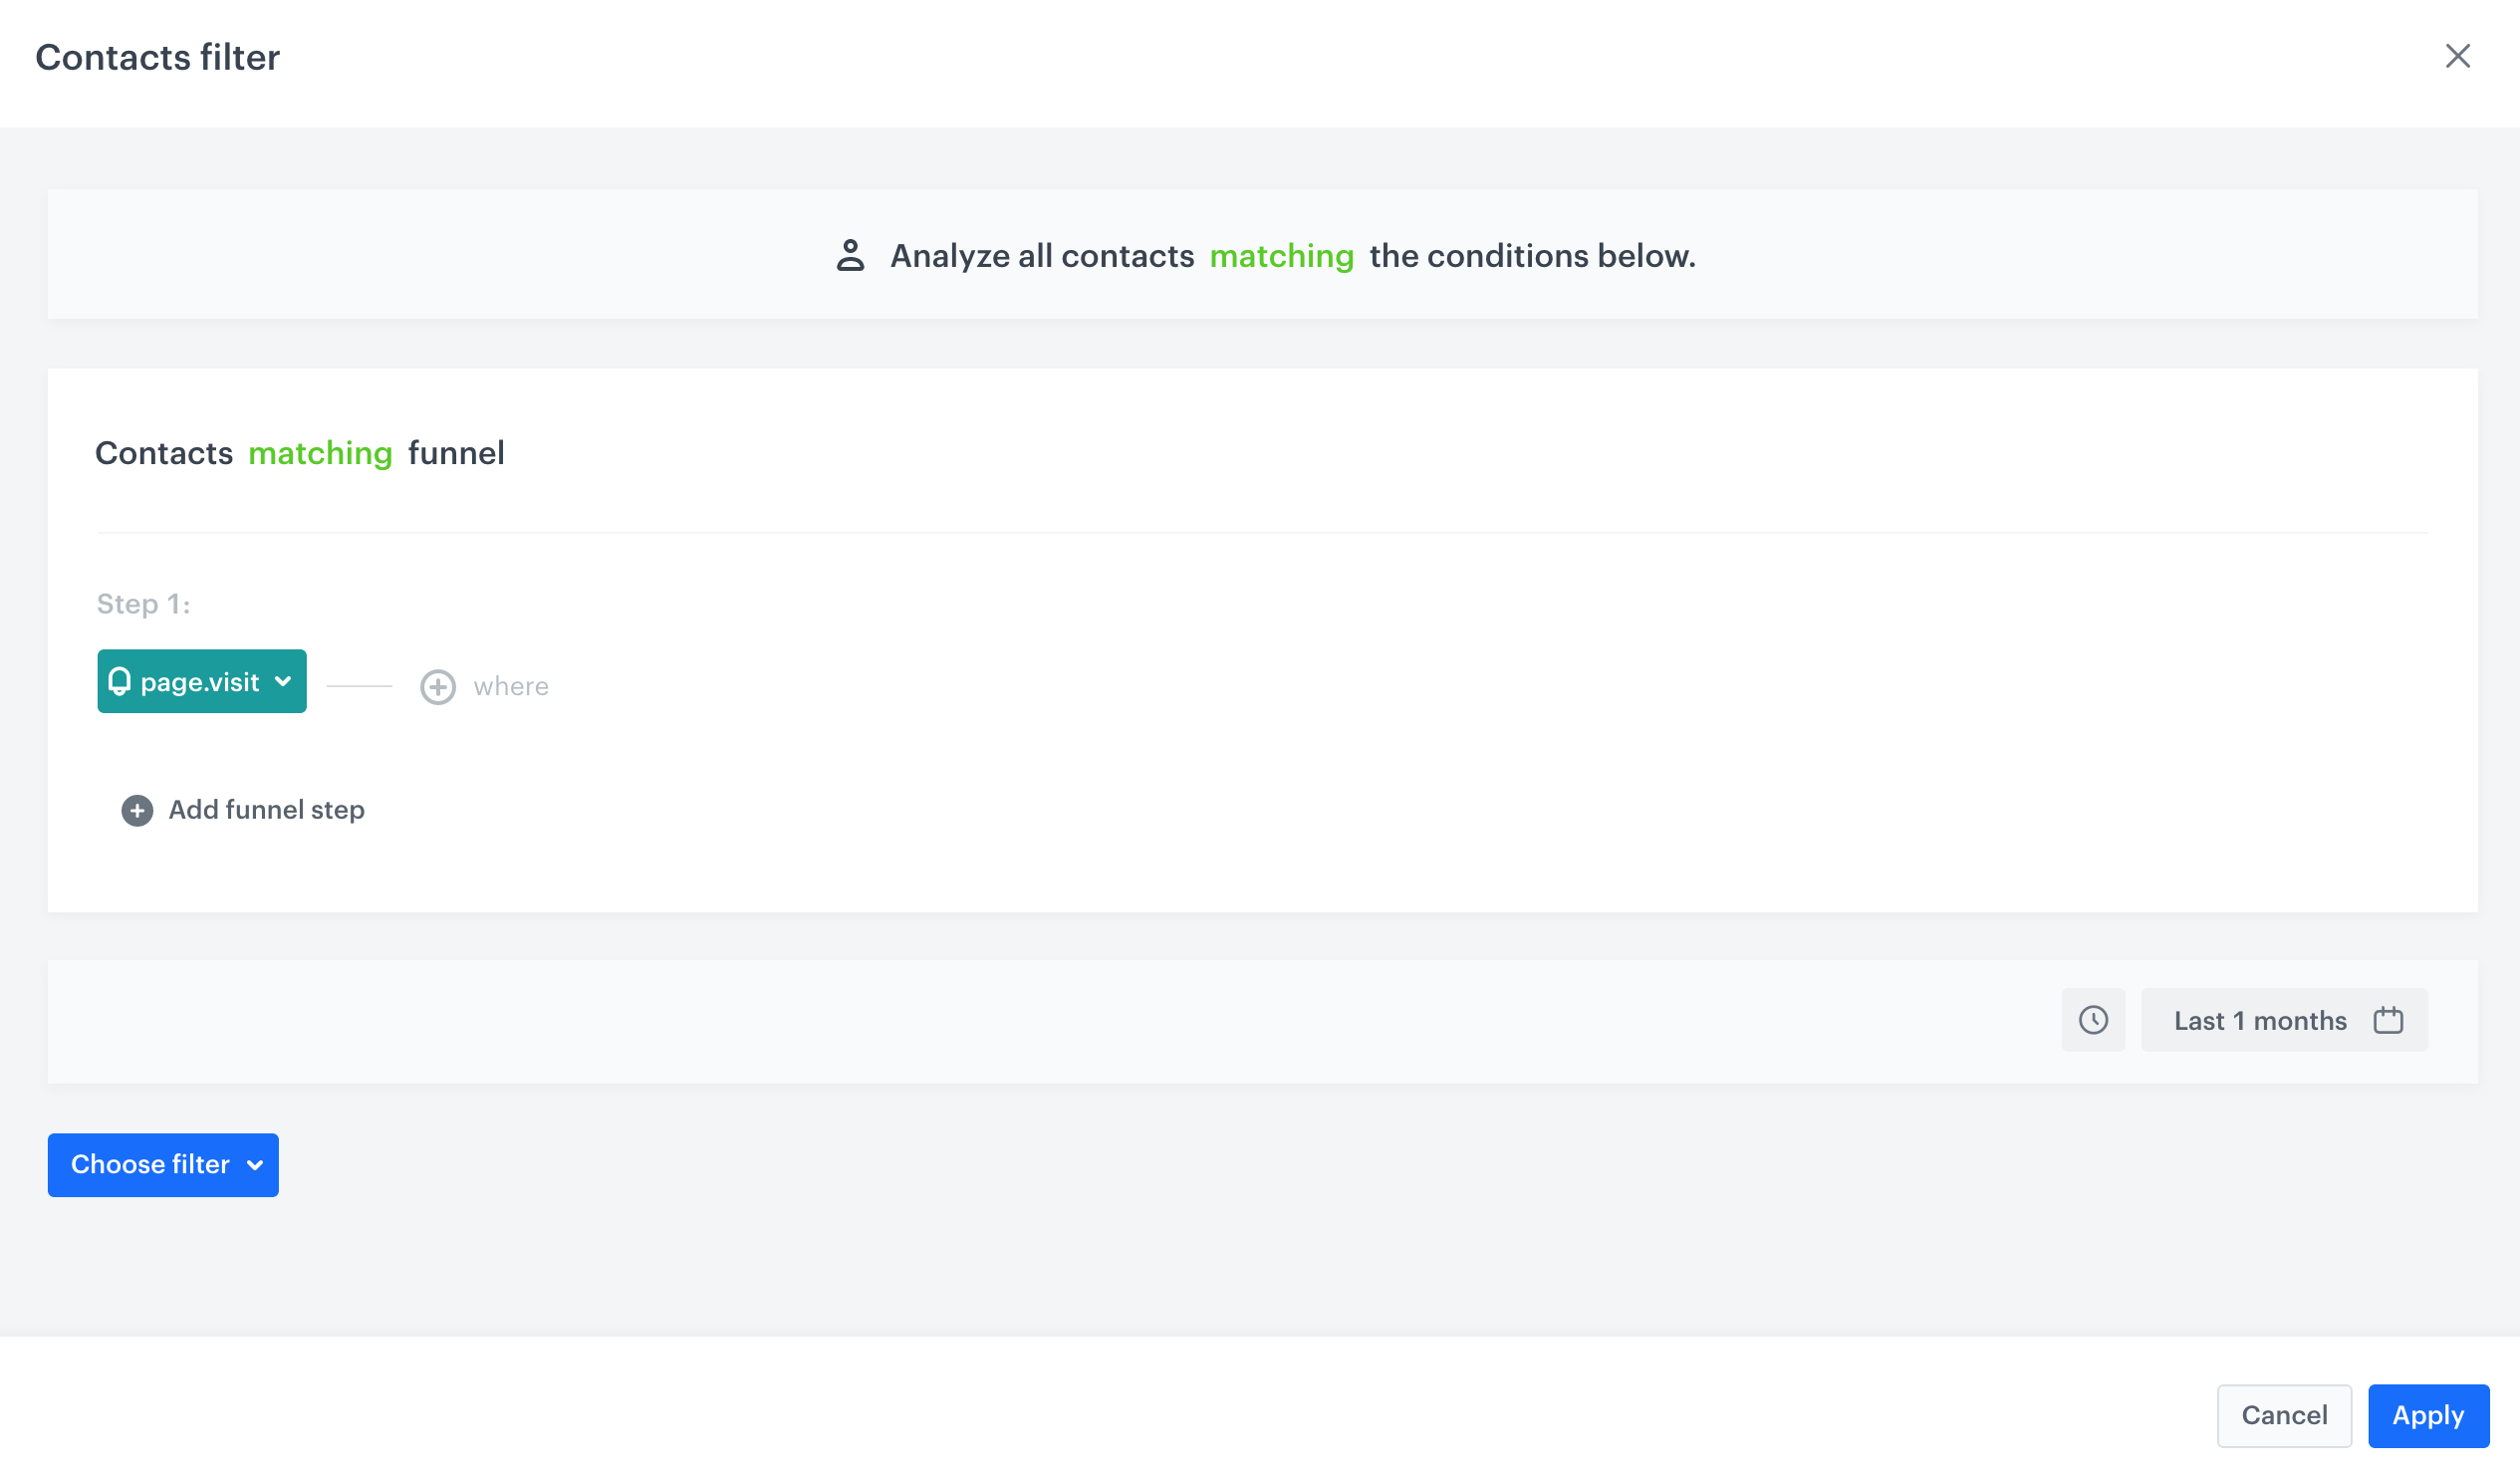
Filtering out customers who visited a website last month -
Confirm by clicking Apply.
Results: The list presents the filtered results and the filter icon is marked with the red dot:
Importing profiles
You can import profiles to your workspace in three ways:
- through API
- through webhooks
- upload a file
The following file types are allowed:.CSVJSONGoogle Merchant XML
To import profiles, at the top of the page, click the Import button.
Exporting profiles
You can export a chosen group of profiles or companies to a .CSV file.
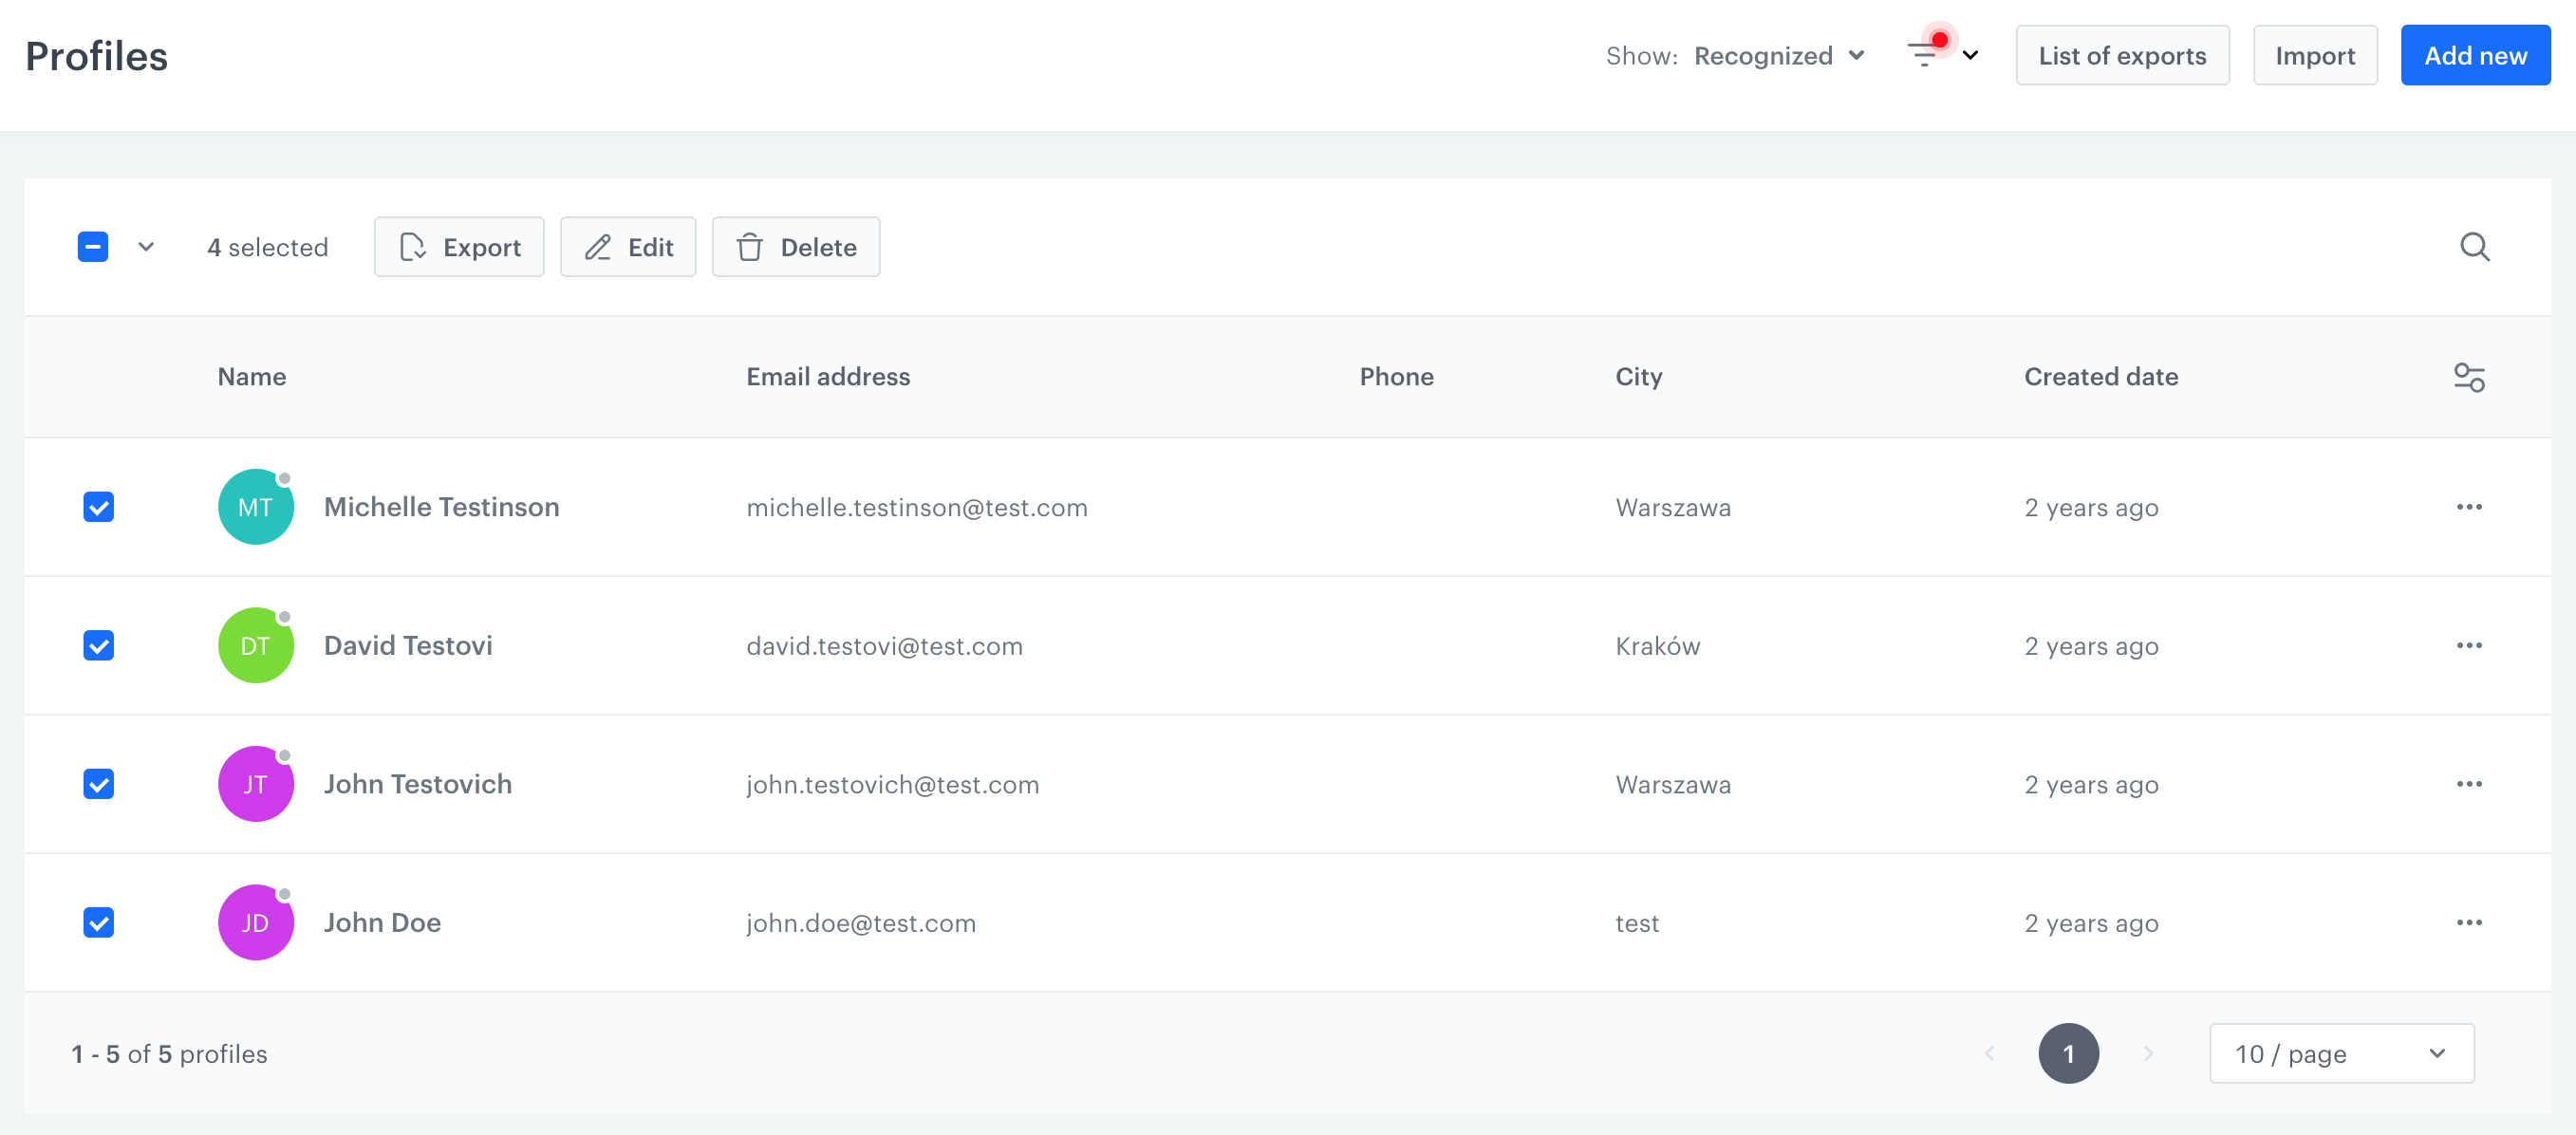
- Go to
- Select profiles on the list by ticking the checkboxes on the left.
- Click the Export button.
- On the pop-up:
- Enter the name of the export.
- Select the attributes to be included in the exported file.
- Confirm by clicking Apply.
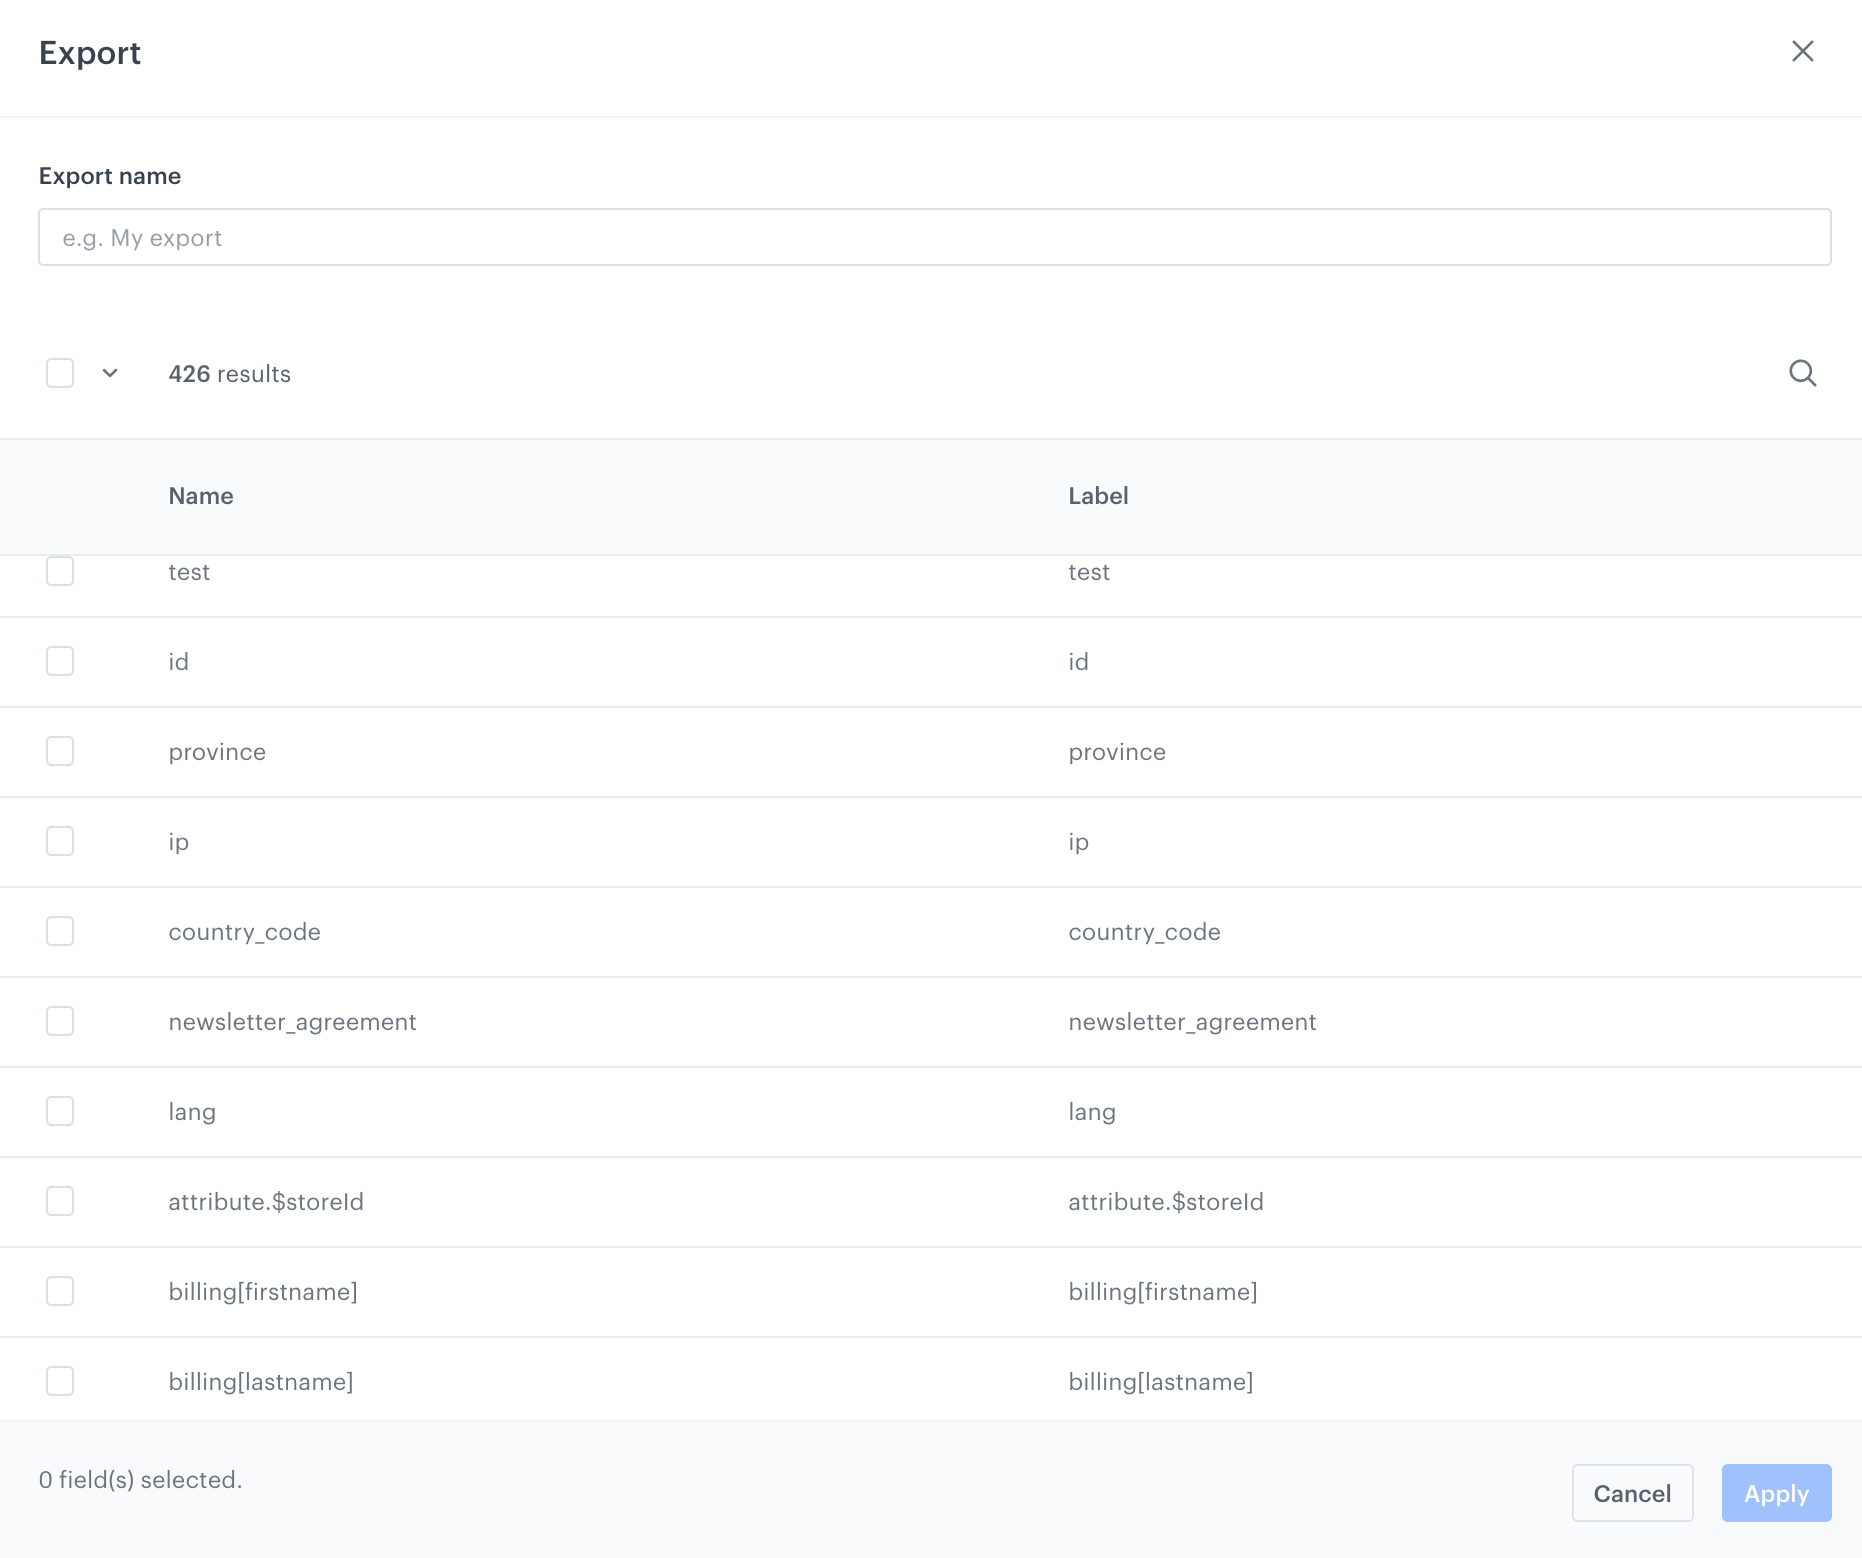
Export form
Export list
Example: Exporting customers who subscribed to a newsletter
To get the CSV file with a group of customers who subscribed to a newsletter in the defined period:
- Go to
- At the top of the page, click
- Click Choose filter.
- From the list, select the
newsletter.subscribeevent.
Important: In your workspace, the name of event that signifies newsletter subscription can be different. - From the calendar, select the time period.
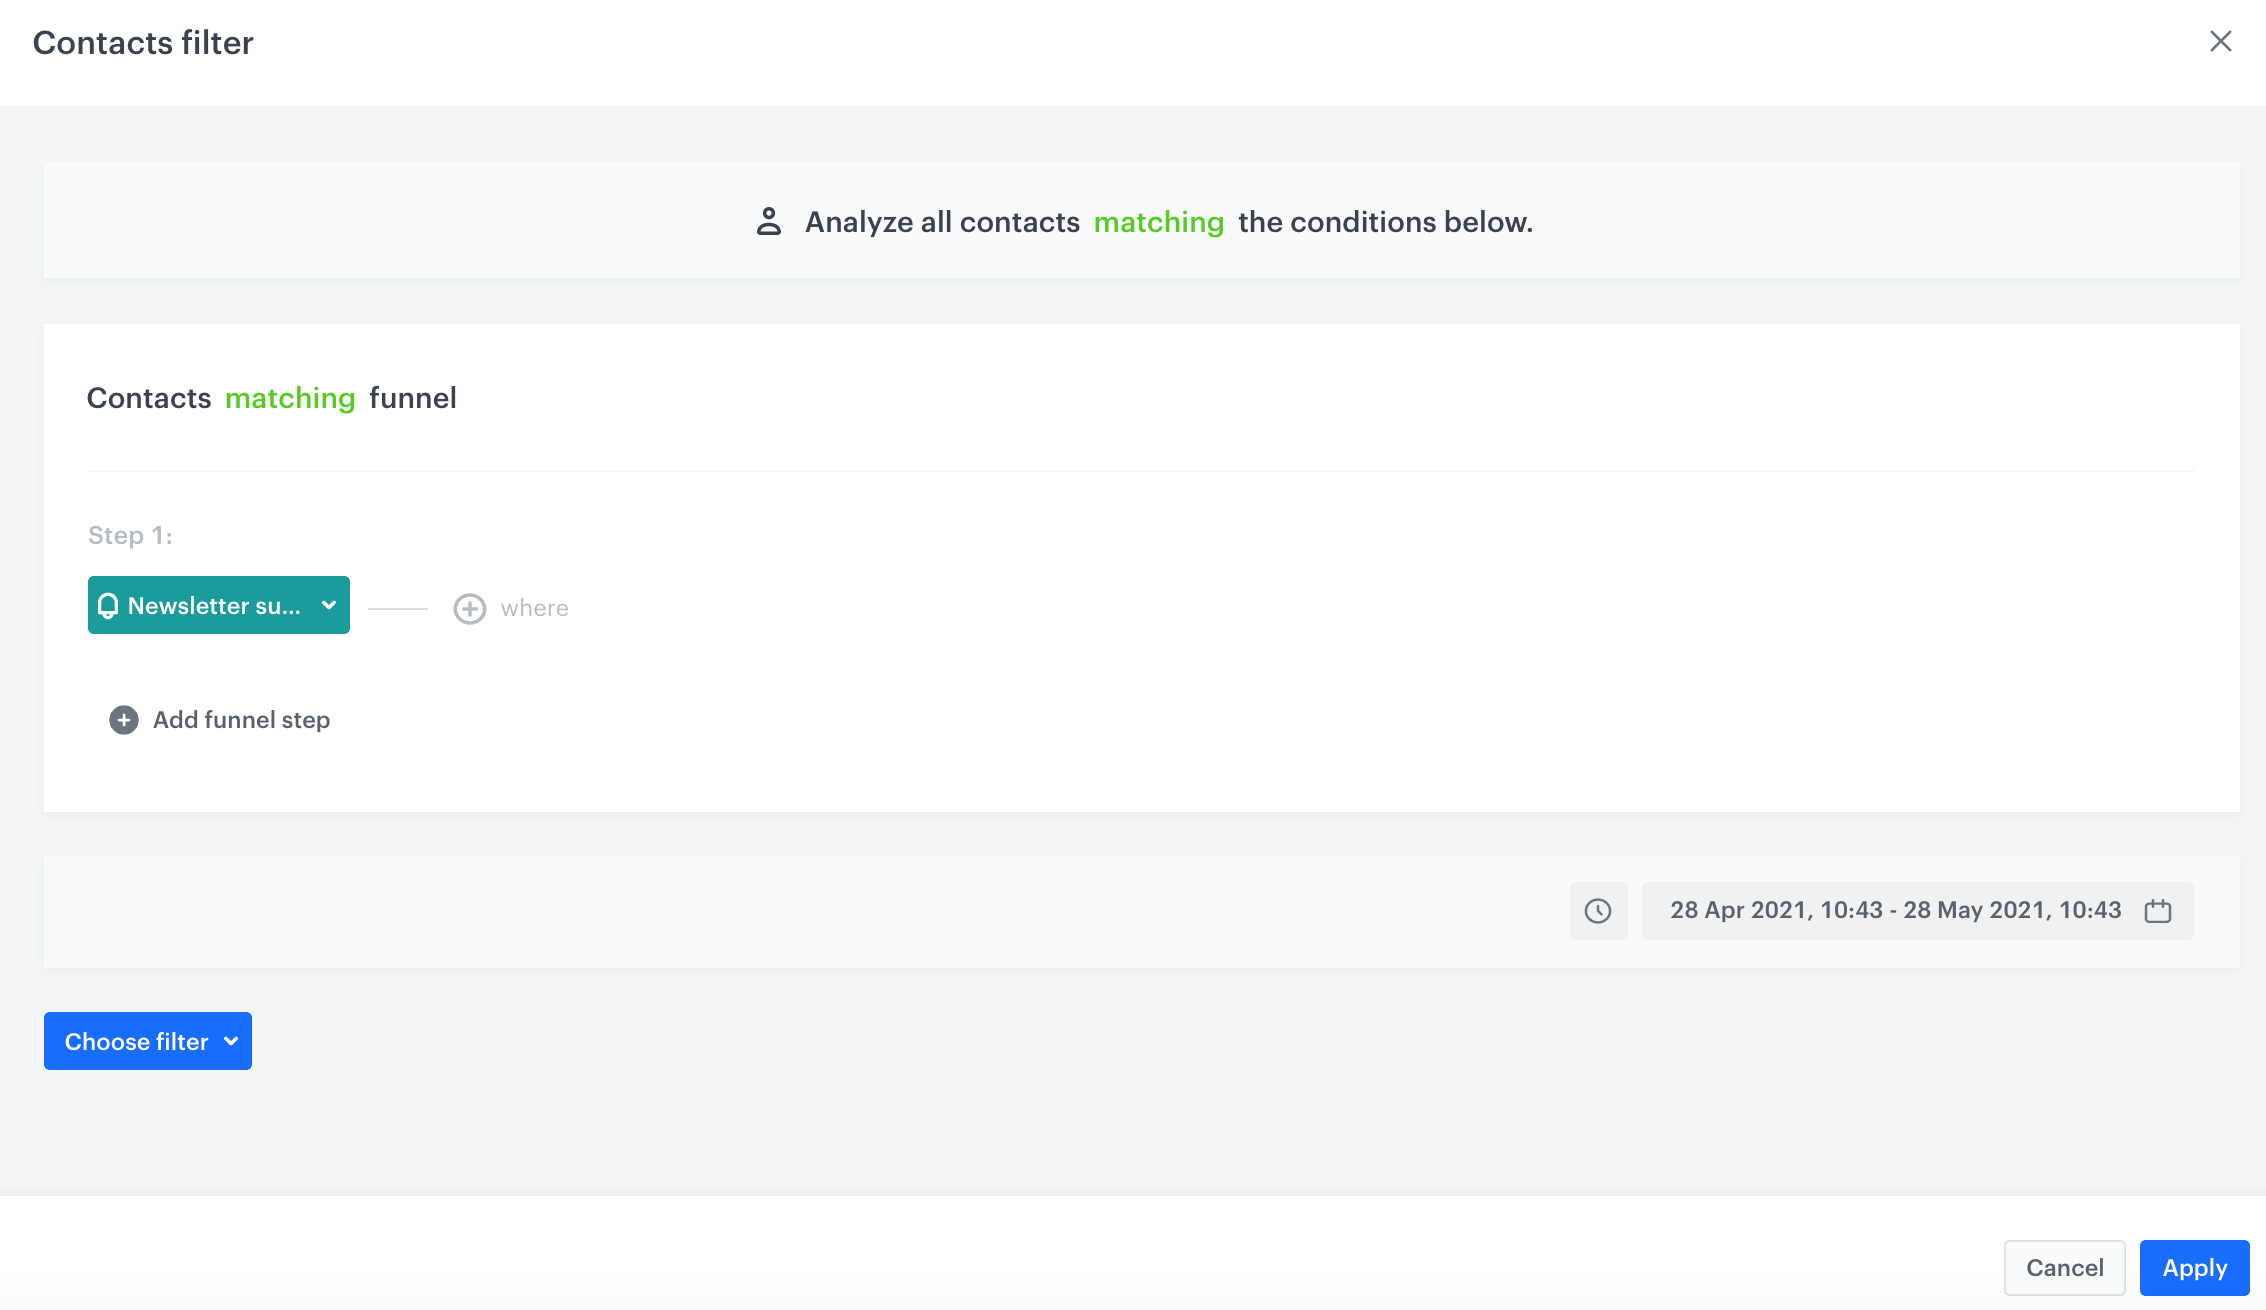
Conditions of the segmentation - Confirm by clicking Apply.
- Select all filtered customers.

Conditions of the segmentation - Click Export.
- On the Export form, select the attributes you want to include in the CSV.
Export form - Confirm by clicking Apply.
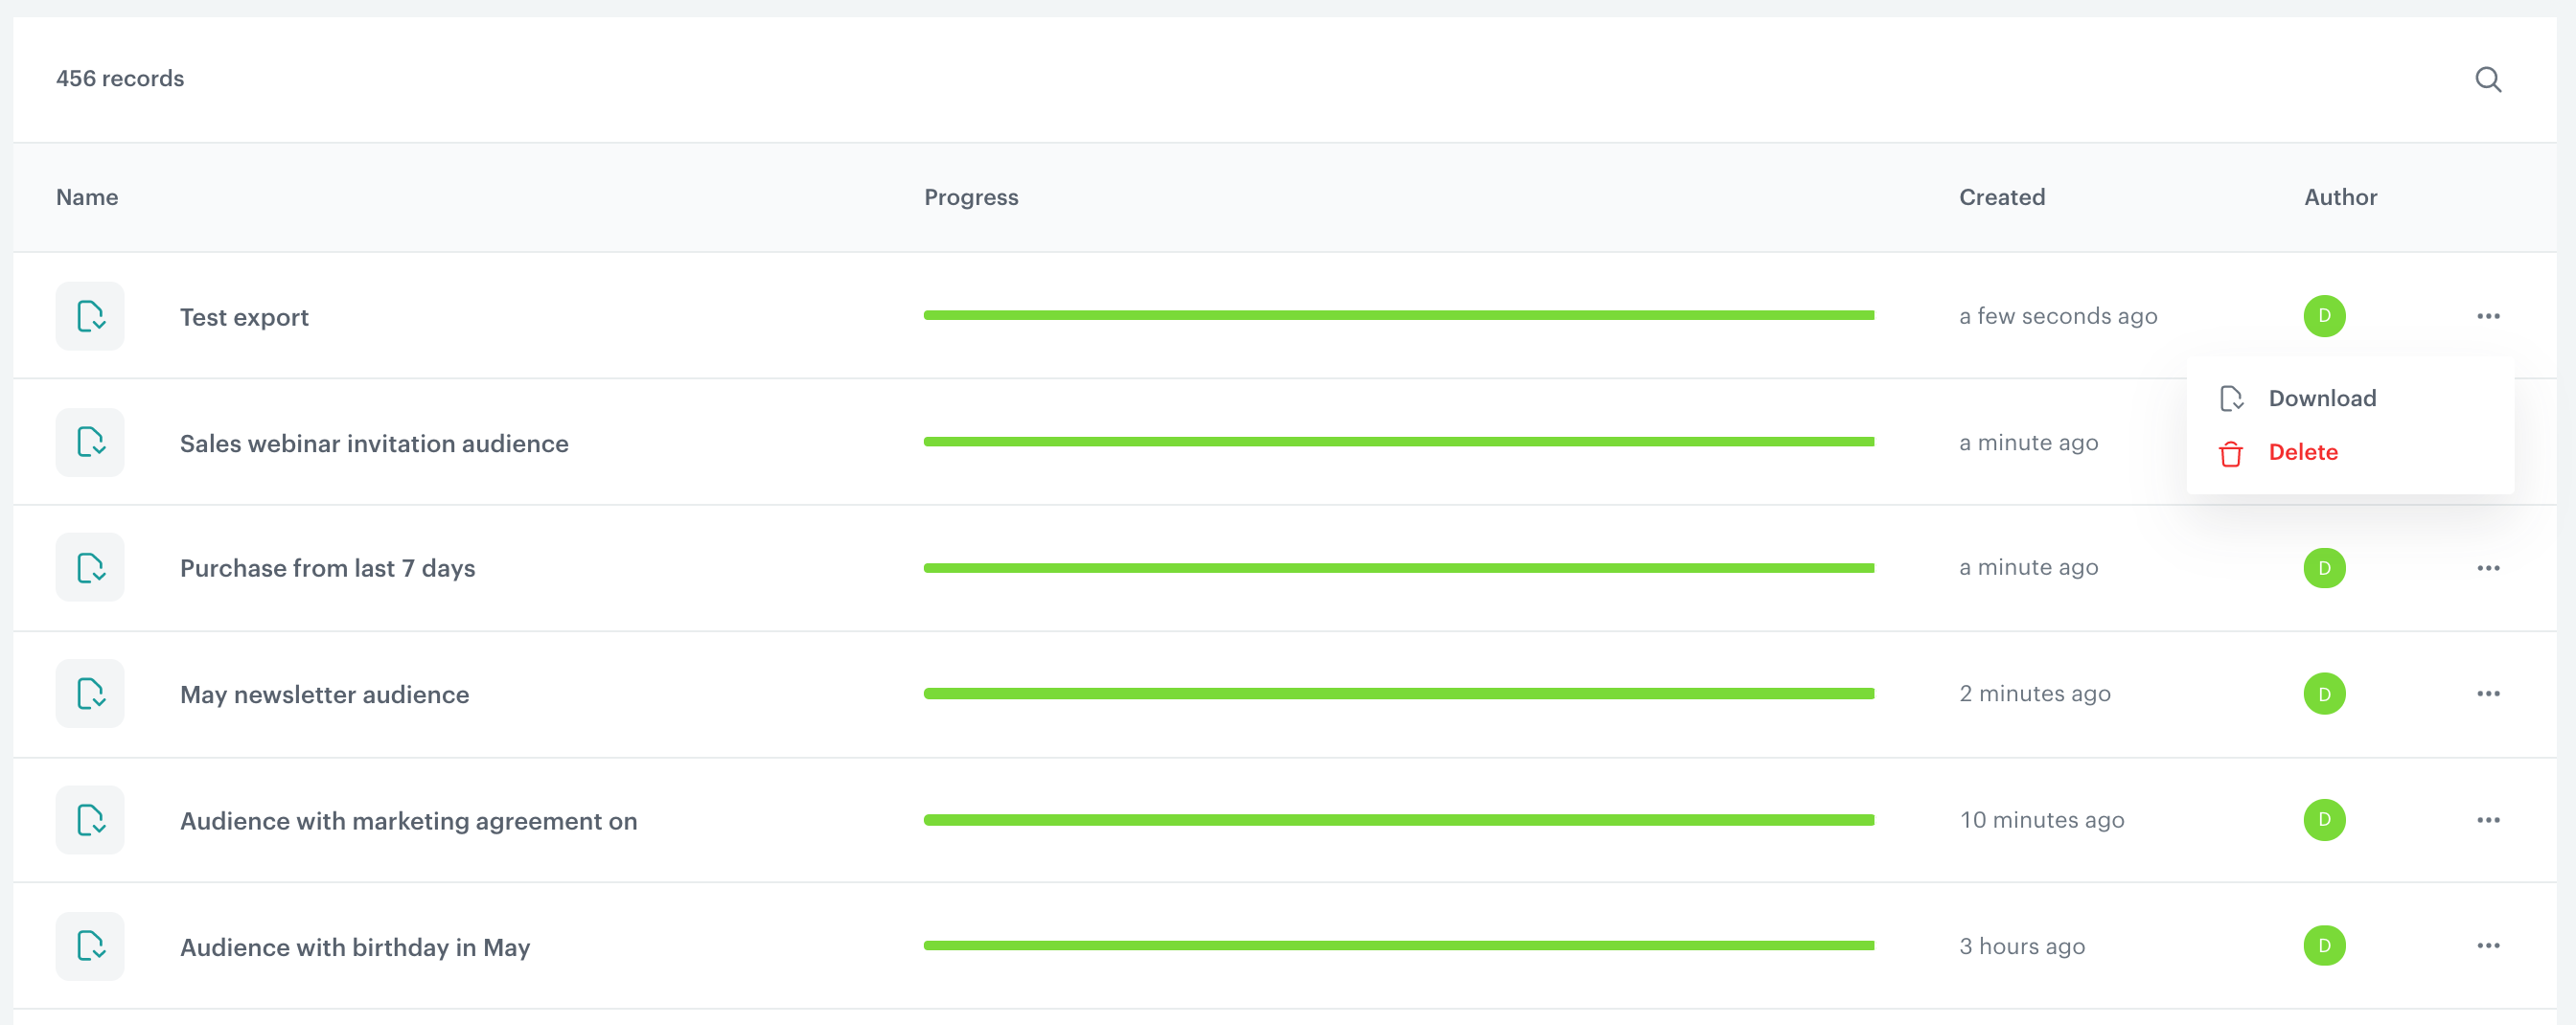
Result: A pop-up appears. - On the pop-up, click Go to Reports.
- Find your export on the list and download it.