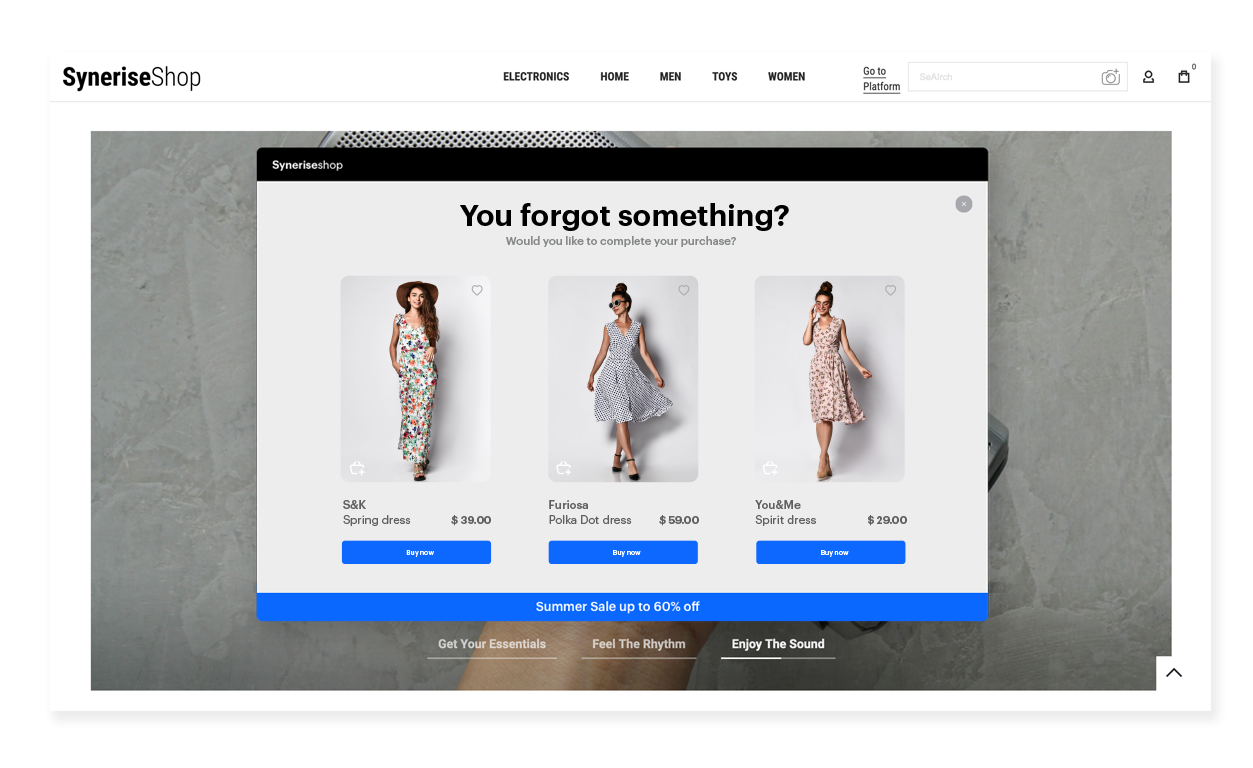
Pop-up with a reminder about abandoned products in the cart
An effective strategy for online businesses to retrieve lost sales is through an abandoned cart pop-up message. Such notifications serve as a reminder to customers about the products they have left in their shopping cart and urges them to finalize their purchase. They often include a personalized message, a list of items left in the cart, and a call-to-action button to encourage the customer to complete their purchase. By using this method, online businesses can potentially increase sales and improve customer engagement while being cost-efficient.
This use case describes the implementation of dynamic content (DC) with abandoned cart notification. With predefined dynamic content web layer templates, you can create such a DC much faster without having to create a template from scratch.
Prerequisites
- Implement a tracking code.
- Implement the transaction events using SDK or API.
- Implement the
cart.statusevent, which stores the current status of the basket in the form of an event on the profile’s card. The event has to be sent to Synerise after every change in the cart status. - Collect product.addToCart event.
Process
In this use case, you will go through the following steps:
- Create an aggregate that returns the products in the cart for every individual customer.
- Create a dynamic content with the contents of the abandoned cart using the predefined template.
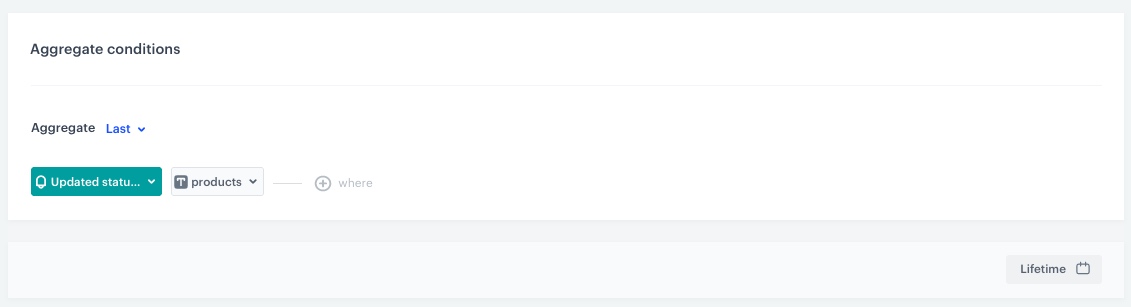
Create an aggregate
In this step, create an aggregate that returns the list of products in a cart. The result of the aggregate will be used to display products in your dynamic content.
- Go to
 Analytics > Aggregates > New aggregate.
 - Enter the name of the aggregate.
- As the type of the aggregate, select Last.
- From the Choose event dropdown list, select the
cart.statusevent. - As the event parameter, select products.
- Set the period from which the aggregate will analyze the results to Lifetime.
- Save the aggregate.
Create a dynamic content
Create a dynamic content campaign with abandoned cart items using a predefined web dynamic content layer template. This dynamic content will be displayed as a pop-up on your site for customers who haven’t made a transaction within an hour from adding the product to cart.
- Go to
 Communication > Dynamic Content > Create new.
 - Enter the name of the content.
- Choose Web layer type.
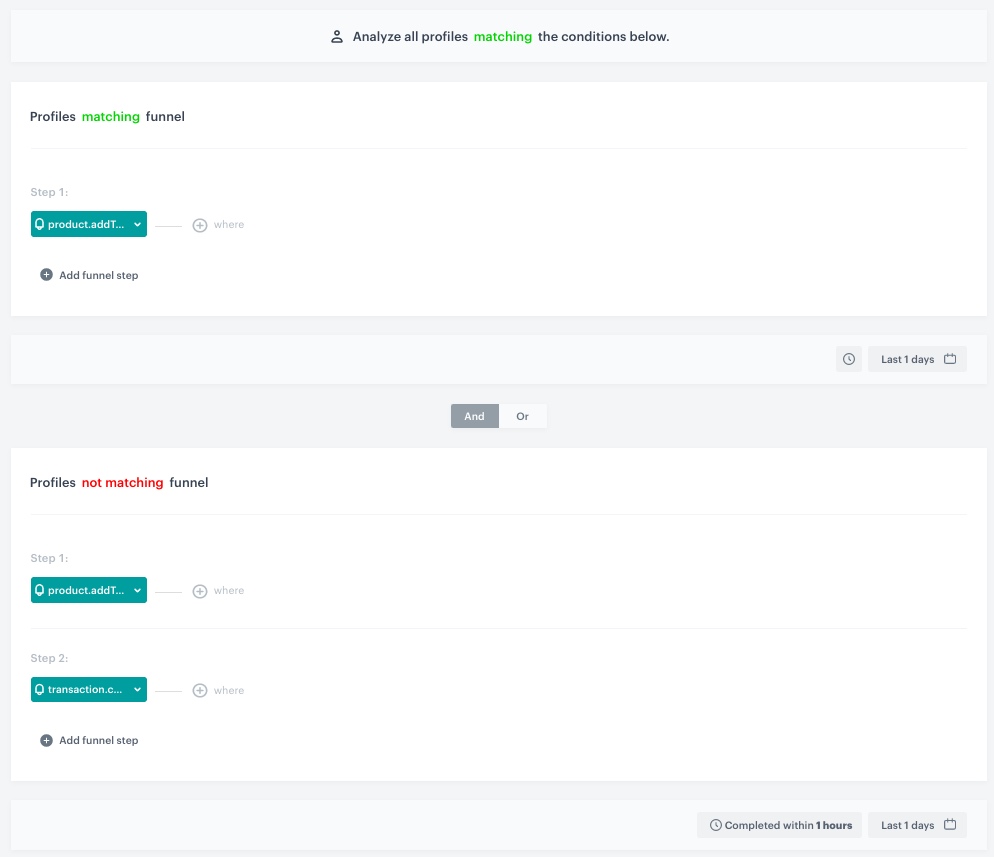
Define Audience
-
In the Audience section, select New Audience and click Define conditions.
- From the Choose filter dropdown list, select the
product.addToCartevent. - Click the calendar in the right bottom of the page.
- In the Relative date range section, define the analyzed period. In this case, choose Today.
- Click Apply.
- Click Choose filter, from the dropdown list, select the
product.addToCartevent. - Click add funnel step.
- From the Choose event dropdown list, select the
transaction.chargeevent. - Change matching to not matching.
- Click the calendar in the right bottom of the page.
- In the Relative date range section, define the analyzed period. In this case, choose Today.
- Click Apply.
- Click the clock next to the calendar.
- Type
1and from the dropdown list, select Hours. - Click Apply.
- Type
Audience configuration - From the Choose filter dropdown list, select the
-
To save the audience, click Apply.
Define content
-
In the Content section, click Create Message.
-
From the list of template folders, select a folder with the predefined Web layer templates.
Result: You are redirected to the list of predefined templates.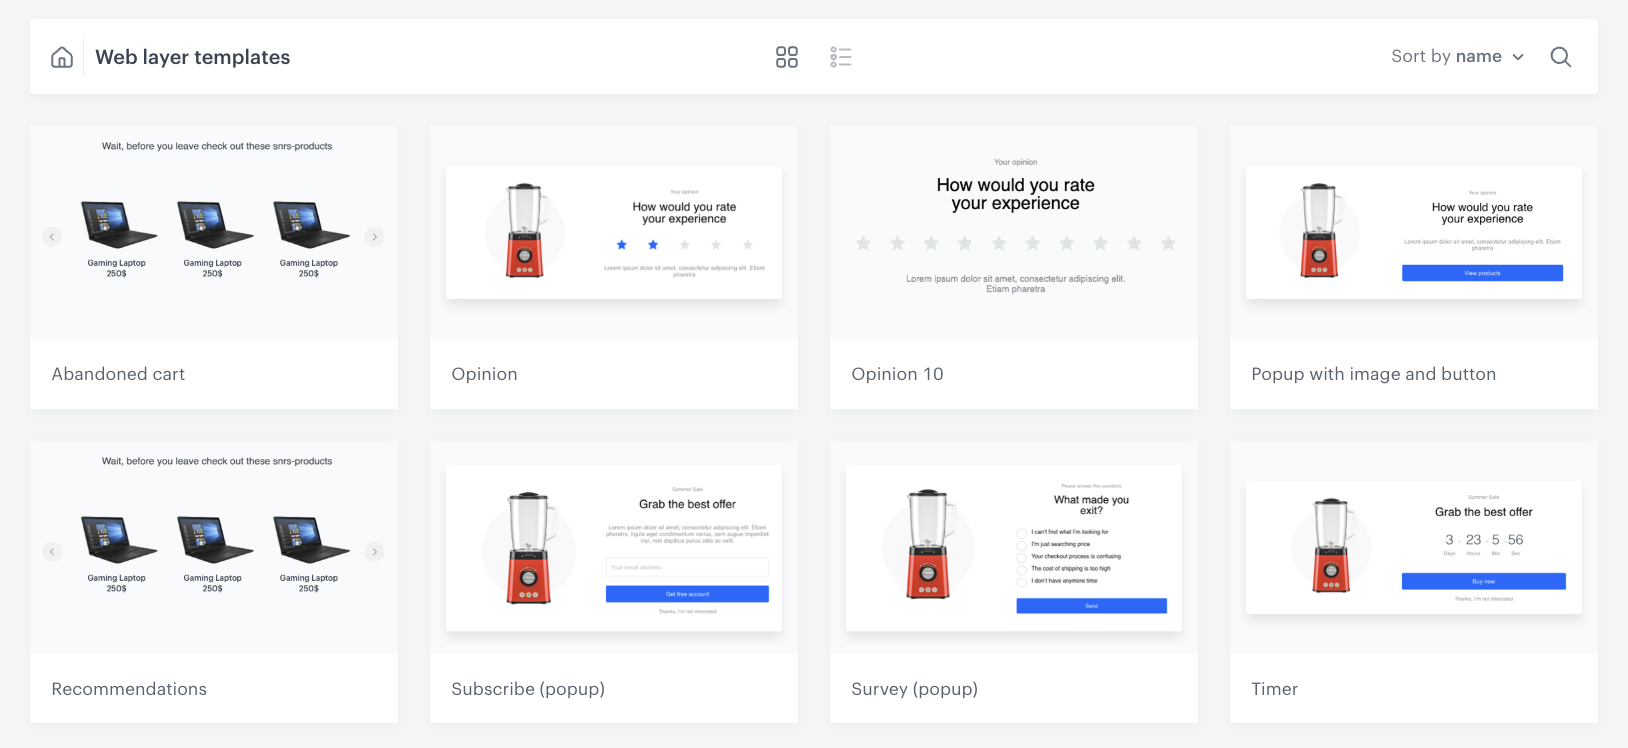
Web layer templates folder -
Select the Abandoned cart template.
Result: You are redirected to the template builder.Note: You can edit the template in two ways, by editing the code of the template (add inserts, add variables and/or by filling out the form in the Config tab. In this use case, we will use the capabilities of the predefined Config tab.
Edit the form in the Config tab
The form in the Config tab is already filled in with default values. You can keep them or change them to fit your business needs.
-
From the Aggregate with products left in the cart dropdown list, select the ID of the aggregate you created in the previous step. You can find it by typing its name or ID in the search box.
-
In the Header text field, define the header you want to display in the pop-up message.
-
In the Currency field, specify the currency in which you want to display the prices of the items.
-
In the Bottom text field, define the copy you want to appear on the bottom of the page.
-
In the Font field, define the font of all text displayed in the dynamic content.
-
Define the colors in the Bottom bar background and Bottom bar text color.
-
Choose the most suitable carousel scrolling method for you by enabling one or all toggles the same time:
- Carousel autoplay: activation of this toggle allows automatic scrolling of items in the carousel;
- Carousel loop: activation of this toggle allows users to navigate to the first article in the carousel by clicking the arrow after the last article displayed in the carousel;
- Enabling these two options at the same time will combine these functionalities. In this case, the recommendation carousel will scroll automatically and return to the first item automatically after displaying the last one.
- If you don’t activate any of the toggles, users will have to scroll through the carousel on their own, and when they get to the last item, it won’t automatically redirect them to the beginning of the carousel
-
In the following fields, define the item amount that you would like to display in small, medium, large and extra large screens.
-
After you make changes to the template, you can check the preview.
- Click the Preview button on the upper left side.
- Enter the ID of a customer.
Important: Select a customer who has the
product.addToCartevent in their activity list in the Profile module - Click Apply.
Important: If you are using custom attributes in your product feed, you need to replace the names of the standard attributes used in the template code with the names of the attributes used in your feed. -
If the template is ready, in the upper right corner, click Save this template > Save as.
-
On the popup:
- In the Template name field, enter the name of the template.
- From the Template folder dropdown list, select the folder where the template will be saved.
- Confirm by clicking Apply.
-
To continue the process of configuring the dynamic content campaign, click Next.
-
To save your content changes, click Apply.
Define schedule and display settings
- In the Schedule section, click Define and set the time when the message will be active.
- In the Display Settings section, click Define.
- Specify circumstances for dynamic content to be displayed. Optionally, you can also define the Advanced options. In our case, we will define the frequency of dynamic content to be displayed to Once per day. You can also define the type of device you want to show your dynamic content.
- Click Apply.
- Optionally, you can define the UTM parameters and additional parameters for your dynamic content campaign.
- Click Activate.
Check the use case set up on the Synerise Demo workspace
You can check the the configuration of each step from this use case in our Synerise Demo workspace:
If you don’t have access to the Synerise Demo workspace, please leave your contact details in this form, and our representative will contact you shortly.