
Rewarding customers in loyalty program for custom activities
When building a loyalty program, you usually want improve customer engagement and experience, increase revenue and sales, and increase customer lifetime value. To achieve these goals, you need tools that make the whole process simple to build and attractive to the customer, so they want to feel as a part of your company. Synerise has your back. We ensure you have the best experience building loyalty scenarios, including the most flexible way to calculate and charge loyalty points.
A flexible approach to collecting loyalty points allows them to be earned through interaction in the mobile app, website, and by interaction with external tools. If any machine, tool, or device can send us a custom event, we can assign points in the loyalty program without having to create advanced integrations. As an example, we consider the bottle machines of one of our clients. The company created this solution for customers to encourage them to use green solutions that help protect the environment.
In this use case, we describe the process of adding points in the loyalty program for returning used bottles to the bottle machine. The bottle machine sends a custom event to Synerise, informing about the bottles’ return, the number of bottles, and their description. Based on this information, Synerise assigns loyalty points for the activity to customers who have previously scanned their barcode from the app. All the collected parameters are used in the push notification sent to the customer when the bottles are returned to the bottle machine.
Prerequisites
-
Integrate Synerise mobile SDK in your mobile application.
-
Implement mobile pushes in your mobile application: iOS, Android.
-
Use custom events to save data to customers’ profiles when they perform an activity.
In this particular use case:- The bottle machine reads the barcodes on the bottles.
- A custom
client.returnBottlesevent is sent from the machine to Synerise. - The custom event’s parameters include:
- the number of bottles (
productsCount) - the customer’s identifier (
custom_identify)Note: The event name and parameters are examples. You can define your own names and parameters depending on your business needs.
- the number of bottles (
-
Create a mobile push template that will be used later in a workflow. It should inform customers who use mobile app about points added for returned bottles. To do it, use
{{event.params.points}}in code of your message.
Security configuration
Before you start working with this module, if you are a Synerise customer or partner, consider reading the section about denylisting events. This natively accessible configuration will allow you to manage the restrictions in points management that may help you prevent fraud.
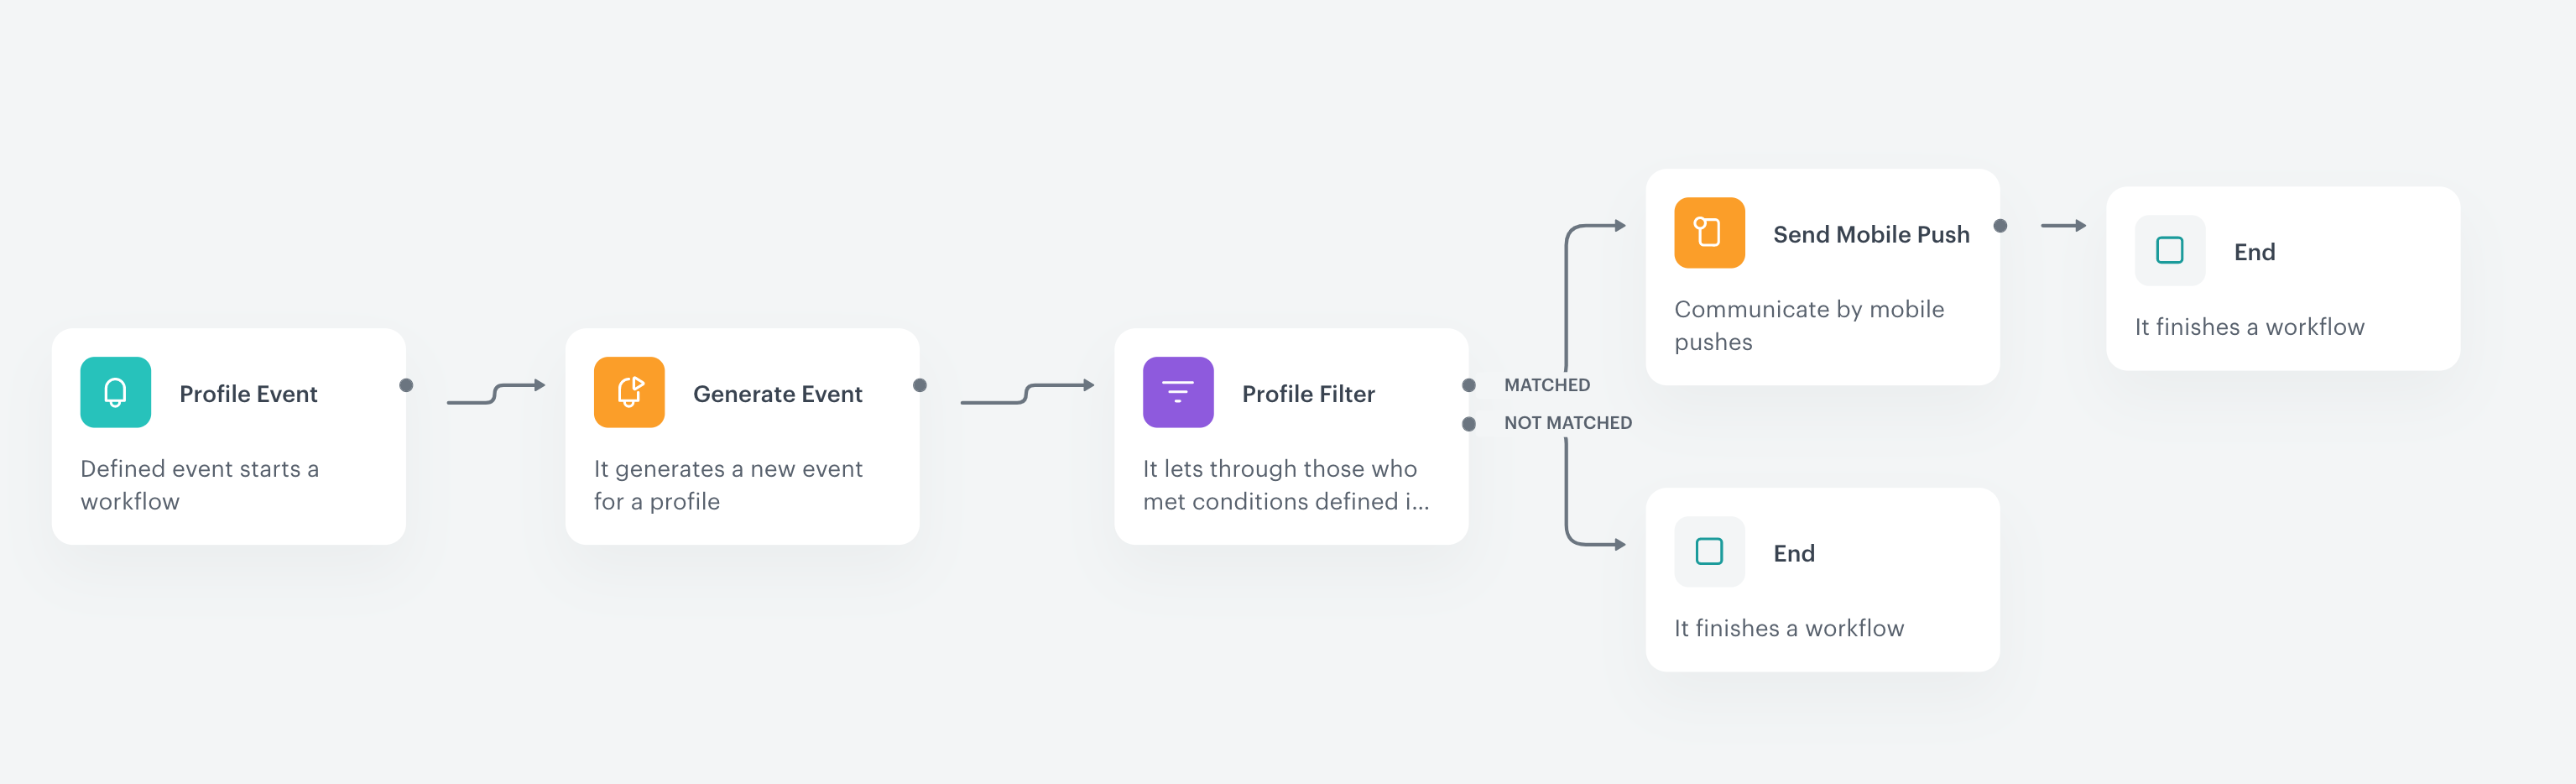
Create a workflow
This use case is based on a workflow triggered by the client.returnBottles event. The workflow generates an event with the number of points rewarded to the specific customer for this activity and sends them a push notification with this information.
- Go to
 Automation > Workflows > New workflow.
 - Enter the name of the workflow.
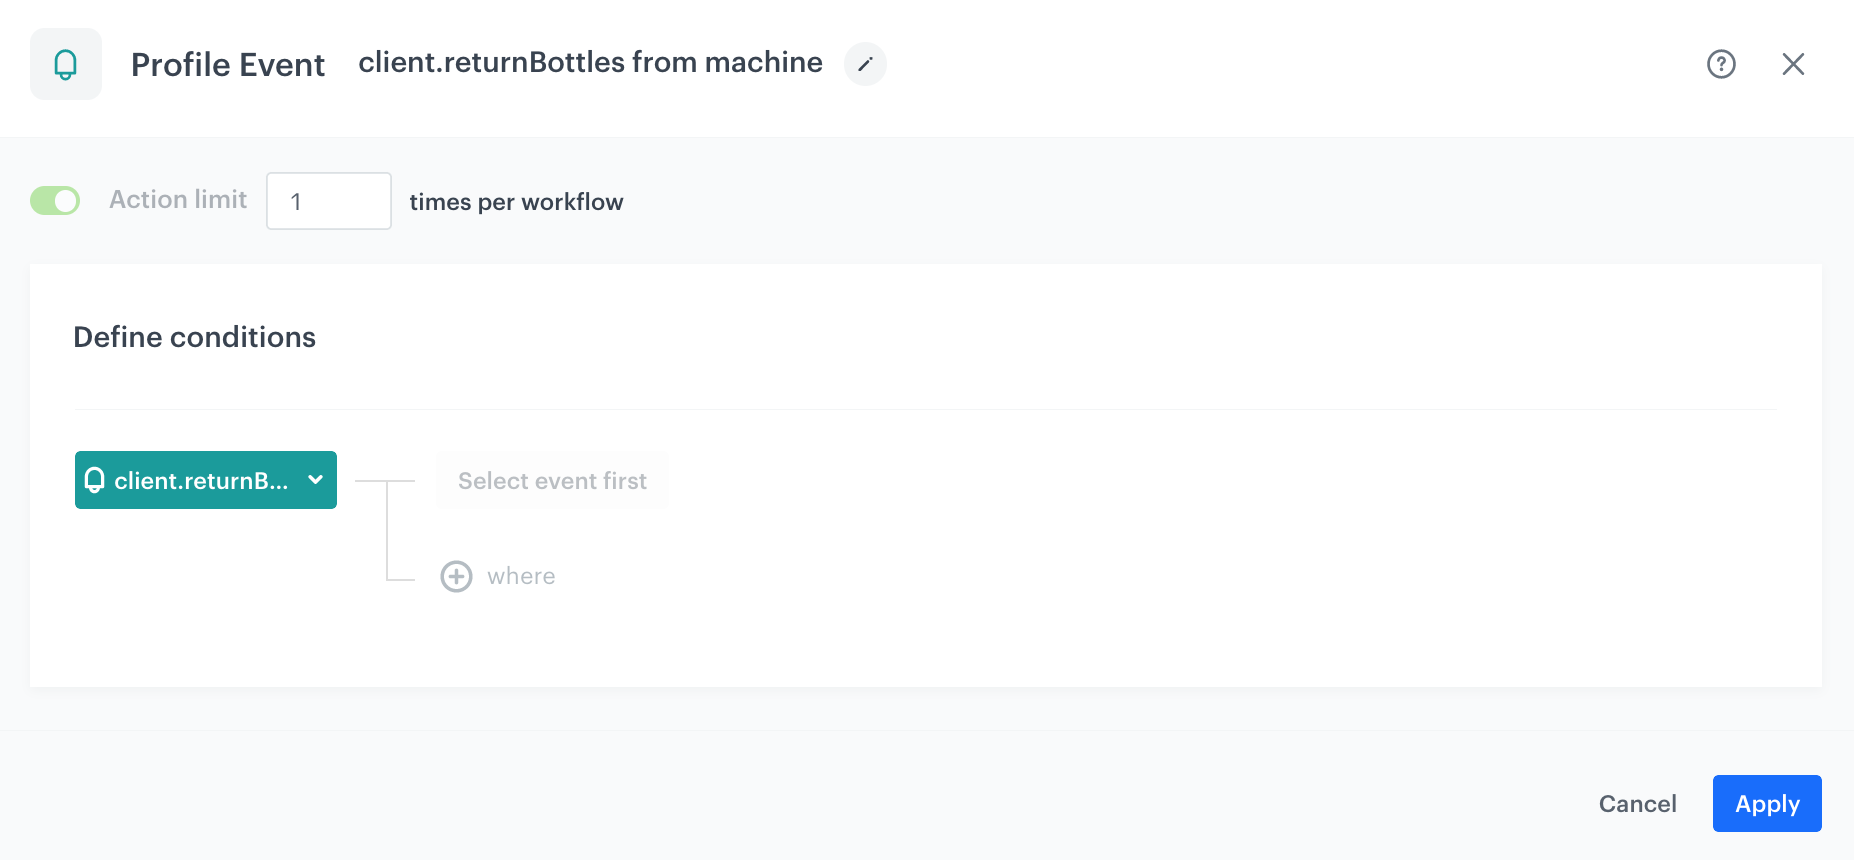
Define the Profile Event trigger node
At this stage, you should configure the conditions that trigger the workflow. Use the client.returnBottles event as a trigger.
- As the first node of the workflow, add Profile Event.
- From the Choose event dropdown menu, choose the
client.returnBottlesevent. - Confirm by clicking Apply.
Define the Generate Event node
At this stage, an event with information about the number of points added for returning bottles for specific customer will be generated.
-
As the second node of the workflow, add Generate Event.
-
In the Event name, enter the name of the event that will be generated on the customer’s profile. In this case, it is
points.upcharge. This event cause counting the points for customers.Important: While naming your custom event, follow thecontext.actionpattern used for the default events in the application, such aspage.visit,product.buy, and so on. -
In the Label add the text which will be visible in the header of the event details on a profile card.
-
In the Body section, define the parameters of this event, and click Apply.
Example content of Body section:
{
  "description": "Points for returning bottles",
  "displayHeader": "Eco - second life of your bottle",
  "points": "{{event.params.productsCount|multiply(10)|int}}"
}
In the jinjava code presented above, points is the number of points added to the profile. This number is counted based on the productsCount from the client.returnBottles event, which stores the number of returned bottles. In our use case, the number of points is the number of bottles multiplied by 10.
Define the Profile Filter node
As the next step, you should add the Profile Filter node, which checks if the customer agreed to receive notifications about the points status.
-
Add Profile Filter node.
-
In the settings of the node choose Profiles > Attributes and select the attribute that is assigned to customers who have agreed to receive push notifications. In our case it is
receive_push_messages. -
As the Operator, choose Boolean - Is true.
-
Click Apply.
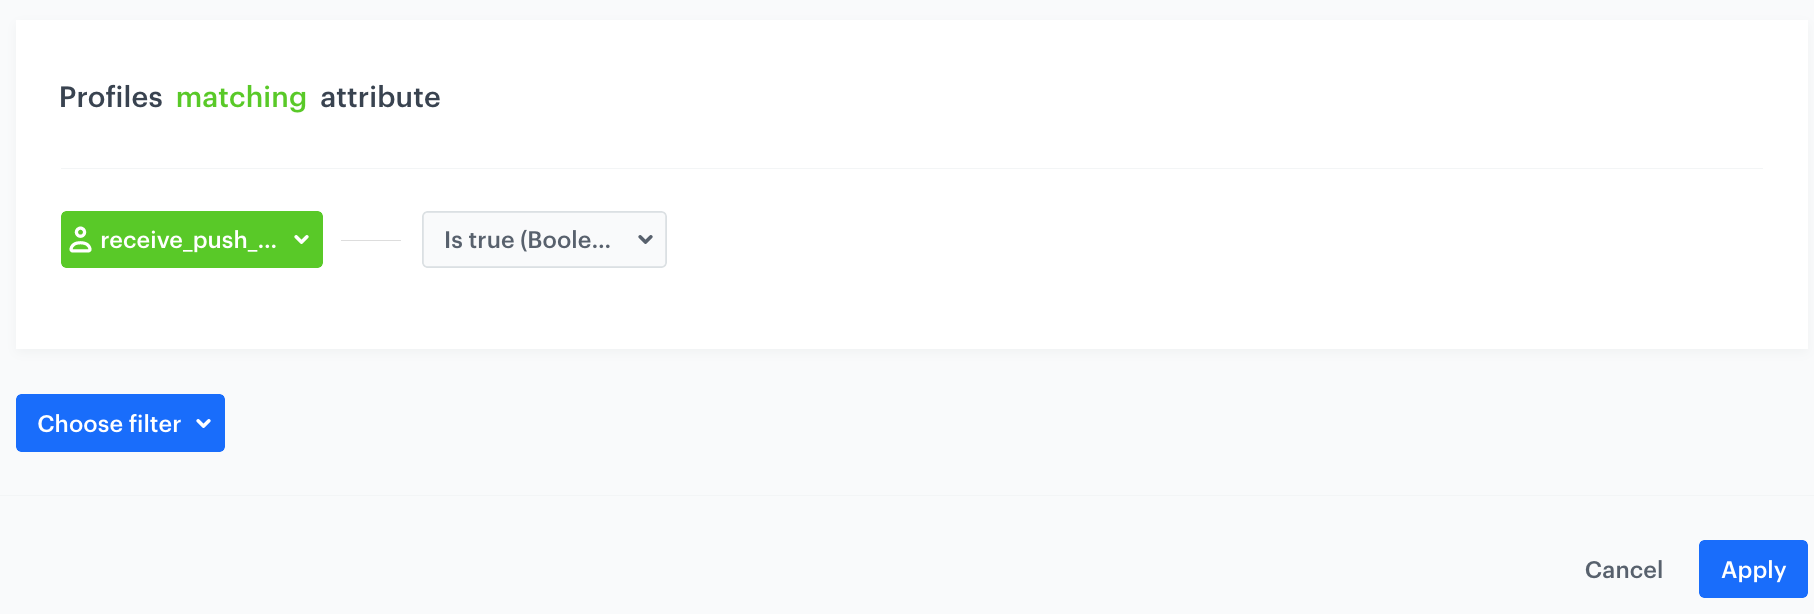
The Profile Filter node configuration
Configure the Send Mobile Push node
- To the Matched path, add a Send Mobile Push node.
- In the settings of the node, choose the Template type of the mobile push and add the template you have prepared in the prerequisites.
- Click Apply.
Prepare the final settings
- To the Not matched path and after Send Mobile Push, add End nodes.
- Optionally, define capping.
- Optionally, add titles to each node so the workflow will be more understandable to your colleagues.
- Activate the workflow by clicking Save & Run.
Check the use case set up on the Synerise Demo workspace
You can also check the workflow configuration directly in Synerise Demo workspace.
If you don’t have access to the Synerise Demo workspace, please leave your contact details in this form, and our representative will contact you shortly.