Adform integration
Adform integration empowers businesses to extend their reach and connect with specific segments and similar audiences, capitalizing on Adform’s extensive partner network. By seamlessly sending user segments from Synerise to Adform, you can reach not only users within your predefined segments but also individuals who share striking similarities with them. This can be a valuable tool for increasing advertising effectiveness, brand awareness, driving traffic to your website and boosting sales.
In this use case, you will create dynamic content that assigns the adFormID attribute to customers and a workflow that sends segments of customers to Adform.
Prerequisites
- Have an Adform account.
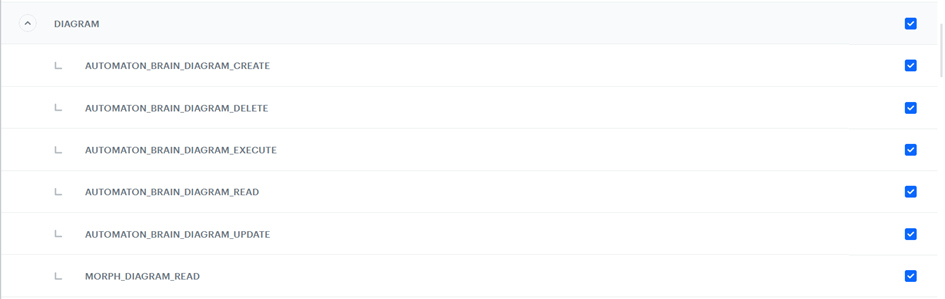
- Create API keys according to this instruction, and add appropriate permissions. Screenshot below shows all the required permissions:
Process
In this use case, you will go through the following steps:
- Match ID Cookie on Web, create Dynamic Content assigning AdformID value to site customers.
- Match ID Cookie on Mobile, send a custom event assigning AdformID value to mobile customers.
- Save Adform ID as an attribute.
- Create a workflow to sends a group of customers to Adform.
Match ID Cookie on Web
In this part of the process, you match the Adform ID with your customer’s profile in Synerise.
In the browser, Adform issues an ID in a cookie named uid from the adform.co.uk domain. This cookie is unique within your browser and resets itself in the following cases:
- Clearing cookies in the browser
- Expiration of a cookie (60 days)
- Mechanisms on the website that enforce the right of users to be forgotten (clearing cookies)
document.cookie.Since one customer can use multiple devices, it is necessary to store multiple Adform IDs per a customer in Synerise. The Adform ID is stored in the adFormID attribute, which will take values separated by | (the unique Adform ID collected from the browser or application), for example:
"adFormID": "2122903280729231000|2122903280729231001"
You can prepare a dynamic content with the code that matches the Adform ID with the UUID from Synerise by adding a value to the adFormID attribute. It is important that the value is added, not overwritten.
- Go to
 Communication > Dynamic content > Create new.
 - Enter the name of the dynamic content.
- Choose the Insert Object type.
- As the Audience, you can leave Everyone or specify to whom the attribute should be assigned according to your business needs.
- In the Content section, click Define.
- Leave Simple message as default.
- In CSS selector:
- Select After (in div)
- In the field, enter
.snrs-modal-wrapper
- In the Create your template tab, click Create message.
- Click + New template in the upper rght corner.
- Leave the HTML and CSS tabs blank, and in the JavaScript tab paste the following script:
(function () { function loadScript(src, callback) { let script = document.createElement('script'); script.src = src; script.onload = function () { return callback(window.Adform); }; document.head.append(script); } function checkAdform(instance) { if (!instance || !instance._uid) { console.log('no uid') } else { var oldUid = "{% if 'adFormID' in customer|string %}{{ customer['adFormID'] }}{% else %}brak{% endif %}"; if (oldUid === 'brak' || oldUid.indexOf(instance._uid) === -1) { SR.event.trackCustomEvent('adformid.save', { newId: instance._uid.toString(), }); console.log('adform uid sent -> ' + instance._uid); } } } loadScript('https://track.adform.net/serving/cookie/?adfaction=getjs;adfcookname=uid', checkAdform) })(); - To continue the process of configuring the dynamic content campaign, click Next.
- Click Apply.
- In the Schedule section, click Define.
- As the Display time choose Display immediately.
- Click Apply.
- In the Display Settings section, click Define.
- Specify circumstances for dynamic content to be displayed and Advanced options, according to your business needs.
- Click Apply.
- Optionally, you can define the UTM parameters and additional parameters for your dynamic content campaign.
- Click Activate.
Result: adformid.save event is generated, it will contain the adFormID parameter with the ID value.
Match ID Cookie on Mobile
The cookie matching is based on the Adveritising ID, which is a fixed ID for a given device issued by Google.
Currently, Advertising ID is not collected through our SDK. You must implement such tracking in the application. You can do this by sending a custom event.
{
  "label": "custom.event",
  "action": "adformid.save,
  "client": {
  "uuid": "xxx", // uuid from mobile app
  },
  "params": {
    "newId": "ADVERTISEMENT_ID"
    "source": "MOBILE_APP"
    }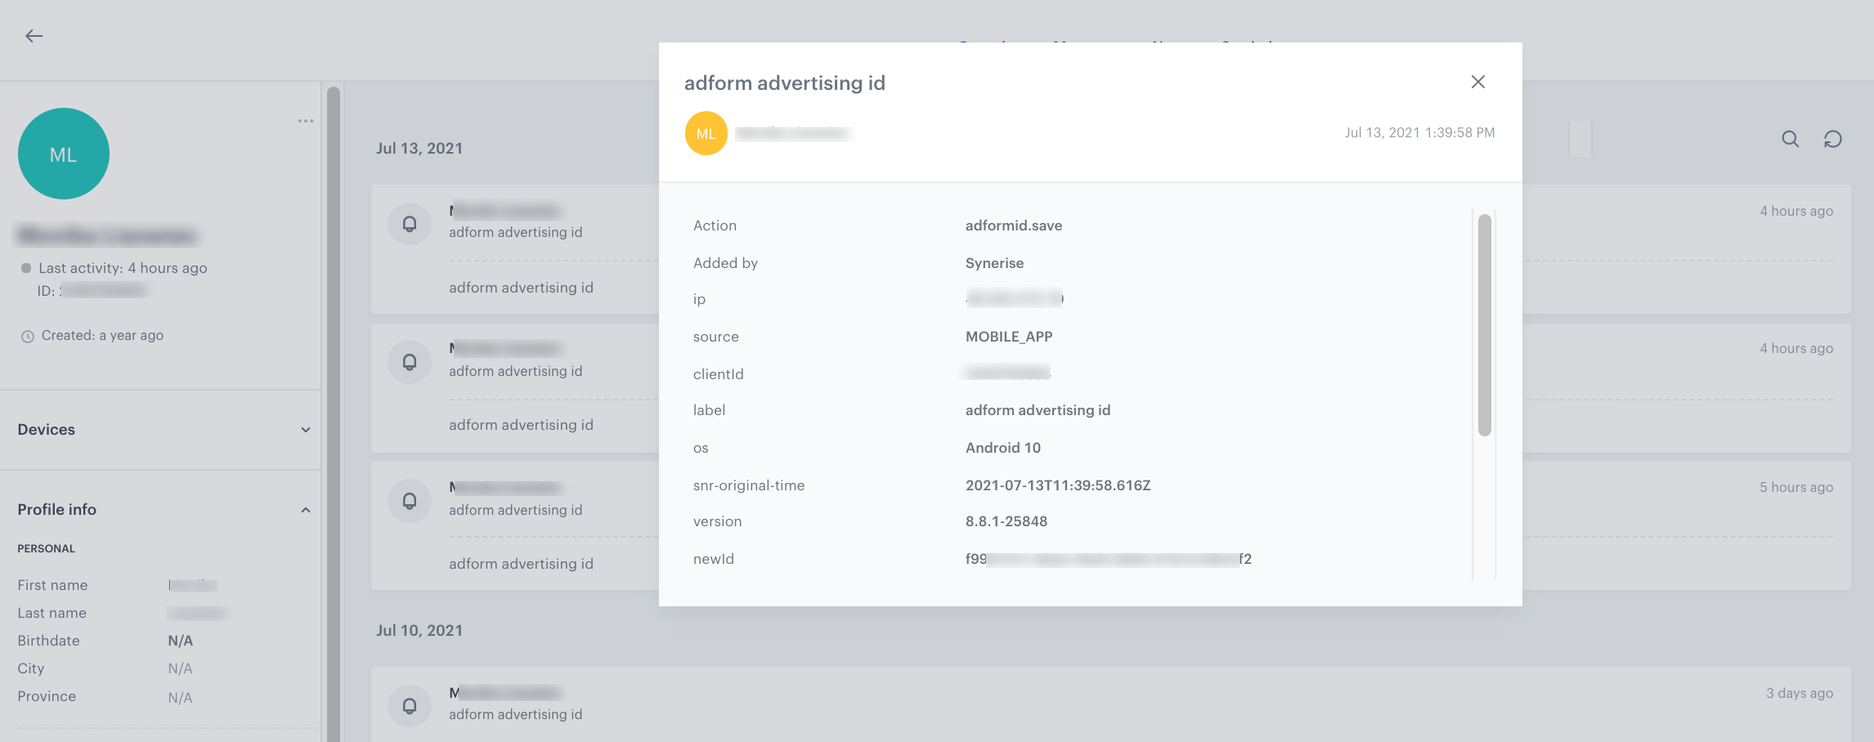
}The custom event available on the activity list on the customer’s profile:
Save Adform ID as an attribute
In this part of the process you will create a workflow that is triggered by the adformid.save event and adds the ID it contains to the current value of the client attribute.
- Go to
 Automation > Workflows > New workflow.
 - Enter the name of the workflow.
Define the Profile Event trigger node
- As the first node of the workflow, add Profile Event. In the configuration of the node:
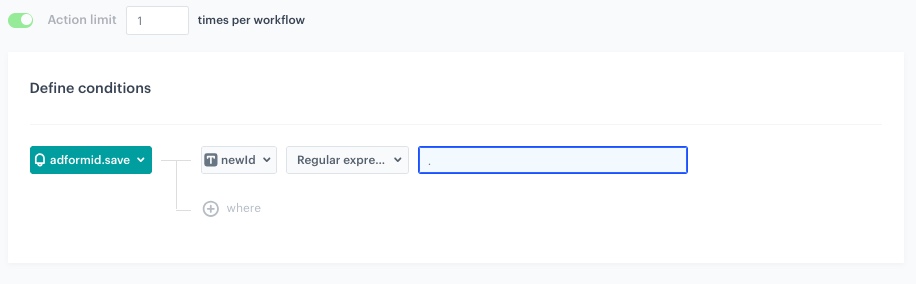
- From the Choose event dropdown menu, choose the adformid.save event.
- Click the + where button, from the Choose parameter dropdown menu, choose newId.
- From the Choose operator dropdown, choose Regular expression.
- In the next field, type the
., which means that all values are considered (except fornull).
- Click Apply.
Define the Update Profile node
-
Add the Update Profile node. In the configuration of the node:
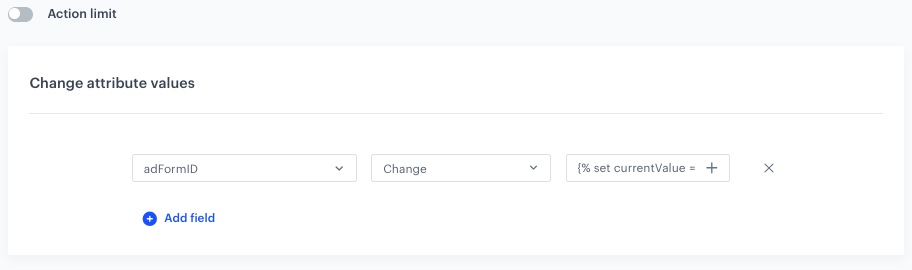
- From the first dropdown list, select adFormID.
- From the next dropdown list, select Change.
- In the field enter the following formula:
{% set currentValue = customer['adFormID'] %}{% set newVal = event.params.newId|string %}{% set currentValues = currentValue|split('|') %}{% do currentValues.append(newVal) %}{% set finalValues = [] %}{% if currentValue|length > 255 %}{% for x in currentValues %}{% if loop.index0 > 0 %}{% do finalValues.append(x) %}{% endif %}{% endfor %}{% else %}{% if newVal in currentValue %}{% catalog.kill(it) %}{% else %}{% set finalValues = currentValues %}{% endif %}{% endif %}{{ finalValues|join('|') }}
Note:The insert above checks:
- If the customer doesn’t have the
adformIDassigned, the attribute is assigned to them. - If the customer has the
adformIDassigned, the length of the ID is checked. If it exceeds 255 characters, old ID is deleted and new is added. If it doesn’t, new ID is added.
-
Click Apply.
Add the finishing node
-
Add the End node.
-
In the upper right corner, click Save & Run.
Results: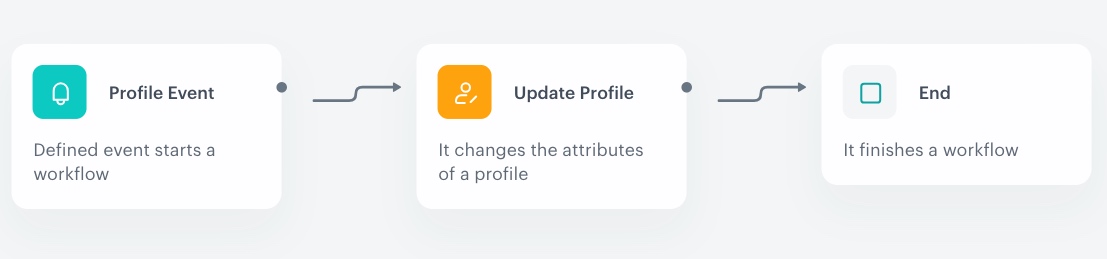
The workflow configuration 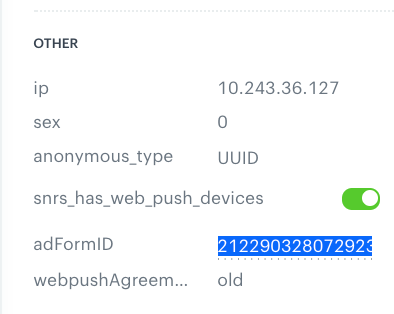
Updated attribute in the customer's profile
Create a workflow to share segmentation
In this part of the process, you will prepare a workflow which sends a group of customers based on the adFormId to Adform. You will define the filters in the Audience node to include customers with assigned adFormId according to your business needs.
- Go to Automation > Workflows > New workflow.
- Enter the name of the workflow.
Define the Audience trigger node
- Start the workflow with the Audience node.
- Click the node to configure it.
- In the Run trigger section, specify whether you want the workflow to run cyclically or on a one-time basis.
- In the Define audience section, choose New audience.
- Click Define conditions.
- From the Choose filter dropdown list, select the adFormId attribute.
- From the Choose operator dropdown, choose Is true.
- Optionally, you can add other filters to define the audience according to your business needs.
- Click Apply
You can optionally add the Profile Filter node as the next step in your workflow. This node allows you to divide your segment into subgroups.
Configure the Outgoing Integration node
You will use the Outgoing Integration node to upload segments from Synerise to Adform.
-
Add Outgoing integration. In the configuration of the node:
- In the upper right corner, choose Custom.
- As the Webhook connection type, choose API key.
- Click Select connection, select the API key you created as a part of prerequisites.
- If the connection you want to use is in the list, select it and proceed. If the connection list is empty or you don’t see a connection, follow this instruction.
-
Name the webhook.
-
Select the POST method.
-
In the Endpoint field, enter the endpoint to which you will send the segment.
Important: To obtain the endpoint, contact us atsynerise.com/support. When contacting, provide: the link to the automation responsible for submitting the segment and the DMP ID, which you can find in your Adform panel. -
Leave the content-type at the default value:
application / json. -
In the body of the request, paste the code below. The OwnerID value must be a combination of your workspace name and the name of the segmentation that it will be exported with to Adform, for example, SyneriseDemo_female where SyneriseDemo is the name of the workspace and female is the name of the segmentation
  {% set ids = customer['adFormID']|split('|') %}
[
{% for x in ids %}
{"adformID2": "{{ x }}" ,
"OwnerID": "SyneriseDemo_female"
}
{% if loop.index != ids | count %},{% endif %}
{% endfor %}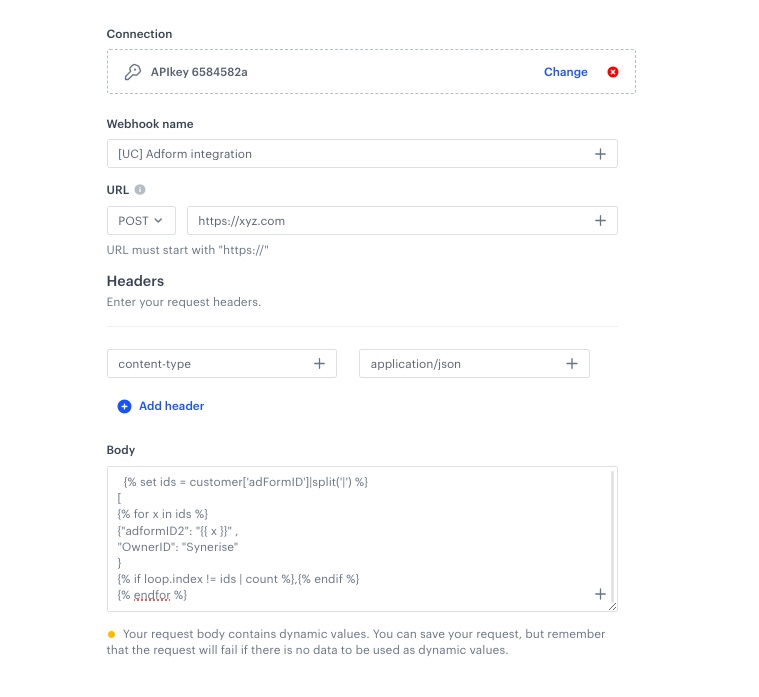
The configuration of the Outgoing Integration node -
Click Apply.
Add the finishing node
-
Add the End node.
-
In the upper right corner, click Save & Run.
Result: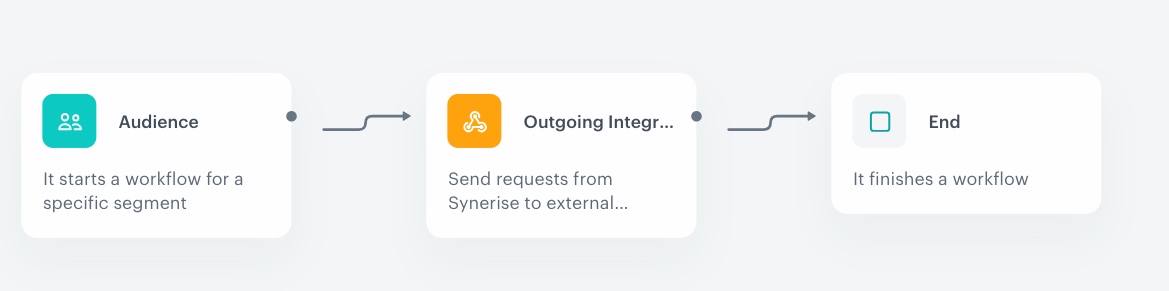
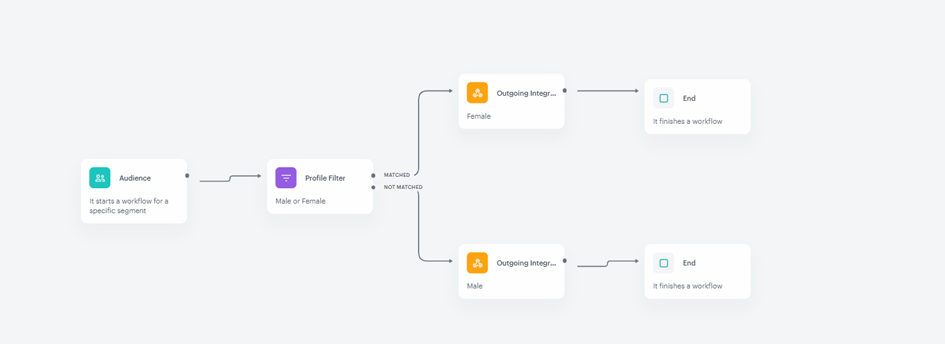
The workflow configuration
Check the use case set up on the Synerise Demo workspace
You can check the configuration of each step from this use case in our Synerise Demo workspace:
If you don’t have access to the Synerise Demo workspace, please leave your contact details in this form, and our representative will contact you shortly.