


Google Spreadsheet integration
The Synerise and Google Sheets integration allows easy data export from Synerise to Google Sheets. Using the “Upload Data to Spreadsheet” node, you can add data as rows or columns to the spreadsheet, including various data types (events and analytics). This integration opens up new possibilities for data analysis and informed decision-making.
This use case shows a workflow configuration that sends daily information from Synerise to Google Spreadsheets about the number of transactions made on the current day, enriched with information about the date of sending this data.
Prerequisites
- Check the requirements you must meet to integrate Synerise with Google Spreadsheets.
- Implement transaction events using SDK or API.
Process
- Create a metric that counts the number of transactions.
- Create an expression that returns the current date.
- Create a workflow.
Create a metric
In this part of the process, you will create a metric that counts the number of transactions completed on the current day and will be sent to Google Spreadsheet.
-
Go to
 Analytics > Metrics > New metric.
 -
Enter the name of the metric.
-
As the metric type, select Simple metric.
-
As the type, leave Event.
-
As the aggregator, set Count.
-
As the occurrence type, set All.
-
From the Choose event dropdown list, select
transaction.charge. -
To select a specific time range, click the calendar icon. In our case, it will be Today. Confirm your choice with the Apply button.
-
Click Save.
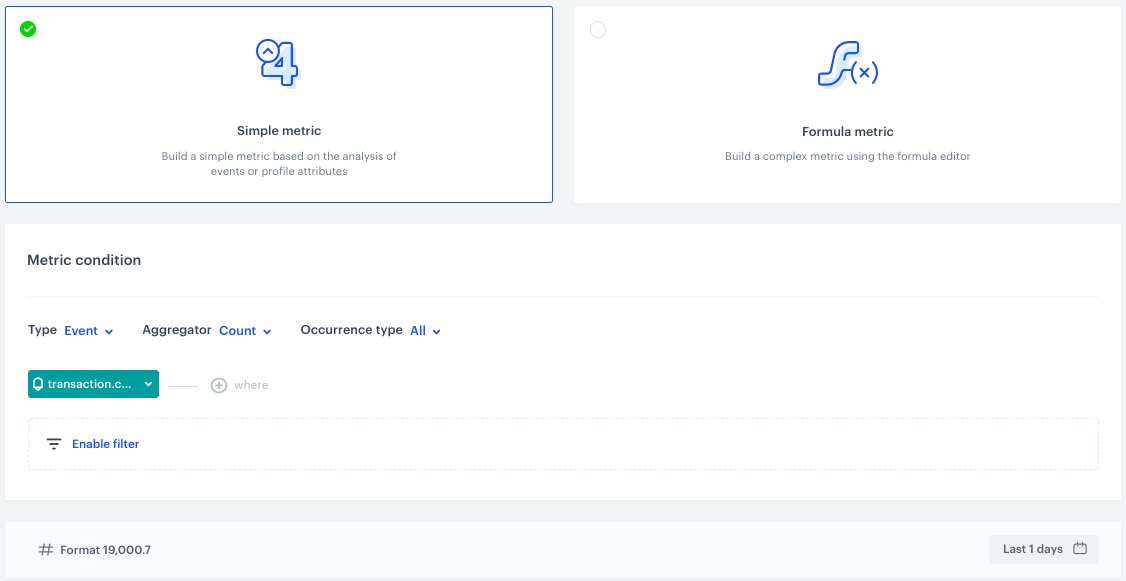
Configuration of the metric returning the number of all transactions
Create an expression
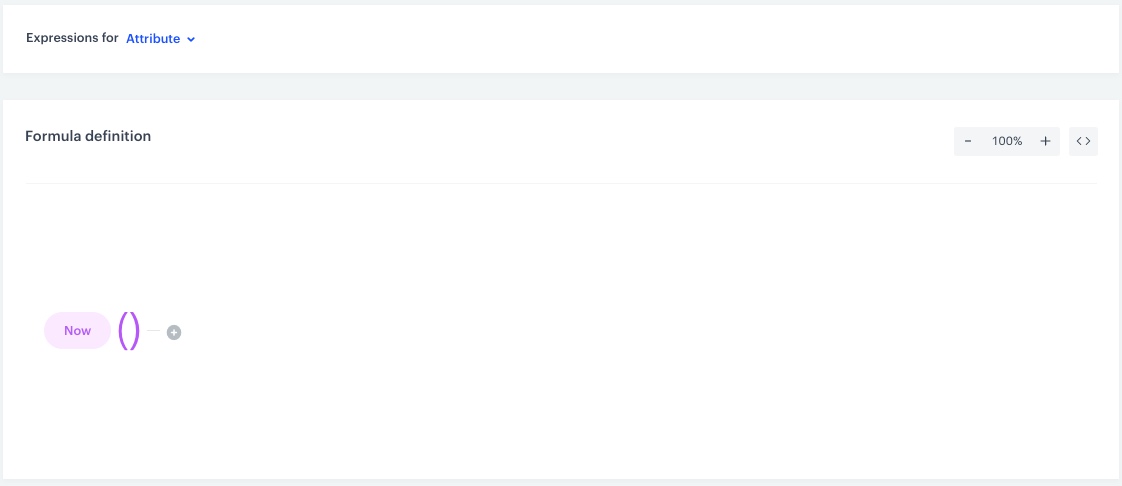
In this part of the process, create an expression that returns the current date.
- Go to Analytics > Expressions > New expression.
- Enter the name of the expression.
- Set the Expression for option to Atribute.
- Click Select and from the Function dropdown list, choose Now.
- Save the expression.
Create a workflow
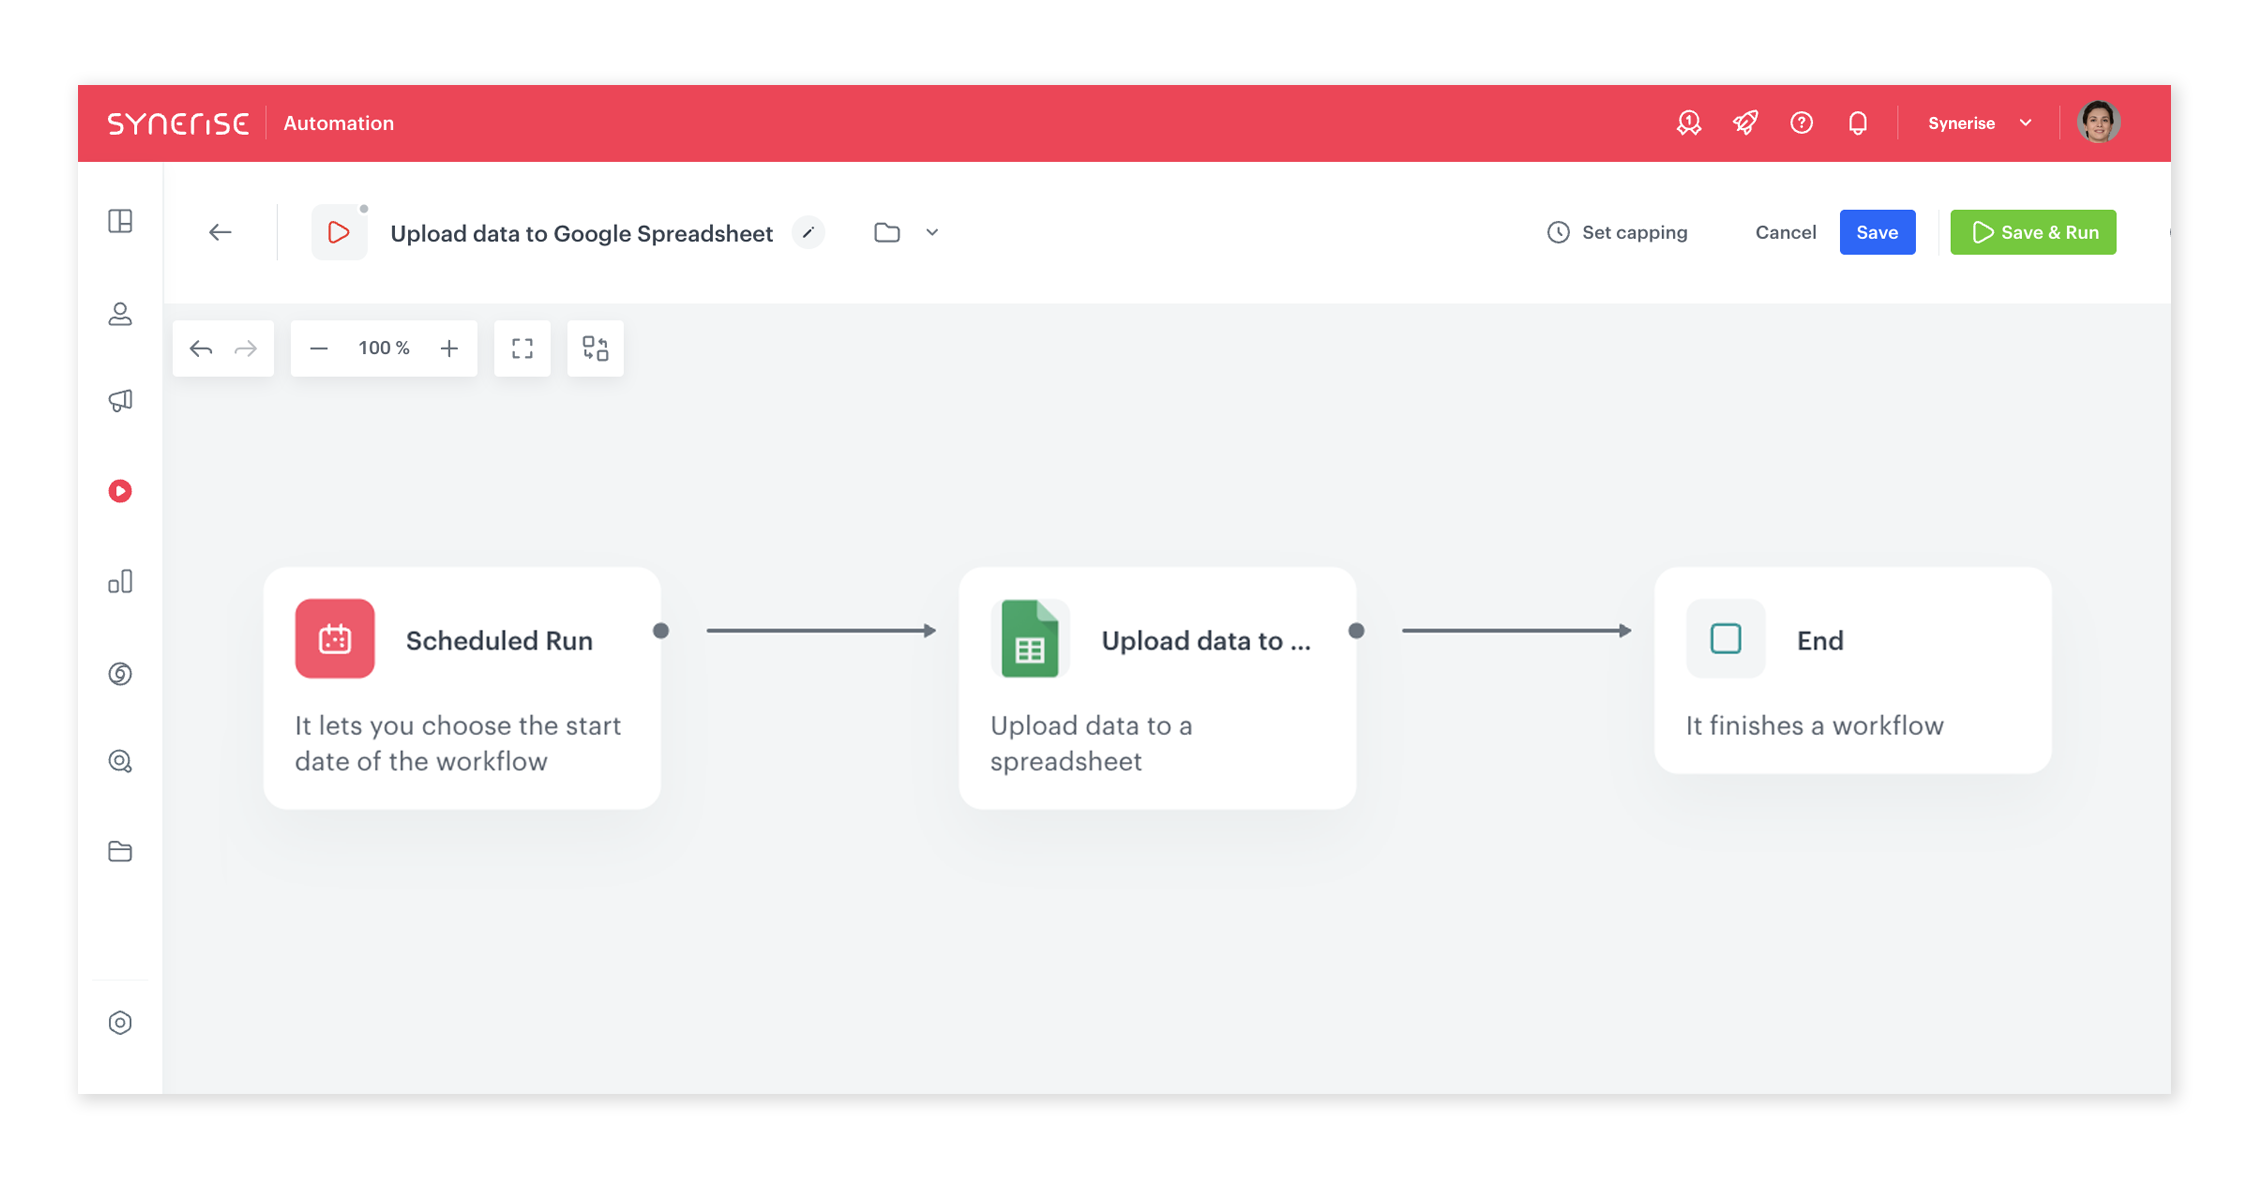
In this part of the process, create a workflow which adds a new row with the Synerise metric value to a Google Spreadsheet. The workflow starts at 6 A.M. daily and automatically updates the Spreadsheet.
- Go to
 Automation > Workflows > New workflow.
 - Enter the name of the workflow.
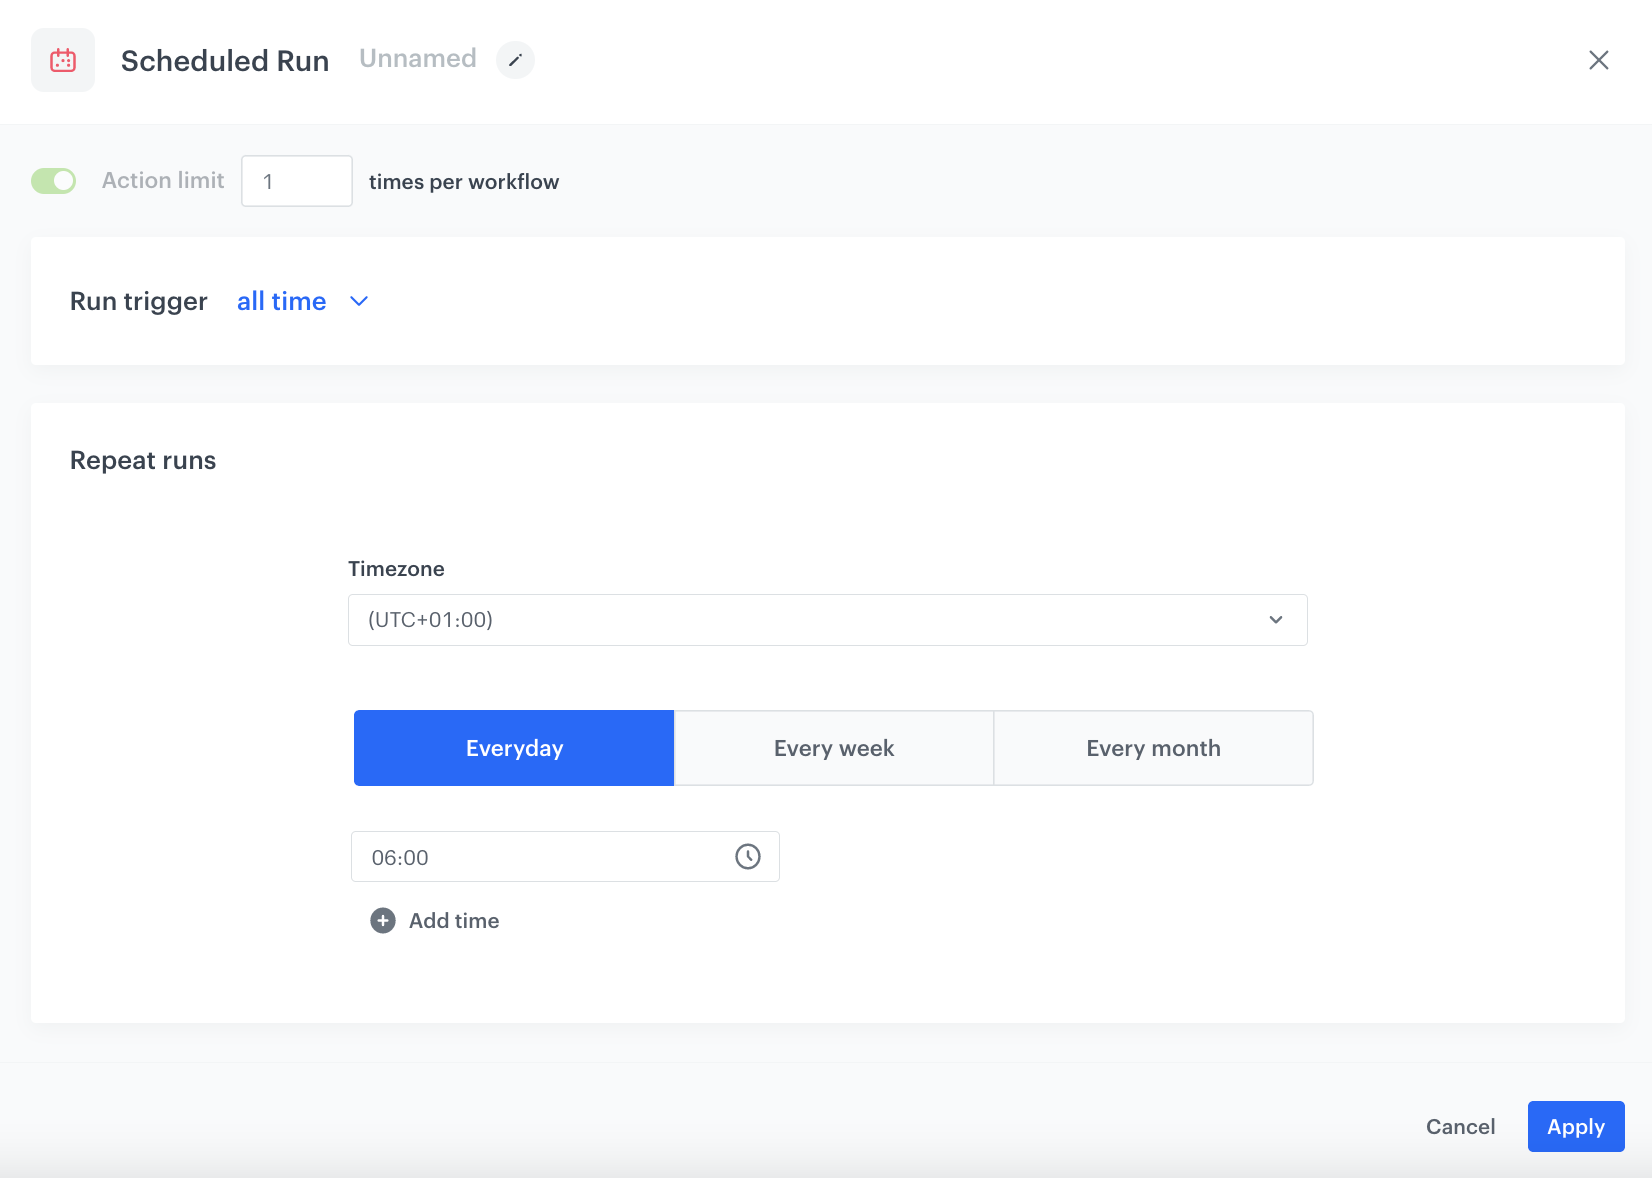
Define the Scheduled Run trigger node
- As the trigger node, add Scheduled Run.
- In the configuration of the node:
- Leave the Run trigger option at default (all time).
- From the Timezone dropdown list, select the time zone consistent with the timezone selected for your workspace.
- Define the frequency of the workflow. In this use case, it’s every day at 6:00 A.M.
- Confirm by clicking Apply.
Configure the Upload data to a spreadsheet node
-
As the next node, add Google Sheets > Upload data to a spreadsheet node.
-
Click the node and then Select connection.
-
From the dropdown list, select the connection.
- If no connections are available or you want to create a new one, see Create a connection.
- If you selected an existing connection, proceed to defining the integration settings.
-
Fill out the Configure integration form.
-
In the Spreadsheet ID field, enter the ID of the Spreadsheet to which you want to upload data. You can find the ID in the URL of the Spreadsheet, it is the last string of characters.
-
In the Range field, define the range of cells to which the data will be uploaded. The values will be appended to the first empty cell available within the indicated range. The value in this field must be given in the A1 notation, for example
Sheet1!A4:A5, then the data will be added in a column to A4 and A5 cells in theSheet1Spreadsheet. -
From the Dimension dropdown list, select Columns.
-
In the Values field, enter the data you want to upload to the Spreadsheet. In this case:
Note: In the request body with the values, we use inserts and Jinjava to refer to the data gathered in Synerise. Make sure to add the id of the metrics and expressions you created earlier.[ [ "{% metrics %} example-ID-of-the-metric {% endmetrics %}" ], [ "{% expression %} example-ID-of-the-expression {% endexpression %}" ] ]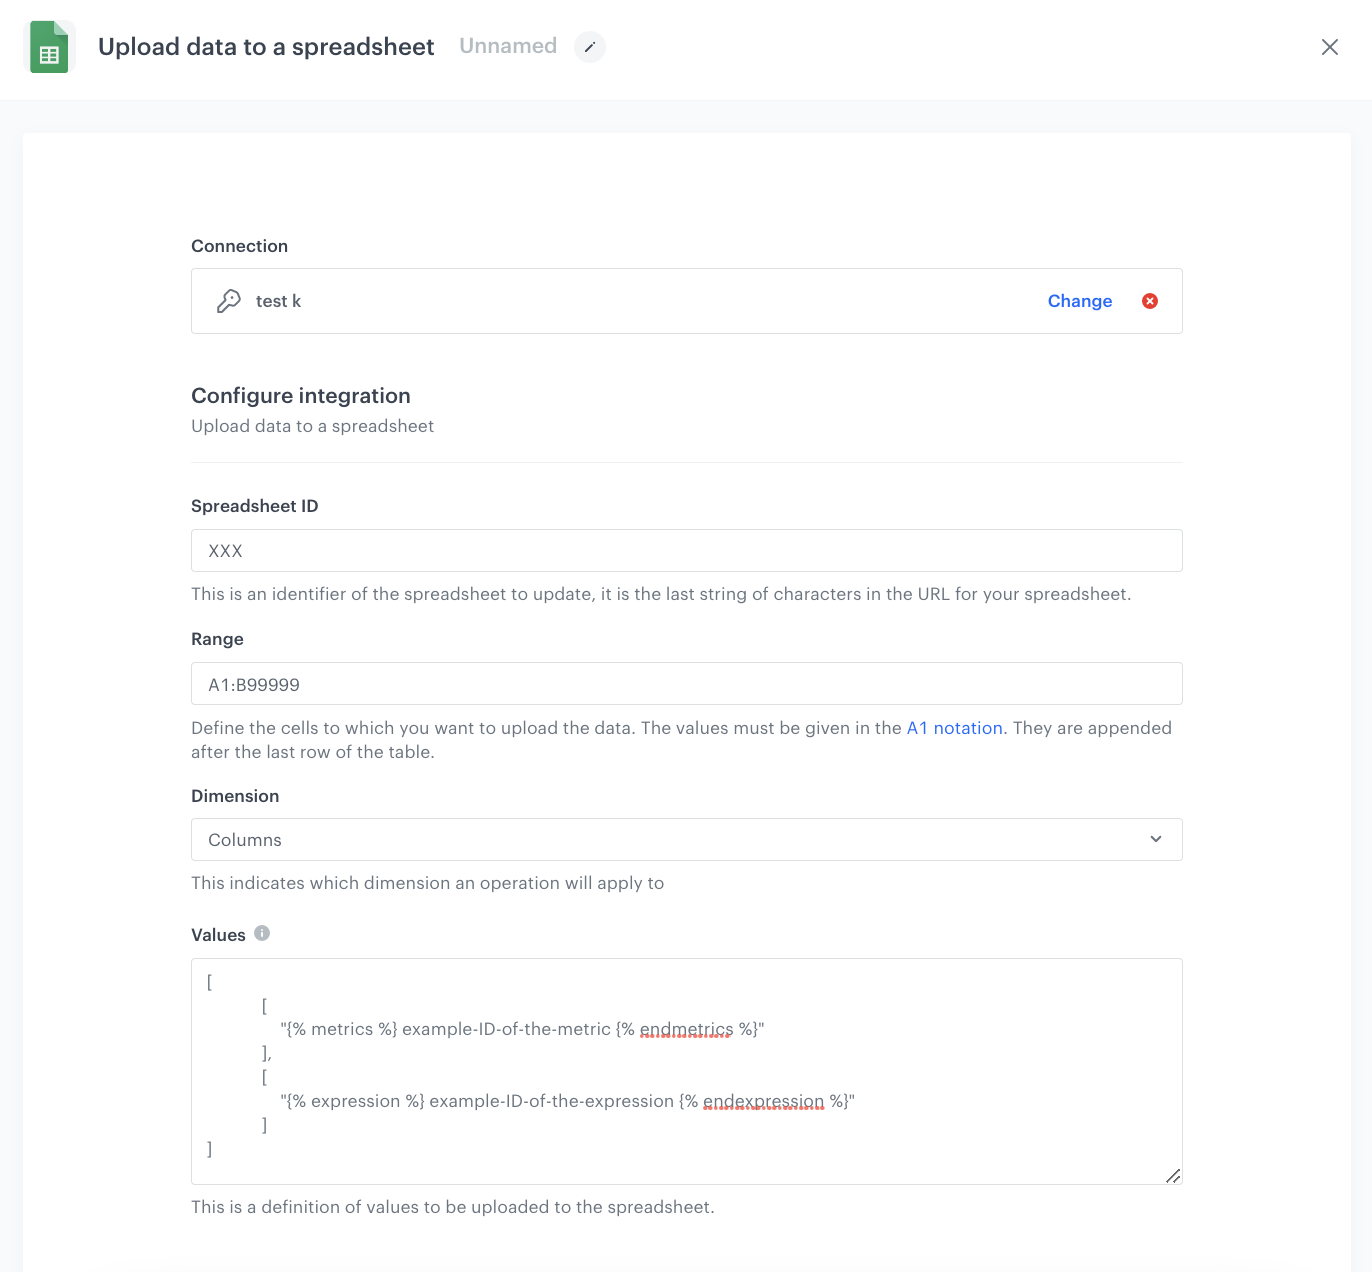
The configuration of the Upload data to a spreadsheet node
-
-
Confirm by clicking Apply.
Add the finishing node
- Add the End node.
- In the upper right corner, click Save & Run.

Check the use case set up on the Synerise Demo workspace
You can check all the configurations directly in Synerise Demo workspace:
If you don’t have access to the Synerise Demo workspace, please leave your contact details in this form, and our representative will contact you shortly.