
Email with products similar to the last added to the cart
Nowadays, it is important to try not to lose customers even if they don’t make a transaction. One effective solution is to offer them products similar to the ones they have previously viewed. AI algorithms that select similar products based on established characteristics, e.g. brand, model, visual similarity, are useful here. A communication based on these assumptions can help reduce customer churn and increase the total revenue.
Example of use - Electronics Industry
Challenge
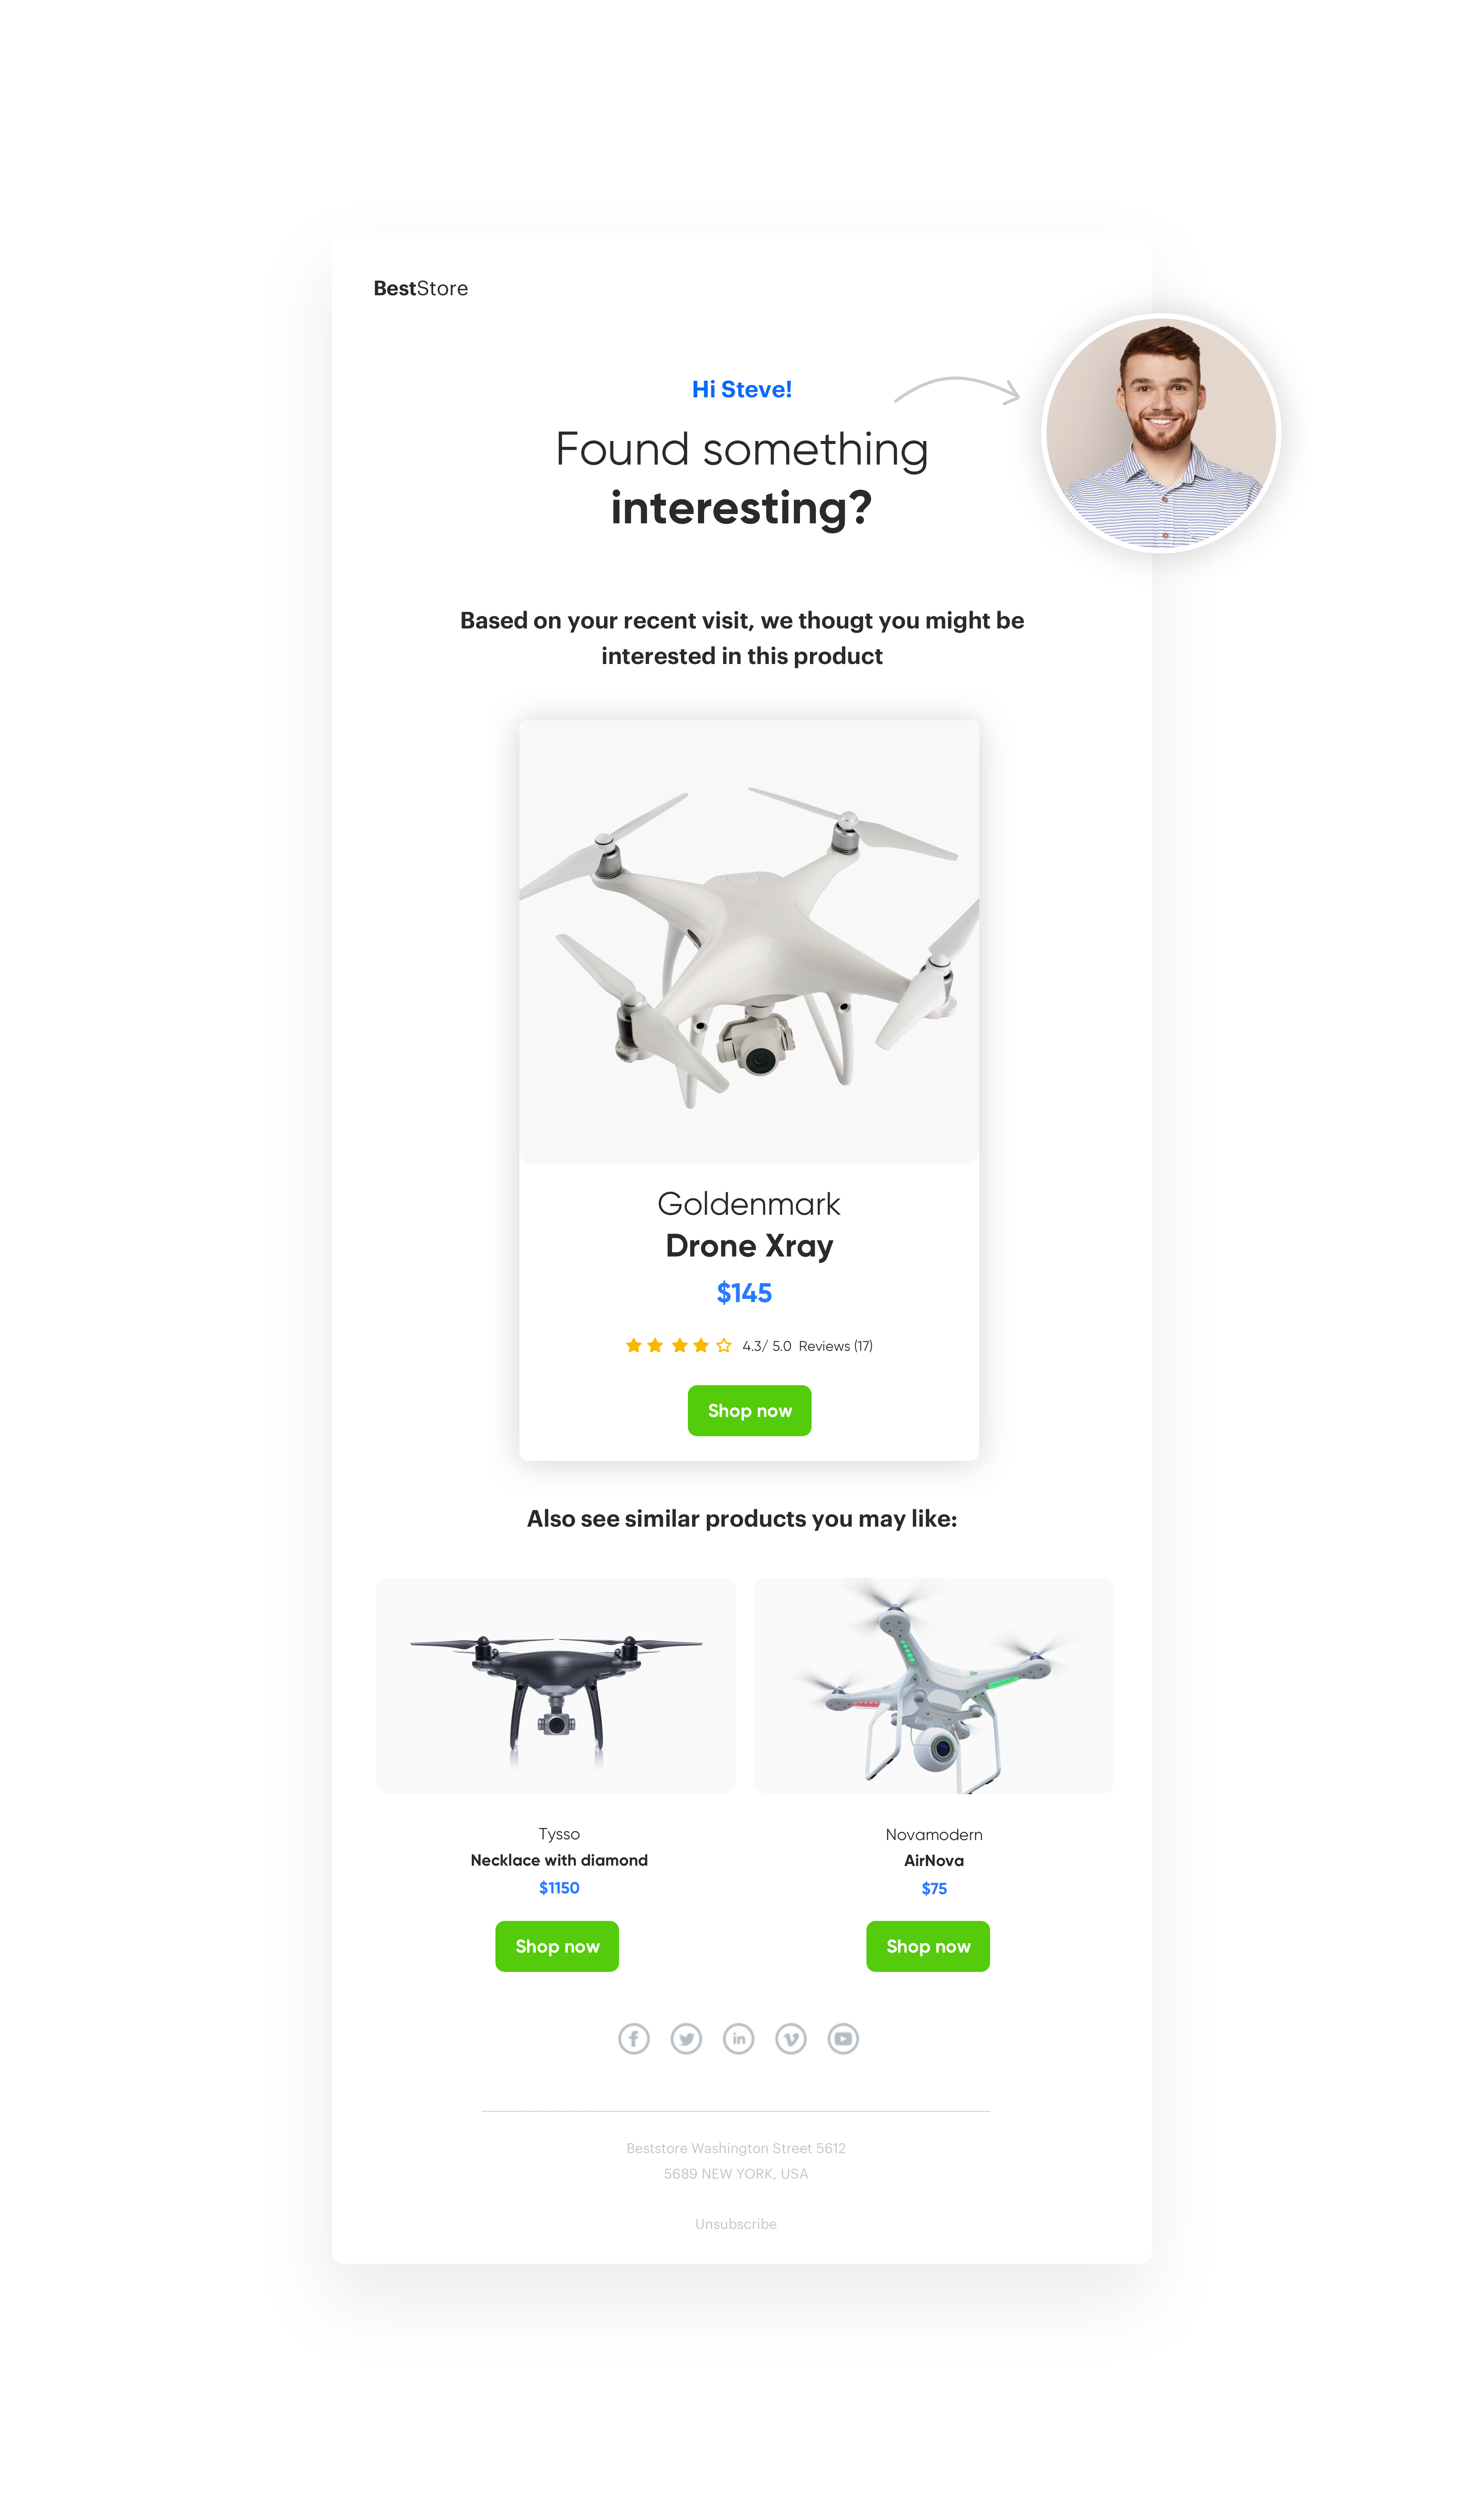
Our customer from the home and electronics industry prepared an email called “abandoned products”.
If the user added a product to the cart, but did not complete the transaction, he would receive an email presenting the product added to the cart along with similar products that were selected and personalized thanks to AI algorithms.
Results
- OR 14,53%
- CTR 32.9%
- CTOR 99,7%
- CONVERSION 0.7%
Prerequisites
- Tracking code implemented on your website.
- Implementing product feed.
- Implementing product catalog.
- Transaction events.
- Add to cart event.
- Email account configured.
- Subscriber’s database implemented to Synerise.
Process
In this use case, you will go through the following steps:
Prepare an aggregate
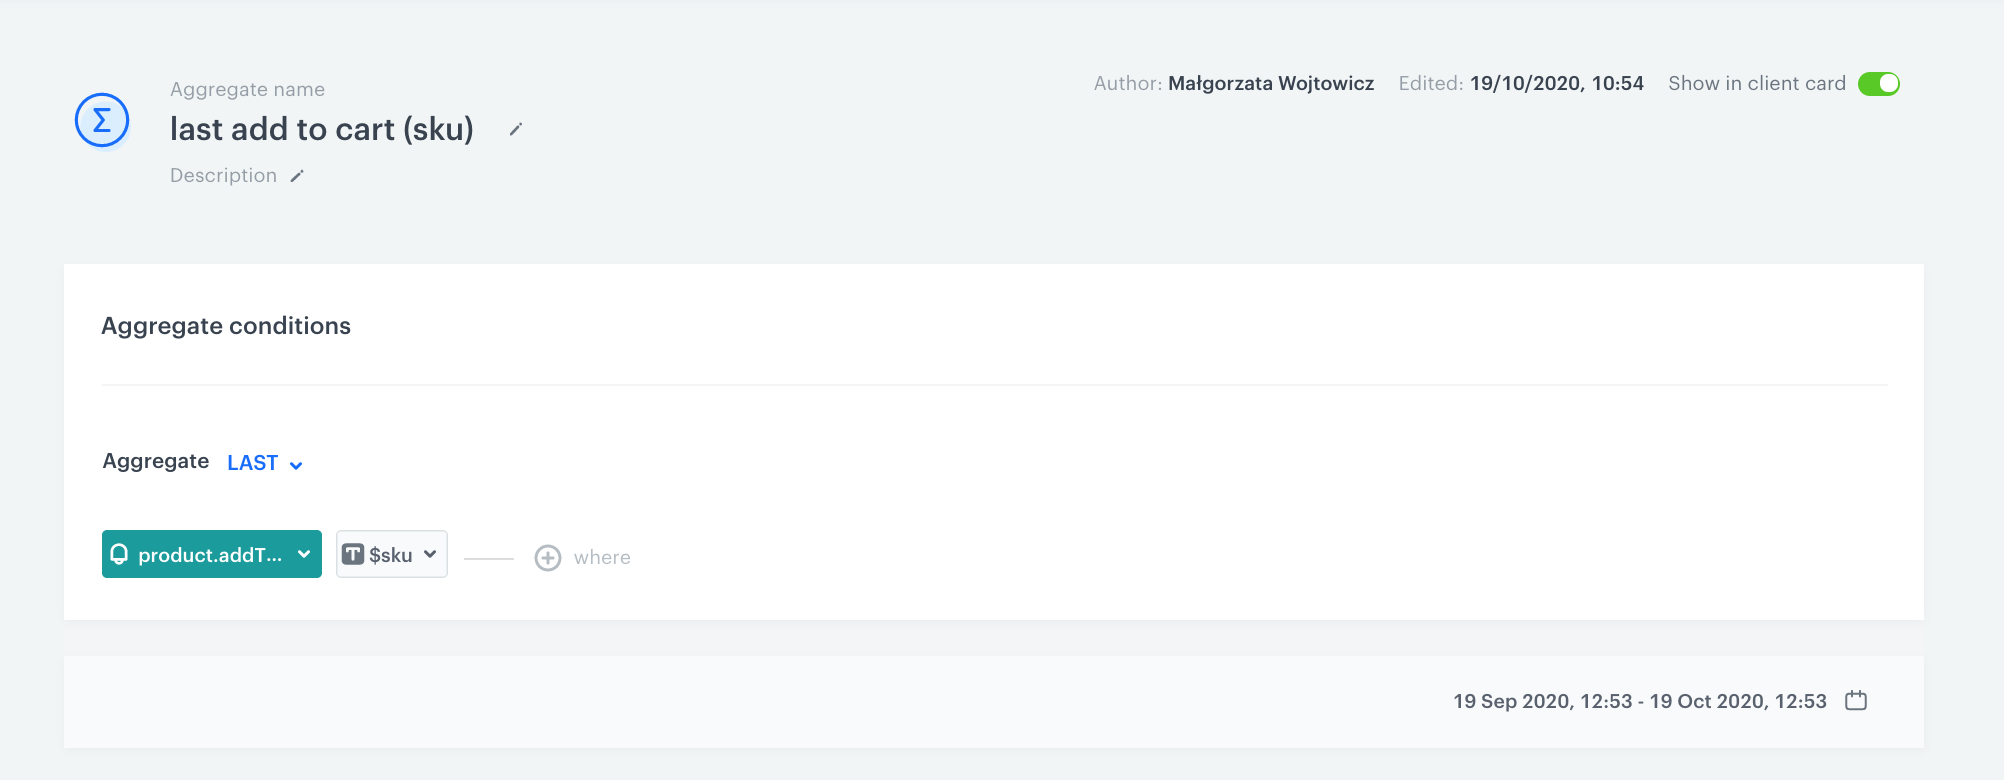
- Go to Analytics > Aggregates.
- To create the appropriate aggregate, choose the Last type.
- Select productAddToCart event, and specify the $sku parameter.
Prepare AI recommendations
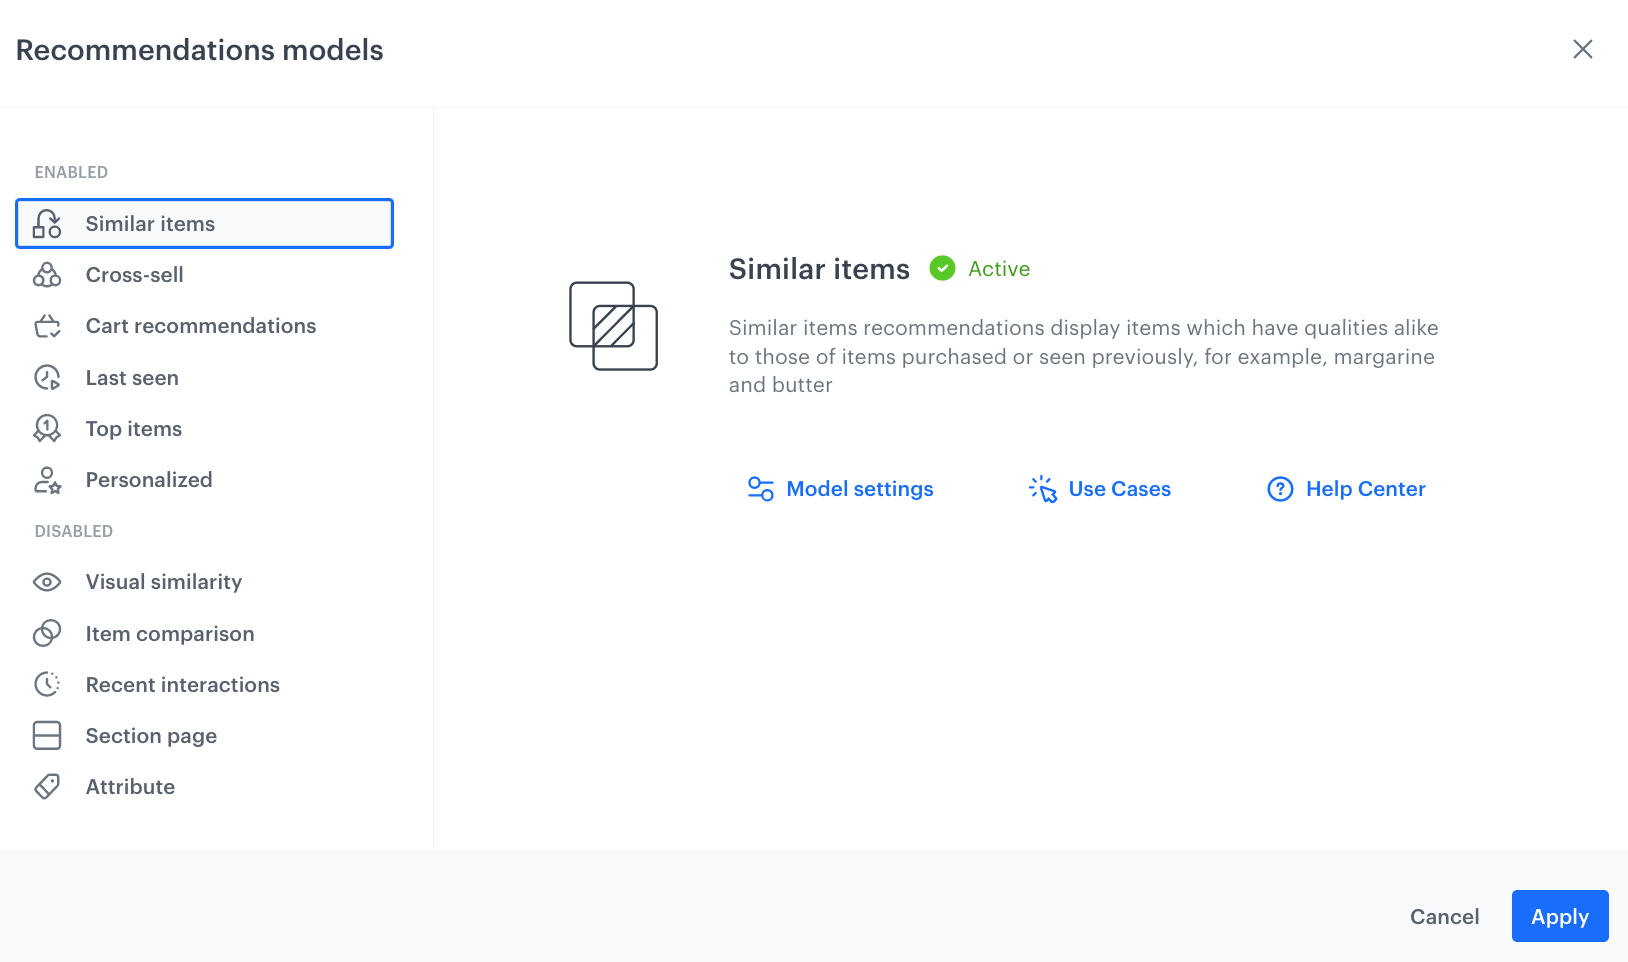
- Go to Communication > Recommendations > Add recommendation.
- Enter the name of the recommendation (it is only visible on the list of recommendation).
- In the Type & source section and click Define.
- From the Catalog dropdown list, select a trained product feed.
- Select the recommendation type, in our example it will be similar product.
Prepare the email template
- Go to Communication > Email > Templates.
- To create a new template, click Create new.
- To create a template out of an existing template, click From template.
- Select the template.
- Select the wizard:
- Drag&drop builder - Create email templates with ready-made components.
- Code editor - Create email templates in CSS and HTML.
- To add the dynamic part to the email template (last added product to the cart and AI recommendations), you will have to use jinjava and add your own CSS. Let’s look at how to prepare the appropriate jijnava code.
    <!-- Opening the tag that retrieves the value from the aggregate prepared in point 1-->
    {% aggregate a5f787bc3-db2d-3791-bef5-bd027102ca3e %}
    <!-- Assign an aggregate value to skuValue -->
    {% set skuValue = aggregate_result[0] %}
    <!-- Referencing with the help of variable to the snrs-product-ogTag directory built by default from OG tags. The variable names depend on the name of the OG tags on your page -->
    <div class="wrapper-card">
        <h2 style="text-align:center">Product Card</h2>
        <div class="card">
            <img src="{% catalog.Snrs-produktu-ogTag(skuValue).og:image %}" alt="Product image" style="width:100%">
            <h1>{% catalog.Snrs-produktu-ogTag(skuValue).product:brand %}</h1>
            <p class="price">$ {% catalog.Snrs-produktu-ogTag(skuValue).product:price:amount %}</p>
            <p>{% catalog.Snrs-produktu-ogTag(skuValue).og:title %}</p>
            <p><button>Add to Cart</button></p>
        </div>
    </div>
    <!-- Adding the skuValue variable to the array for which we will retrieve similar products -->
    {% set itemContext = [] %}
    {% do itemContext.append(skuValue) %}
    <!-- Downloading the similar campaign for the product in the table -->
    {% recommendations2 campaignId=a7wO36CRGJm6P products=itemContext %}
        <!-- Iterating loop through the received products -->
        {% for item in recommended_products2 %}
        <!-- Listing the attributes assigned to the product in the feed -->
        <div class="wrapper-card" style="width:25%;float:left">
            <h2 style="text-align:center">Product Card</h2>
            <div class="card">
                <img src="{{ item.imageLink }}" alt="Product image" style="width:100%">
                <h1>{{ item.brand }}</h1>
                <p class="price">$ {{ item.priceValue }}</p>
                <p>{{ item.title }}</p>
                <p><button>Add to Cart</button></p>
            </div>
        </div>
        {% endfor %}
    {% endrecommendations2 %}
    <!--
    Closing of the tag that gets the value from the aggregate prepared in point 1 -->
{% endaggregate %} Create a workflow
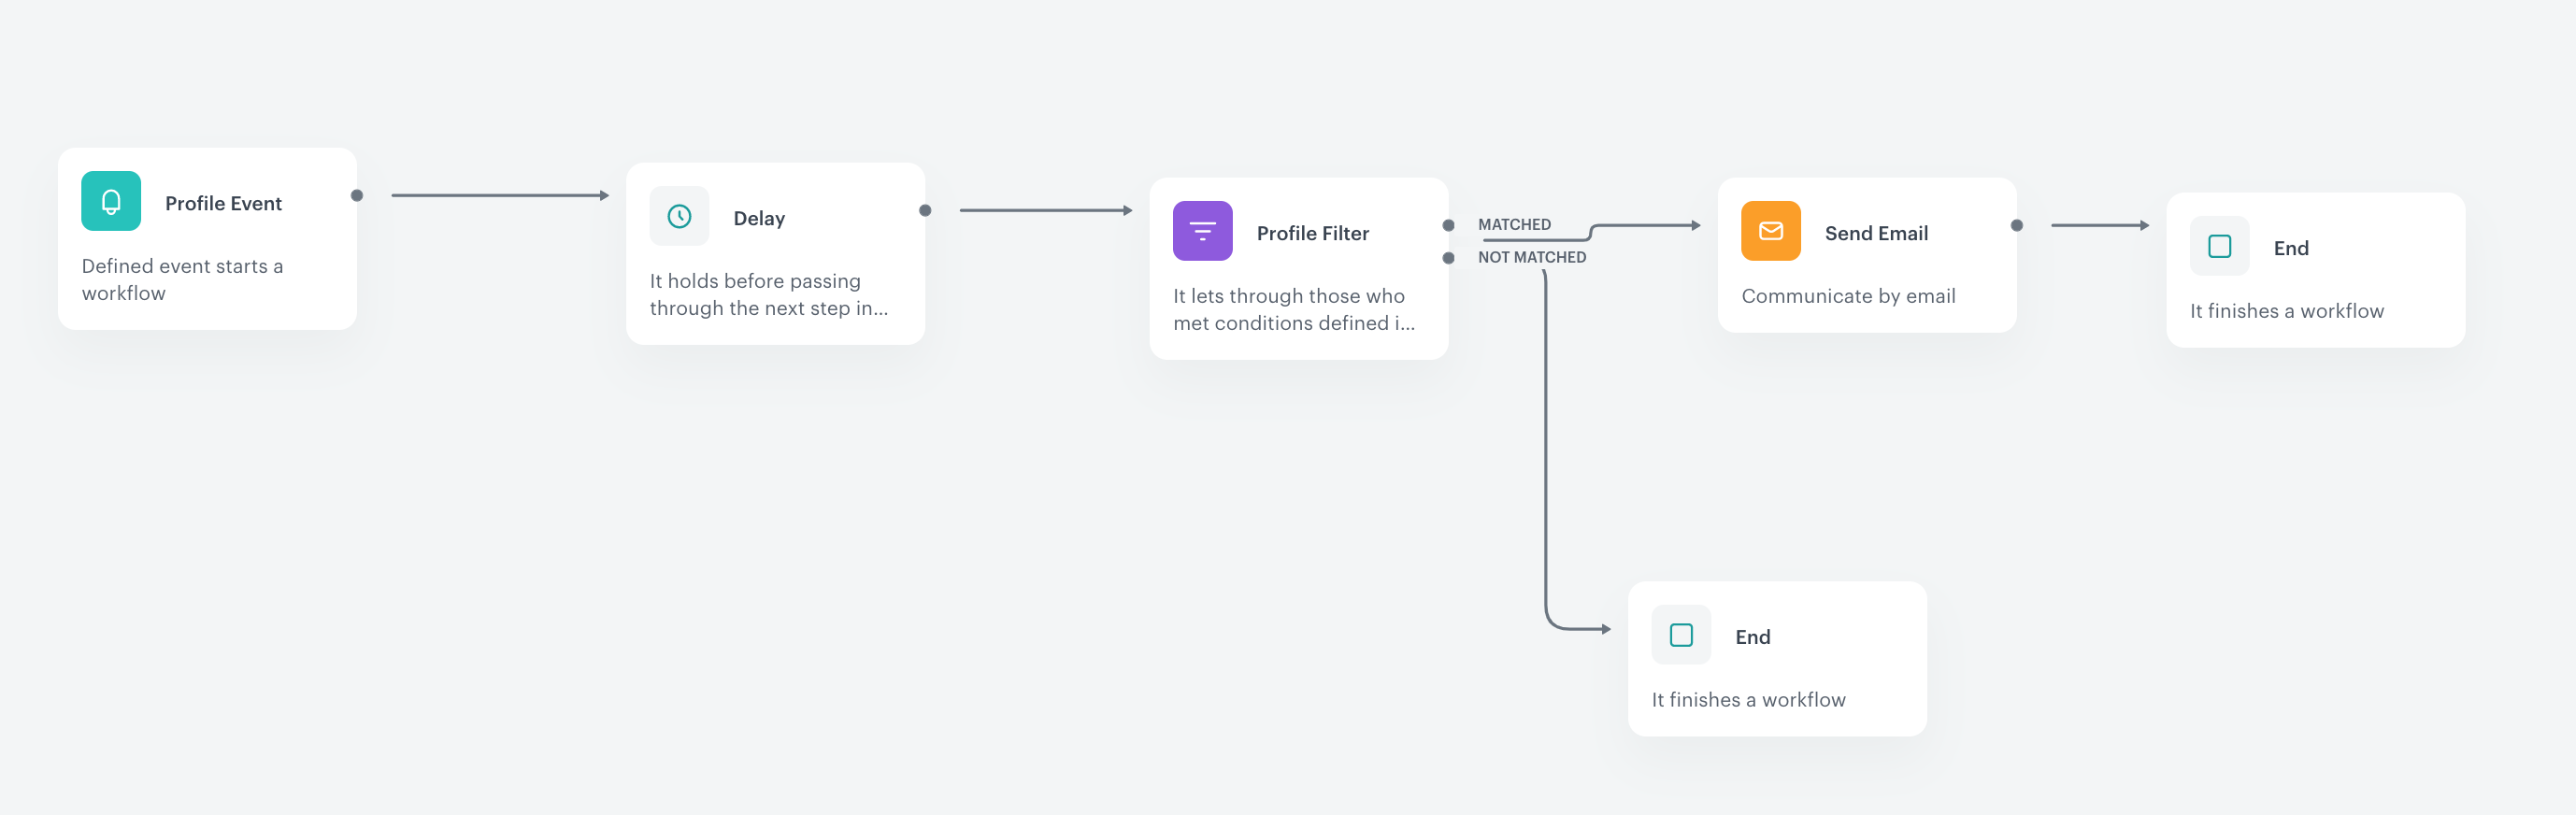
To start sending emails to customers you will have to prepare a workflow, which in basic configuration may look like the one below.
- Go to Automation > Workflows > New workflow..
- On the dashboard, click the plus button to add the first node.
- Start the workflow by choosing a trigger. For every user who will add a product to the cart – choose the Profile Event trigger node and select productAddToCart event from the list.
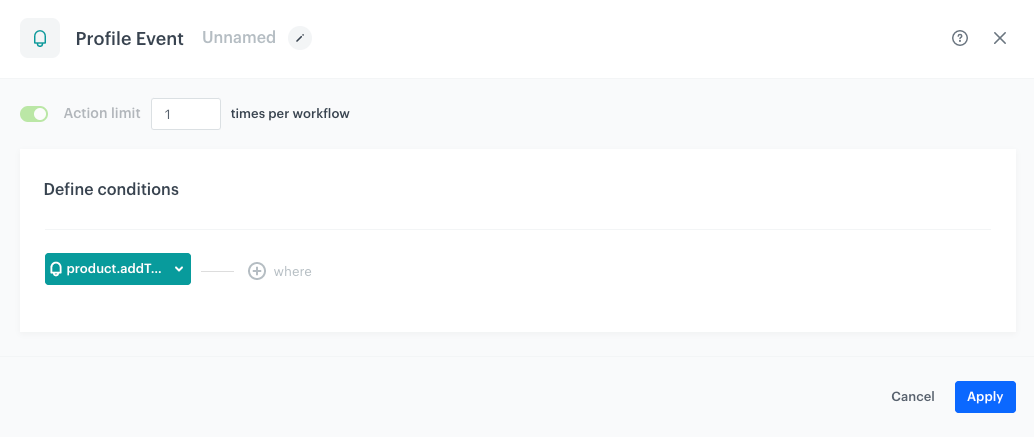
Profile Event - Confirm the settings by clicking Apply.
- Set up time period users will get the message by using the Delay node, here this is 1 day (24 hours).
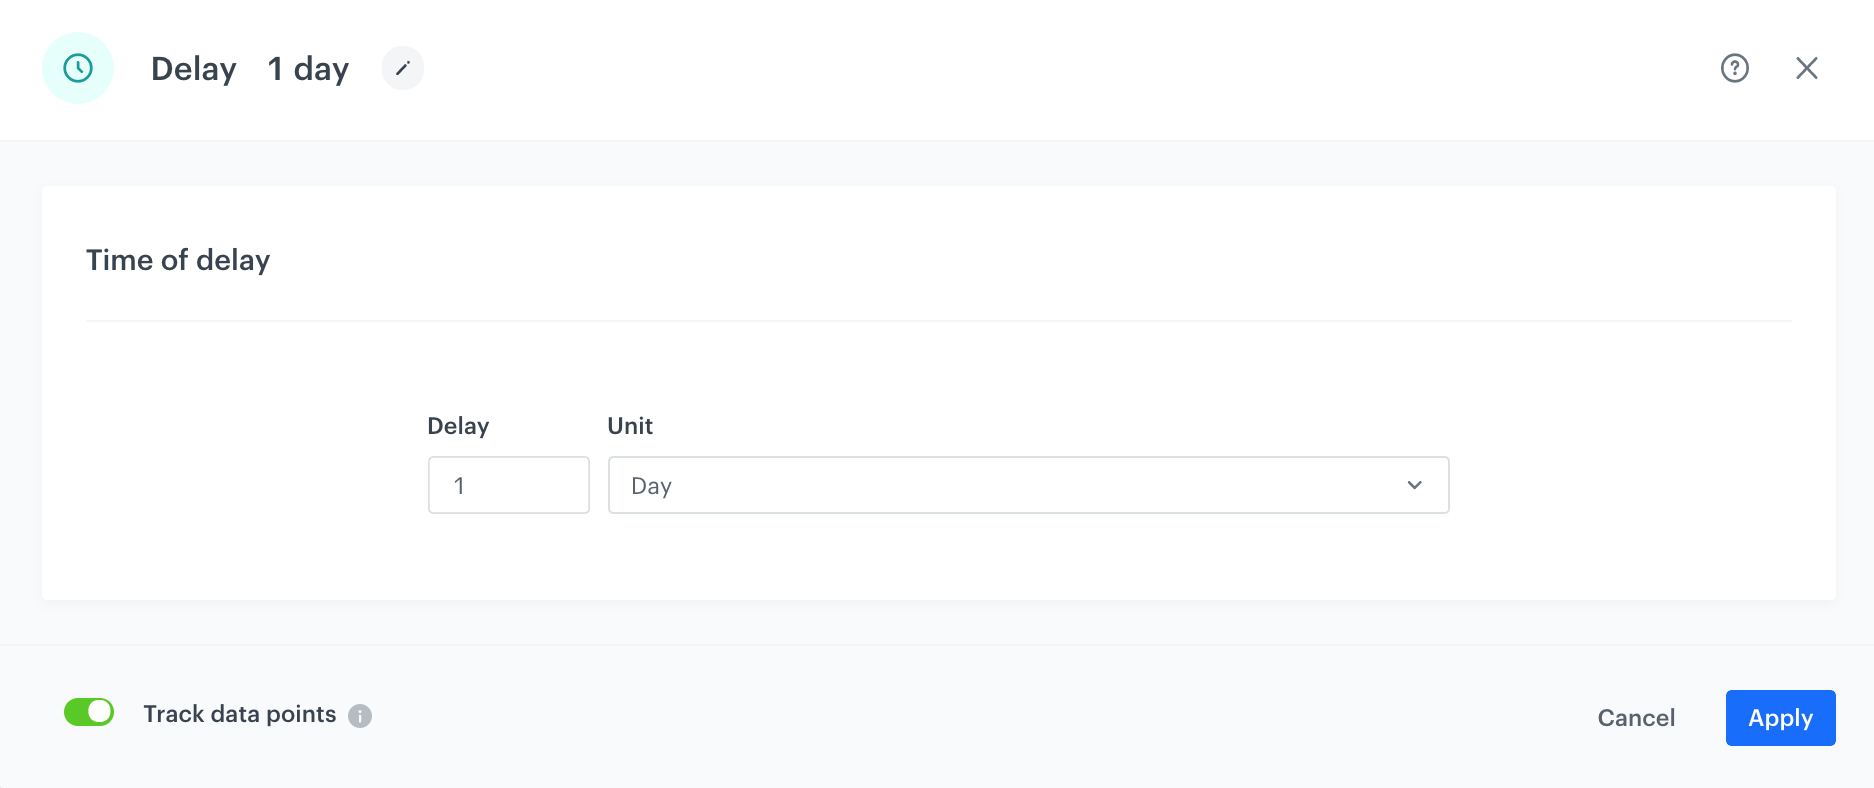
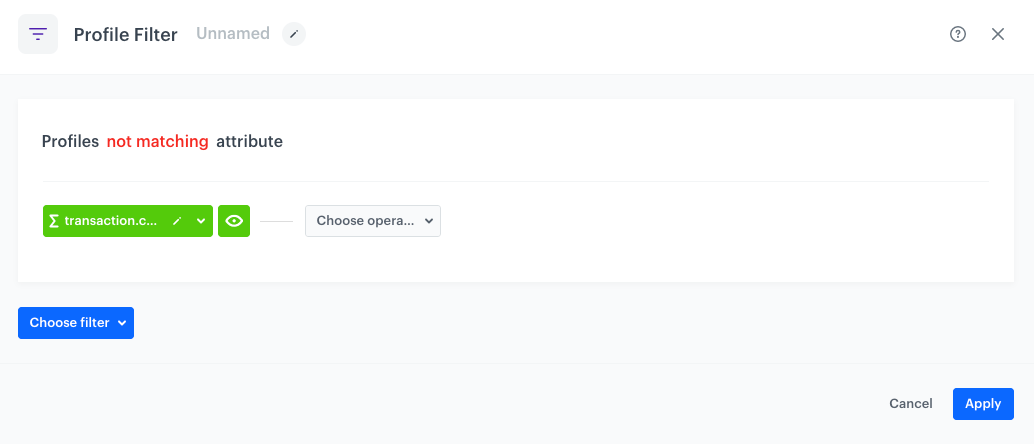
Delay node - Use the Profile Filter node, exclude users who have made a transaction in last 24h.
- Select trasaction.charge event, mark “not matching”, and select appropriate date range.
Important: Please note that we use 1440 minutes instead of 1 day – use smaller granulation, as in this case 1 day would take the time from current hour till the midnight, so such an analysis will not take into consideration all necessary users.
Profile Filter node - Set the Send Email node by selecting the appropriate email account, choosing the template that you prepared in previous step and adding the email subject.
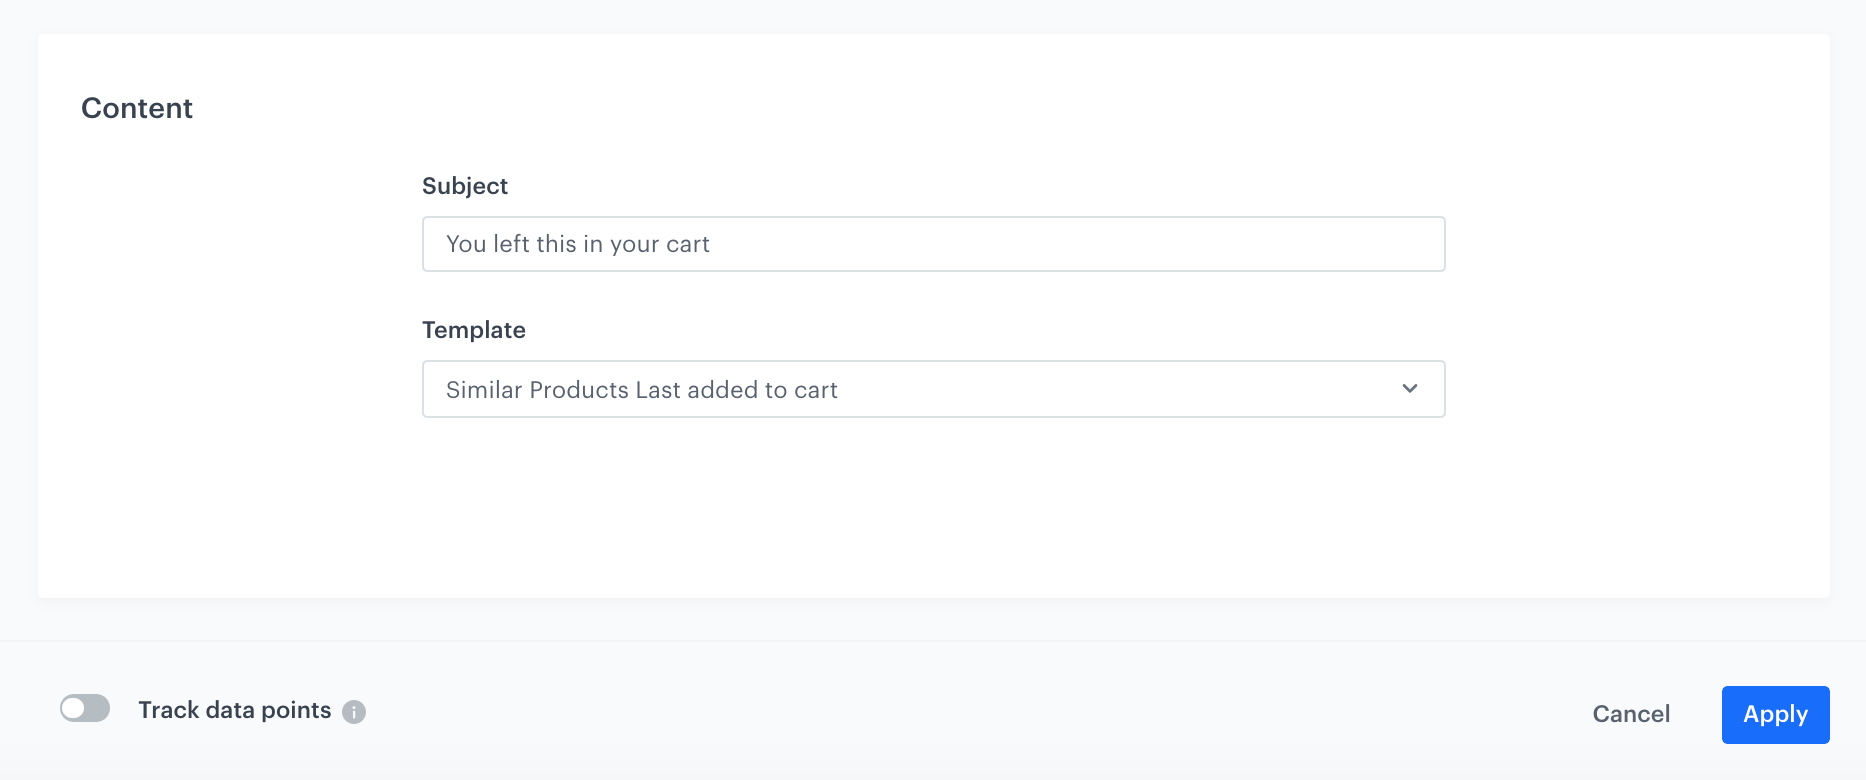
Send Email node - Add the End nodes where the workflow should finish for users.
- Specify capping (here 1 for 1 day).
- Optionally add titles to each node so the workflow will be more understandable for your colleagues.
- Name the automation and Save it or Save & Run.
Check the use case set up on the Synerise Demo workspace
Check the aggregate settings directly in Synerise Demo workspace.
You can also find there recommendation and workflow settings.
If you don’t have access to the Synerise Demo workspace, please leave your contact details in this form, and our representative will contact you shortly.