Improve ratings on external websites
Online shopping gives customers huge opportunities to compare offers between different e-commerce sites and to search for the best price. Many online services, like price comparison websites, offer access to reviews and average ratings of a given store. Low rates can discourage potential customers from buying in a particular store.
Generally, it is often dissatisfied customers who make the effort to express their opinion, while people who have successfully completed the purchasing process are not motivated to share their positive experiences. In this way, a store’s opinion can be easily damaged, so it is so important to maintain its good rating.
A good idea is to encourage your loyal and satisfied customers to leave their opinion and reviews to collect more feedback and improve your ratings. To do this, you need to use some kind of reward, such as a discount or any other special offer which will be added to the customer’s account if they leave their feedback.
This use case describes an automated process in which, after the transaction and receiving the order, the customer gets an email encouraging them to leave reviews on the website. As a gift, the customer receives a discount on future purchases, and additionally participates in the contest in which they can win a voucher for a higher amount.
Prerequisites
- Implement a tracking code.
- Send transactional events.
- Configure an email account.
Process
- Send custom event with information about the order status.
- Prepare an email template.
- Create a workflow.
Send custom event
To run a workflow which allows you to send an email after customers receive their orders, you must send information to Synerise that the order was delivered. Using the API, send a custom event with information about the order status.
The example event:
{
"label": "Order delivered",
"action": "order.delivered",
"client": {
        "email": "john.doe@test.com"
    },
    "params": {
        "orderId": "1988100"
    }
}transaction.charge event with the updated orderStatus parameter using this API method. You must include eventSalt parameter in such case.Prepare an email template
In this part of the process, create an email template that will be sent to the customers who received their orders.
- Go to Communication > Email.
- On the left side of the screen, click Templates.
- Select the wizard in which you will create your message.
- Drag&drop builder - It lets you create templates with ready-made components.
- Code editor - It lets you create templates in CSS and HTML.
- Prepare the template according to your business needs.
- Click Save this template > Save as.
- Enter the name of the template and select the folder in which the template will be saved.
Create a workflow
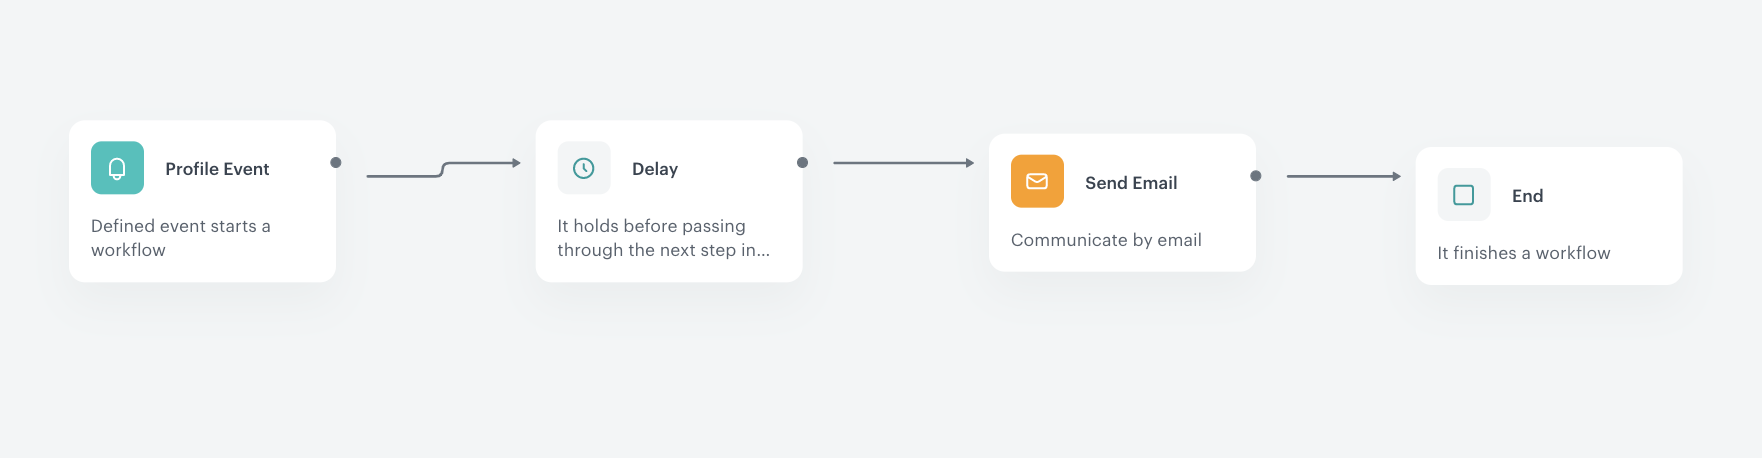
In this part of the procedure, create a workflow triggered by the event that signifies the delivery of the order to the customer. 3 days after the occurrence of the event, send the email to the customers who received their orders. Optionally, you can send two versions of the email.
- Go to Automation > Workflows > New workflow.
- Enter the name of the workflow.
- As the first node, add Profile Event.
- In the configuration of the node:
- As the name of the node, enter
OrderDelivered. - Select the event that is generated when the order is delivered to a customer. In this use case, it is
order.delivered. - Confirm by clicking Apply.
- As the name of the node, enter
- As the second node, add Delay. In the configuration of the node, set the delay to 3 days.
- As the third node, add Send Email node. In the configuration of the node:
- In the Sender details section, select the email account from which the email will be sent.
- In the Content section, select the email template.
Tip: In the email subject, you can insert information about order ID, which is retrieved from the Profile Event trigger. Insert the{{ automationPathSteps['OrderDelivered'].event.params.orderId }}snippet, which will display as the order ID . Note thatOrderDeliveredis the name of the Profile Event trigger added manually. - In the UTM & URL parameters section, add the parameters to your email.
- Confirm by clicking Apply.
If you want to perform A/B test instead of sending a single email, click here
- Instead of performing step 6 and its substeps, add the ABx test node. In the configuration of the node, define the allocation of groups. Optionally, you can add more groups.
- On the ABx test node, click the plus icon.
- From the dropdown list, select the Send Email node.
Result: Group A path appears. - On the ABx test node, click the plus icon.
- From the dropdown list, select the Send Email node.
Group B path appears. - In the configuration of the Send Email nodes:
- In the Sender details section, select the email account from which the email will be sent.
- In the Content section, select the email template.
Tip: In the email subject, you can insert information about order ID, which is retrieved from the Profile Event trigger. Insert the
{{ automationPathSteps['OrderDelivered'].event.params.orderId }}snippet, which will display as the order ID . Note thatOrderDeliveredis the name of the Profile Event trigger added manually. - In the UTM & URL parameters section, add the parameters to your email.
- Confirm by clicking Apply.
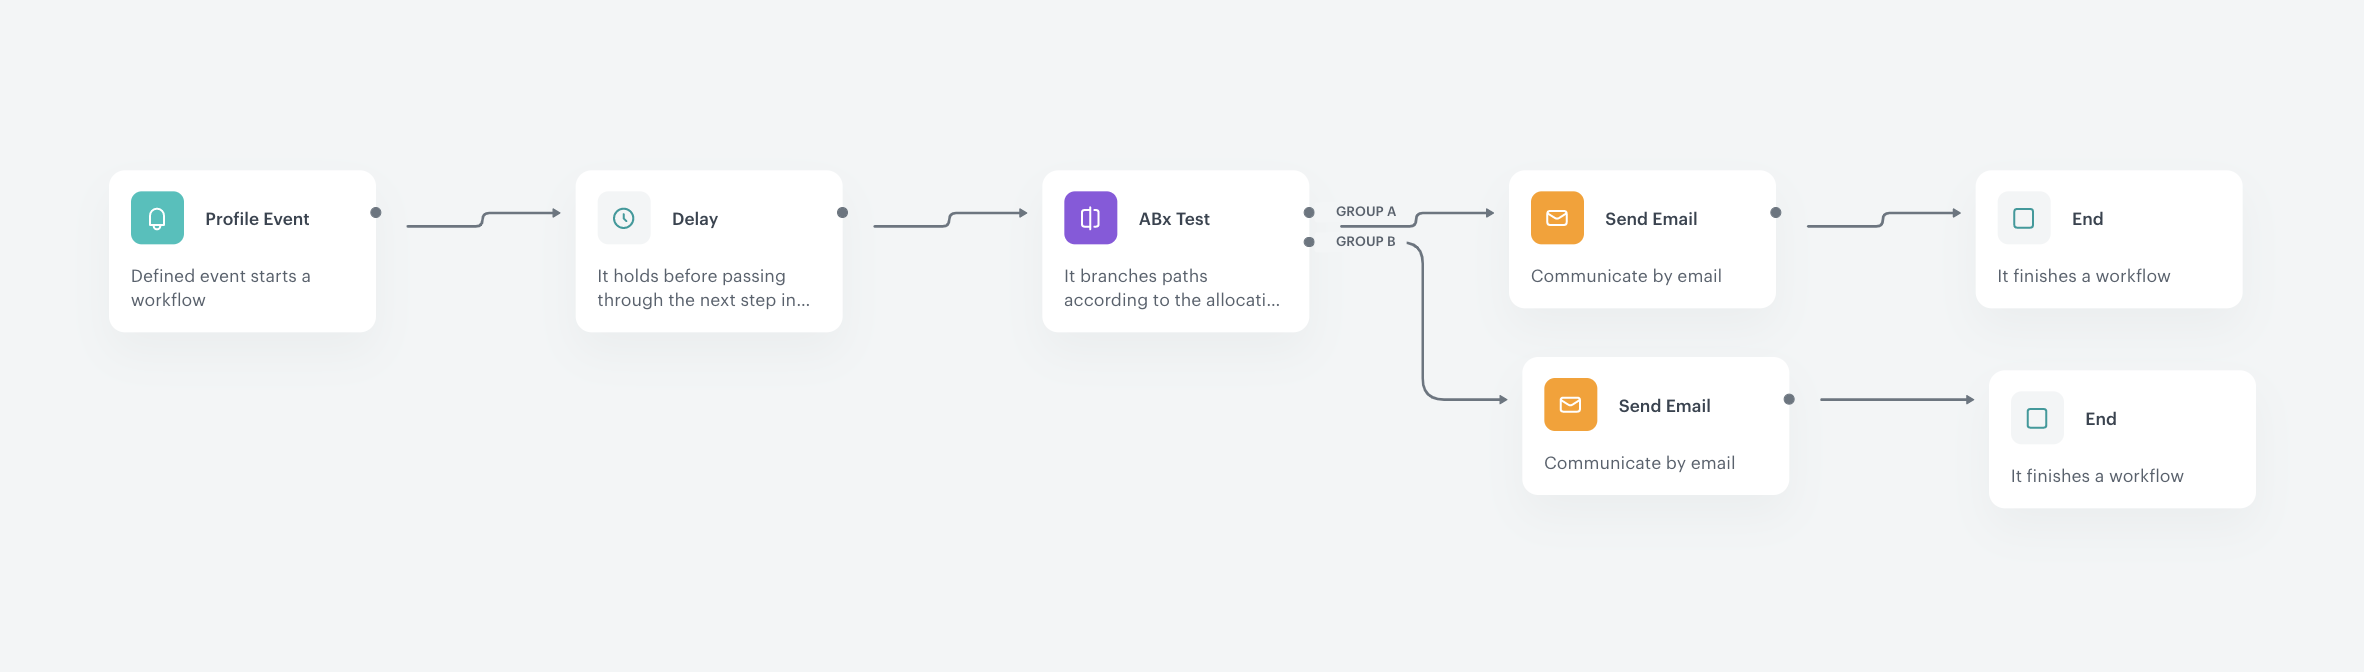
The configuration of the workflow with A/B testing
- Add the End node.
- Click Save & Run.