
Send an email with TrustMate survey link
TrustMate is a tool that enables building online brand image through management of reviews of your online shop or company. You can integrate it with Synerise using dedicated node in Automation to build a variety of business scenarios. The node enables you to get two survey links - to rate the purchased product and to rate the company.
This use case describes the process of creating a workflow to generate a survey link from TrustMate and send it in email communication to encourage customers to leave their feedback about the purchased products. The link to the survey will be sent after 7 days from the day of purchase.
Prerequisites
- Contact TrustMate to receive access key for API requests.
- Implement transaction events using SDK or API.
- Create an email account.
- Create an email template.
Process
Create a workflow
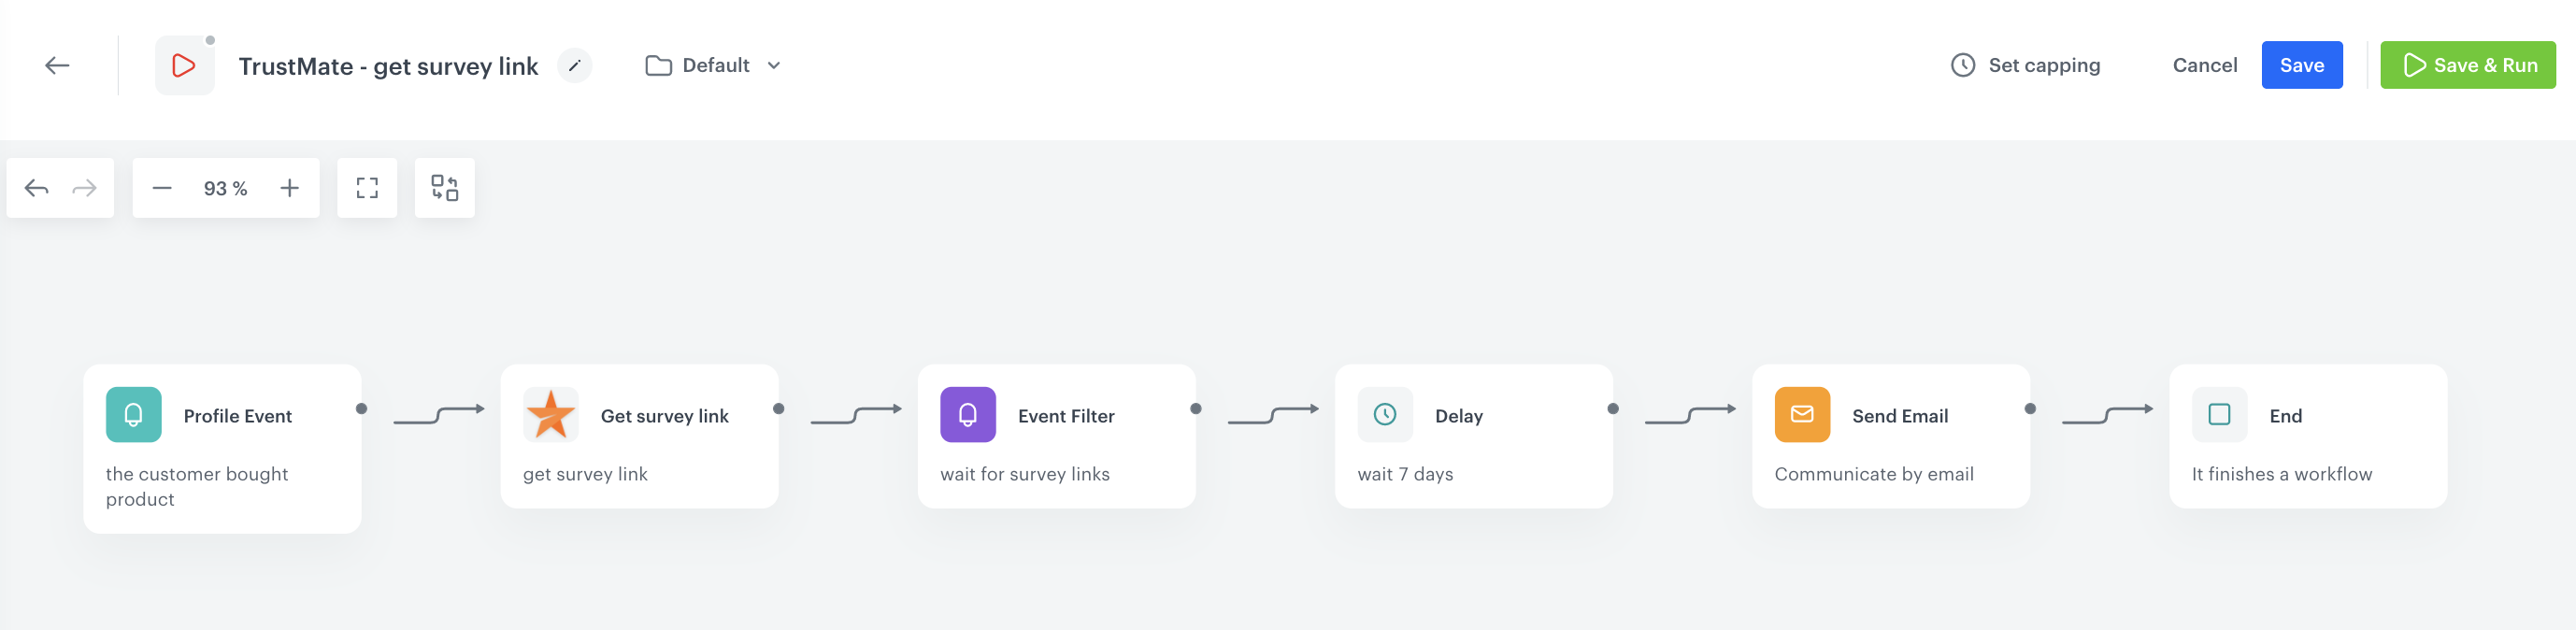
Create a workflow that is triggered by every product purchase. In response to the purchase, the system sends a request to TrustMate with the details of the purchased products. In exchange, a link to the survey is saved to Synerise. After 7 days, the workflow sends an email to a customer.
Define the Profile Event trigger
- In Synerise, go to Automation > Workflows > New workflow.
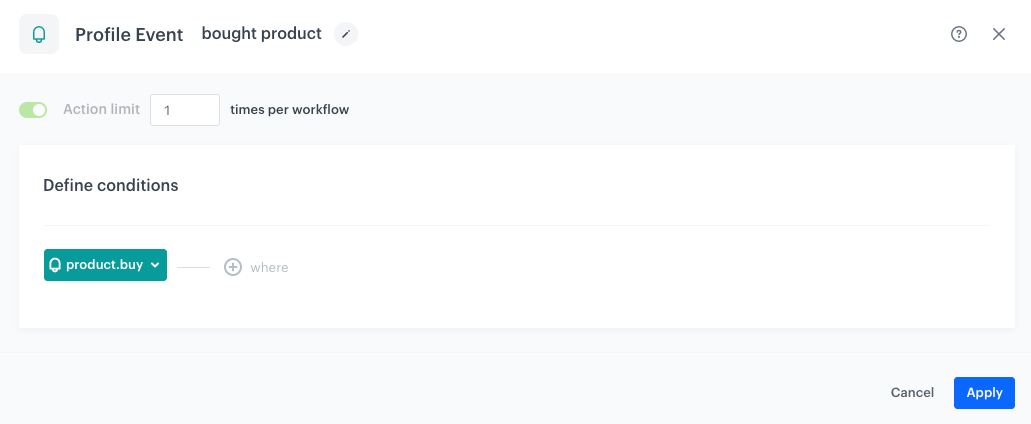
- Add the first node - Profile Event. In the node configuration:
- Select an event that signifies a purchase of an item (in this use case it’s
product.buy). - Confirm by clicking Apply.
Configuration of the Profile Event node
- Select an event that signifies a purchase of an item (in this use case it’s
Configure TrustMate Integration node
In this part of the process, you will configure an action that workflow performs - outgoing integration that sends the details of purchased products to TrustMate and generates the trustMate.getSurveyLinks event with survey links. The values of the integration parameters are dynamic and they are sourced from the event trigger by using inserts.
- On the Profile Event node, click the plus icon.
- From the dropdown list, select TrustMate.
- From the dropdown list, select Get survey links.
- Click the node.
- Click Select connection.
- From the dropdown list, select the connection.
If you haven’t established a connection yet, see Create a connection.
Create a connection
Use an access key which allows you to send a request.
- At the bottom of the Select connection dropdown list, click Add connection.
- In the Access key field, enter the access key received from TrustMate.
- Click Next.
- In the Connection name field, enter the name for the connection you created.
- Click Apply.
Result: A connection is created and selected.
Define the integration parameters
-
In the Customer’s firstname field, enter the insert that extracts the customer’s first name from the customer’s attribute:
{{ customer['firstname'] }} -
In the Customer’s email field, enter the insert that extracts the email of your customer from the customer’s attribute:
{{ customer['email'] }} -
In the Order Id field, enter the insert that extracts the order ID of the purchase from the Profile Event trigger:
{{ event.params['$orderId'] }} -
In the Product’s name field, enter the insert that extracts the name of the purchased product from the Profile Event trigger:
{{ event.params['$name'] }} -
In the Product’s category field, enter the insert that extracts the category of the purchased product from the Profile Event trigger:
{{ event.params['$category']|join(' / ') }}Note: TrustMate requires to separate categories path elements with/, ex.clothes/dresses/pink-dresses -
In the Product’s SKU field, enter the insert that extracts the SKU of the purchased product from the Profile Event trigger:
{{ event.params['$sku'] }} -
In the Product’s image URL field, enter the image URL of the purchased product. Use the following insert to extract it from the profile event trigger:
{{ event.params['image-link'] }}. -
In the Product’s URL field, enter the insert that extracts the SKU of the purchased product from the Profile Event trigger:
{{ event.params['$url'] }}
The names of the parameters you send in the transaction events may differ in your case, so make sure that Jinjava inserts correspond with the parameters’ names you send in the transaction events.
If you do not pass some of the parameters required to configure TrustMate integration node in transaction events, try extracting them from the product catalog using inserts.
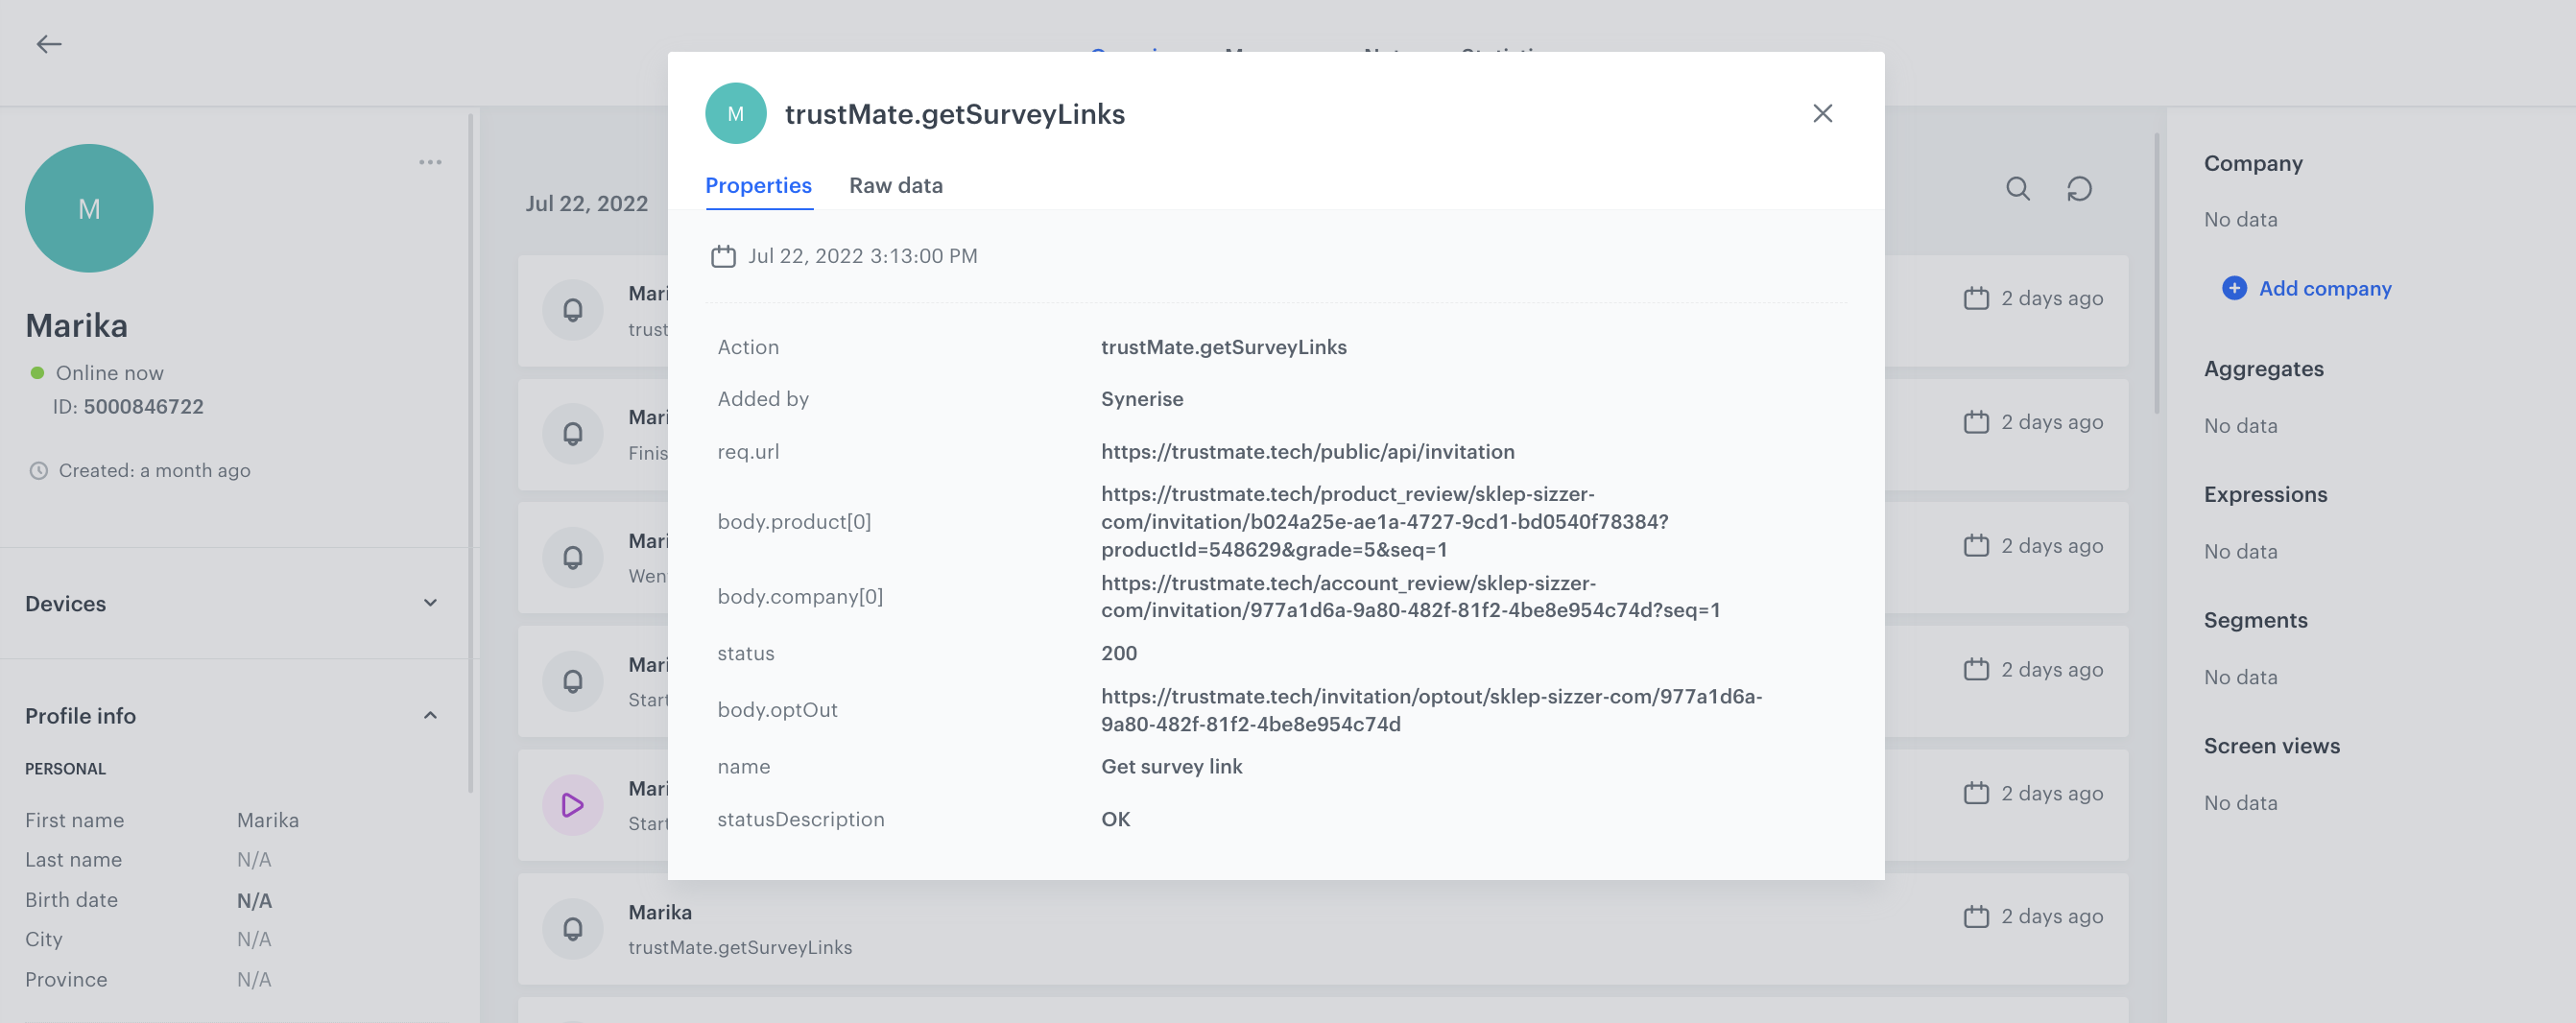
When the TrustMate node is launched, trustMate.getSurveyLinks event is generated on the customer’s profile. There are links to surveys in event parameters.
Configure the Event Filter node
This node enables you to make sure the link to survey is generated and keeps it as the context for the workflow.
-
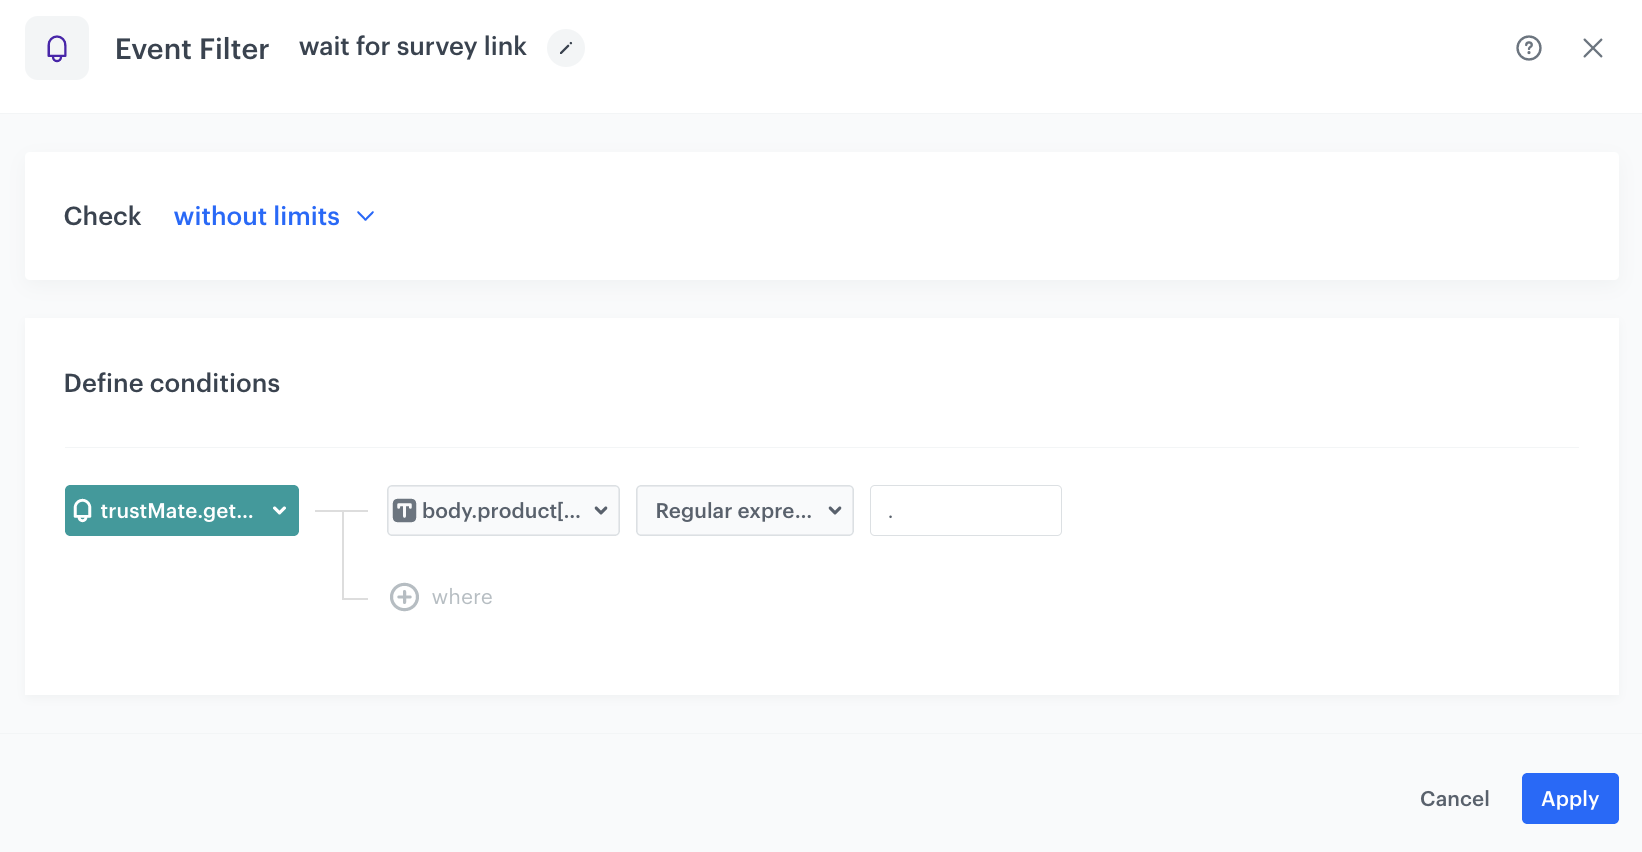
Add Event Filter. In the configuration of the node:
- In the Define conditions field, from the Choose event dropdown menu, choose
trustMate.getSurveyLinksevent. - Click where button.
- From the dropdown menu, select the
body.product[0]parameter. - From the Choose operator dropdown menu, select
Regular expression (String). - Enter the
.value. - Confirm by clicking Apply.
- In the Define conditions field, from the Choose event dropdown menu, choose
Configure the Delay node
Add the Delay node to define the lag between the purchase and sending an email with survey link. In this example it is 7 days.
- On the Get survey links node, click the plus icon.
- From the dropdown list, select Delay.
- Click the node.
- In the Delay field enter
7. - From the Unit dropdown menu, select
Day.
Configure settings for email
-
As the next node, add Send Email. Configure it according to your business needs.
-
Configure the sender details section.
-
Configure the Content section.
- In the Subject field, enter your message subject.
- In the Template section, choose the template email template prepared earlier.
- You can define UTM & URL parameters.
-
Confirm by clicking Apply.
Important: You need to enrich your email template with the survey link generated in the TrustMate integration node. The link to survey about purchased product is stored in thebody.product[0]parameter of thetrustMate.getSurveyLinksevent, so you can use the following Jinjava code in your email template:{{ event.params['body.product[0]'] }} -
Add the End node.
-
In the upper right corner, click Save & Run.
Track survey answers
Optionally, you can level up your communication with customers based on the answers from the survey. To make it possible, configure a custom event that will be sent to Synerise through API and which will include the rate of a product. When a customer fills in the survey, this event will be sent to Synerise.
Exemplary event frame:
{
   "action":"client.review",
   "client":{
      "email":"string"
   },
   "params":{
      "author_name":"string",
      "created_at":"2021-04-28T14:09:27.000Z",
      "grade":0,
      "brand":"string",
      "category":"string",
      "group_id":"string",
      "gtin":"string",
      "image_url":"string",
      "local_id":"string",
      "name":"string",
      "product_url":"string",
      "public_identifier":"string"
   }
}Check the use case set up on the Synerise demo workspace
You can also check the workflow configuration directly in Synerise Demo workspace at this link.
If you don’t have access to the Synerise Demo workspace, please leave your contact details in this form, and our representative will contact you shortly.