
Calculate value of all sold items
You can calculate the value of sold items including items sold by weight and volume. It helps you analyze the sold products statistics in more effective way.
Prerequisites
- Implement tracking code on your website.
- Implement transactions.
Process
In this use case, you will go through the following steps:
- Create an expression that will be available as a variable when including the
product.buyevent in analytics. - Create a metric that calculates all sold items.
Create an expression
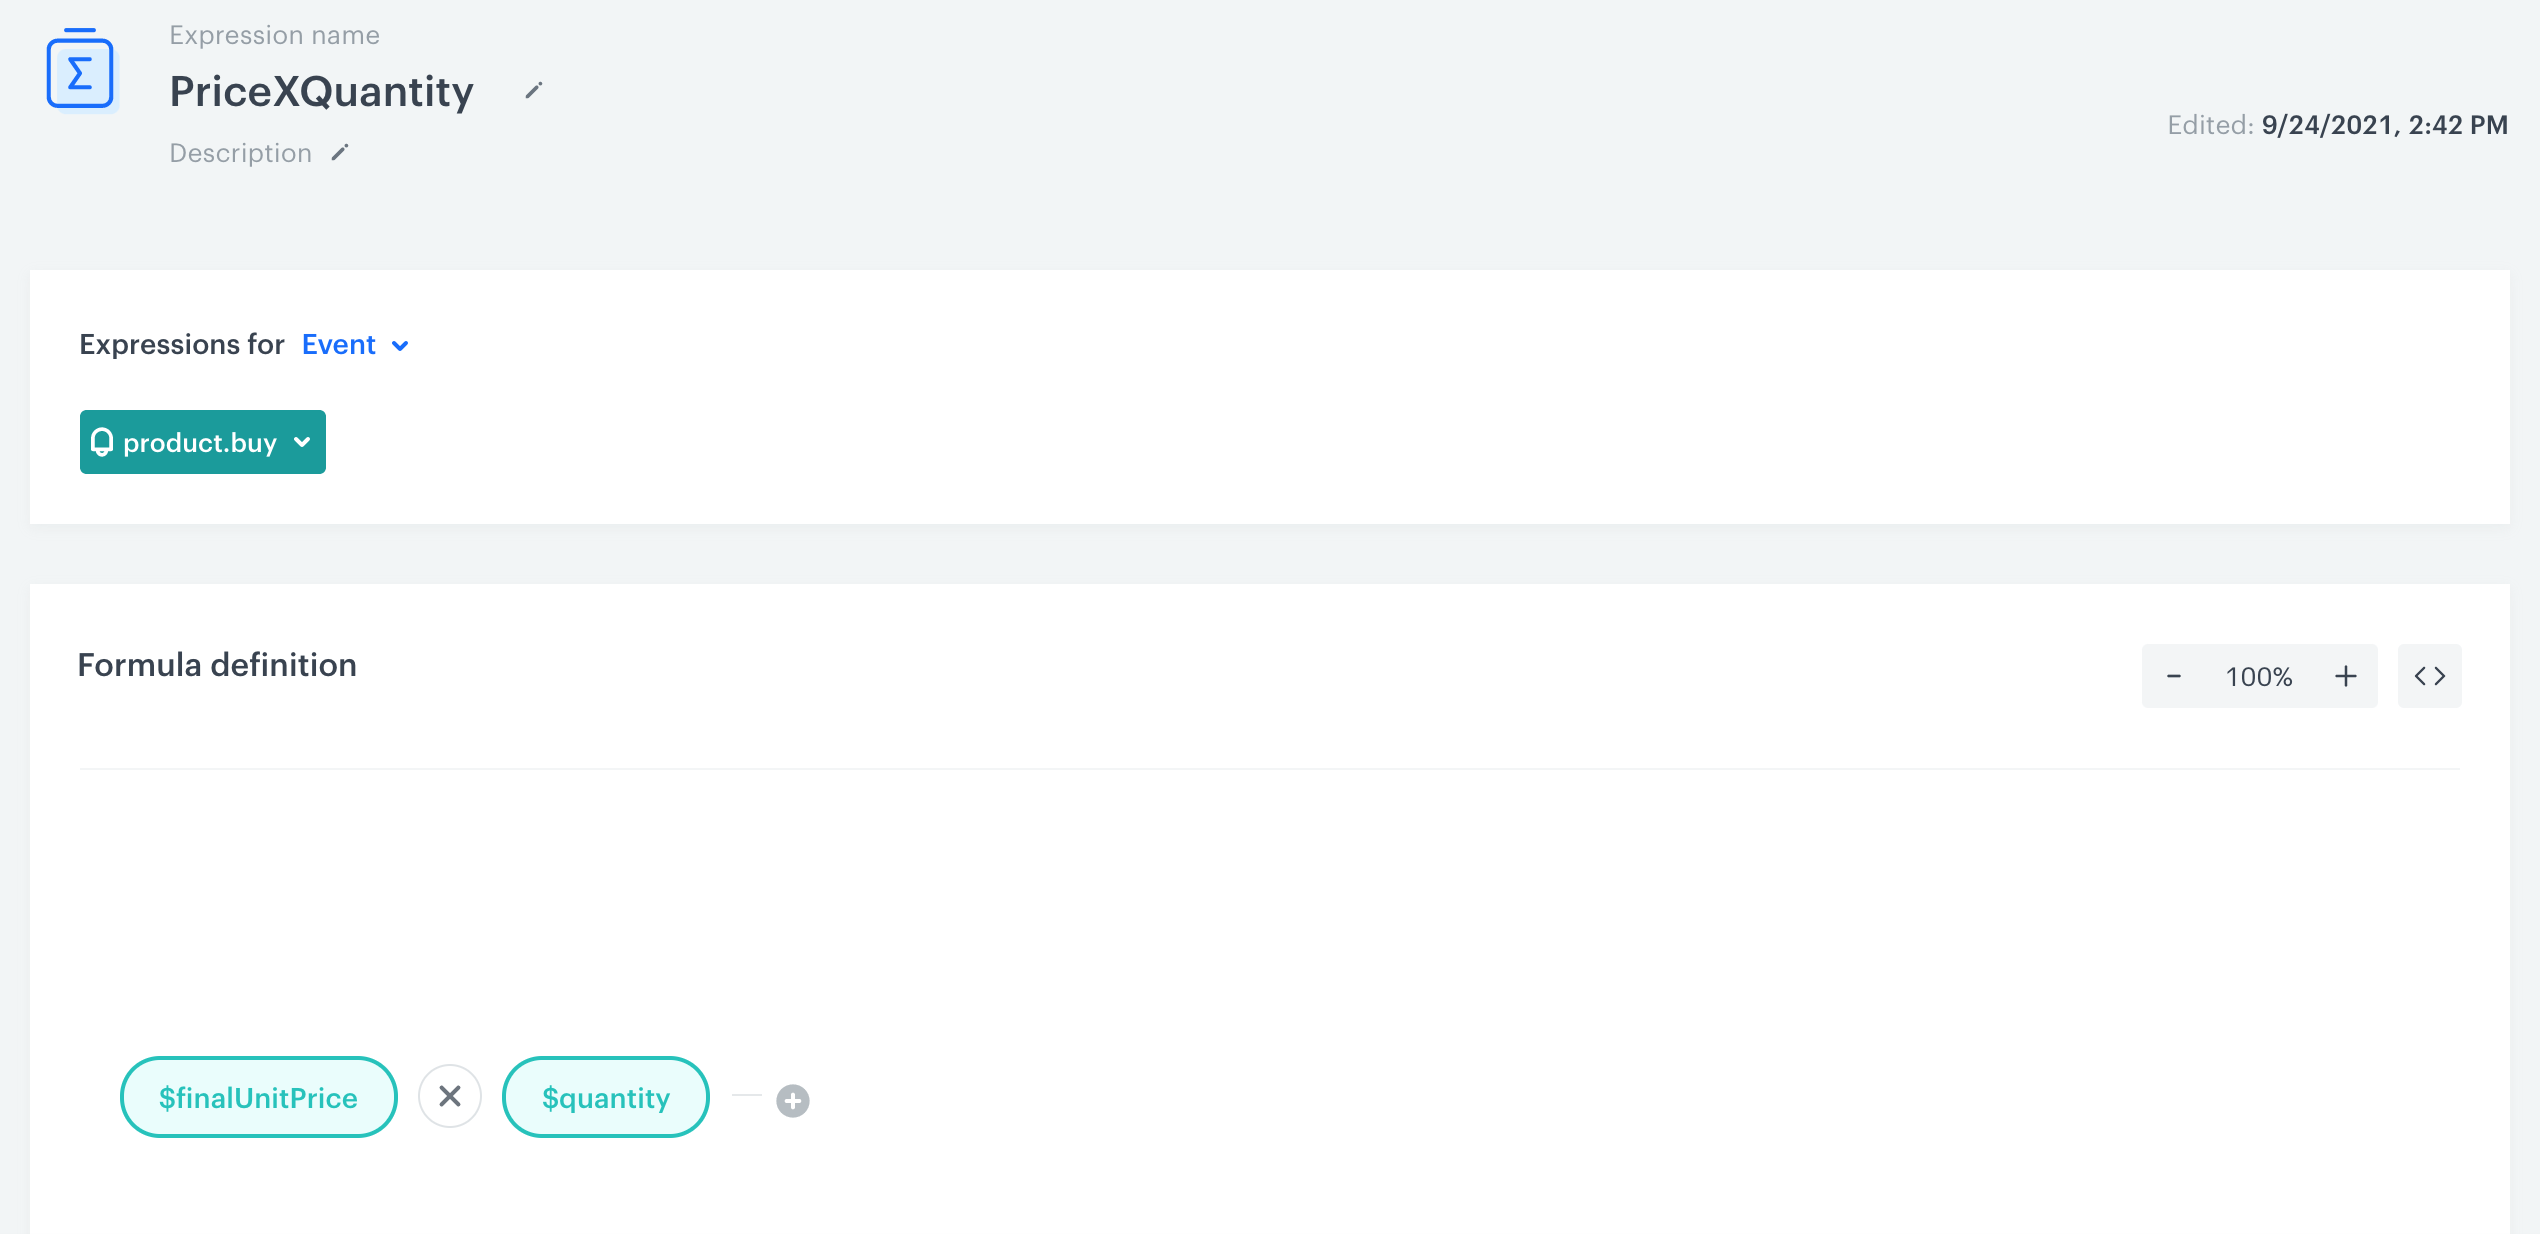
In this part of the process, create an expression that will be available as a variable when including the product.buy event in analytics. The formula of the expression multiplies the quantity of the item by the price of a single item.
- Go to
 Analytics > Expressions > New expression.
 - Enter the name of the expression.
Note: The name of the expression is also used as the name of the event’s parameter.
- As a type of expression, select Event.
- From the Choose event dropdown, select the
product.buyevent. - In the Formula definition section of the page, click Select.
Result: A dropdown list appears. - From the dropdown list, select Event attribute.
- Open the settings of the event attribute by clicking the unnamed expression element that appeared.
- From the Choose parameter dropdown, select
$finalUnitPrice. - Next to the added event attribute, click the plus button.
Result: A dropdown list appears. - From the dropdown list, select Event attribute.
- Open the settings of the event attribute by clicking the unnamed expression element that appeared.
- From the Choose parameter dropdown, select
$quantity. - Click the mathematical operator between the attributes and change it to multiplication.
- Click Save.
Create a metric
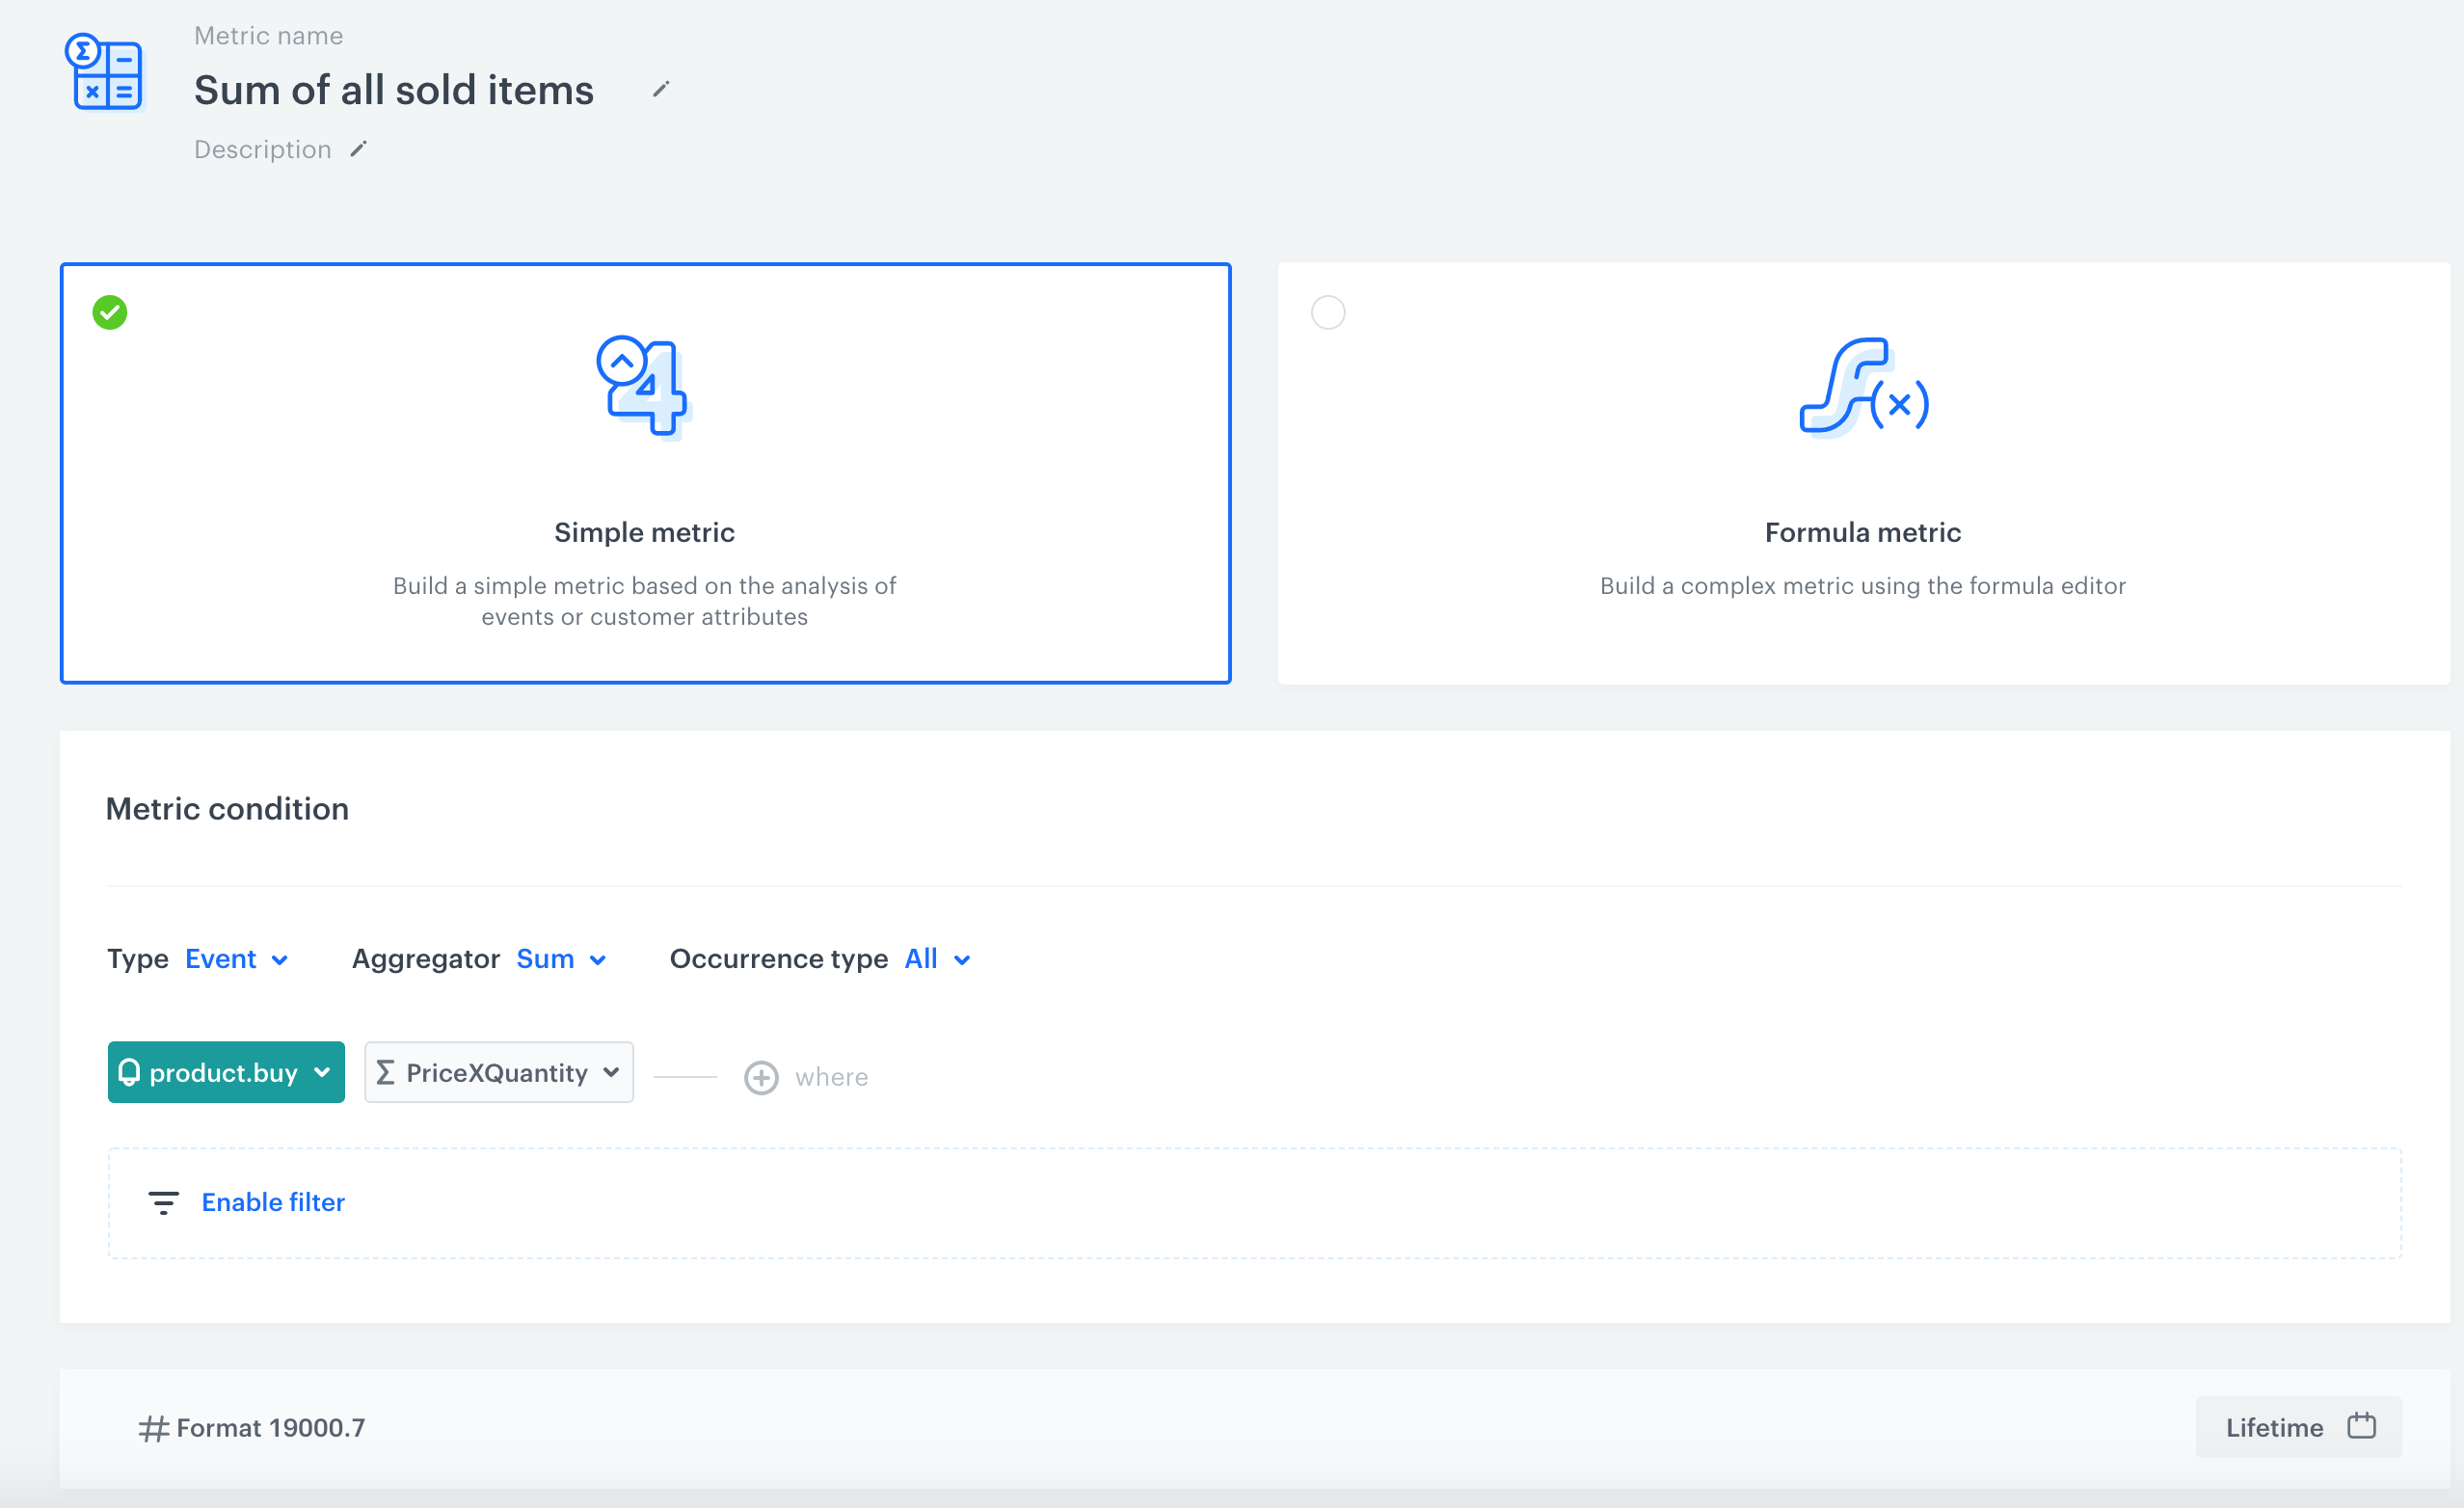
In this part of the process, create a metric that calculates all sold items. The metric reuses the expression you created in the previous part of the process.
- Go to Analytics > Metrics > New metric.
- Enter the name of the metric.
- As a metric kind, select Simple metric.
- As the aggregator, set
Sum. - As the occurrence type, set
All. - From the Choose event dropdown list, select
product.buy. - Click
 button.
Result: The Choose parameter button appears. - Click the Choose parameter button.
Result: A pop-up appears. - On the pop-up, click the three-dot button.
Result: A dropdown shows. - From the dropdown, select Expressions.
- In the list of expressions, find the event expression you have created earlier.
- To select a specific time range, click the calendar icon. In our case it will be Lifetime. Confirm your choice with the Apply button.
- Click Save.
What’s next
You can reuse the expression and metric while preparing the analyses to calculate items purchased in a given campaign. You can find more instructions here.
Check the use case set up on the Synerise Demo workspace
Check the expression and metric settings directly in Synerise Demo workspace.
If you don’t have access to the Synerise demo workspace, please leave your contact details in this form, and our representative will contact you shortly.