
Import transactional data from Google Cloud Storage to Synerise
Synerise allows you to collect data from any customer touchpoint. Using Synerise’s seamless integration with Google Cloud Storage (GCS), you can transfer any data stored in the GCS directly to Synerise and use it in the platform.
In this use case, we will import a file with transactional data and purchase history from Google Cloud Storage.
Prerequisites
- You must have a Google Cloud account.
- Create a project in Google Cloud.
Prepare a workflow
Create a workflow which performs a single import of the file with transactional data and purchase history from Google Cloud Storage to Synerise.
- Go to
 Automation > Workflows > New workflow.
 - Enter the name of the workflow.
Define the Scheduled Run trigger node
At this stage, we will configure conditions that launch the workflow. As a trigger, we will use the Scheduled Run node.
- As the trigger node, add Scheduled Run.
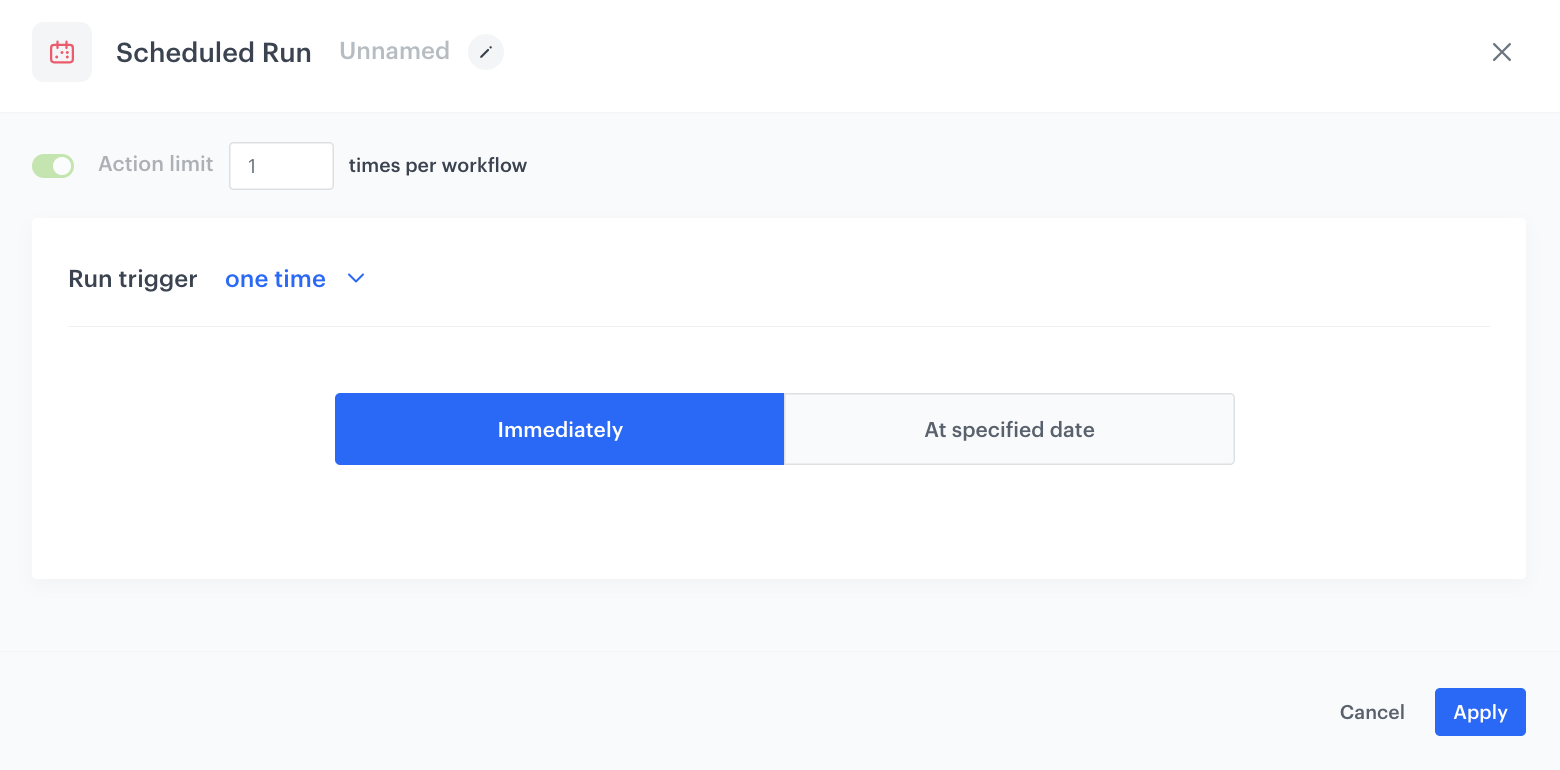
- In the configuration of the node:
- Change the Run trigger option to one time.
- Select Immediately.
- Confirm by clicking Apply.
Configure the Google Cloud Storage - Get file node
In this step, to allow the data exchange, establish a connection between Synerise and Google Cloud Storage.
- Add Google Cloud Storage > Get file node.
- Click Select connection.
- From the dropdown list, select the connection.
- If no connections are available or you want to create a new one, see Create a connection.
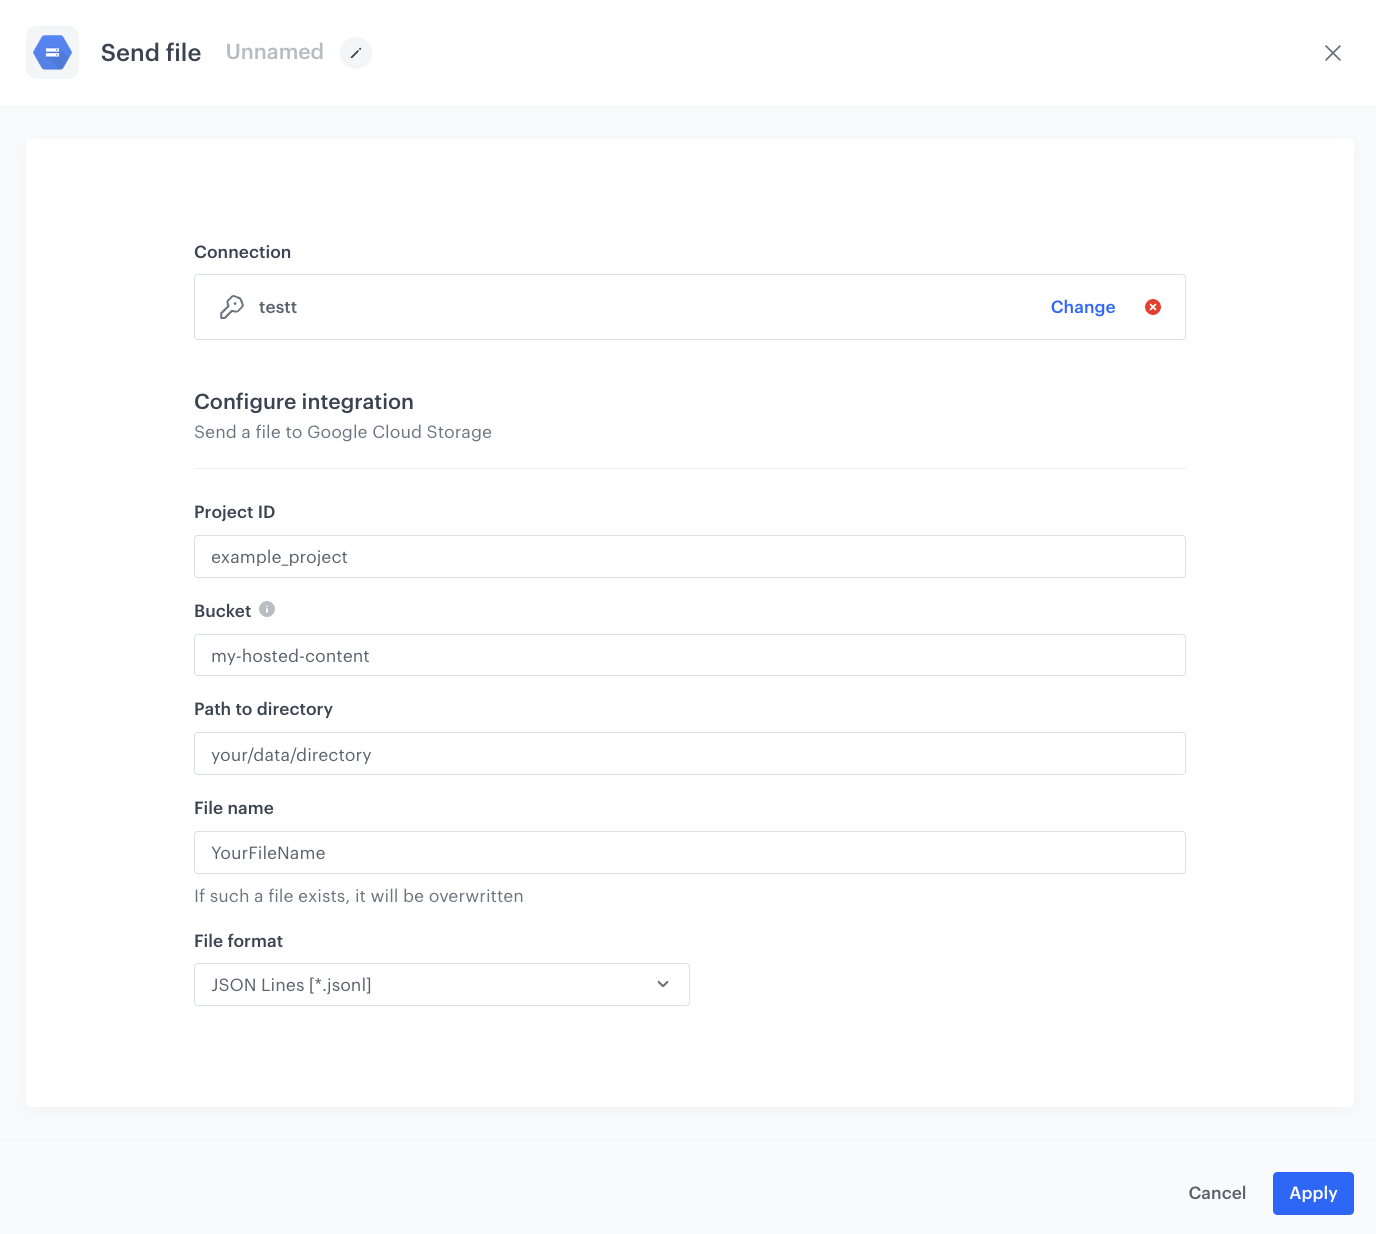
- If you selected an existing connection, proceed with the integration settings.
- In the Project ID field, enter the unique identifier of your project in Google Cloud.
You can learn how to find the project ID here. - In the Bucket field, enter the name of an existing bucket (container) from which you will download a file with data.
- In the Path to directory field, enter the path from which the file will be downloaded.
- In the File name field, enter the name of the file you want to download from the storage. If the file already exists, the contents of the file will be overwritten.
- From the File format dropdown list, select the format of the file which will be downloaded.
- Confirm by clicking Apply.
Add Import transactions node
In this step, add the Import transactions node to import the file with transactions directly to Synerise.
- Choose Synerise node.
- From the list that opens, select Synerise > Import transactions.
Add the finishing node
-
Add the End node.
-
In the upper right corner, click Save & Run.
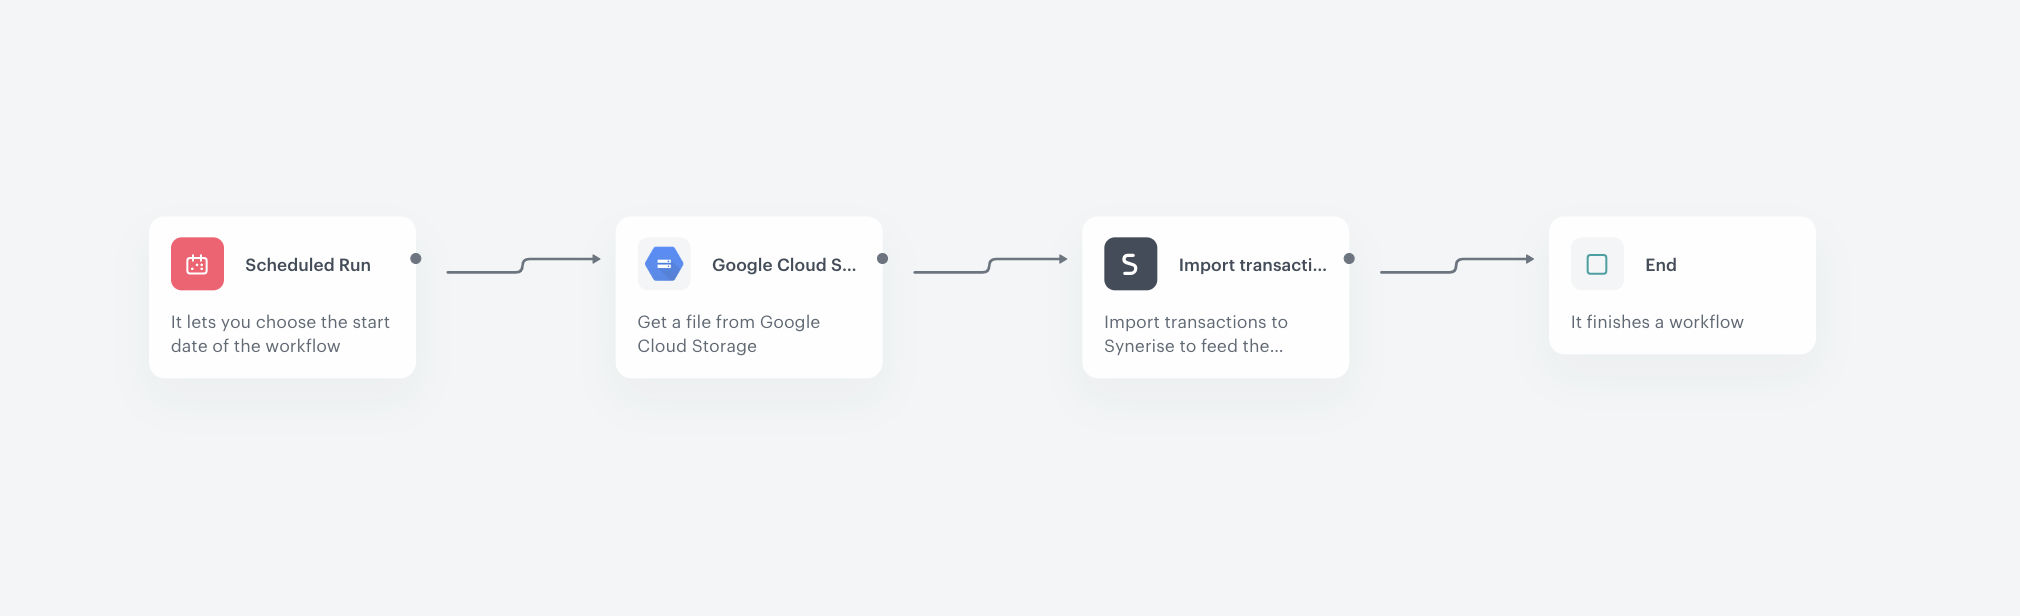
The workflow configuration
Check the use case set up on the Synerise Demo workspace
You can check the configuration of the workflowin this use case on our Synerise Demo workspace.