

Transform and import product data to a catalog
In this use case, we will focus on the process of importing and transforming product data from an .XML file using data transformation. This method of data transformation is beneficial as it eliminates the need for the data to be in a predetermined, structured format.
In this use case, we will make the following modifications to the file:
- Add 2 new columns:
- discounted: this column will contain the
truevalue for all products which have a value (price) assigned in theg:sale_pricecolumn. - percentage_discount: this column contains the percentage value of the discount based on
g:priceandg:sale_pricecolumns.
- discounted: this column will contain the
- Edit values:
Replace the value of
g:availabilitycolumn from1/0toin stock/out of stock.
Input data in use case
In this use case, we use two files:
- the complete
.XMLfile in the Google Merchant Format which contains the full set of products. The file contains the following attributes:g:id,g:title,g:description,g:image_link,g:price,g:sale_price,g:availability. - the sample of the product data in the
.XMLformat. To reproduce this scenario in your workspace, create a catalog and prepare the files.Note: If your product data is complete, you can skip transforming data. But if you need to modify the file with product data before an import to Synerise, you can modify the data in Automation > Data Transformation. To do so, create a sample of your product data and include all attributes you want to modify. If you miss the attributes in the sample file, but import the actual product data with them, the data will be imported as delivered in the actual file.
<?xml version="1.0" encoding="UTF-8"?>
<rss version="2.0" xmlns:g="http://base.google.com/ns/1.0">
<channel>
<title>Your Store Name</title>
<link>https://www.yourstore.com</link>
<description>Your Store with clothes</description>

<item>
<g:id>1</g:id>
<g:title>Shirt</g:title>
<g:description>white cotton shirt with a round neck</g:description>
<g:link>https://www.yourstore.com/product-1</g:link>
<g:image_link>https://www.yourstore.com/product-1-image.jpg</g:image_link>
<g:price>19.99</g:price>
<g:sale_price>10.99</g:sale_price>
<g:availability>1</g:availability>
</item>

<item>
<g:id>2</g:id>
<g:title>Jeans</g:title>
<g:description>blue cotton jeans</g:description>
<g:link>https://www.yourstore.com/product-2</g:link>
<g:image_link>https://www.yourstore.com/product-2-image.jpg</g:image_link>
<g:price>29.99</g:price>
<g:sale_price>20.99</g:sale_price>
<g:availability>0</g:availability>
</item>
</channel>
</rss>
Process
In this use case, you will go through the following steps:
- Create a data transformation rule to transform the data in the sample file.
- Create a workflow to import the .
XMLfile to Synerise.
Create a data transformation
In this part of the process, you define the rules of modifying data before sending it to the Synerise based on the sample file. Each of the following sub-steps describes the individual changes performed on the file. We will add follwing rules:
- Add 2 new columns:
- discounted: this column will contain the
truevalue for all products which have a value (price) assigned in theg:sale_pricecolumn. - percentage_discount: this column contains the percentage value of the discount based on
g:priceandg:sale_pricecolumns.
- discounted: this column will contain the
- Edit values:
Replace the value of
g:availabilitycolumn from “1/0“ to “in stock/out of stock“
- Go to
 Automation > Data Transformation > Create transformation.
 - Enter the name of the transformation.
- Click Add input.
Before you proceed with selecting sample data and defining transformation rules, optionally, you can select a goal to help you structure the data. If you want to create a transformation diagram without a specific goal and you know the structure of the output data, skip this step.
Goals will suggest you the required data for the import into Synerise.
Add file with sample data
This node allows you to add a data sample. In further steps, you define how the data will be modified. Later, when this transformation is used in the Automation workflow, the system uses the rules created for the sample data as a pattern for modifying actual data.
- On the canvas, click the Add input node.
- On the pop-up, click Upload a new file or drag one here.
- Upload the
.XMLfile created as the part of prerequisites. - You can preview the file, then click Apply.
Add the new column
- On the Data Input node, click the grey dot.
- From the dropdown list, select Add column.
- Click the Add column node.
- In the configuration of the node:
- In the Add column field, enter the name of the column. In this use case, it’s
discounted. - From the dropdown list, select Dynamic value.
- In the Type value box, add the Jinja code, which adds the
truevalue for all products withg:sale_priceattribute in this new column. You can use the code presented below:{% if root["g:sale_price"] is defined %}true{% endif %} - Leave Handle incomplete data at default (Skip row if error occurred) to skip missing or invalid data which may occur during transformation.
- Confirm by clicking Apply.
- In the Add column field, enter the name of the column. In this use case, it’s
Add the new column
- On the Add column node, click THEN.
- From the dropdown list, select Add column.
- Click the Add column node.
- In the configuration of the node:
- In the Add column field, enter the name of the column. In this use case, it’s
percentage_discount. - From the dropdown list, select Dynamic value.
- In the Type value box, add the Jinja code, which counts the percentage value of the discount based on
g:priceandg:sale_priceattributes and adds it to this new column. You can use the code presented below:{% if root["g:sale_price"] is defined %}{{ root["g:sale_price"]*100/root["g:price"] }}{% endif %} - Leave Handle incomplete data at default (Skip row if error occurred) to skip missing or invalid data which may occur during transformation.
- Confirm by clicking Apply.
- In the Add column field, enter the name of the column. In this use case, it’s
Edit values
- On the Add column node, click THEN.
- From the dropdown list, select Edit values.
- Click the Edit values node. In the configuration of the node:
- Click Add rule.
- Click Add column.
- From the dropdown list, select column name, in this case it’s
g:availability. - Set the Edit values values option to:
- Replacing
- Dynamic value.
- In the Type value field, enter the Jinja code which replaces the value of
g:availabilityattribute from1and0toin stock/out of stock. You can use the code presented below:{% if root['g:availability'] == 1 %}in stock{% else %}out of stock{% endif %} - Leave Handle incomplete data at default (Skip row if error occurred) to skip missing or invalid data which may occur during transformation.
- Confirm by clicking Apply.
Add the finishing node
This node lets you preview the output of the modifications to the sample data.
- On the Edit values node, click THEN.
- From the dropdown list, select Data Output.
- To preview the results, click the Data Output node.
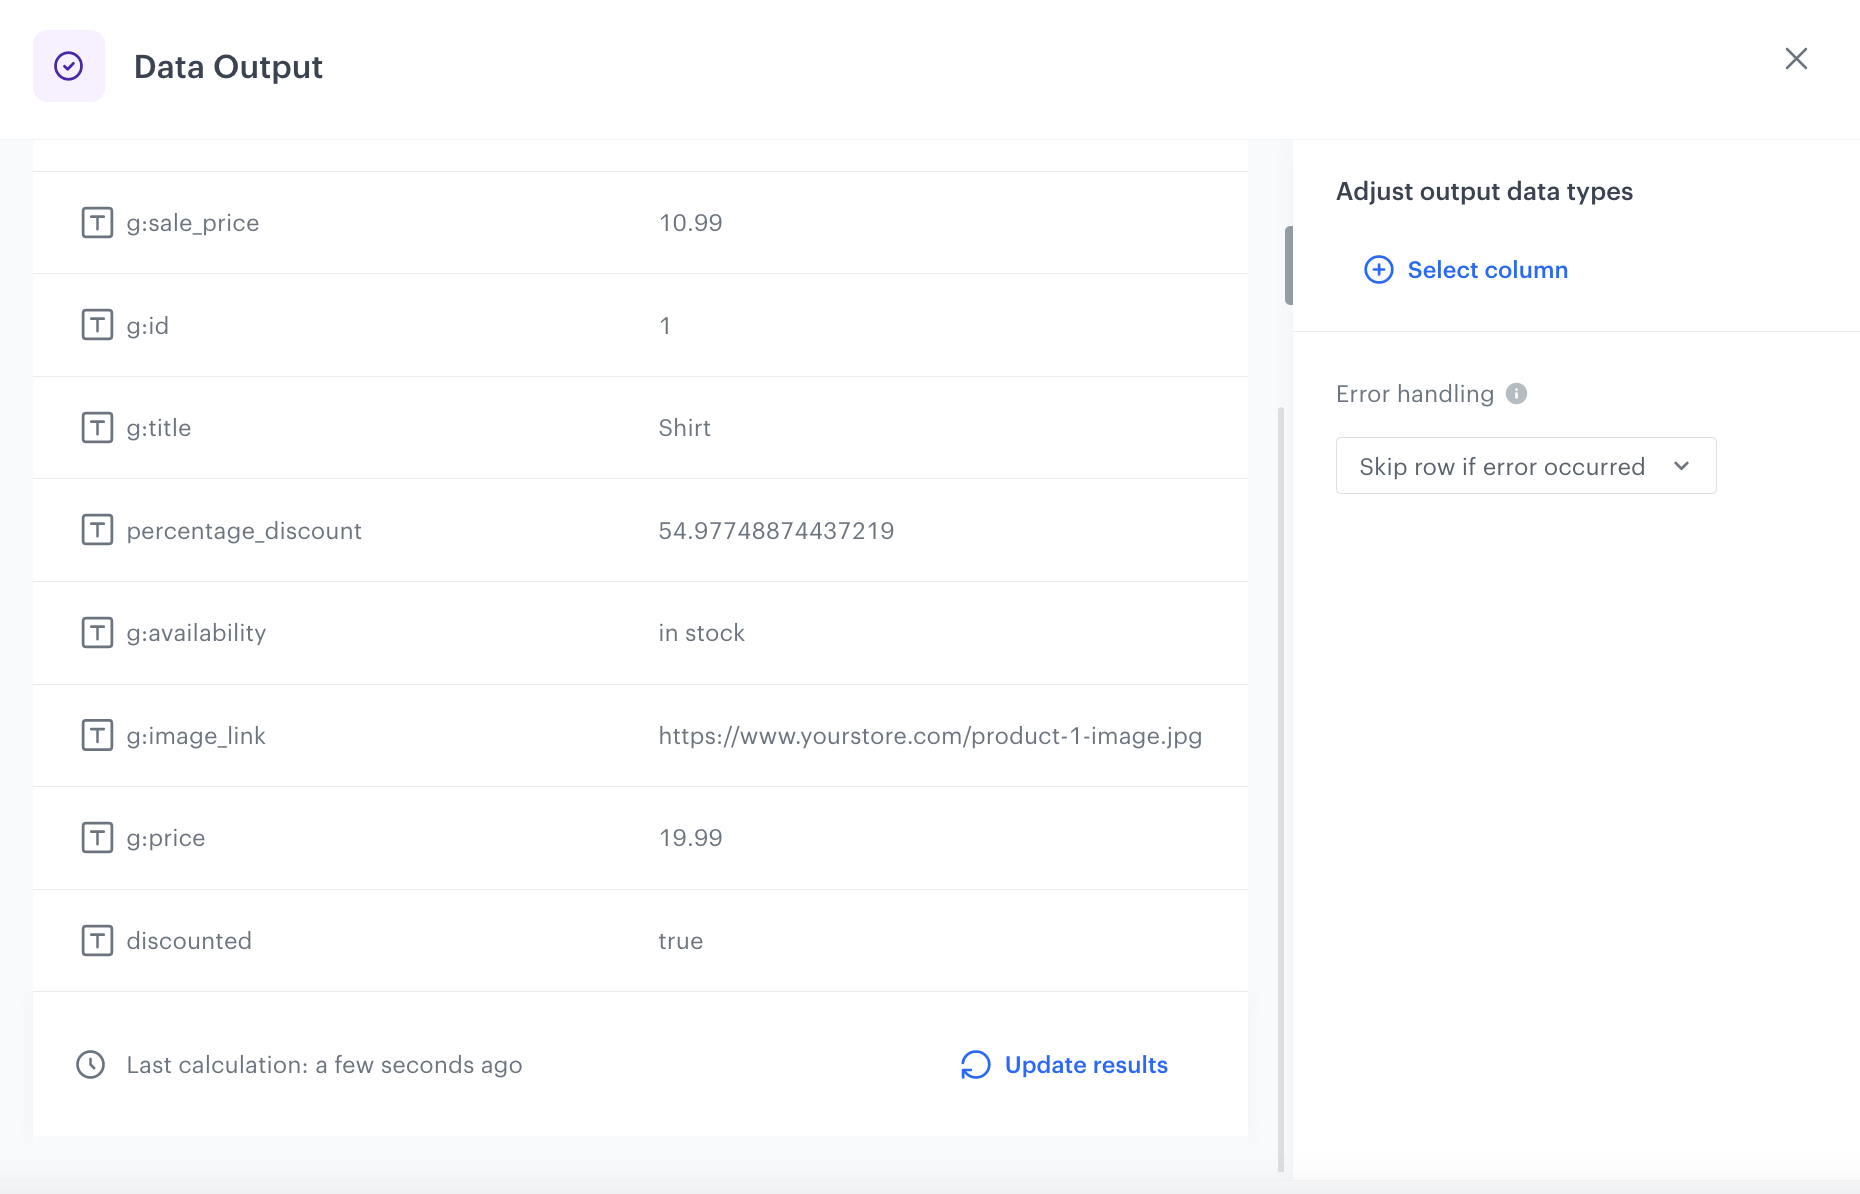
The preview of modifications to the file - Close the preview
- In the upper right corner, click Save and publish.
Result: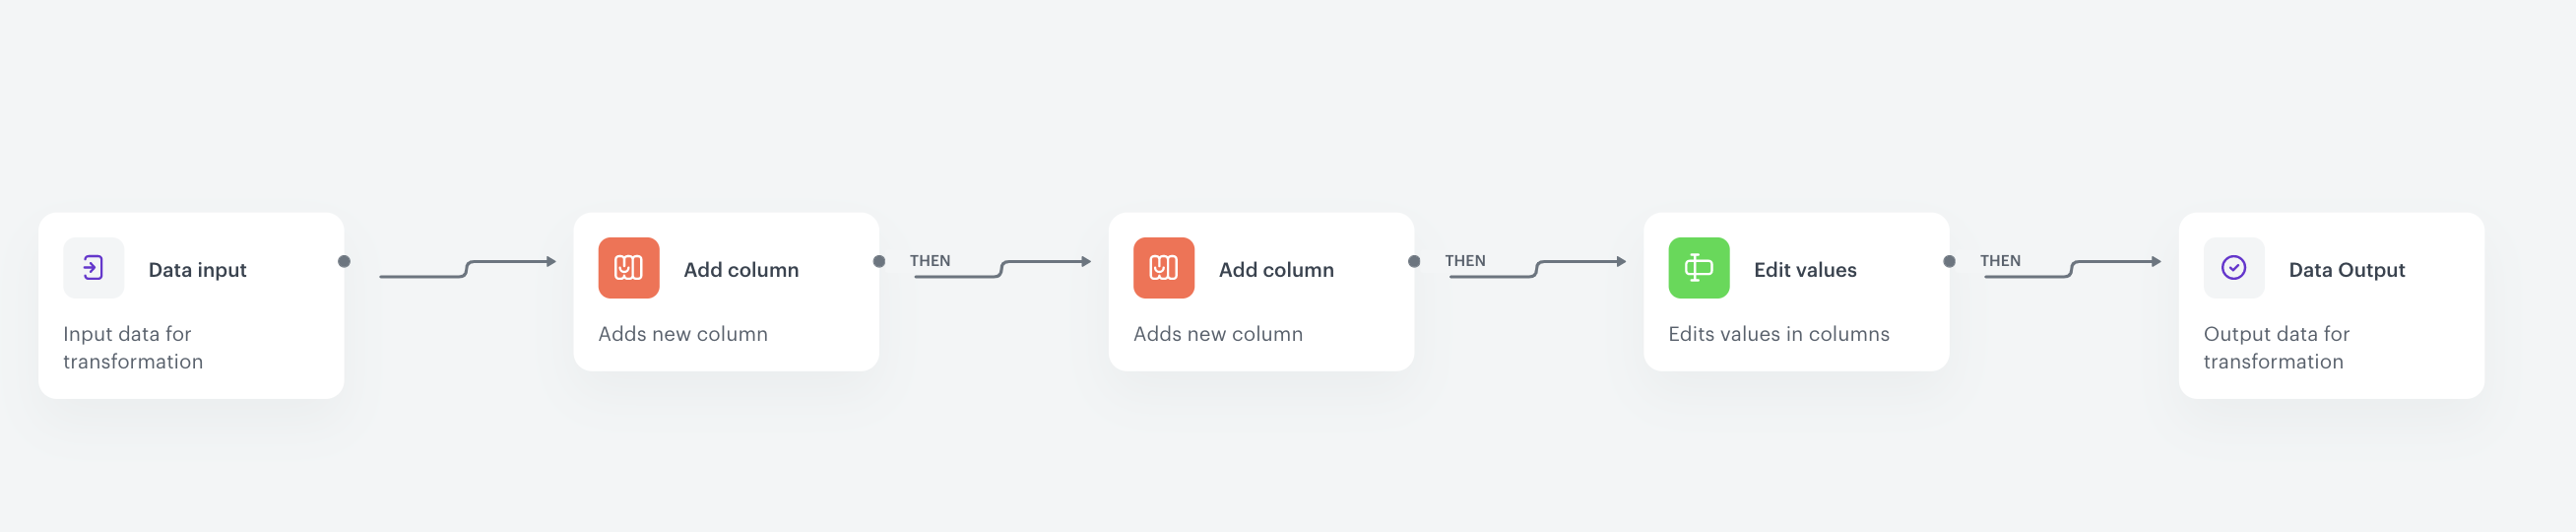
The diagram of data transformation
Create a workflow
The scenario for this use case describes a one-time import of the .XML file with a product database to Synerise.
- Go to Automation > Workflows > New workflow.
- Enter the name of the workflow.
Define the launch date
-
As the trigger node, add Scheduled Run.
-
In the configuration of the node:
- Change the Run trigger option to one time.
- Select Immediately.
- Confirm by clicking Apply.
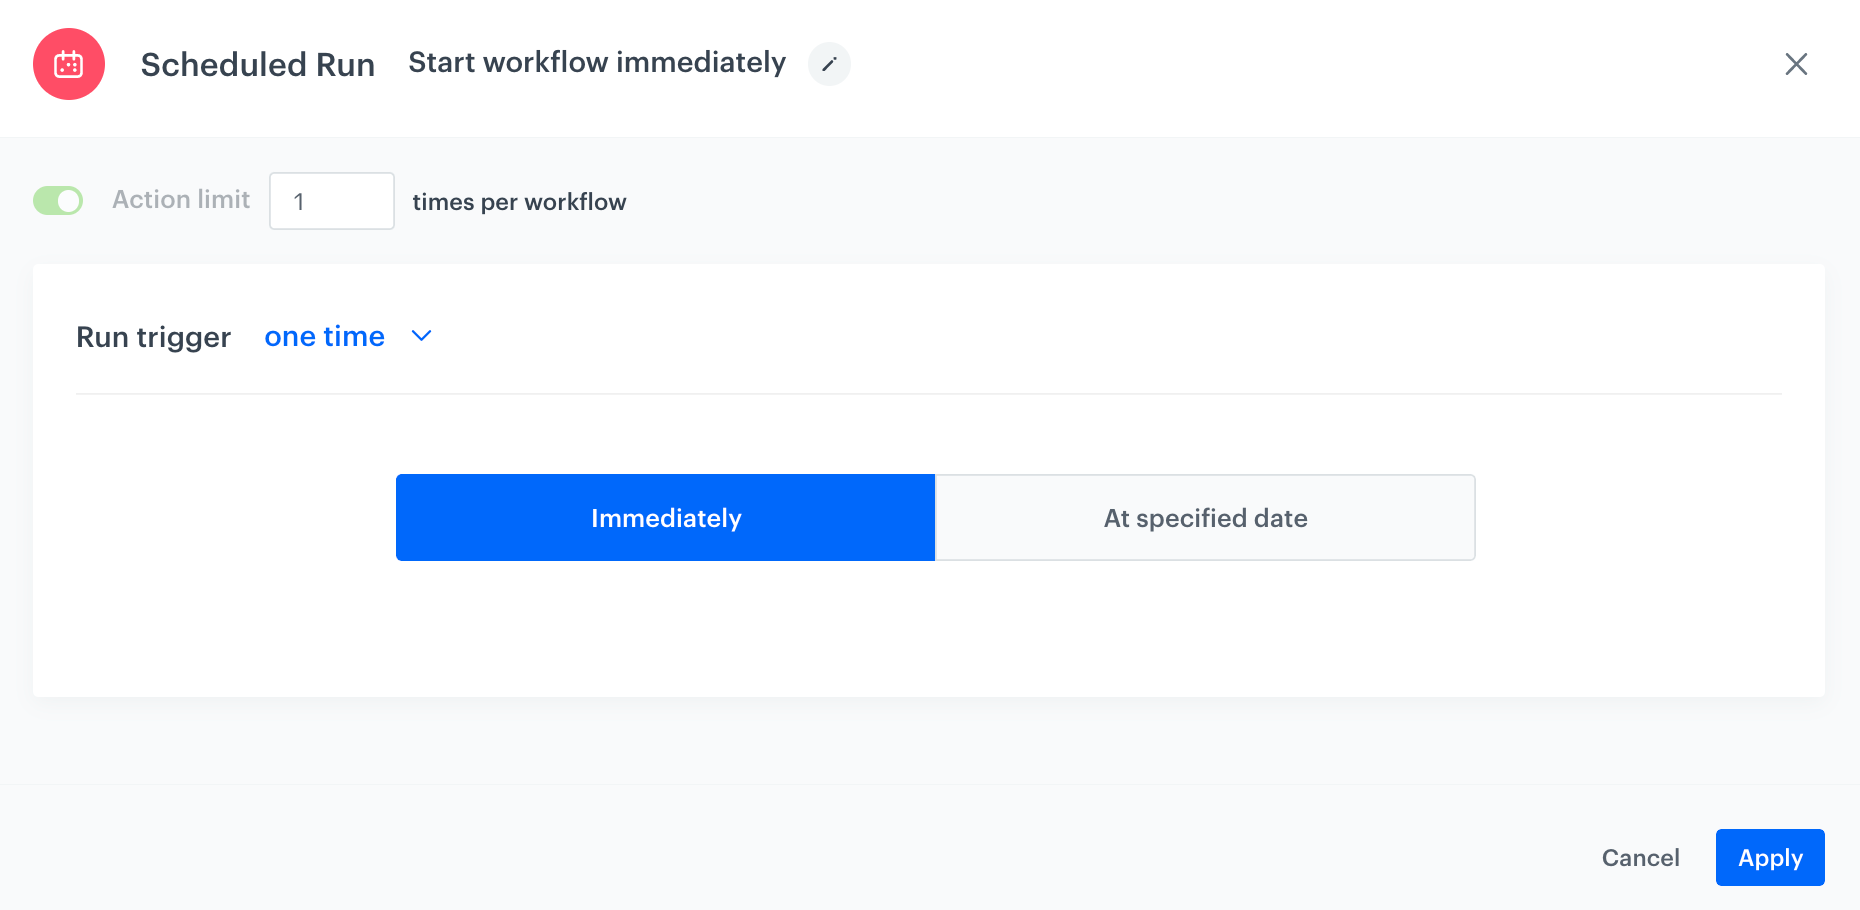
The configuration of the Scheduled Run node
Select file to import
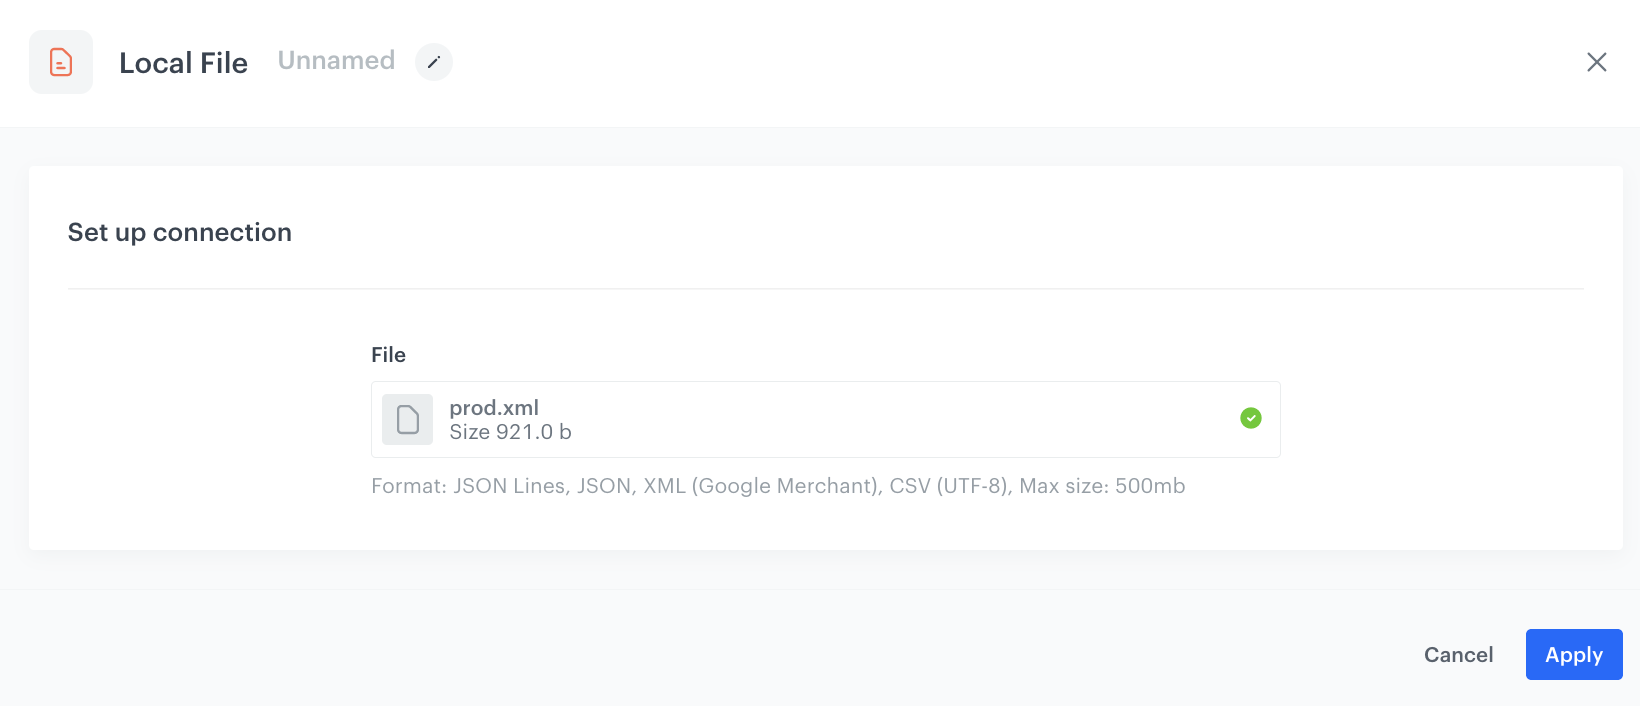
- Add a Local file node.
- In the configuration of the node:
- Upload the file.
- Confirm by clicking Apply.
Add data transformation node
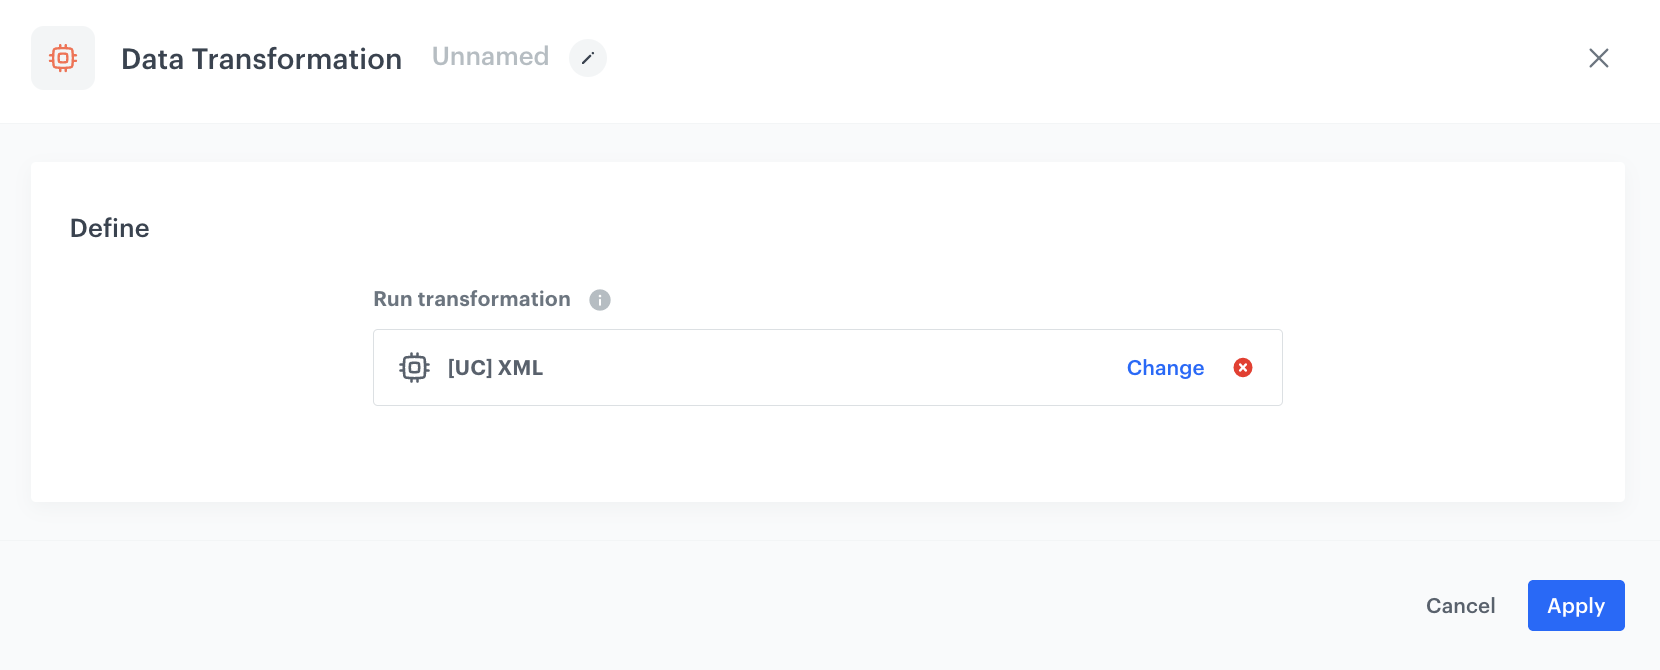
- Add a Data transformation node.
- In the configuration of the node:
- Choose the name of the data transformation, which you have created in the previous part of the process.
- Confirm by clicking Apply.
Add import to catalog
- On the Data transformation node, click THEN.
- From the list that opens, select Synerise > Import to catalog.
- Open Import to catalog node.
- Choose the catalog from the list.
- As a primary key, choose
g:idparameter. - Click Apply.
Add the finishing node
- Add the End node.
- In the upper right corner, click Save & Run.
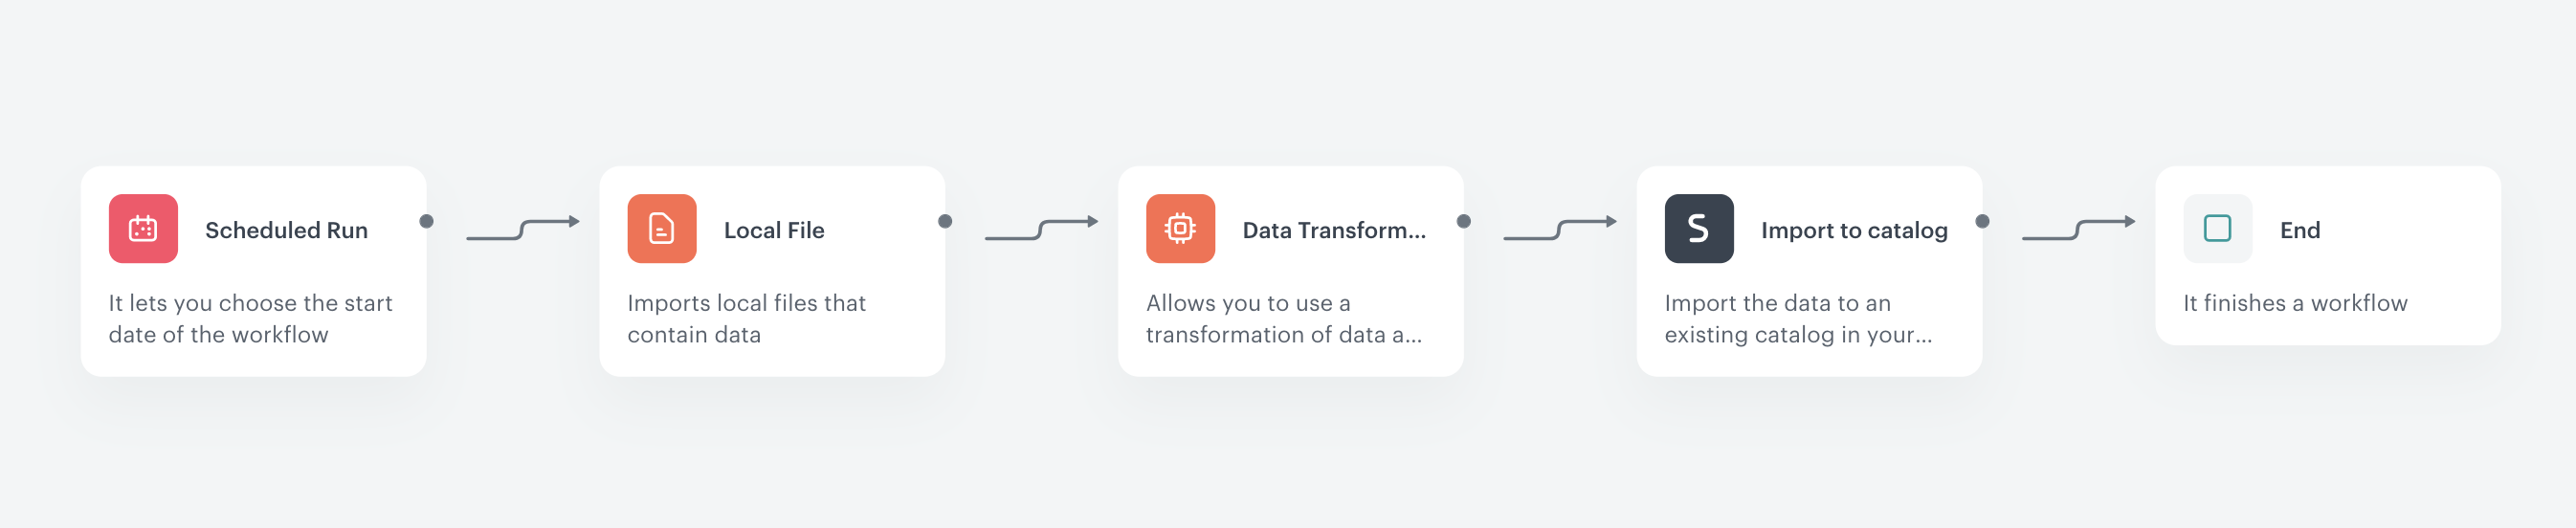
The workflow configuration
You can monitor the flow of the workflow in the Transformation logs tab. It contains information about the execution of the workflow.

Check the use case set up on the Synerise Demo workspace
You can check the data transformation and automation process directly in Synerise Demo workspace.
If you don’t have access to the Synerise Demo workspace, please leave your contact details in this form, and our representative will contact you shortly.