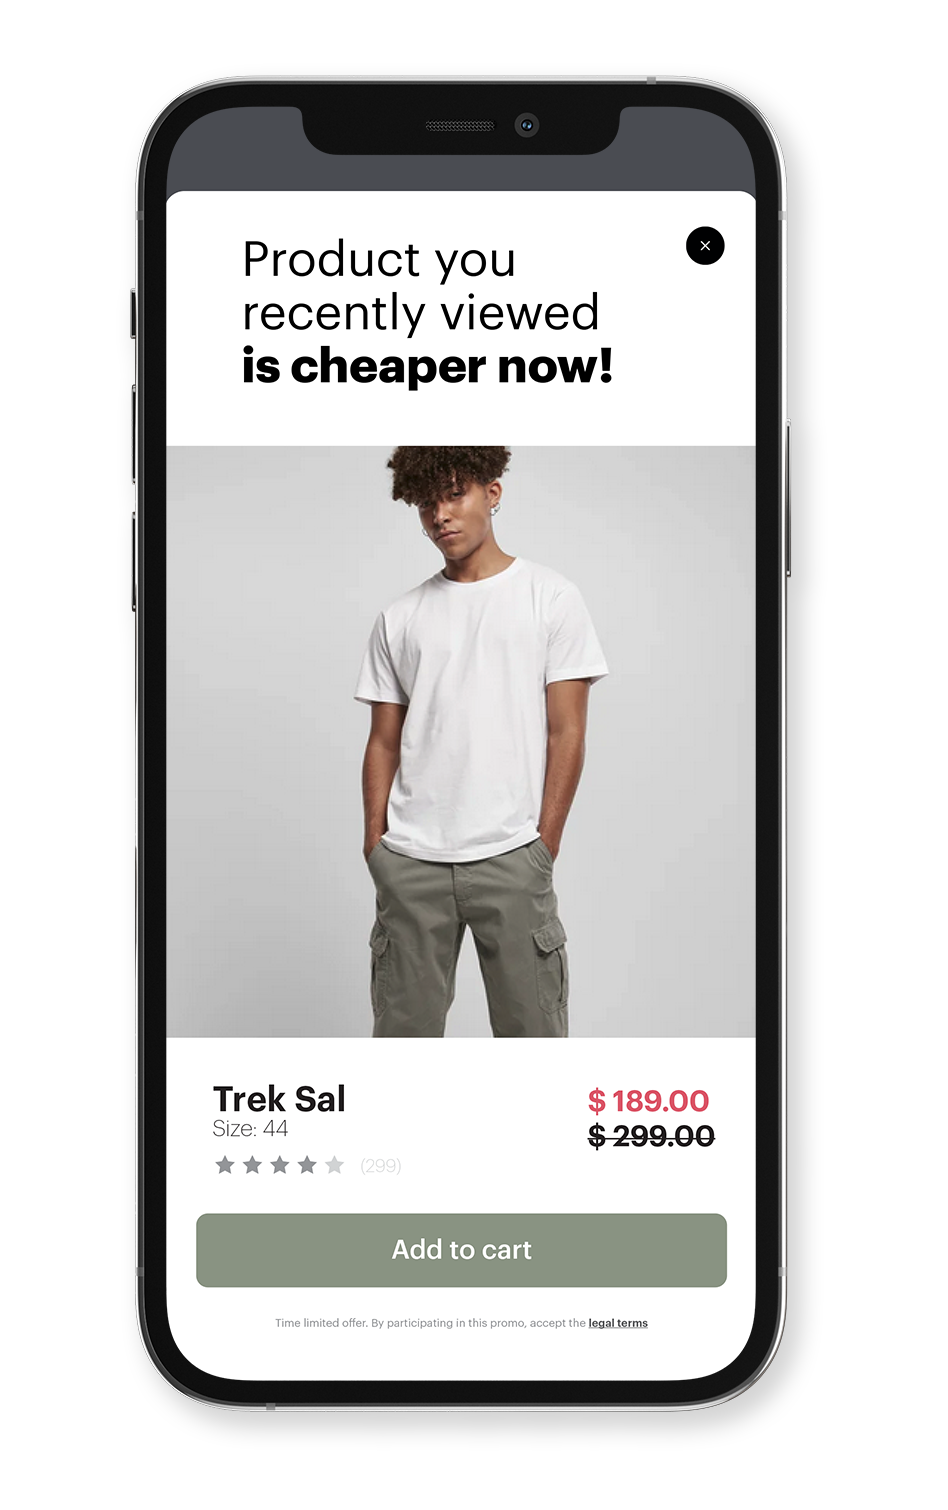
In-app message with a price drop for recently viewed products
In-app messaging has become an essential tool for businesses as it provides a direct and personal communication channel with customers.
Price drops are a key aspect of business strategy to drive sales, increase customer engagement, and enhance brand loyalty. In an ever-competitive market, price drops can help companies stand out and create a unique value proposition for their customers. With the right strategy, price drops can produce significant results, leading to revenue growth and increased customer engagement.
For customers, price drops represent an opportunity to save money on products that interest them. This, in turn, can increase customer loyalty and satisfaction and encourage repeat purchases.
The scenario described in this use case involves using an in-app message to notify customers of price drops on recently viewed products. The in-app message will be displayed right after the start of the mobile session only for customers for whom the product they were viewing has actually been reduced in price.
Prerequisites
- Implement the required version of Synerise SDK in your mobile app.
- Implement the transaction events using SDK or API.
- Create an item catalog containing information on the actual price of products.
Process
In this use case, you will go through the following steps:
- Create an aggregate that returns the IDs of visited products
- Create an aggregate that returns the prices of visited products
- Create an aggregate that returns sku of recently purchased products
- Create an in-app campaign
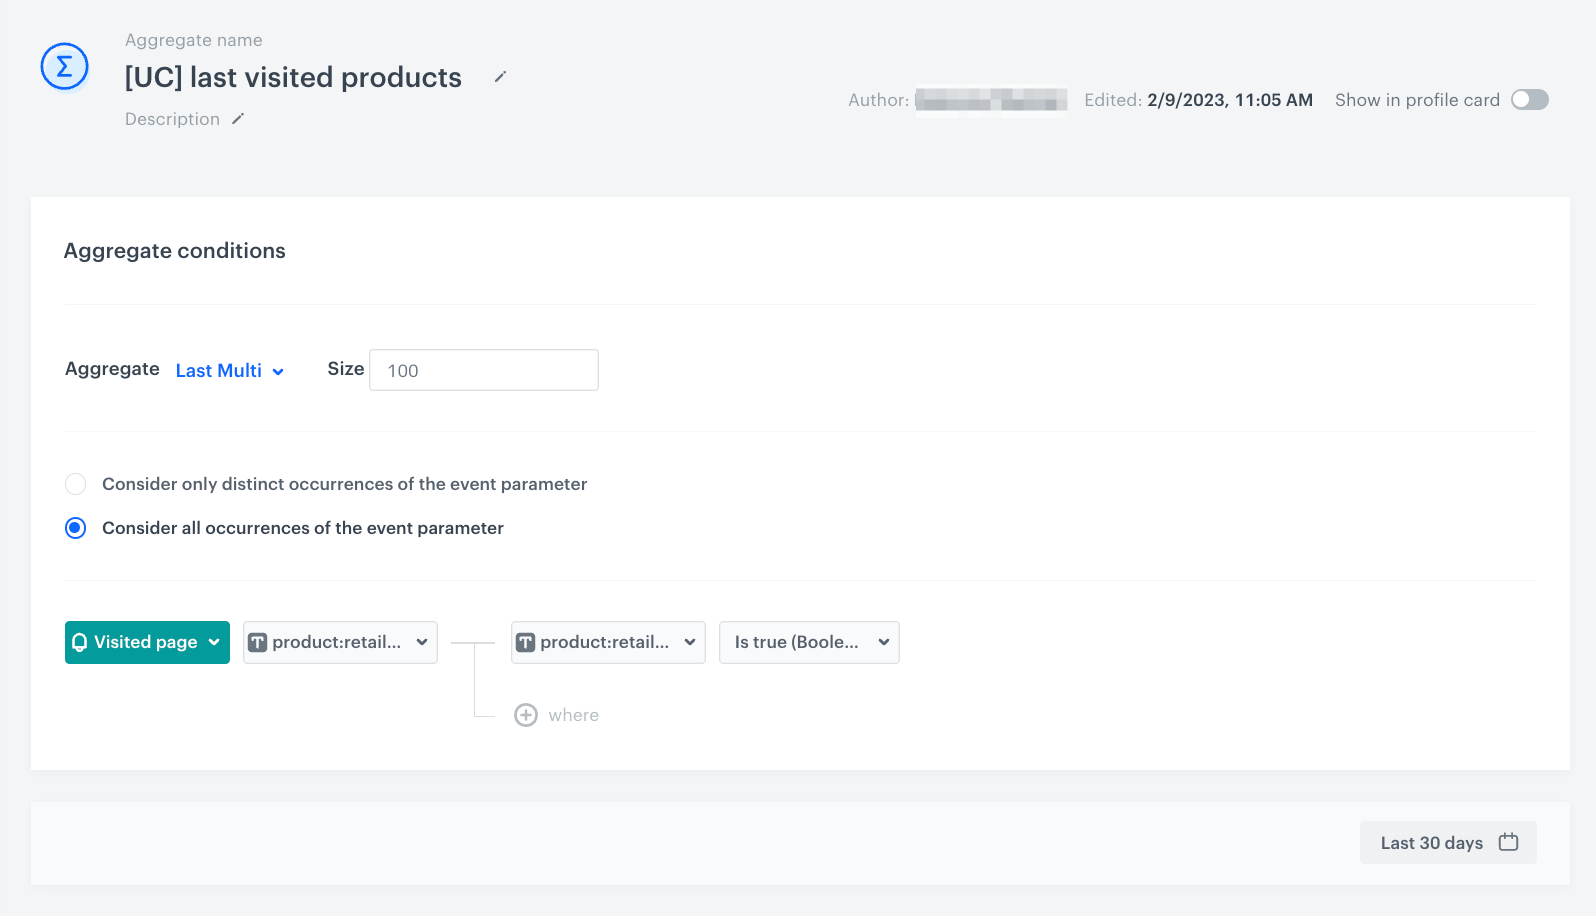
Create an aggregate that returns the IDs of last visited products
- Go to
 Analytics > Aggregates > New aggregate.
 - Enter the name of the aggregate.
- As the type of the aggregate, select Last multi and size: 100.
- Select the Consider all occurrences of the event parameter radio button.
- From the Choose event drop-down list, select the page.visit event.
- As the event parameter, select product:retailer_part_no.
- Click the + where button.
- From the Choose parameter drop-down list, select the product:retailer_part_no parameter.
- From the Choose operator drop-down list, select Is true (Boolean).
- Set the period for which the aggregate will return IDs of the viewed products to the last 30 days.
- Save the aggregate.
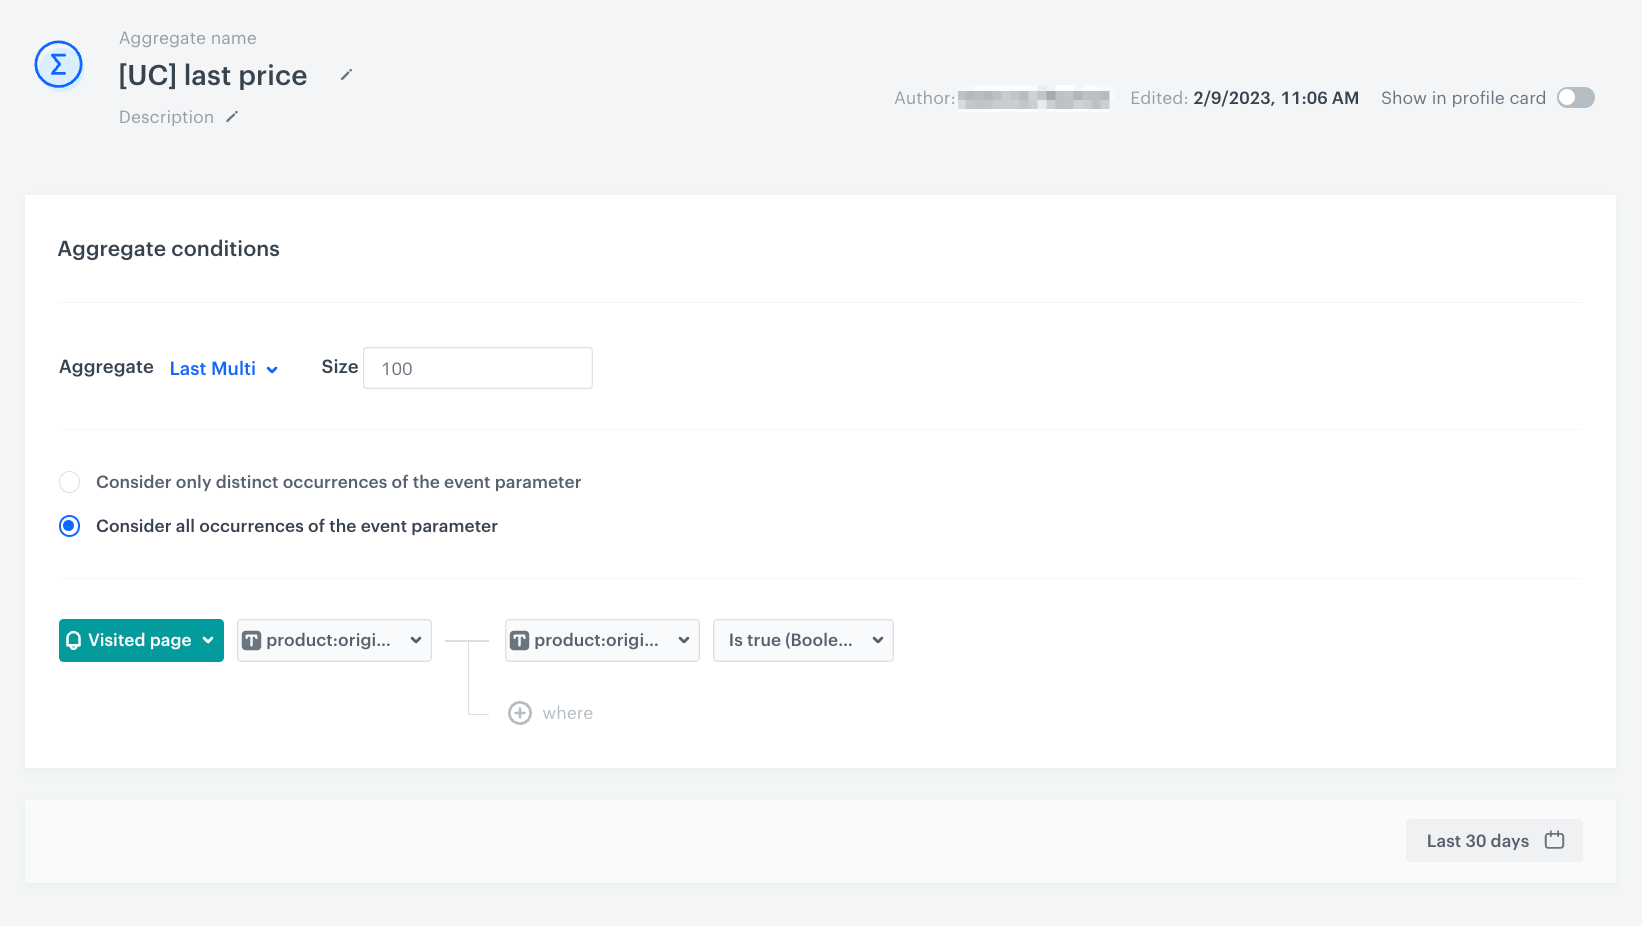
Create an aggregate that returns the original prices of last visited products
- Go to Analytics > Aggregates > New aggregate.
- Enter the name of the aggregate.
- As the type of the aggregate, select Last multi and size: 100.
- Select the Consider all occurrences of the event parameter radio button.
- From the Choose event drop-down list, select the page.visit event.
- As the event parameter, select product:original_price:amount.
- Click the + where button.
- From the Choose parameter drop-down list, select the product:original_price:amount parameter.
- From the Choose operator drop-down list, select Is true (Boolean).
- Set the period for which the aggregate will return the original prices of viewed products to the last 30 days.
- Save the aggregate.
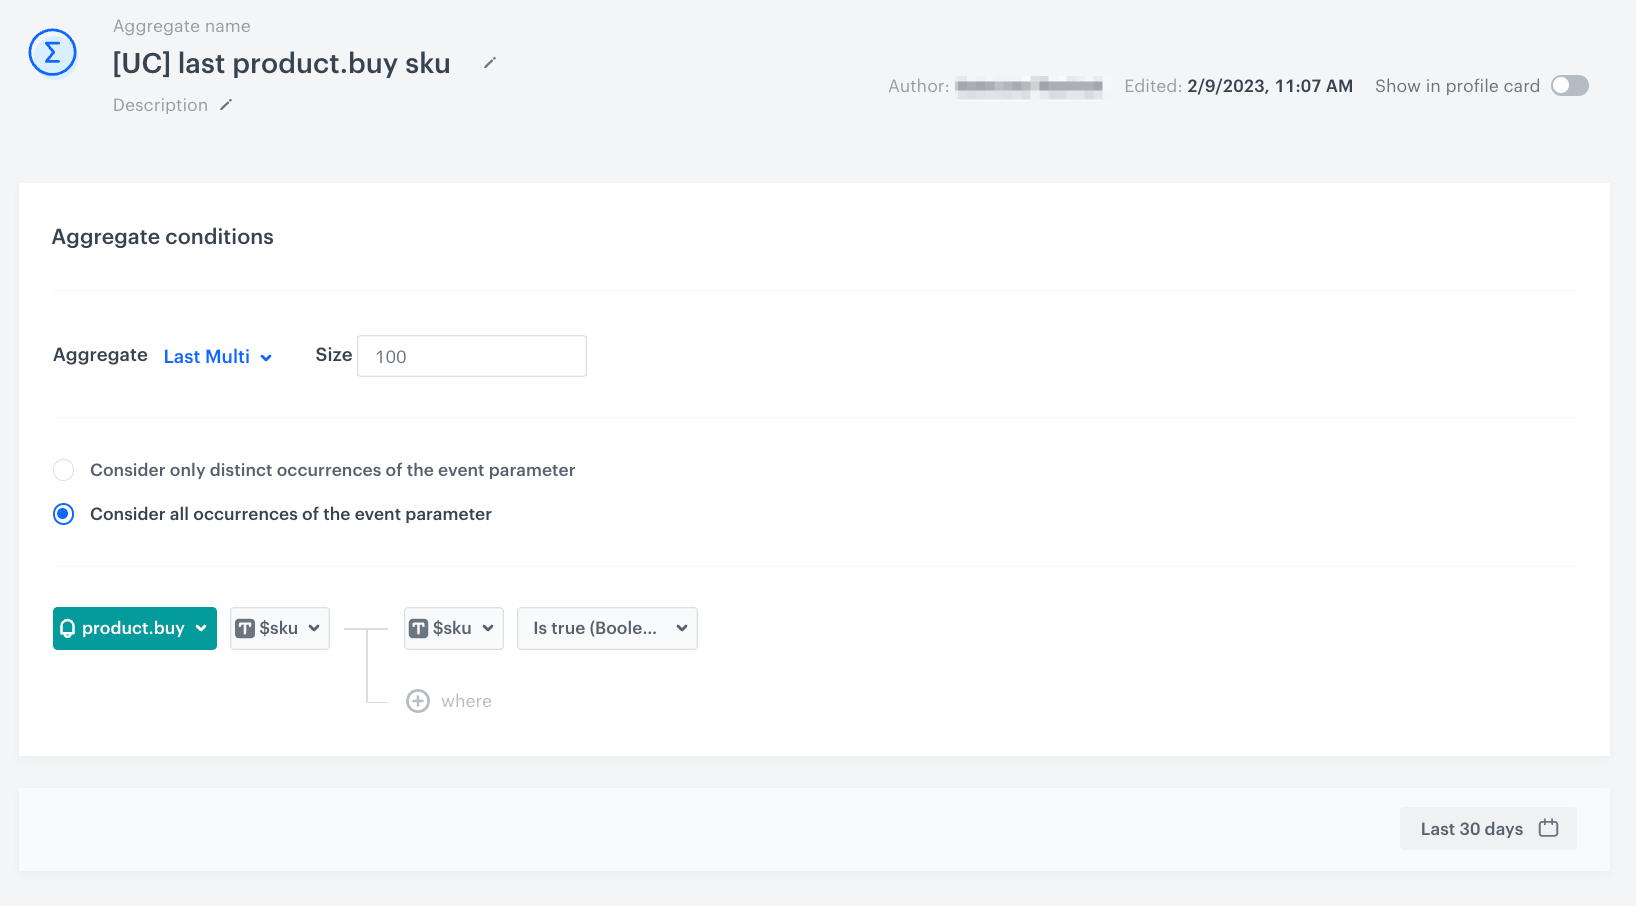
Create an aggregate that returns the skus of recently purchased products
This aggregate will be used to exclude products that the customer has already purchased.
- Go to Analytics > Aggregates > New aggregate.
- Enter the name of the aggregate.
- As the type of the aggregate, select Last multi and size: 100.
- Select the Consider all occurrences of the event parameter radio button.
- From the Choose event drop-down list, select the product.buy event.
- As the event parameter, select $sku.
- Click the + where button.
- From the Choose parameter drop-down list, select the $sku parameter.
- From the Choose operator drop-down list, select Is true (Boolean).
- Set the period for which the aggregate will return skus of the viewed products to the last 30 days.
- Save the aggregate.
Create an in-app campaign
In this part of the process, you will create an in-app campaign triggered by the session.start event. We will use a predefined template for the price drop scenario, so there is no need to create a template from scratch.
- Go to
 Communication > In-app messages > Create new
 - Enter a meaningful name for the in-app campaign.
Define the audience
- In the Audience section, click Define.
- Select the Everyone tab.
- Click Apply.
Define content
- In the Content section, click Define.
- Click Create message and from the list of template folders, select Predefined templates.
- Select Price alert template.
Result: You are redirected to the code editor.Note: You can edit the template in two ways, by editing the code of the template (add inserts, add variables) and/or by filling out the form in the Config tab. In this use case, we will use the capabilities of the predefined Config tab.
Edit form in the Config tab
The form in the Config tab is already filled in with default values. You can keep them or change them to fit your business needs.
The fields in Config are split into two types: ones for dynamic content (related to Jinja) and ones for in-app appearance. The dynamic content fields must match the values in the catalog and the names of the attributes returned by the recommendations. The appearance fields only affect the visual layer of the in-app message.
- In the Header text text box, type the header you want to display in the in-app message.
- From the Aggregate with IDs of products the customer interacted with drop-down list, select the aggregate you created in this step. You can find it by typing its name or ID in the search box.
Note: In this scenario, customers interact with the product by viewing it. This is just one example. You can create other aggregates to show different types of interaction with the product, such as adding it to the cart or favorites list, etc. This also applies to all related aggregates used in this use case.
- From the Aggregate with prices of products the customer interacted with drop-down list, select the aggregate you created in this step. You can find it by typing its name or ID in the search box.
- From the Aggregate with IDs of products purchased drop-down list, select the aggregate you created in this step. This field corresponds to the code fragment in the template that excludes products displayed in the in-app message, so the products with the IDs returned by the selected aggregate won’t be displayed.
You can find it by typing its name or ID in the search box. - In the Name of the catalog with product information field, change the default
Snrs-produktu-ogTagvalue to the catalog name with product information you use. In our case, we use the same product catalog. - In the Name of the column with sale price field, change the default
g:sale_pricevalue to the name of the column with sale price in your catalog with product information. In our case the name of the column with sale price isproduct:sale_price:amount.Note: The price defined in this field refers to a column in the catalog with the discount price of the product. - In the Name of the column with product title field, change the default
og:titlevalue to the name of the column with product title in your catalog with product information. - In the Name of the column with product link field, change the default
og:urlvalue to the name of the column with product link in your catalog with product information. - In the Name of the column with image link field, change the default
og:imagevalue to the name of the column with image link in your catalog with product information. - Define the Name of the column with average rating and Name of the column with number of ratings fields if you want to include this information in your in-app message.
- In the Name of the column with price field, change the default
product:original_price:amountvalue to the name of the column with price in your catalog with product information.Note: The price defined in this field refers to the column in the catalog with the original price of the product - the price before any reductions. - In the Button text text box, type the text you want to display on the in-app button that adds the product to the cart.
- Define the color in the following fields: Wrapper background color, Button background color, Button text color.
- After you make changes to the template, you can check the preview.
- Click the Preview button on the upper left side.
- Enter the ID of a customer or a product.
- Click Apply.
- If the template is ready, in the upper right corner, click Save this template > Save as.
- On the pop-up:
- In the Template name field, enter the name of the template.
- From the Template folder drop-down list, select the folder where the template will be saved.
- Confirm by clicking Apply.
- To continue the process of configuring the in-app campaign, click Next.
- To save your content changes, click Apply.
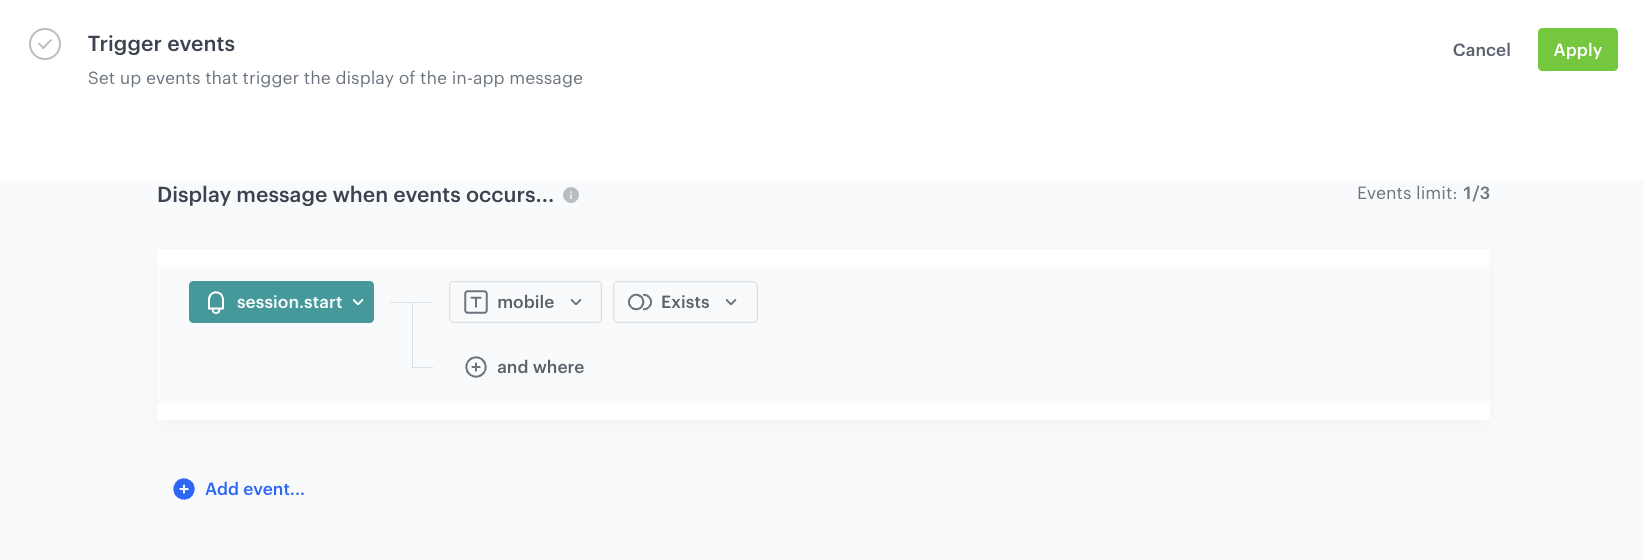
Select events that trigger the in-app message display
In this part of the process, define the event that triggers the display of the in-app message. In our case, the trigger is the start of the session start.
- In the Trigger events section, click Define.
- Select Add event and from the drop-down list, choose the
session.startevent. - Click the + where button and as the parameter, choose
mobile. - As the logical operator, select Exists.
- Click Apply.
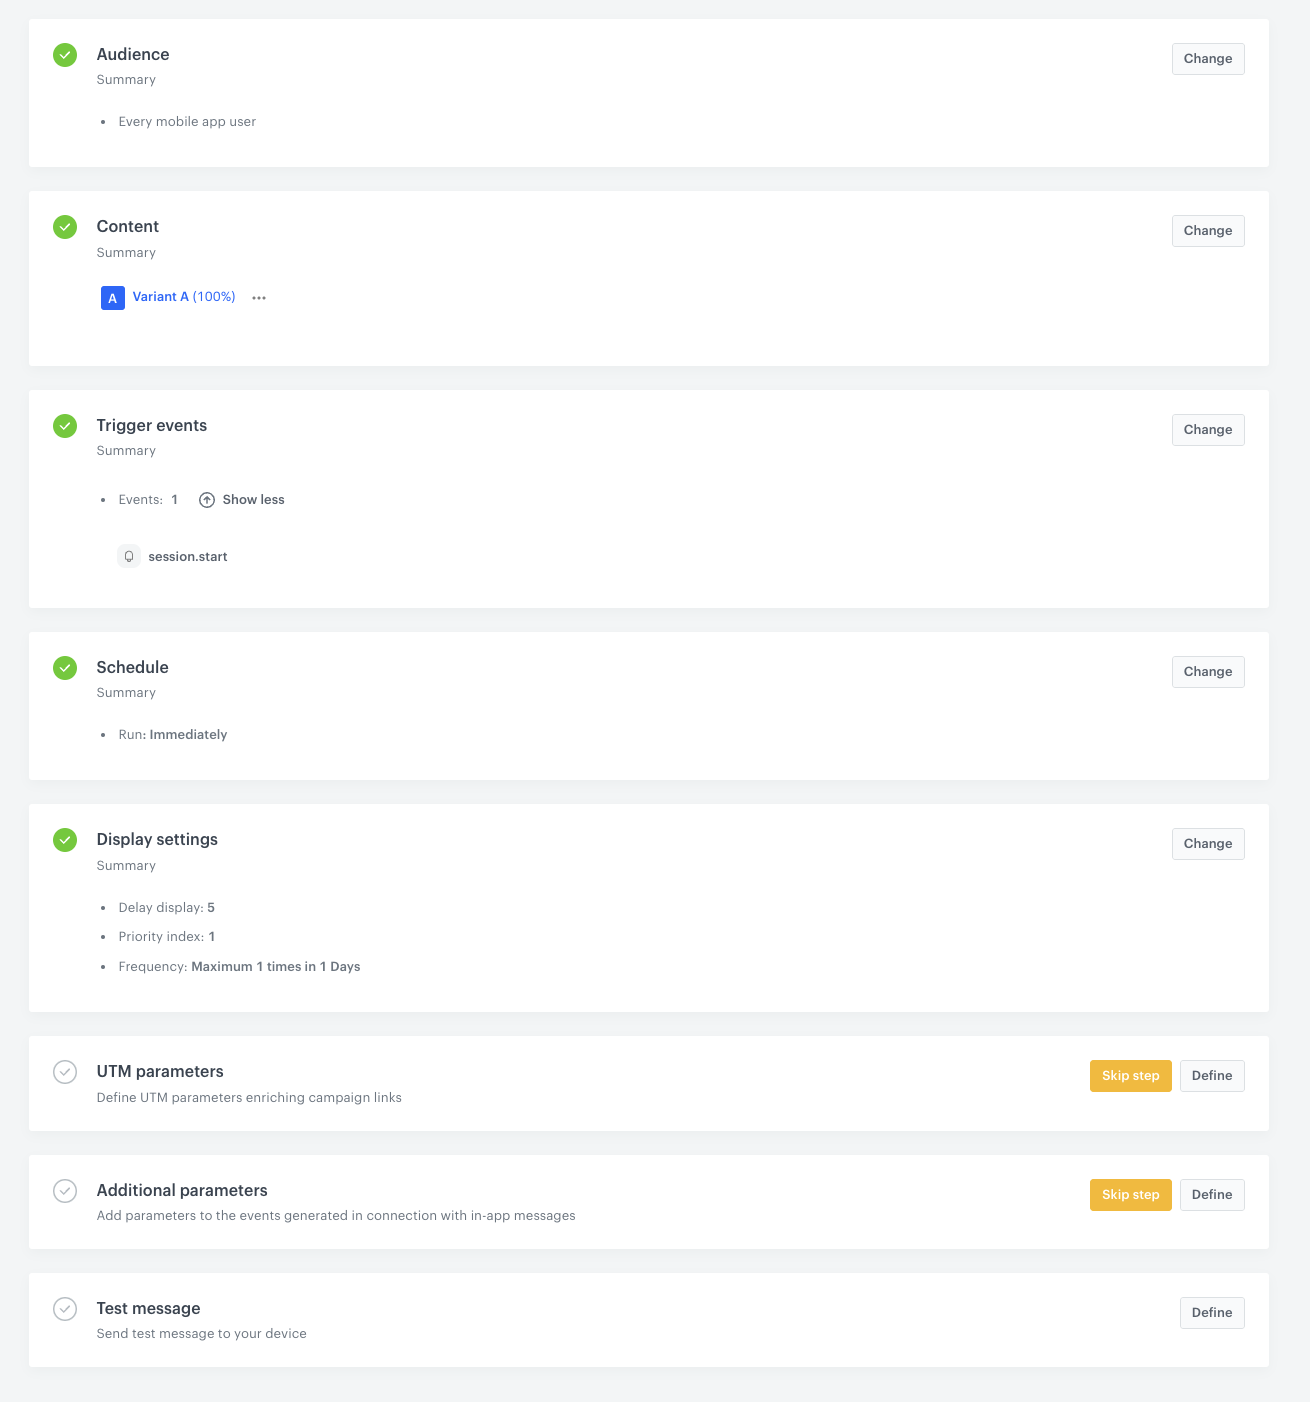
Schedule the message and configure display settings
As the final part of the process, you need to set the schedule, display settings configuration, capping, priority of the message among other in-app messages.
- In the Schedule section:
- Click Define.
- Choose Run immediately option.
- Click Apply.
- In the Display settings section:
- Click Define.
- Define the Delay display as 5 and Priority index as 1.
Note: The mobile application can display one in-app message at a time. If the conditions allow the display of several in-apps at a time, the priority is a decisive factor for displaying the message. The messages with lower priority aren’t queued.
- Enable the Frequency limit toggle to manage the frequency of in-app message display in the application.
In our case, we want to display the message to the customer maximum once a day. - You can additionally enable the Capping limit toggle to limit the amount of time the in-app message can be displayed to a customer in general.
- Click Apply.
- Optionally, you can define the UTM parameters in the UTM & URL parameters section. Otherwise, click Skip step.
- Optionally, you can add the custom parameters in the Additional parameters section. Otherwise, click Skip step.
- To start your campaign, click Activate.
Check the use case set up on the Synerise Demo workspace
You can check the configuration of the campaign components directly in Synerise Demo workspace:
- Aggregate that returns the IDs of visited products,
- Aggregate that returns the prices of visited products,
- Aggregate that returns sku of recently purchased products,
- In-app campaign
If you don’t have access to the Synerise Demo workspace, please leave your contact details in this form, and our representative will contact you shortly.