Lifetime value prediction
Knowing how much money customers will spend in the next couple of days or weeks can be crucial for creating precise marketing campaigns. This use case describes how to make a prediction that returns the expected number of transactions in 90 days ahead for a specific group of customers.
Prerequisites
Process
In this use case, you will go through the following steps:
- Create prediction target based on aggregate and expression.
- Create the segmentation for whom the prediction will be made.
- Create the prediction.
Create prediction target
In the first part of the process, create an analyses based on which the system will make a prediction.
- Go to
 Analytics > Aggregates > New aggregate.
 - Enter the name of the aggregate.
- Set the Aggregate option to Sum.
- Click Choose event.
- From the dropdown list, select transaction.charge.
Note: Events may have different labels between workspaces, but you can always find them by their action name (in this step, it’s transaction.charge).
- As the parameter of the event, select $totalAmount.
- Using the date picker in the lower-right corner, set the time range to Relative time range > Custom > last 90 days.
- Save the aggregate.

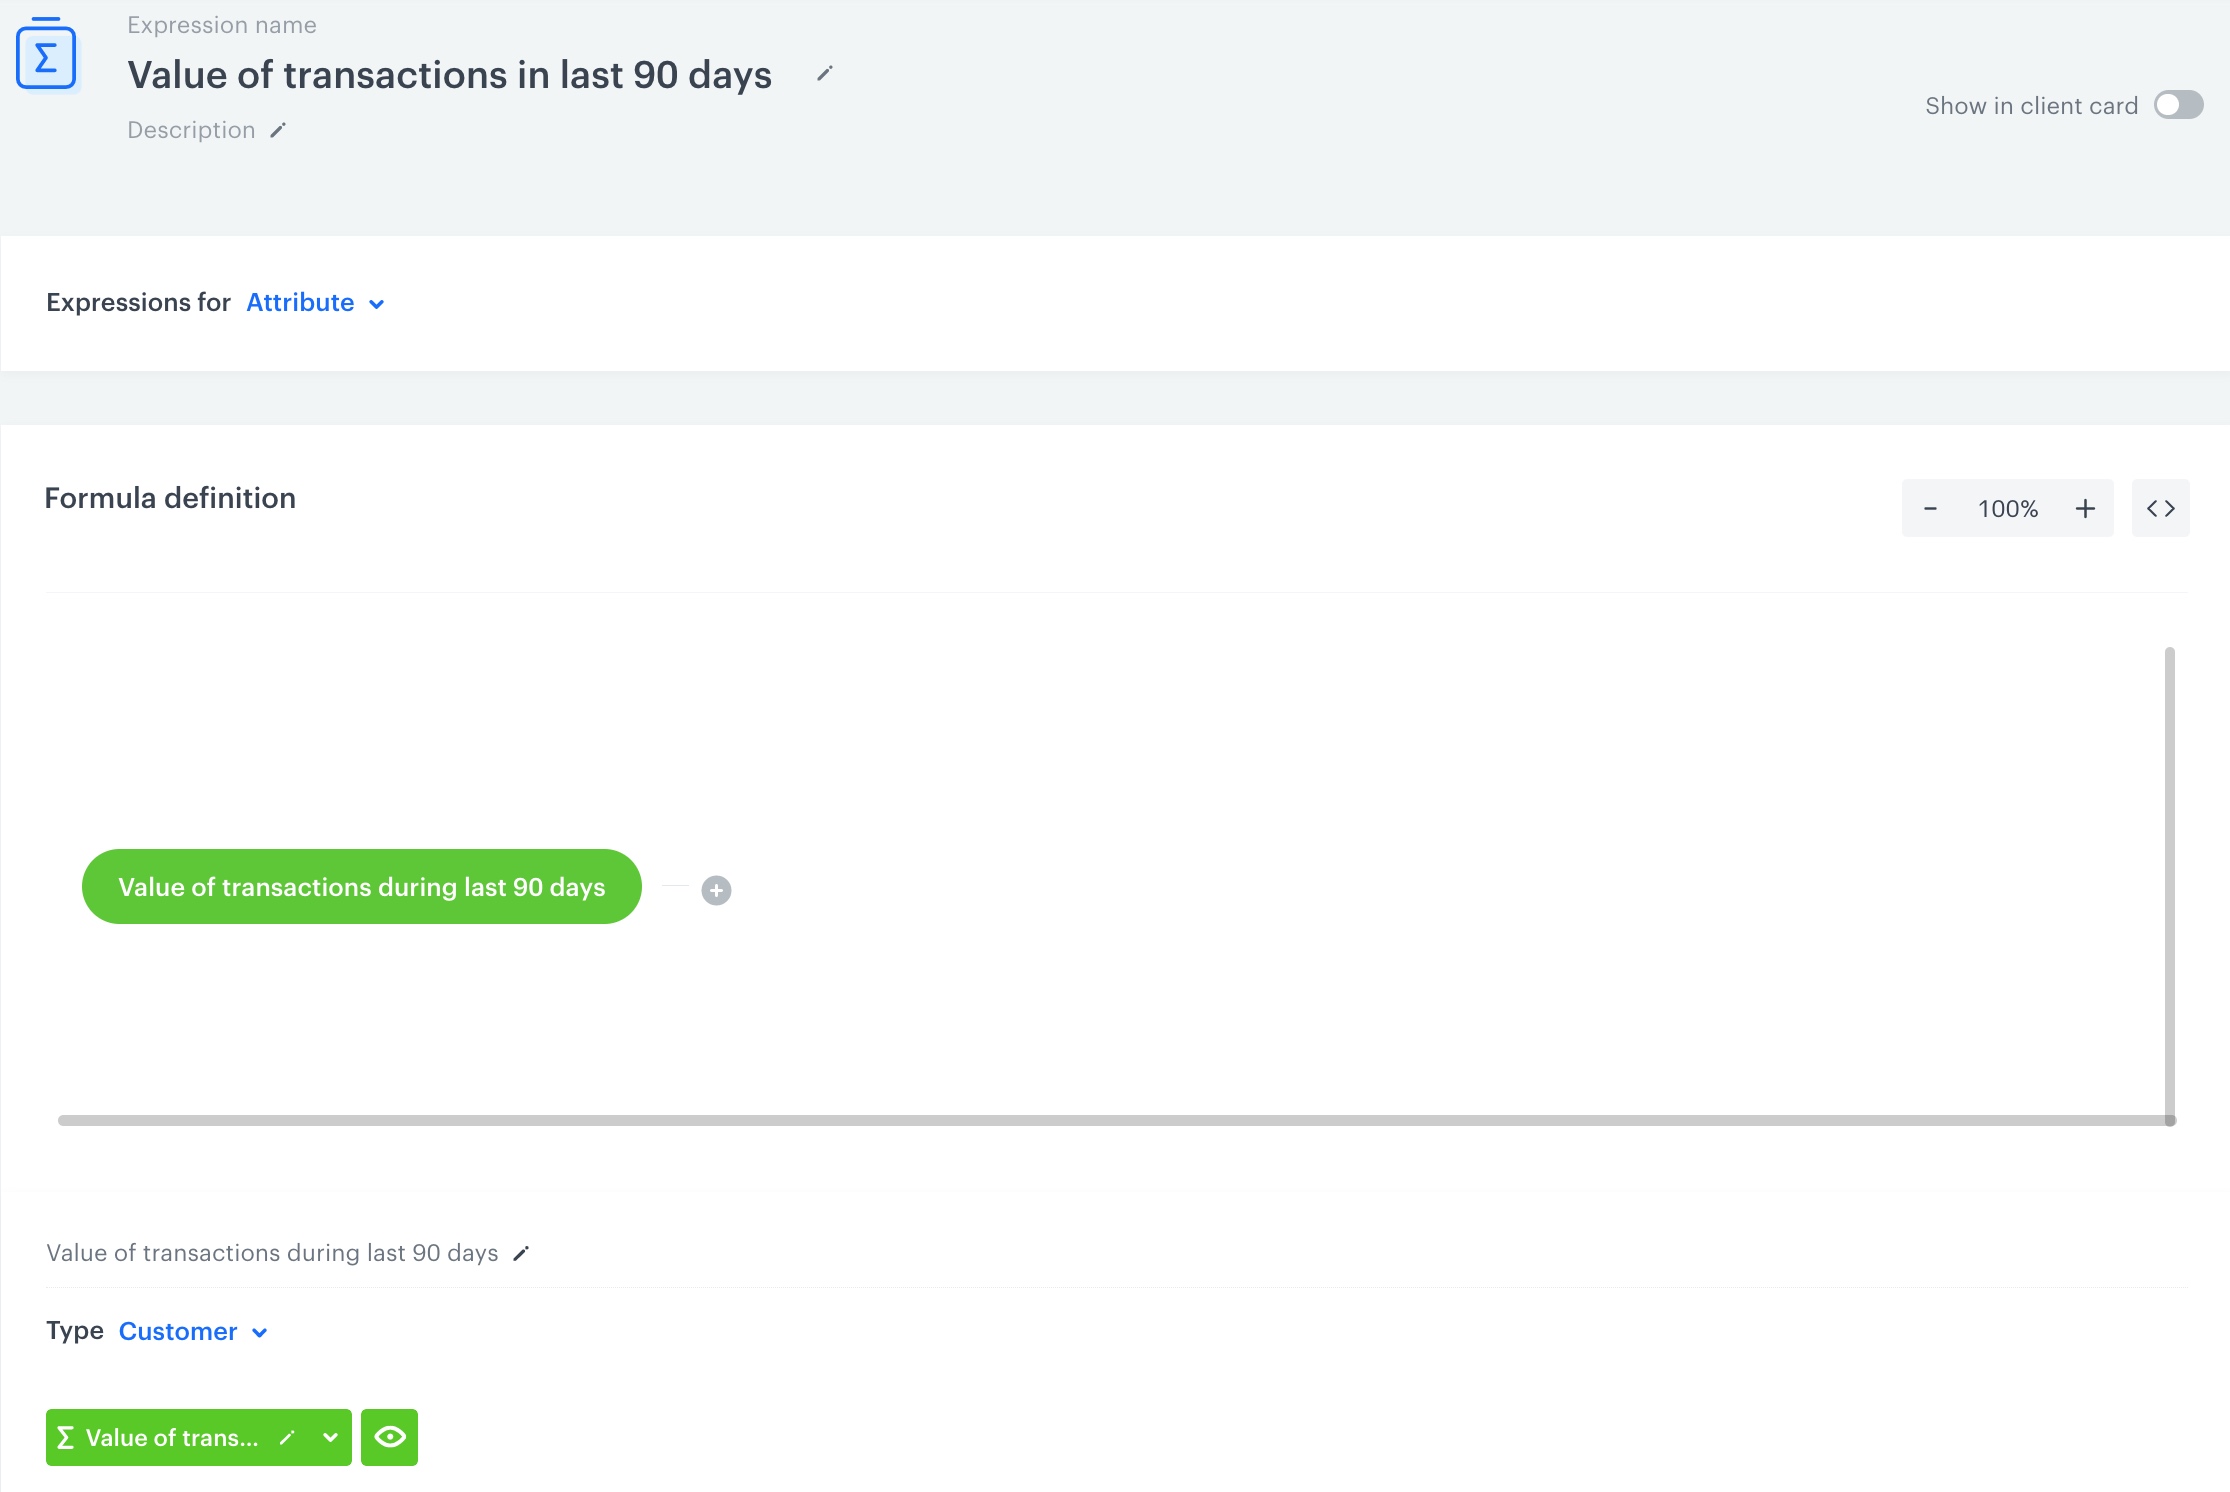
After building the aggregate, you have to create new expression.
- Go to Analytics > Expressions > New expression.
- Enter the name of the expression.
- Set the Expression to Attribute. Predictions work only with attribute expressions.
- On the canvas, click Select.
- From the dropdown list, select Customer.
- Click the unnamed input that appeared on the canvas.
- From the Choose attribute dropdown list, select the aggregate you created in the previous part of the process.
- Save the expression.
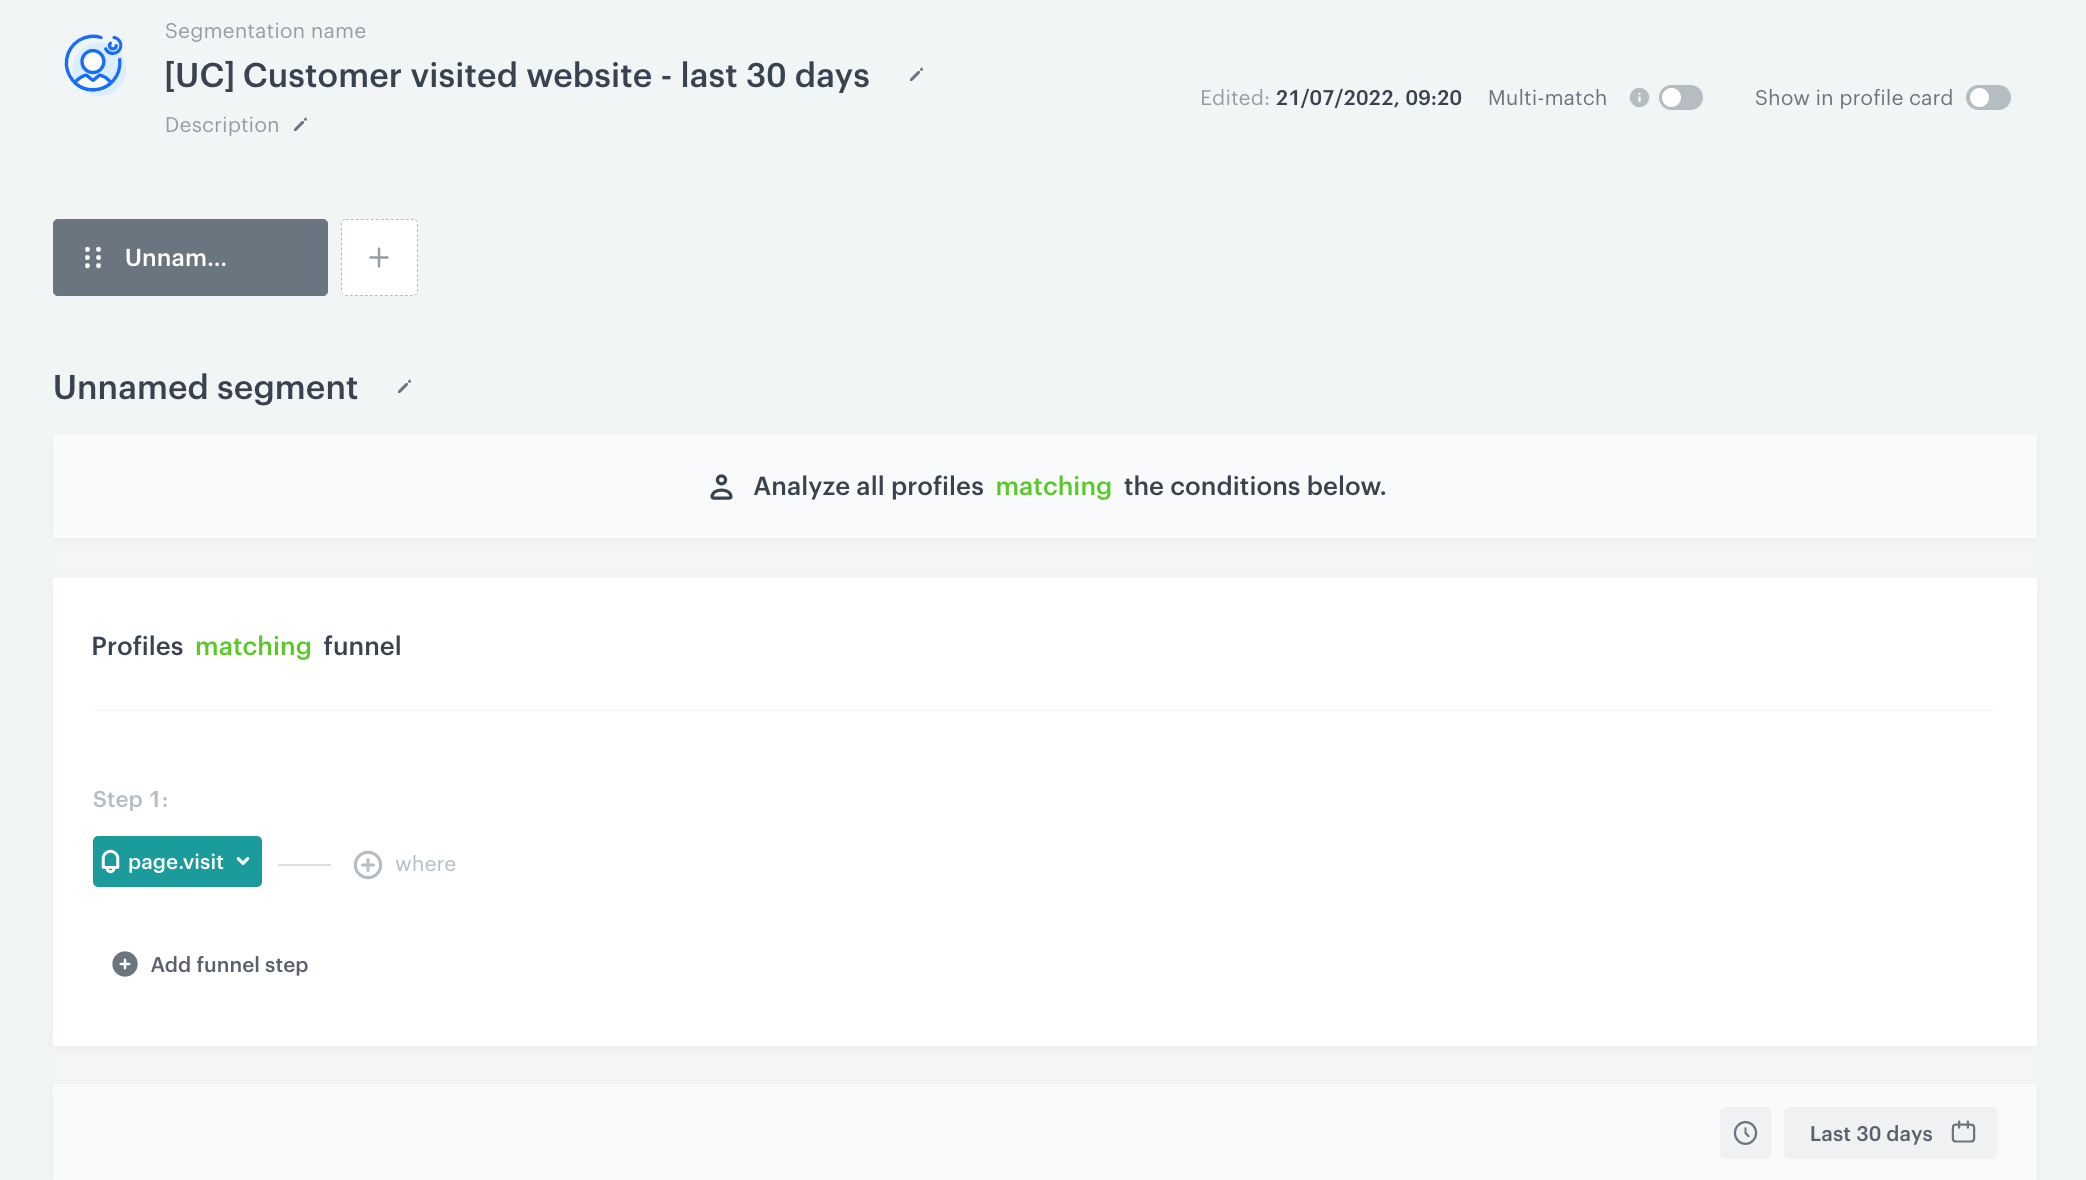
Create a segmentation
In this part of the process, create a group of customers for whom the prediction will be made.
- Go to Analytics > Segmentation > New segmentation.
- Enter the name of the segmentation.
- Create a segmentation of customers who visited your website in the last 30 days.
Note: You can find the instructions on creating segmentations here.
- Save the segmentation.
Create a prediction
In this part of the process, create a prediction that returns the number of transactions that will be made in the 90 days in advance.
- Go to
 Predictions > New prediction.
 - Enter the name of the prediction.
- In the Prediction type section, click Define.
- Select Regression.
- Confirm by clicking Apply.
Select the audience
In this section, select the group of customers you created in this part of the process.
- In the Audience section, click Define.
- Click Choose segmentation.
- Select the the group of customers you created in this part of the process.
- Click Apply.
Select the target
- In the What would you like to predict? section, click Define.
- Click Select expression.
- From the dropdown list, select the expression you created in this part of the process.
Select inputs
In this section, you set up input features based on which the prediction model will be trained.
It is possible to select feature inputs manually, but we recommend using the automatic selection, as explained below. Our algorithms evaluate feature relevance in context of the prediction target and are, in most cases, more effective than manual selection.
- In the Model inputs section, click Define.
- Click Add features.
- From the dropdown list, select Automatically.
- Click Apply.
Configure additional settings
The additional settings define how often re-calculations are made and the content of events produced by the prediction.
- In the Model configuration secion, from the dropdown list select 90 days as the number of days in advance.
The time must correspond to the time range selected earlier in the prediction target. - Leave the Set up recurring prediction calculation option unselected. As a result, the prediction is run only one time.
- In the How would you like to display results? section, select 5-point scale as the prediction labeling method.
- In the How many features would you like to display as event parameters? section, leave the settings at default (0).
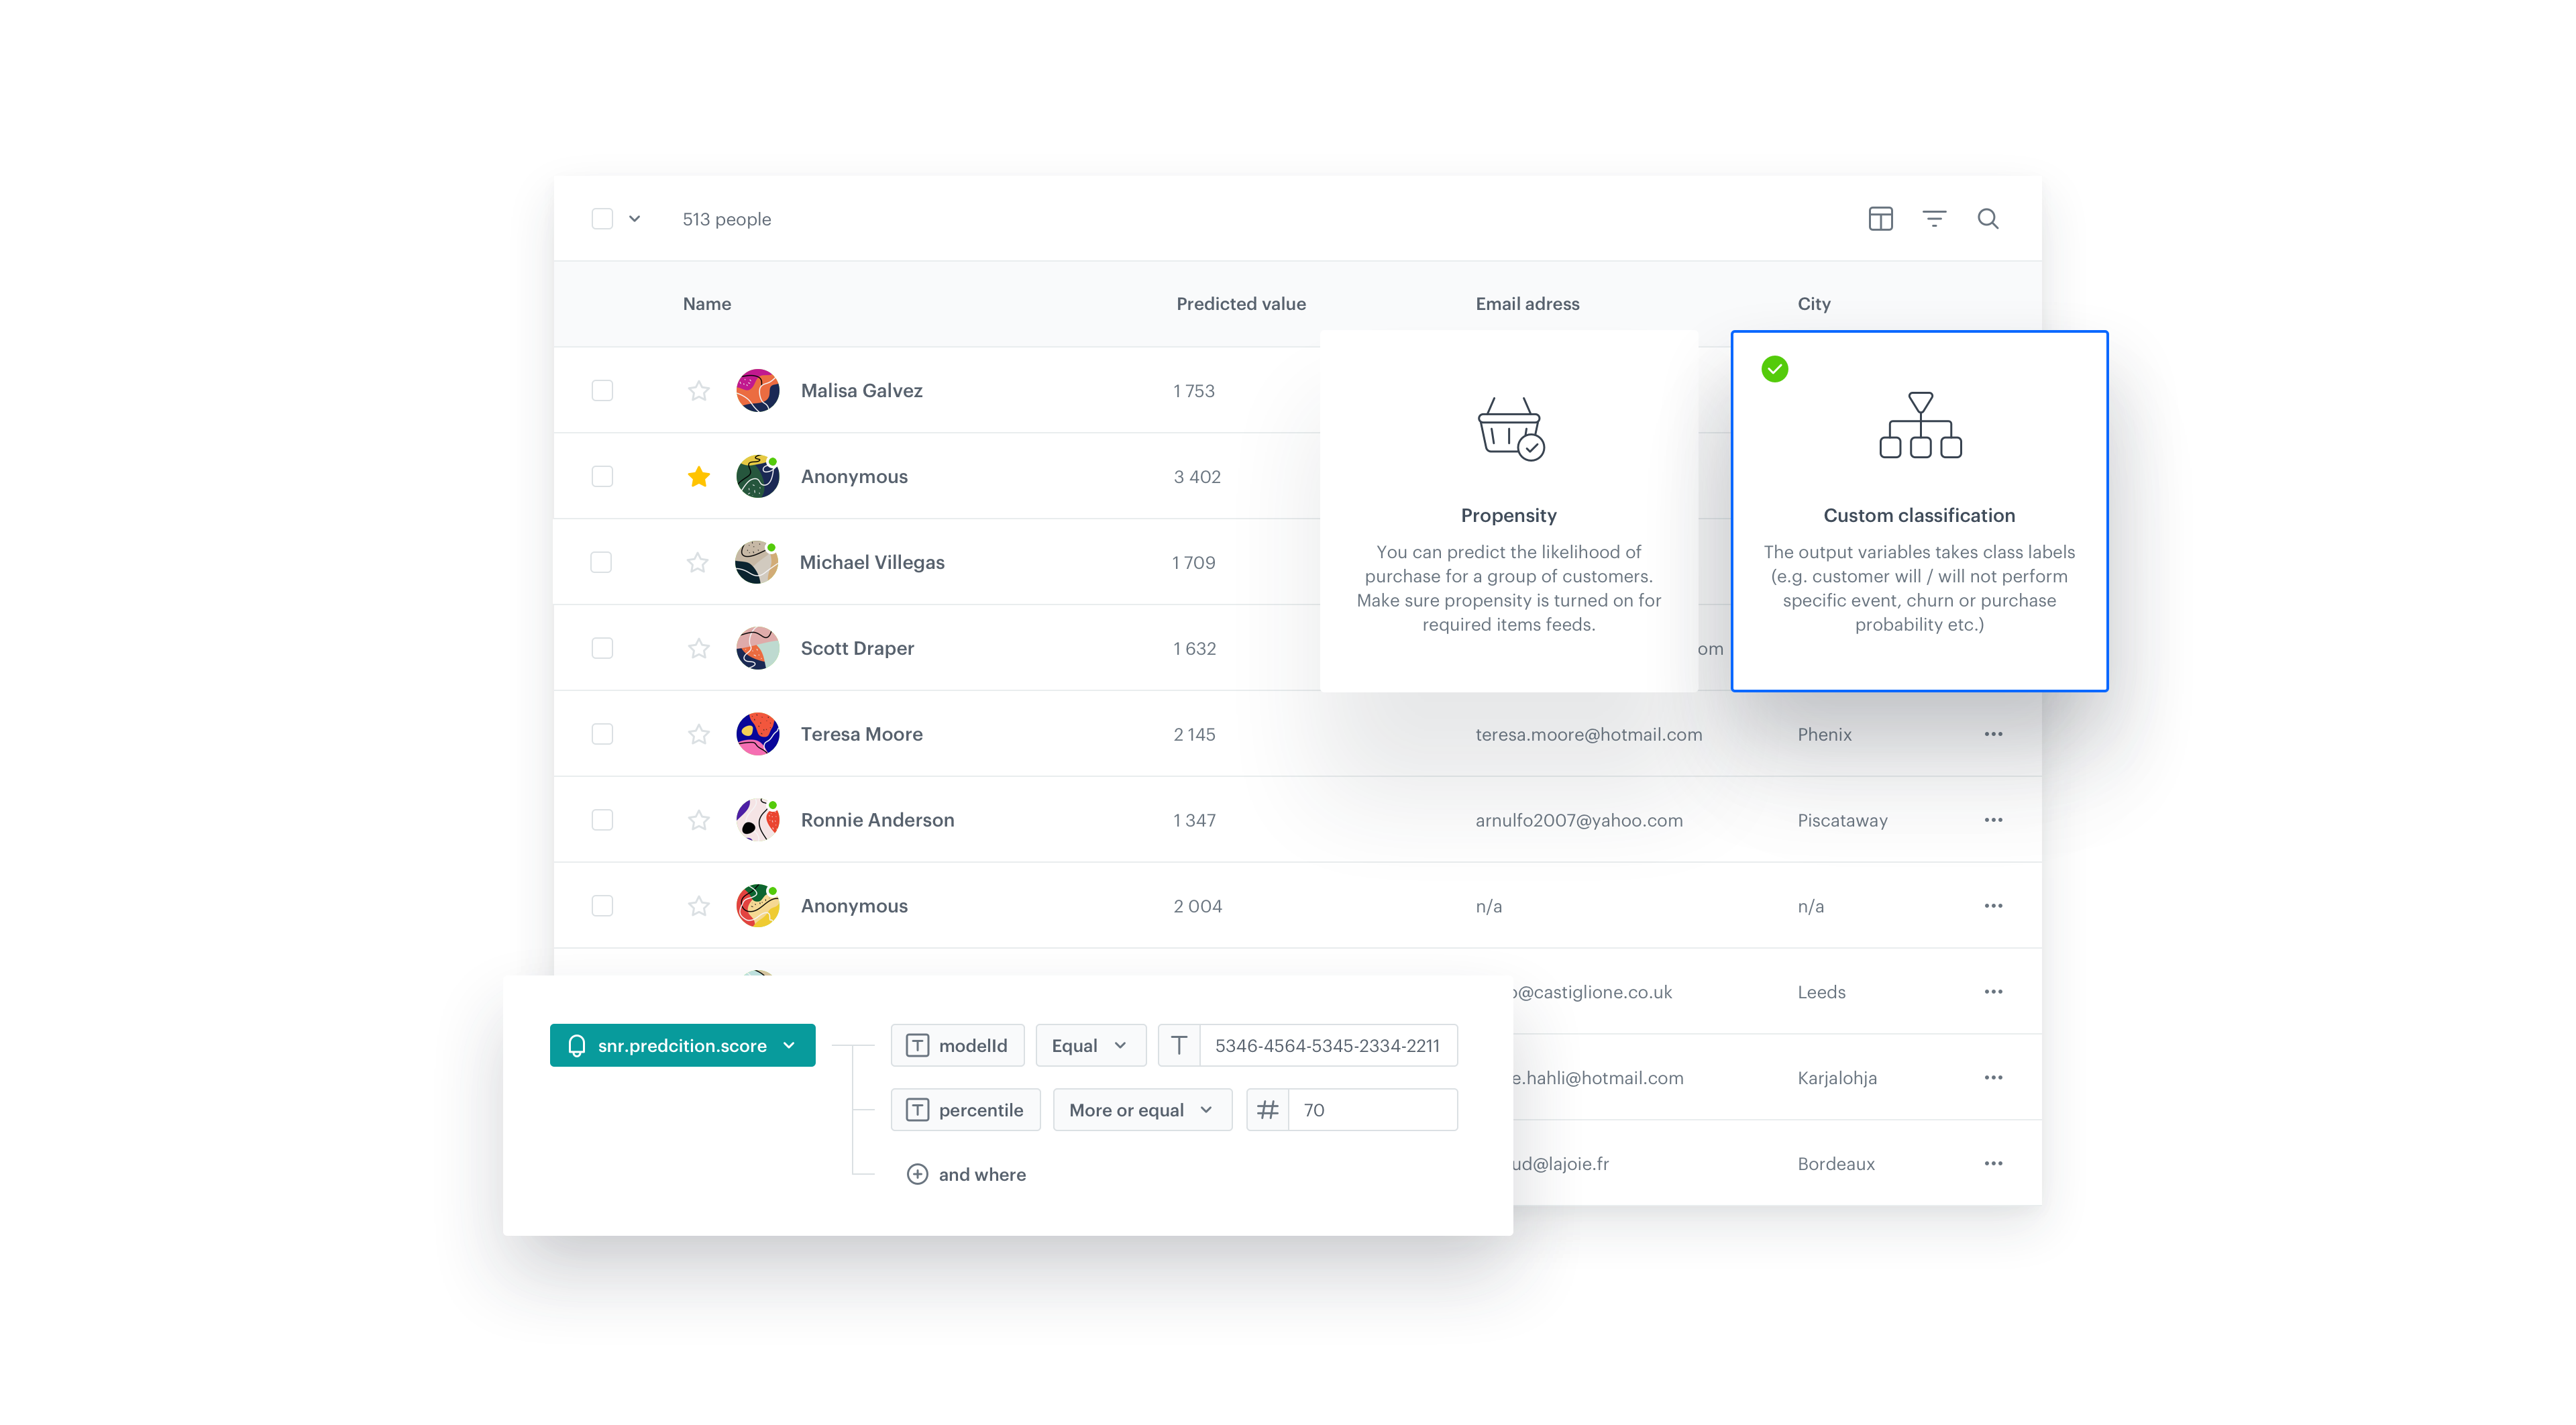
- In the Name field, enter the user friendly name of predictions scores. The score name parameter is shown in the
snr.prediction.scoreevent. - Click Apply.
- Complete the prediction by clicking Save&Calculate.
Result: The calculation begins. After it completes, an event namedsnr.prediction.scoreis saved to the customer profiles selected in the segmentation. The event will be available in the platform, for instance in Analytics, Profiles, and Automation.
What’s next
You can use the prediction results in your work, for example to Evaluate results.
Check the aggregate set up on the Synerise Demo workspace
Check the settings of all analytics created in this use case in Synerise Demo workspace:
If you don’t have access to the Synerise Demo workspace, please leave your contact details in this form, and our representative will contact you shortly.