
Send data from Microsoft Azure Forms to Synerise
You can integrate Microsoft Azure Forms with Synerise to collect data from the forms in Synerise and create new customer profiles or update the existing ones.
In this use case, a submission of a form that contains three fields (name, surname and email address) launches a workflow that creates a customer profile or updates an existing profile with identical credentials.
Prerequisites
Access to Microsoft Forms and Microsoft Azure.
Process
In this use case, you will go through the following steps:
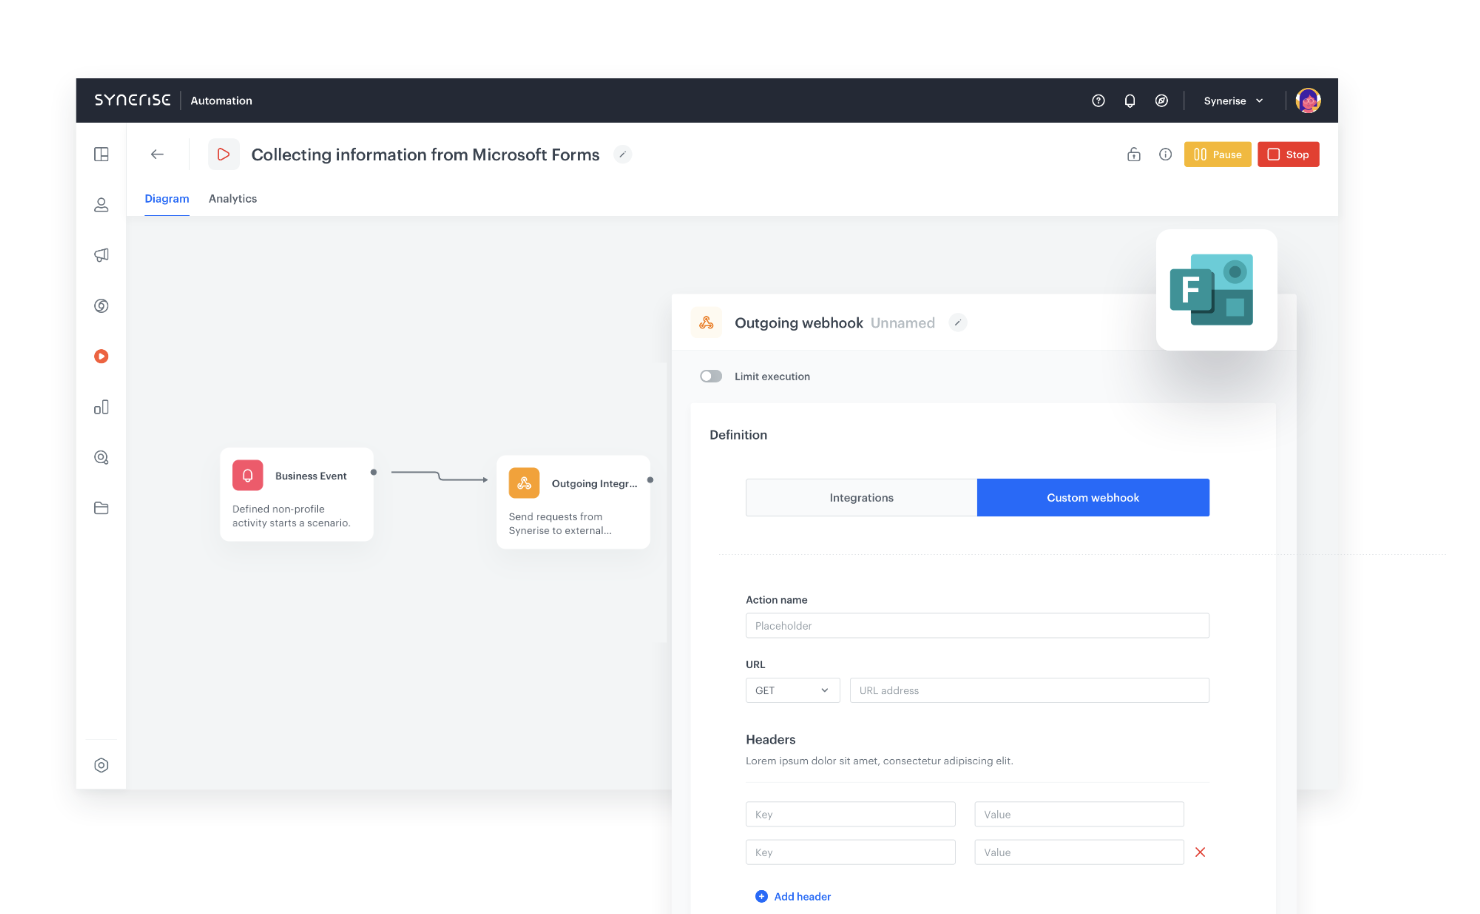
Create an incoming webhook
Create an incoming webhook to which you will send the data submitted through Microsoft Forms.
-
In Synerise, go to Automation > Incoming > New integration.
-
Enter the name of the webhook.
-
In the Endpoint section, click Define.
Important: The URL field is already is filled in with the endpoint to which the data submitted throught the form will be sent.- Optionally, you can add an icon to this integration.
- Confirm by clicking Apply.
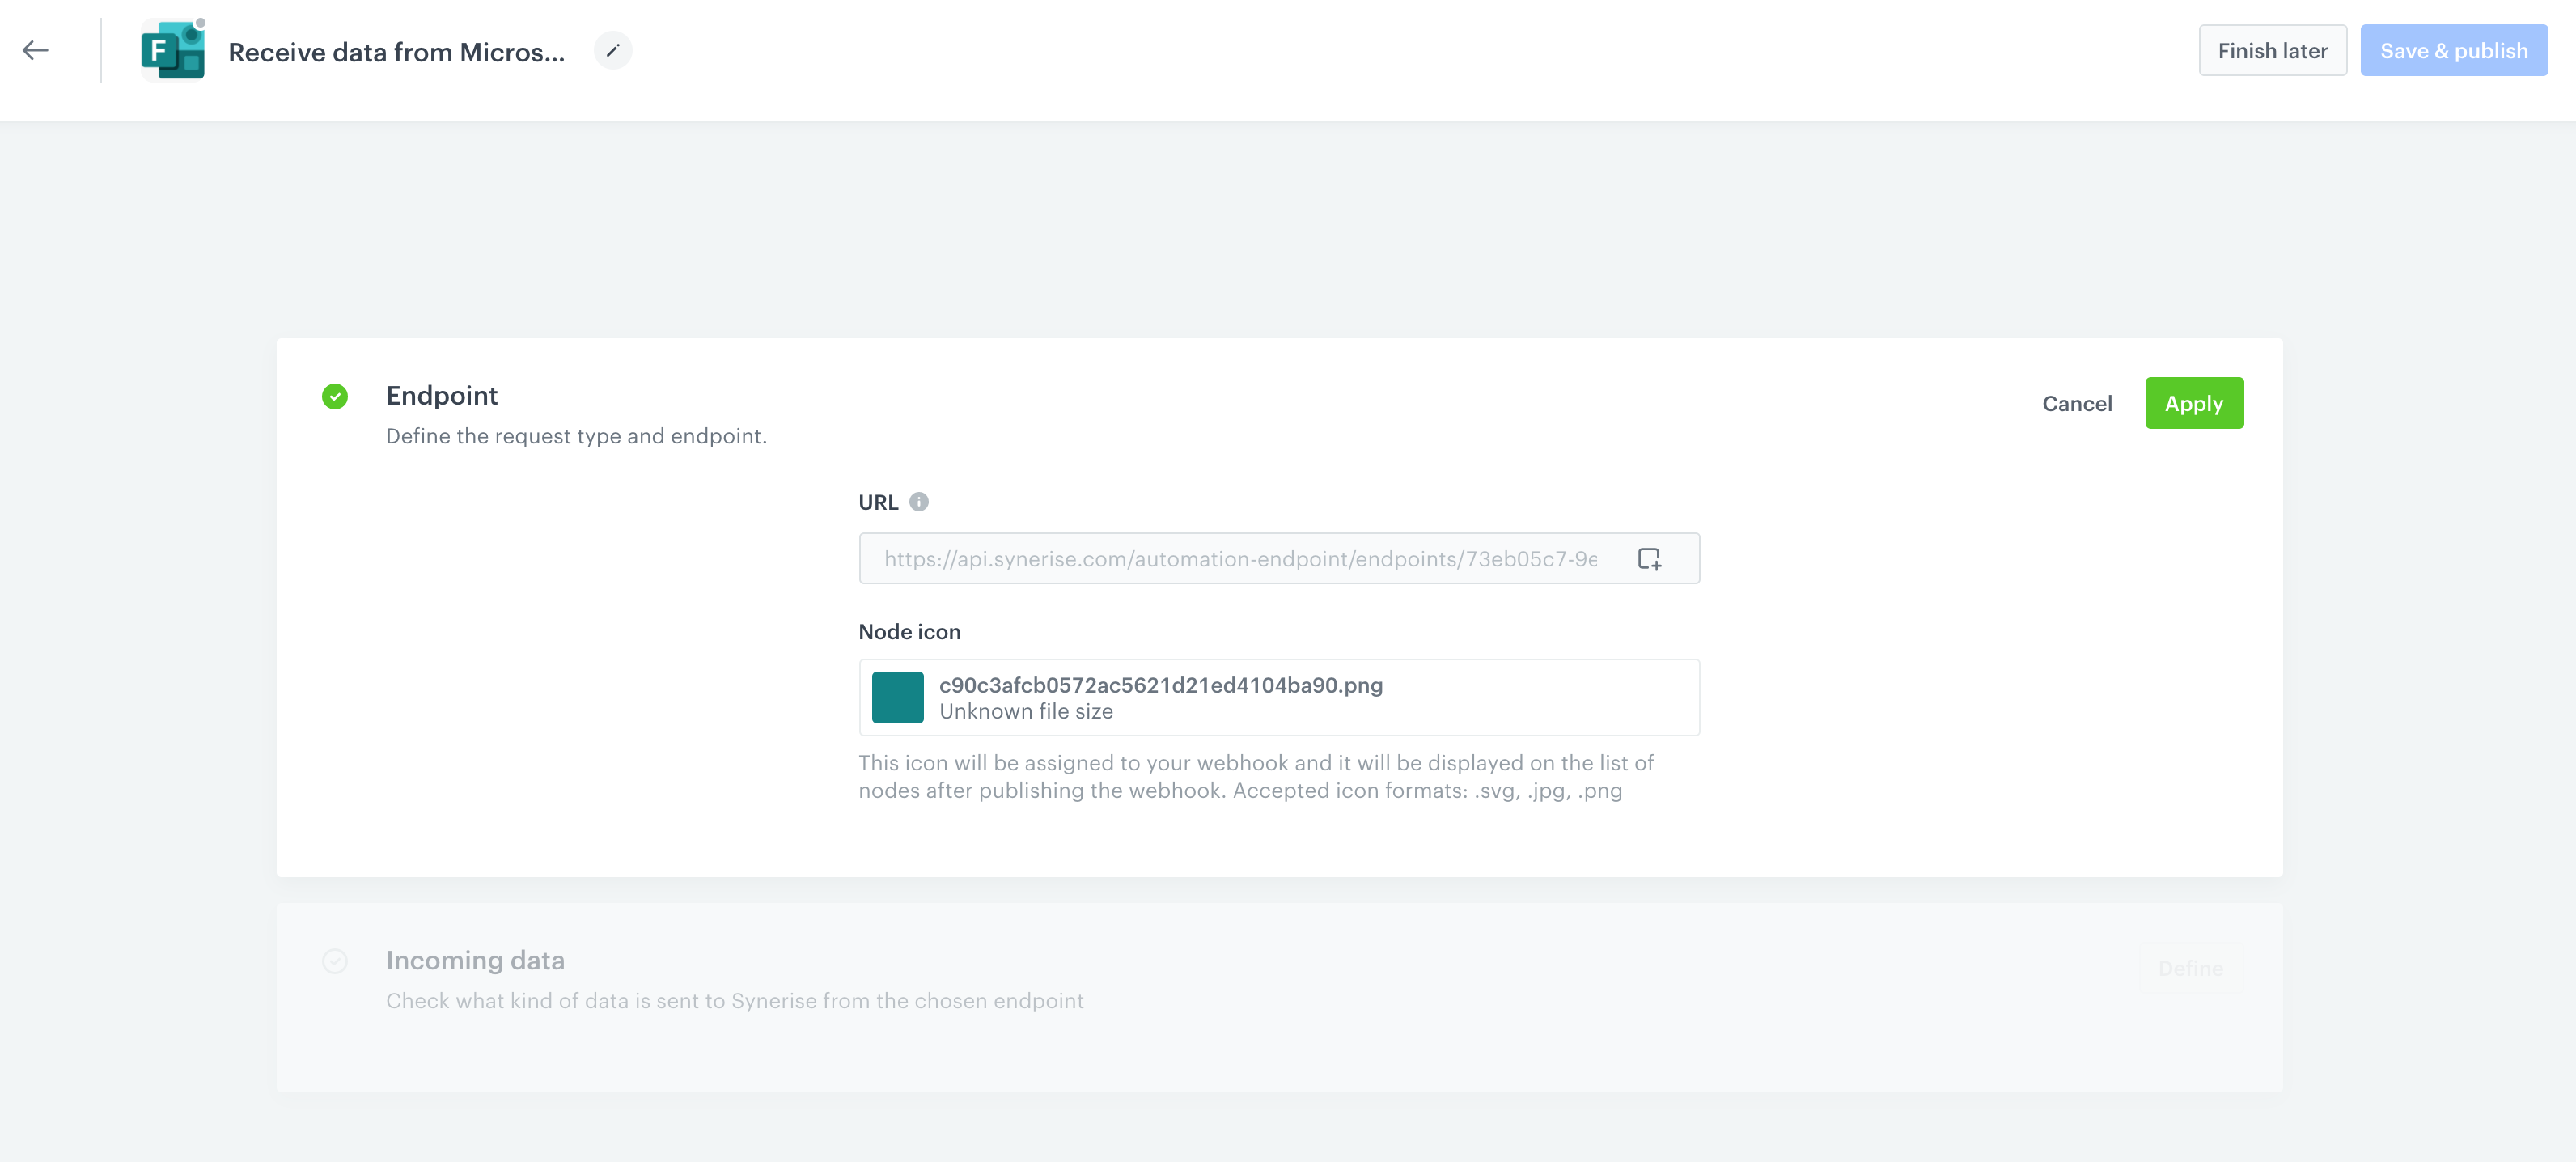
Configuration of the Endpoint section
-
In the Incoming data section, click Define.
-
Click Retrieve data. Right after you click the button, send a request to the endpoint in the Endpoint section with the sample of data that will be sent through forms. The system waits for the incoming request for 1 minute and 30 seconds. Example request:
Important: Replace the endpoint URL from the example with the endpoint URL from step 3.curl --location --request POST 'https://{SYNERISE_API_BASE_PATH}/automation-endpoint/endpoints/END_ID/trigger' \ --header 'Content-Type: application/json' \ --data-raw '{ "firstname": "test", "lastname": "test", "email": "test" }' -
When the endpoint receives data from the request, verify the list of variables. If the variables include those which are in the payload (in this case, firstname, lastname, and email), click Define. If not, click Start again re-send request, and wait for the results.
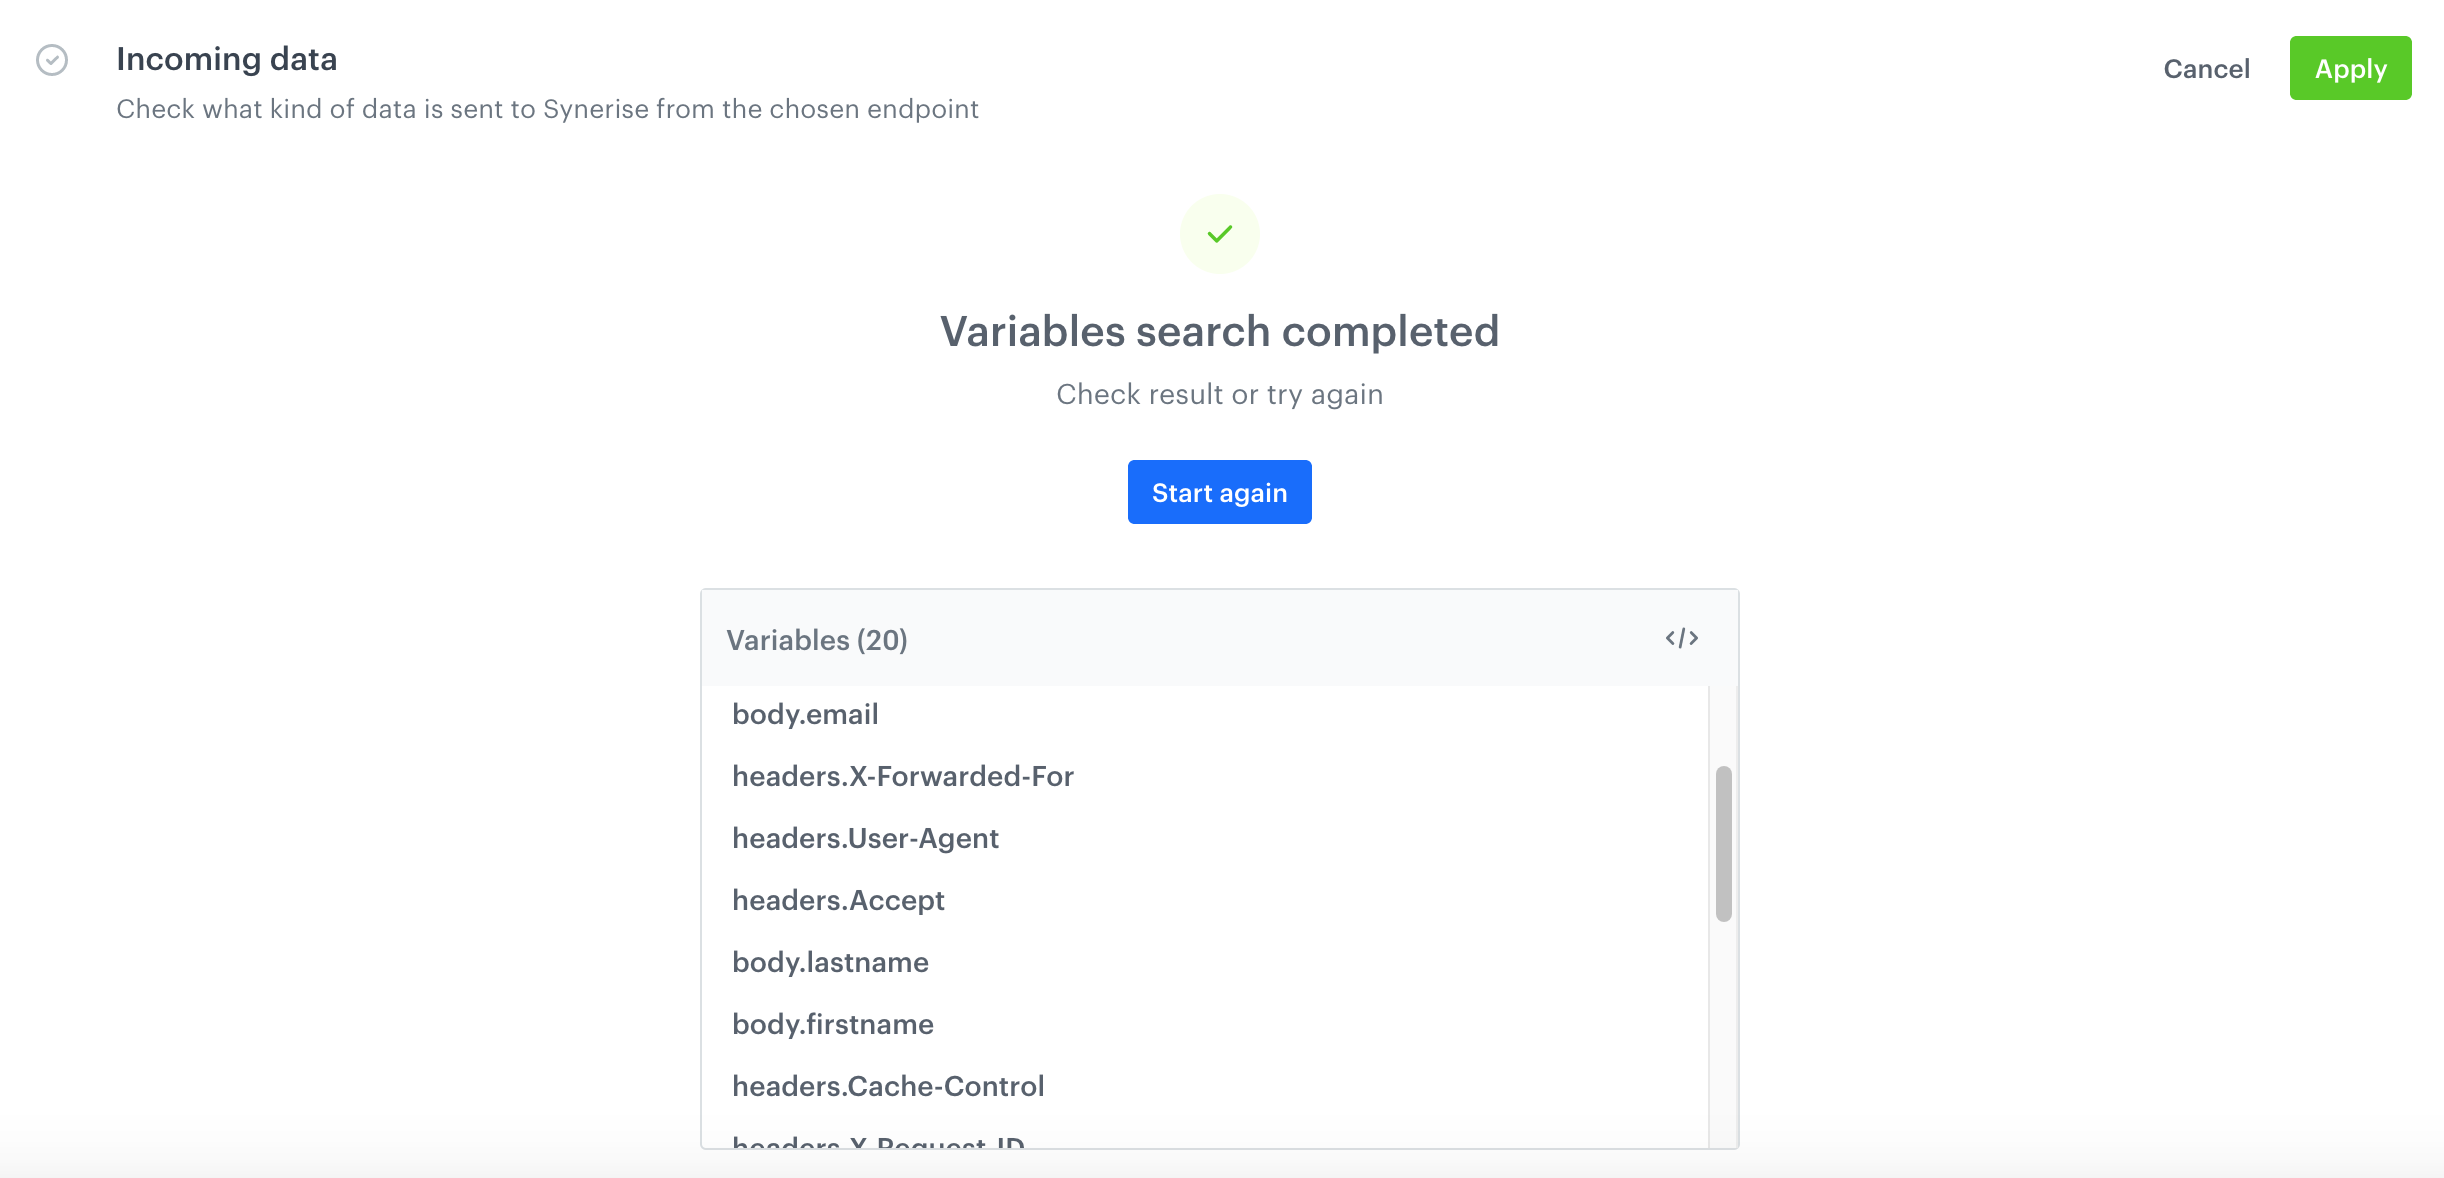
Collected variables from the request -
Click Save & publish.
Tip: You can read the documentation of Incoming integration here.
Create a form
In this part of the process, you need to create a form in Microsoft Forms app and configure the flow of sending data from the form to Synerise.
-
Go to Microsoft Forms app.
-
Create a form.
Tip: If you need help, you can refer to the documentation.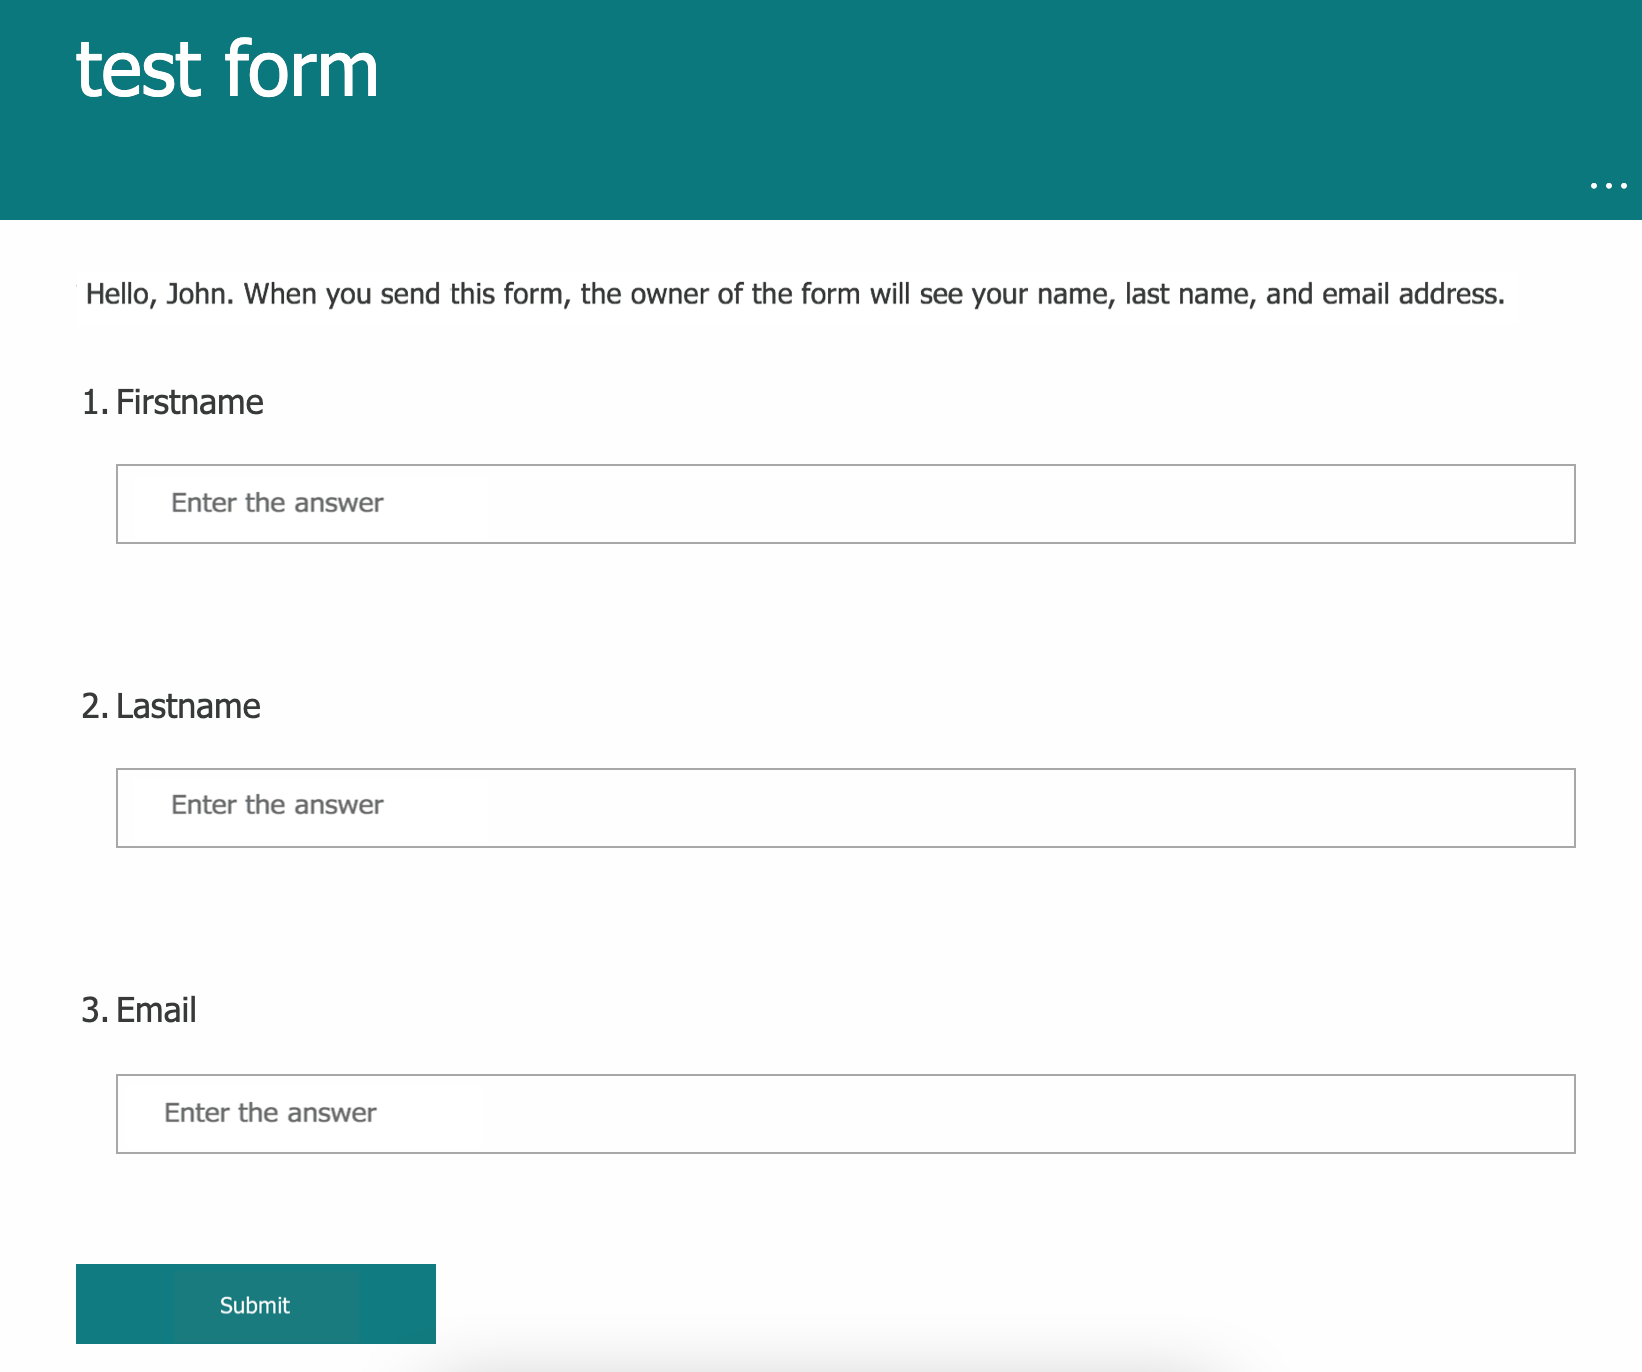
Example form used in this use case -
Go to Azure Portal. From the list of Azure services, select Logic Apps. If you don’t see the icon right away, click More services and find the app.

Azure services available in the Azure Portal -
As the connector of the Logic App, select Microsoft Forms.
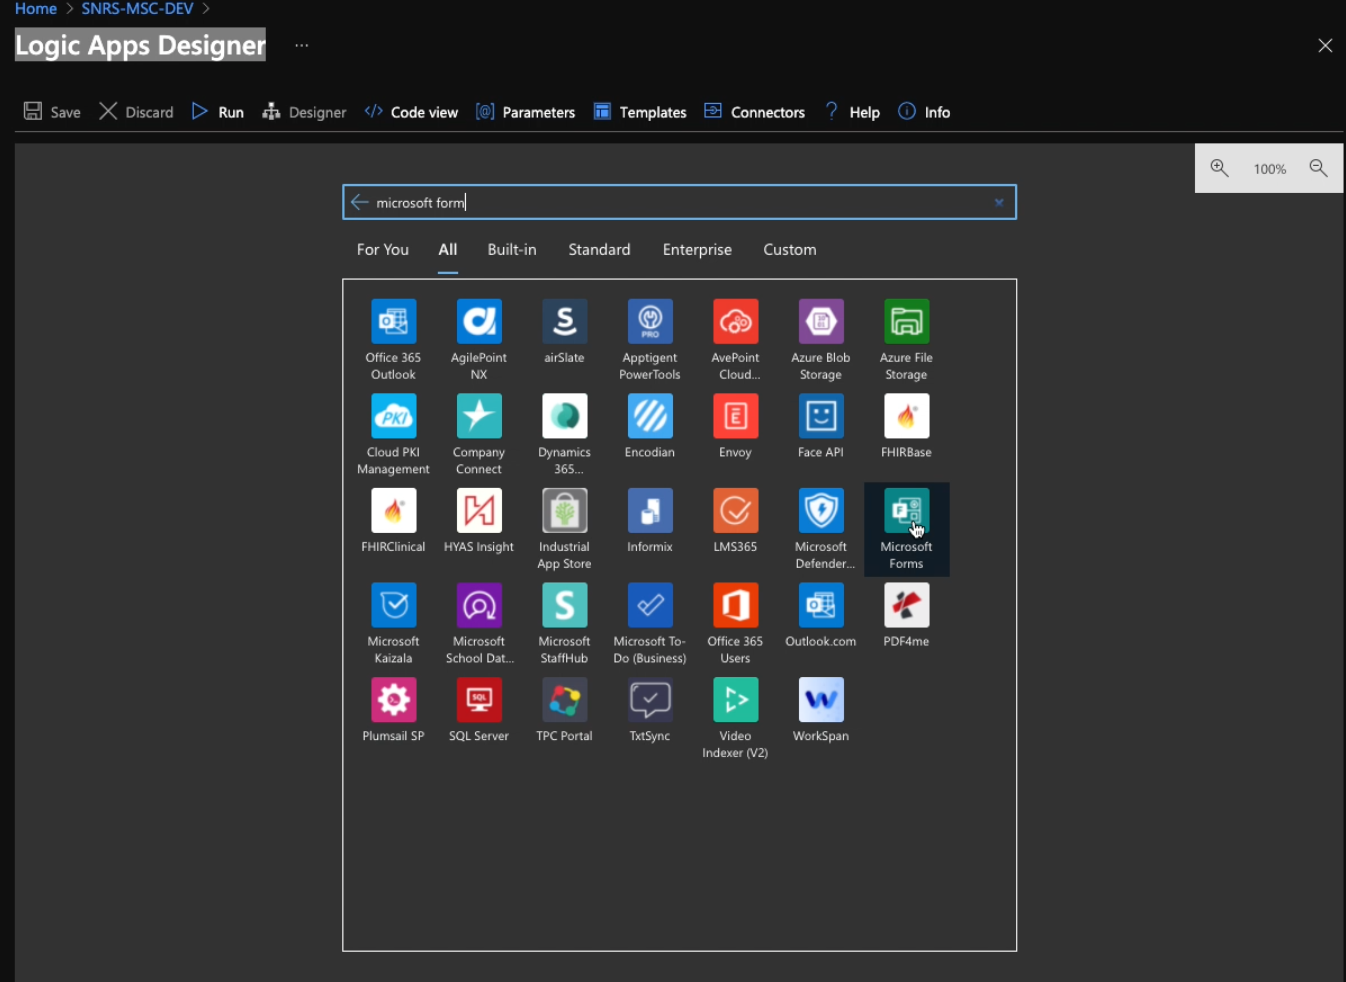
Connecting Logic App with Microsoft Forms -
As a trigger, from the dropdown list, select when a new response is submitted.
-
Choose the form you want to connect.
Selecting a form -
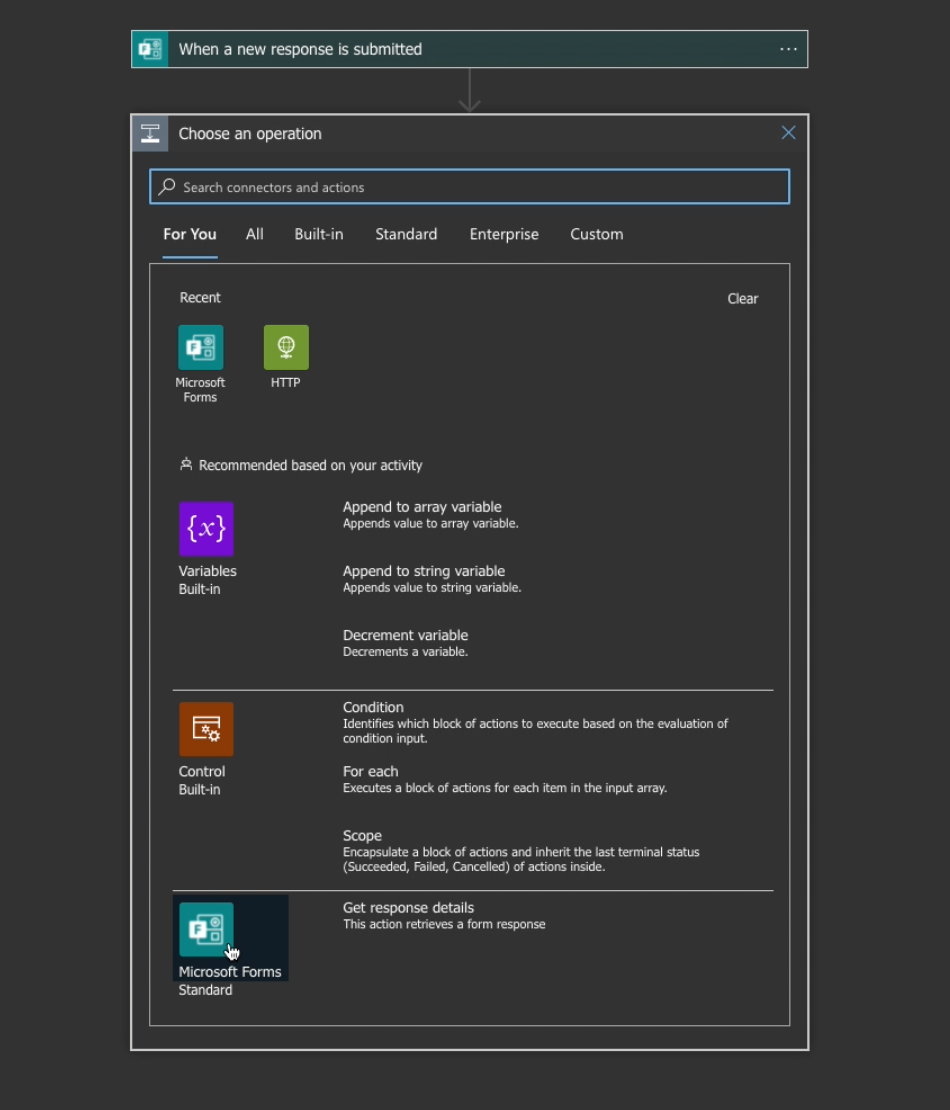
In the panel of operations, choose Microsoft Form Standard. As an action, choose get response details.
-
From the Form Id dropdown list, select the ID of your form.
-
From the Response Id dropdown list, As response Id select List of response notifications Response Id.

Selecting an action to be performed when a form is submitted -
In the panel of operations, choose HTTP. Configure this section according to the incoming webhook you created before. The body must be identical to the body you defined in the incoming webhook in Synerise.
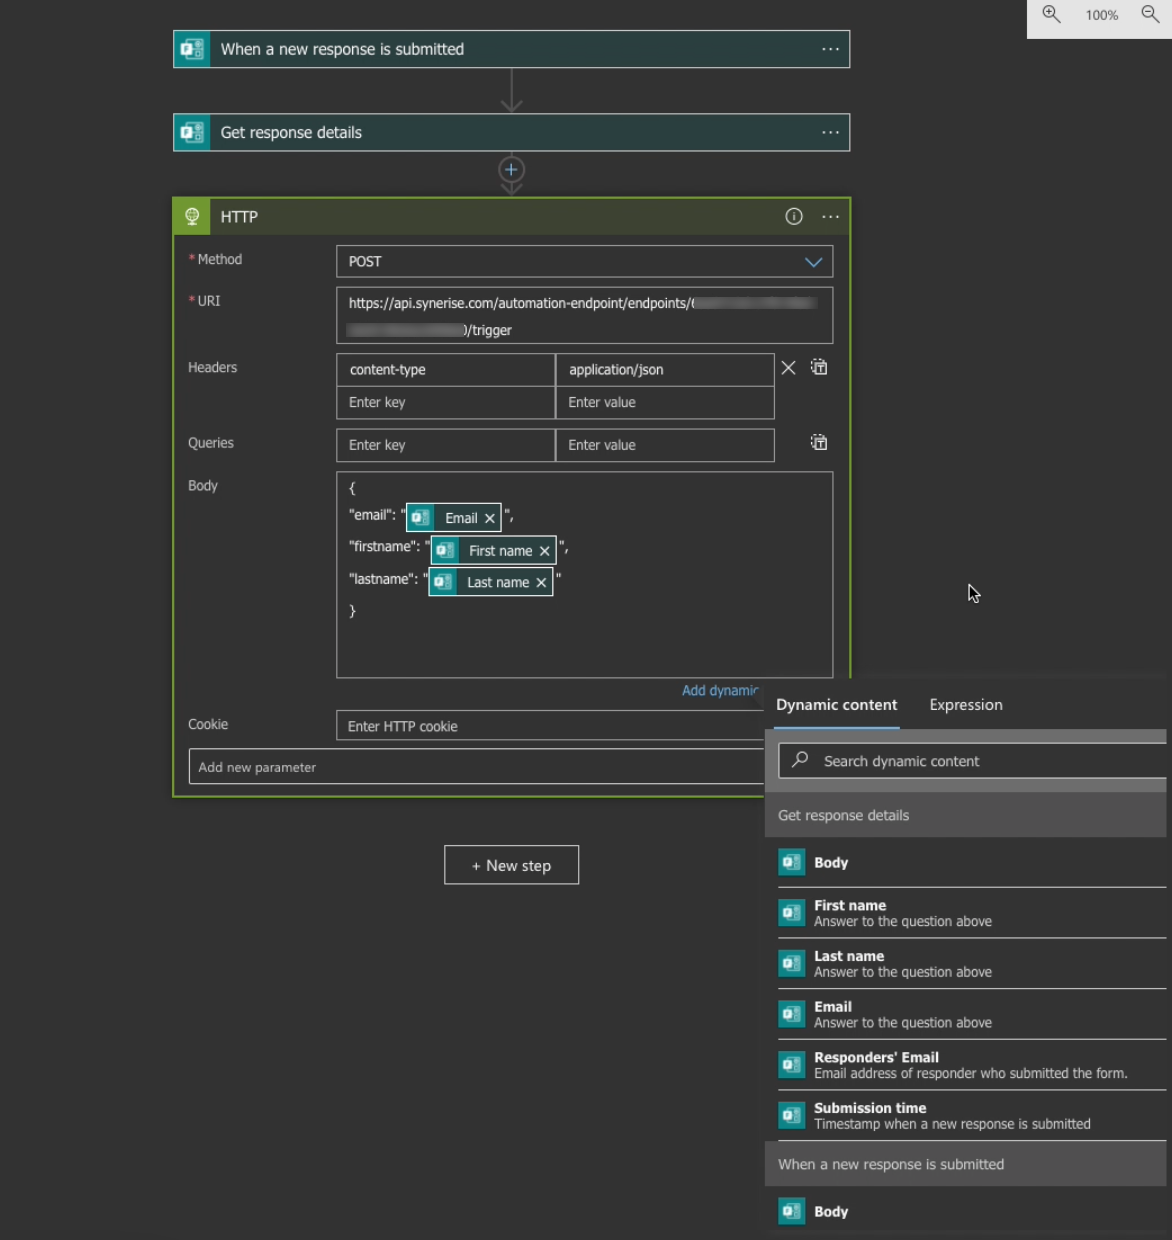
Configuring the endpoint section -
Save the workflow.
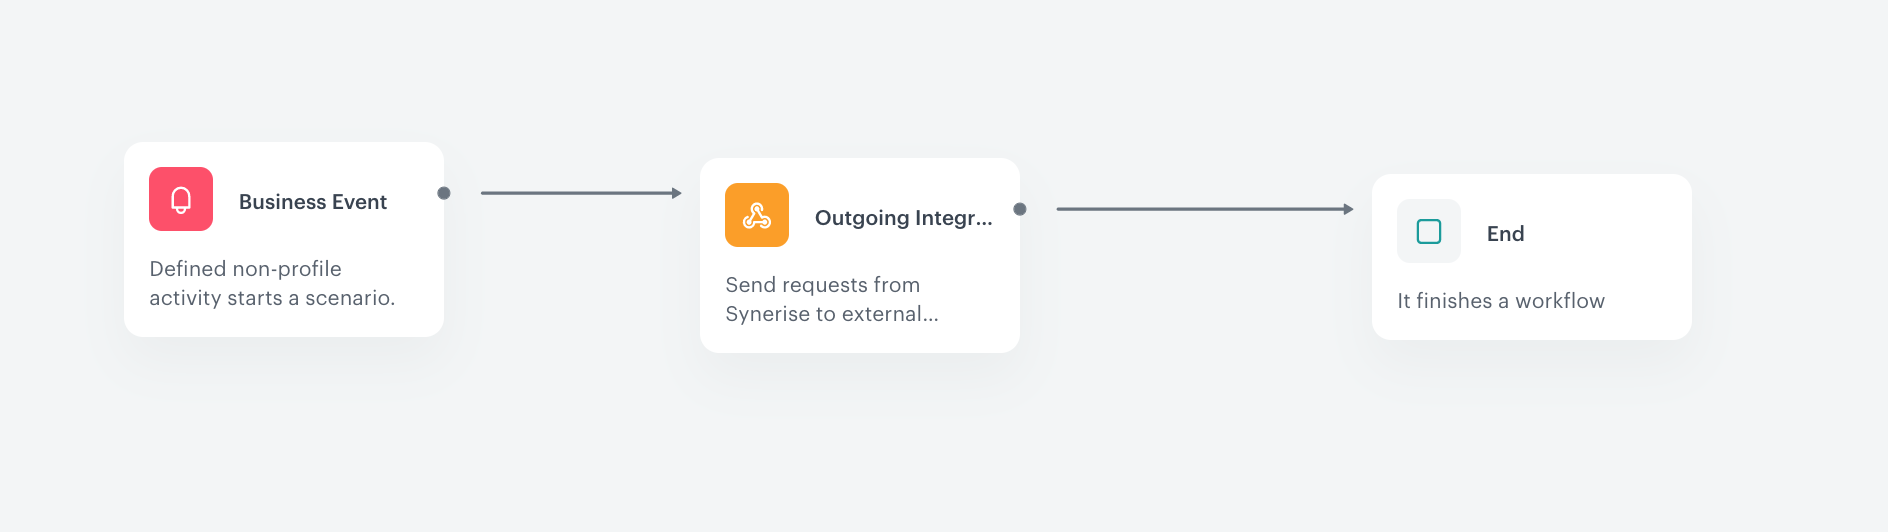
Create a workflow
In this part of the process, you create a workflow in Synerise. The workflow starts with the business event trigger that is launched every time a customer submits the form. In response to that, a customer profile is created or updated if it exists already.
- In Synerise, go to Automation > Workflows > New workflow.
- Enter the name of the workflow.
- As the first node, select Business Event. In the configuration of the node:
- Select the incoming webhook you created as the first part of this use case.
- Confirm by clicking Apply.

Configuring the Business Event node
- Add the Outgoing integration to the workflow. In the configuration of the node:
- Enter the name of the webhook. This name will be used as a value of the
nameparameter of thewebhook.responseevent. - Select the POST method.
- Enter the endpoint URL:
- For workspaces hosted in Microsoft Azure:
https://api.synerise.com/v4/clients/batch - For workspaces hosted in Google Cloud Platform:
https://api.geb.synerise.com/v4/clients/batch
- For workspaces hosted in Microsoft Azure:
- Enter the following headers:
- set the
content-typeheader toapplication/json(default), - set the
acceptheader toapplication/json, - set the
api-versionheader to4.4
- set the
- Enter the request body. For the form used in this case, the body is as follows:
{ "email": "{{ request.body.email }}", "firstname": "{{ request.body.firstname }}", "lastname": "{{ request.body.lastname }}" } - In the Authorization section, select By API key.
- From the dropdown list, select API key that has permissions to create or update customer’s data.
- Enter the name of the webhook. This name will be used as a value of the
- Confirm by clicking Apply.
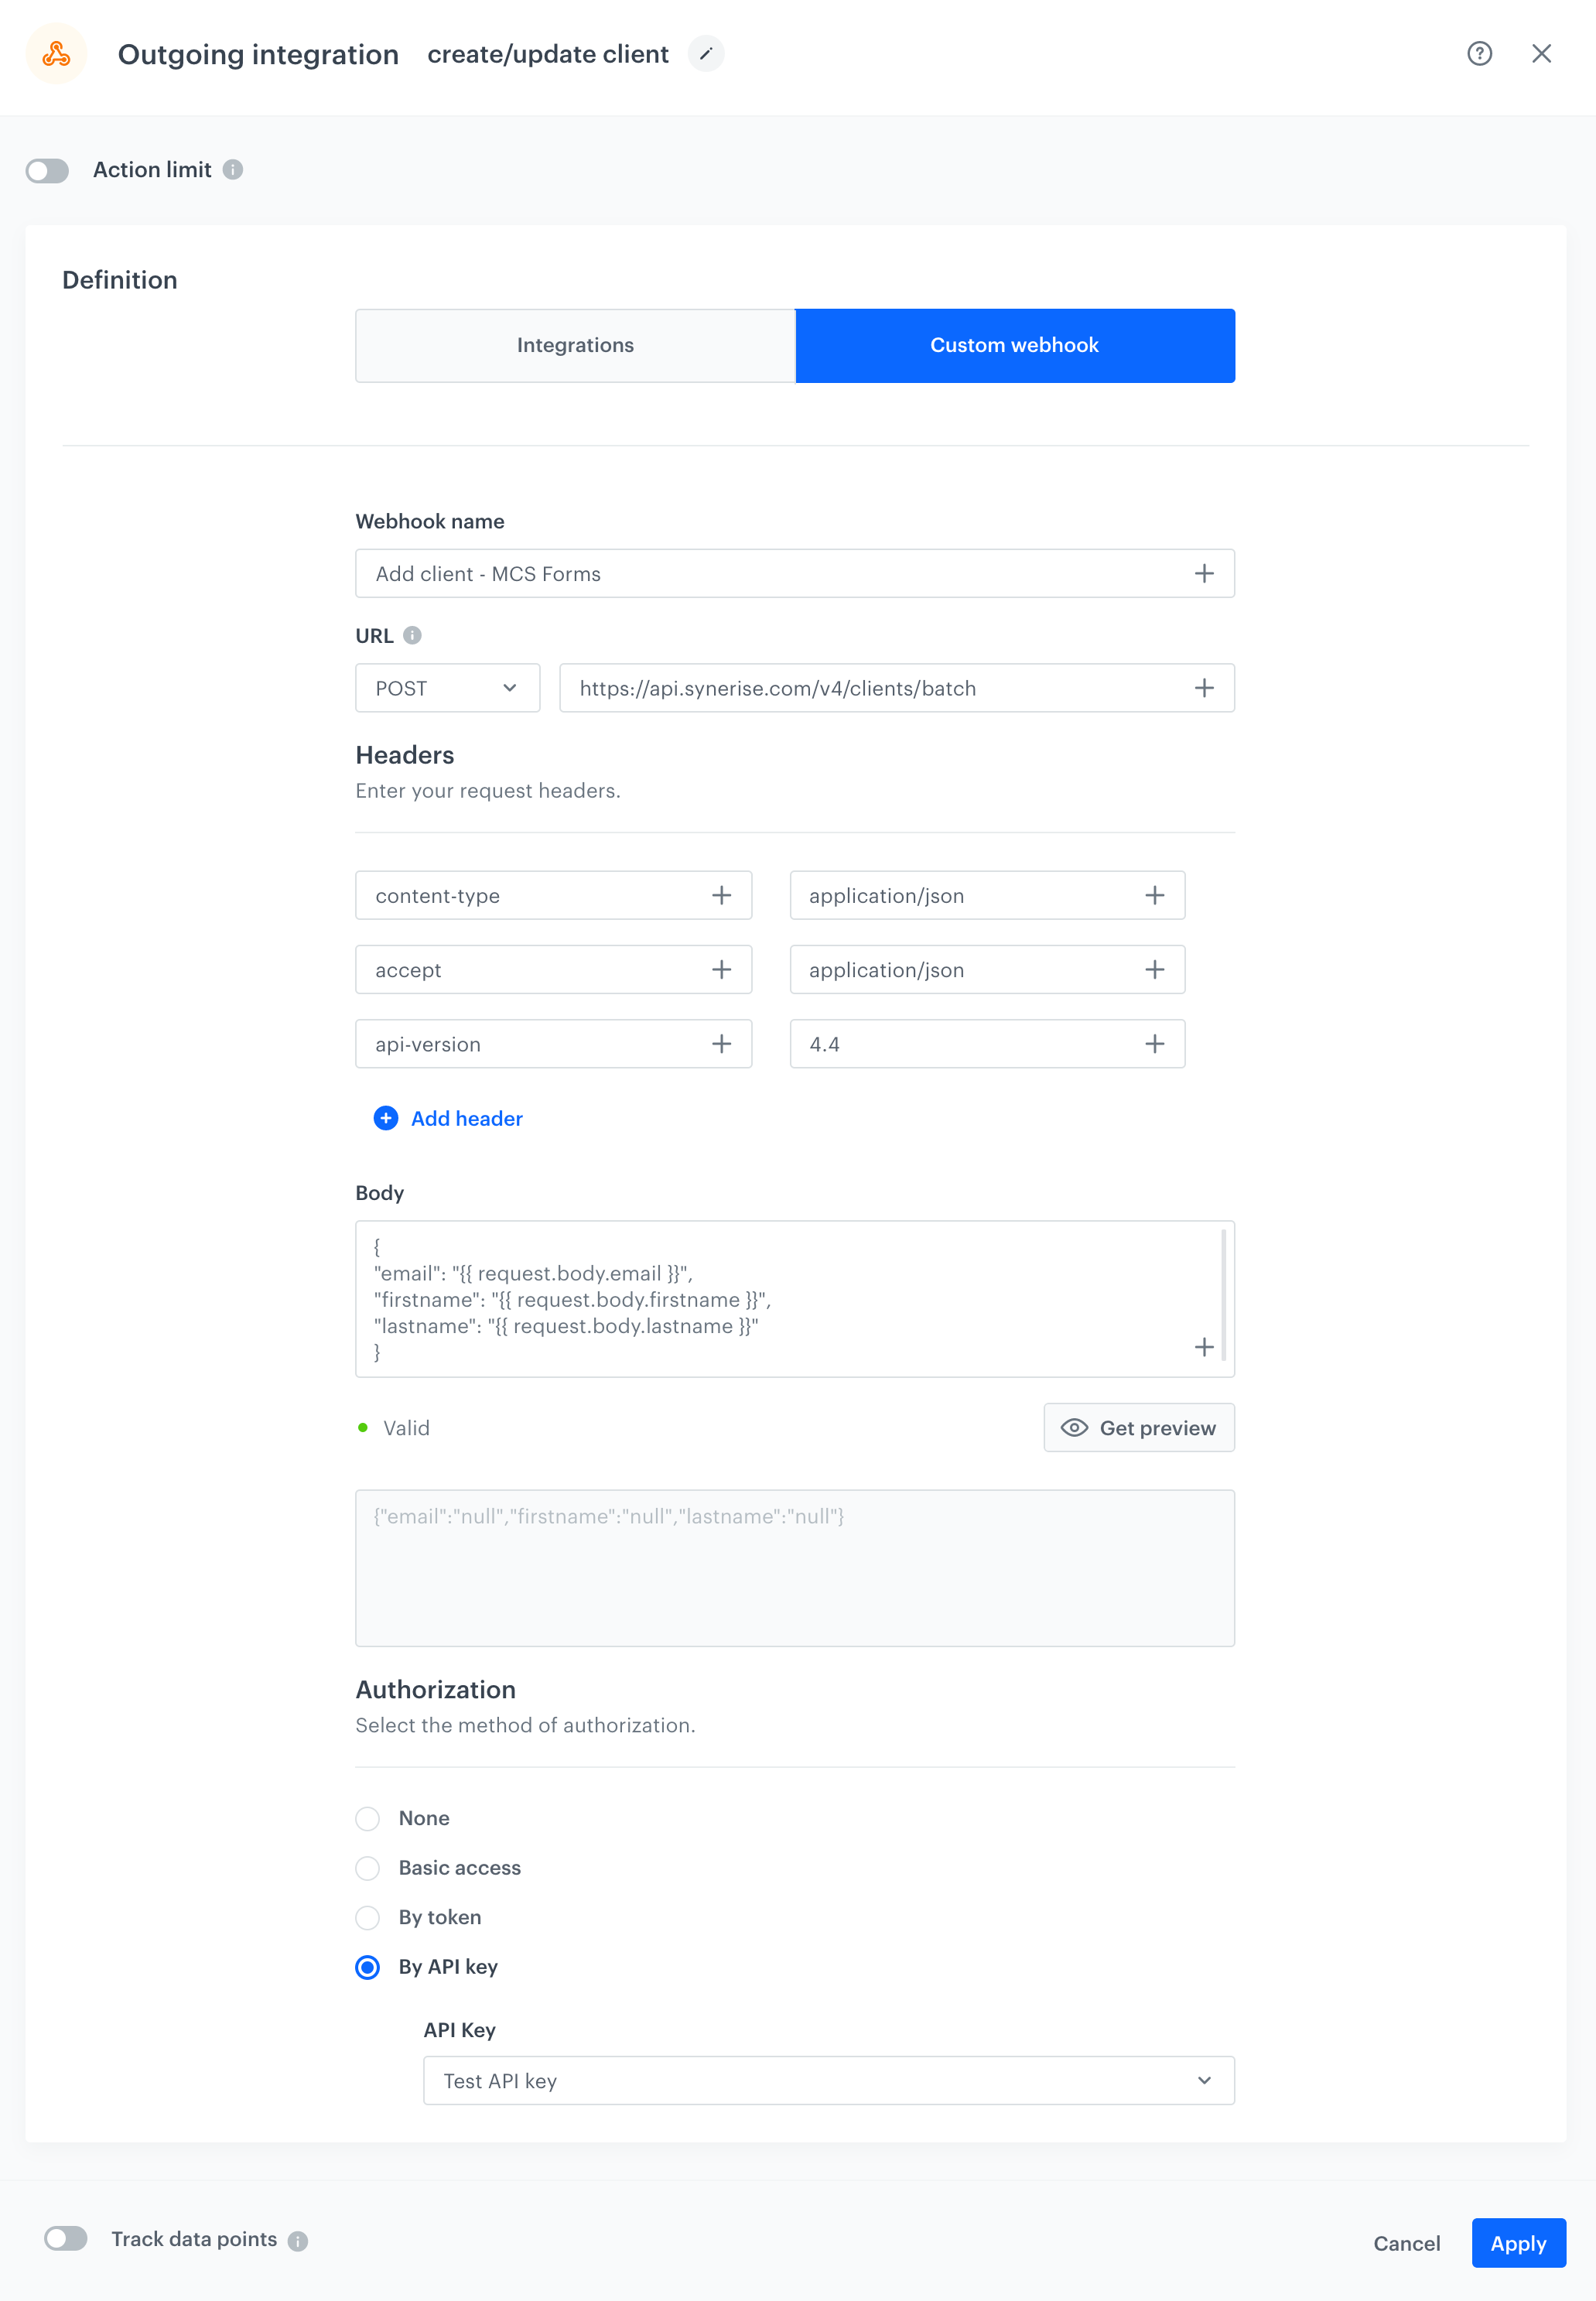
Configuring the Outgoing integration node - Add the End node.
- Activate your workflow by clicking Save & Run.
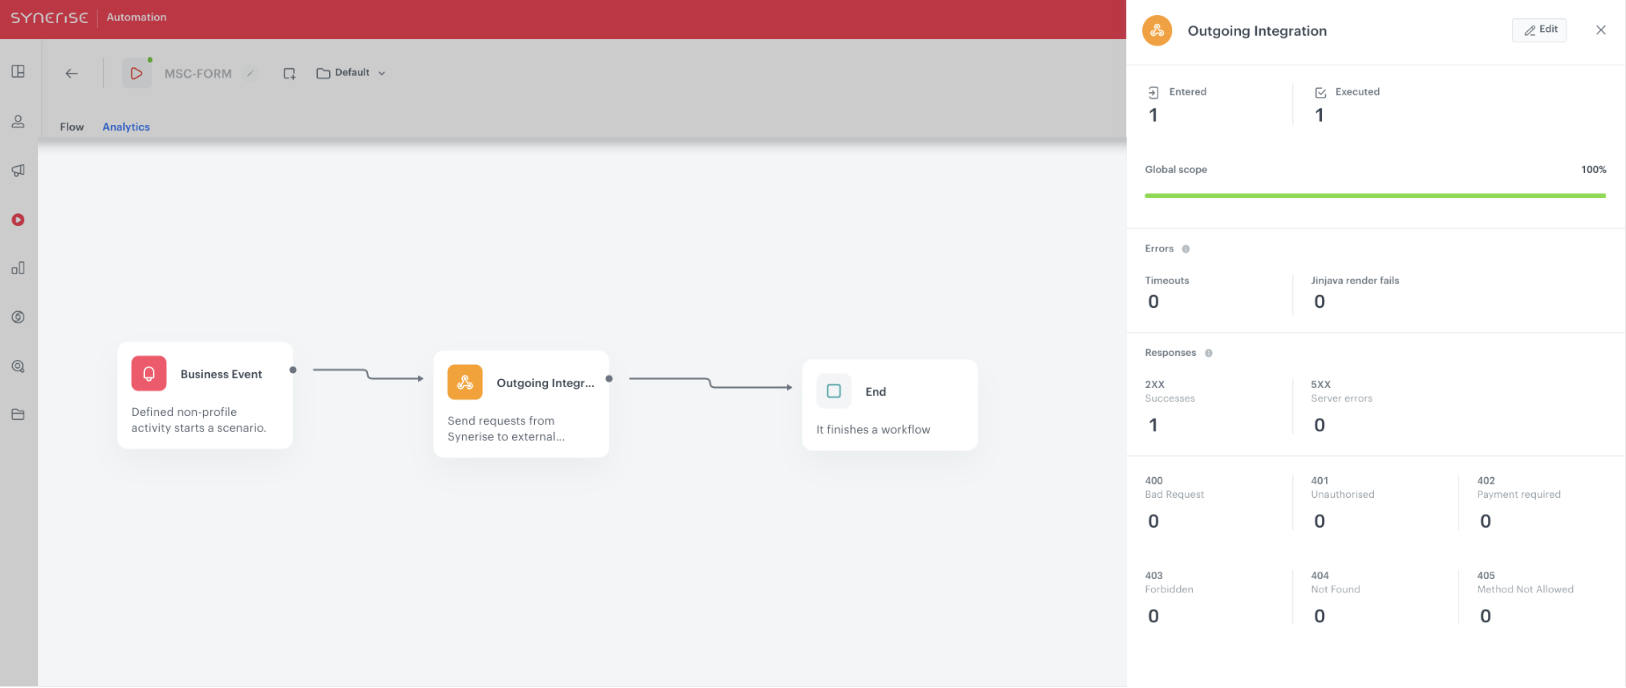
Testing
If the workflow works, you will see a new/updated customer in the Profiles module and a success in the statistics of the Outgoing integration node:
Watch video
You can watch the video that presents the whole process of implementing this use case.
Check the use case set up on the Synerise Demo workspace
You can check the incoming integration settings directly in Synerise Demo workspace.
You can also find there workflow created in this use case.
If you don’t have access to the Synerise Demo workspace, please leave your contact details in this form, and our representative will contact you shortly.