

Synchronize customer data with external services
If you manage the customers’ data in several places at once, you can use the Synerise Automation module to synchronize it. It’s possible thanks to the HTTP and SFTP integrations that allow you to send data from Synerise to external sources and the other way round.
This use case describes how to prepare an automated workflow that launches every day and sends the updated list of customers with the agreement for email communication from Synerise to an external resource using the SFTP protocol.
One of the challenges addressed in this use case is modifying the value of the customer attribute (a newsletter agreement attribute) so the data structure is consistent.
Prerequisites
- You must have customers in the Profiles module.
- You must have a target resource with which you synchronize the data (in this use case, an SFTP server is used).
Process
- Create a segmentation of customers whose data you want to send to the external resource.
- Prepare data transformation to modify the data to meet the requirements of the external resource data structure.
- Prepare a workflow that sends the data of customers from Synerise to the external resource.
Prepare a segmentation
As the first part of the process, create a segmentation of customers who agreed to receive emails. Data of these customers will be sent to the external resource.
-
Go to
 Analytics > Segmentation > New segmentation.
 -
As the name of the segmentation, enter
Subscribers. -
Click Choose filter.
-
From the dropdown list, select
newsletter_agreement. -
As the logical operator, select Equal.
-
In the text field, enter
enabled. -
Click Save.
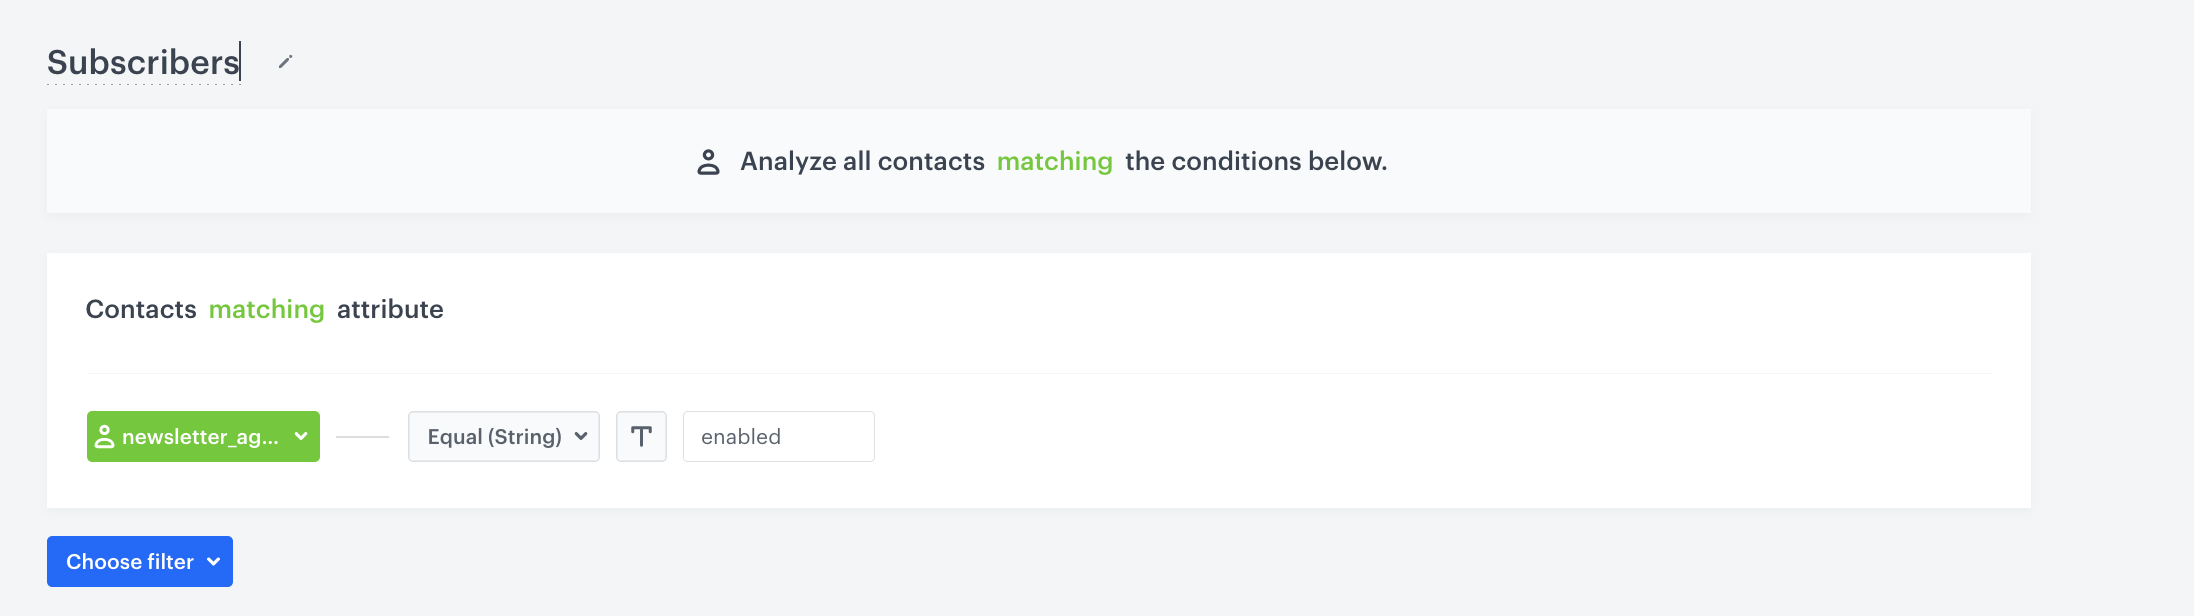
The configuration of the segmentation
Prepare data transformation
In this part of the process, you define the rules of modifying data before sending it to the SFTP server, so the data is consistent. For the purposes of this case, a newsletter_agreement parameter value will be changed from enabled to true. Additionally, we add a parameter which marks data as imported, so this import can be distinguished in the SFTP server.
The data transformation diagram which is the output of this part of the process is used later to automate sending the data.
Prerequisites
You need a sample of data that will be used in data transformation. You can add it in two ways:
- Prepare a
.csvfile with a few columns and example values.
Click here to see an example fileclientId,email,newsletter_agreement 111111111,john.doe@synerise.com,enabled 222222222,kathy.smith@synerise.com,enabled 333333333,lily.novak@synerise.com,enabled 444444444,matt.turner@synerise.com,enabled - Export several customers from the Profiles module to a
.csv file.Click here to read the instructions- Go to Profiles.
- On the list, select several customers.
- At the top of the list, click the Export button.
- On the pop-up, enter the name of the export.
- Select three attributes: email, clientId, and newsletter_agreement.
- Click Apply.
- On the pop-up, click Go to Reports.
- On the list, find your export.
- Next to the export, click the
 icon.
icon. - From the context menu, select Download.
Result: A.csvfile is downloaded.
- Go to
 Automation > Data Transformation > Create transformation.
 - Enter the name of the transformation.
- Click Add input.
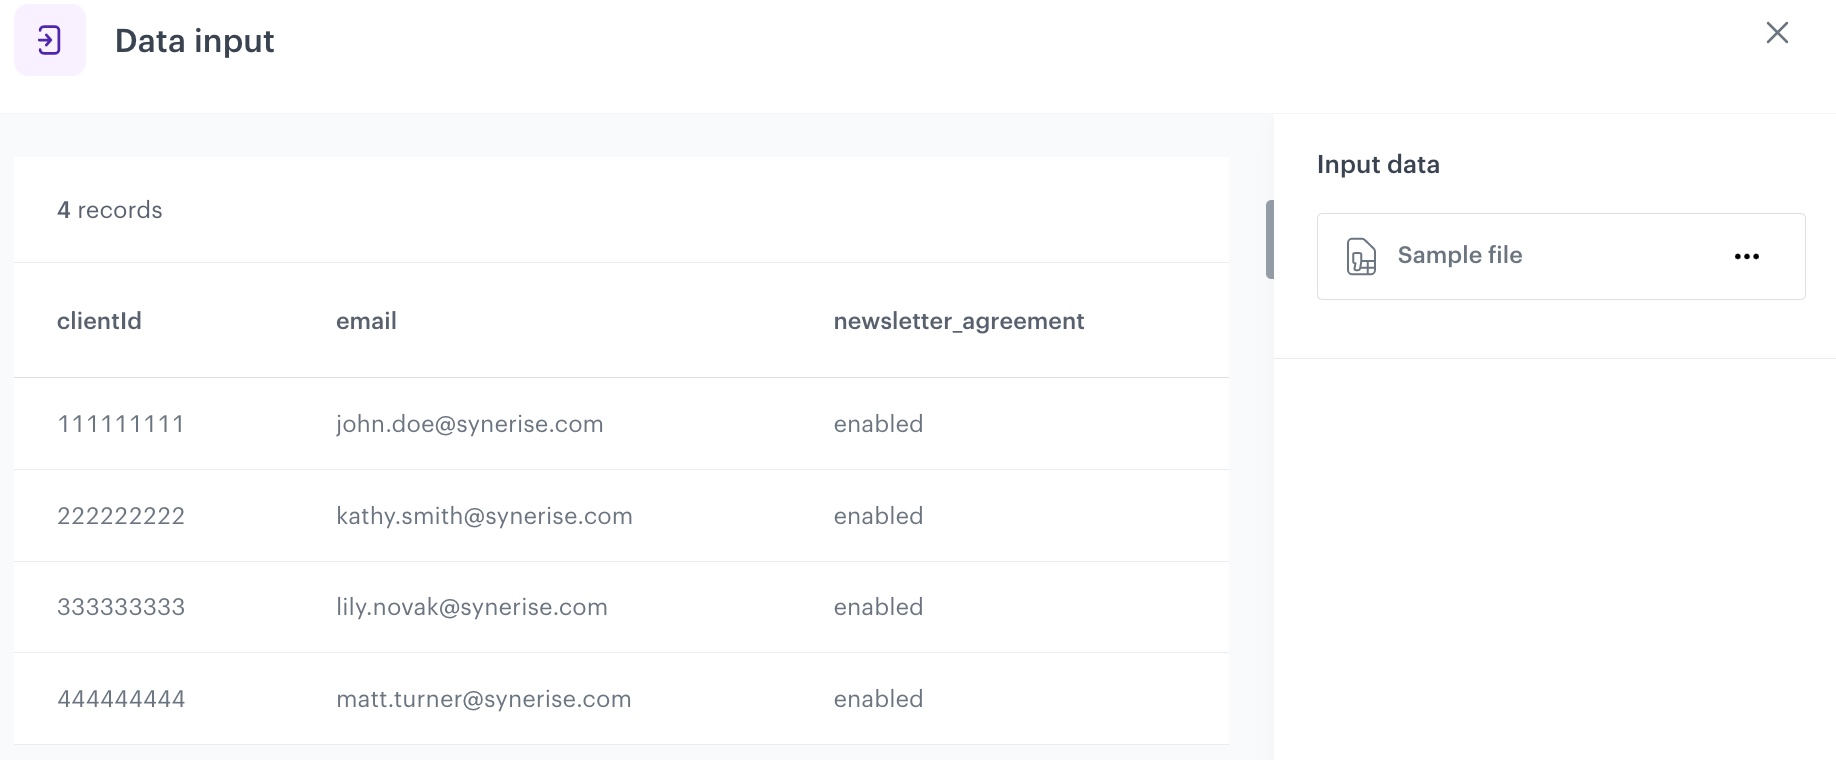
Add file with sample data
This node allows you to add a data sample. In further steps, you define how the data must be modified. Later, when this transformation is used in the Automation workflow, the system uses the rules created with the sample data as a pattern for modifying actual data.
- On the pop-up, click Add example.
- Upload the file with the sample data.
- Click Generate.
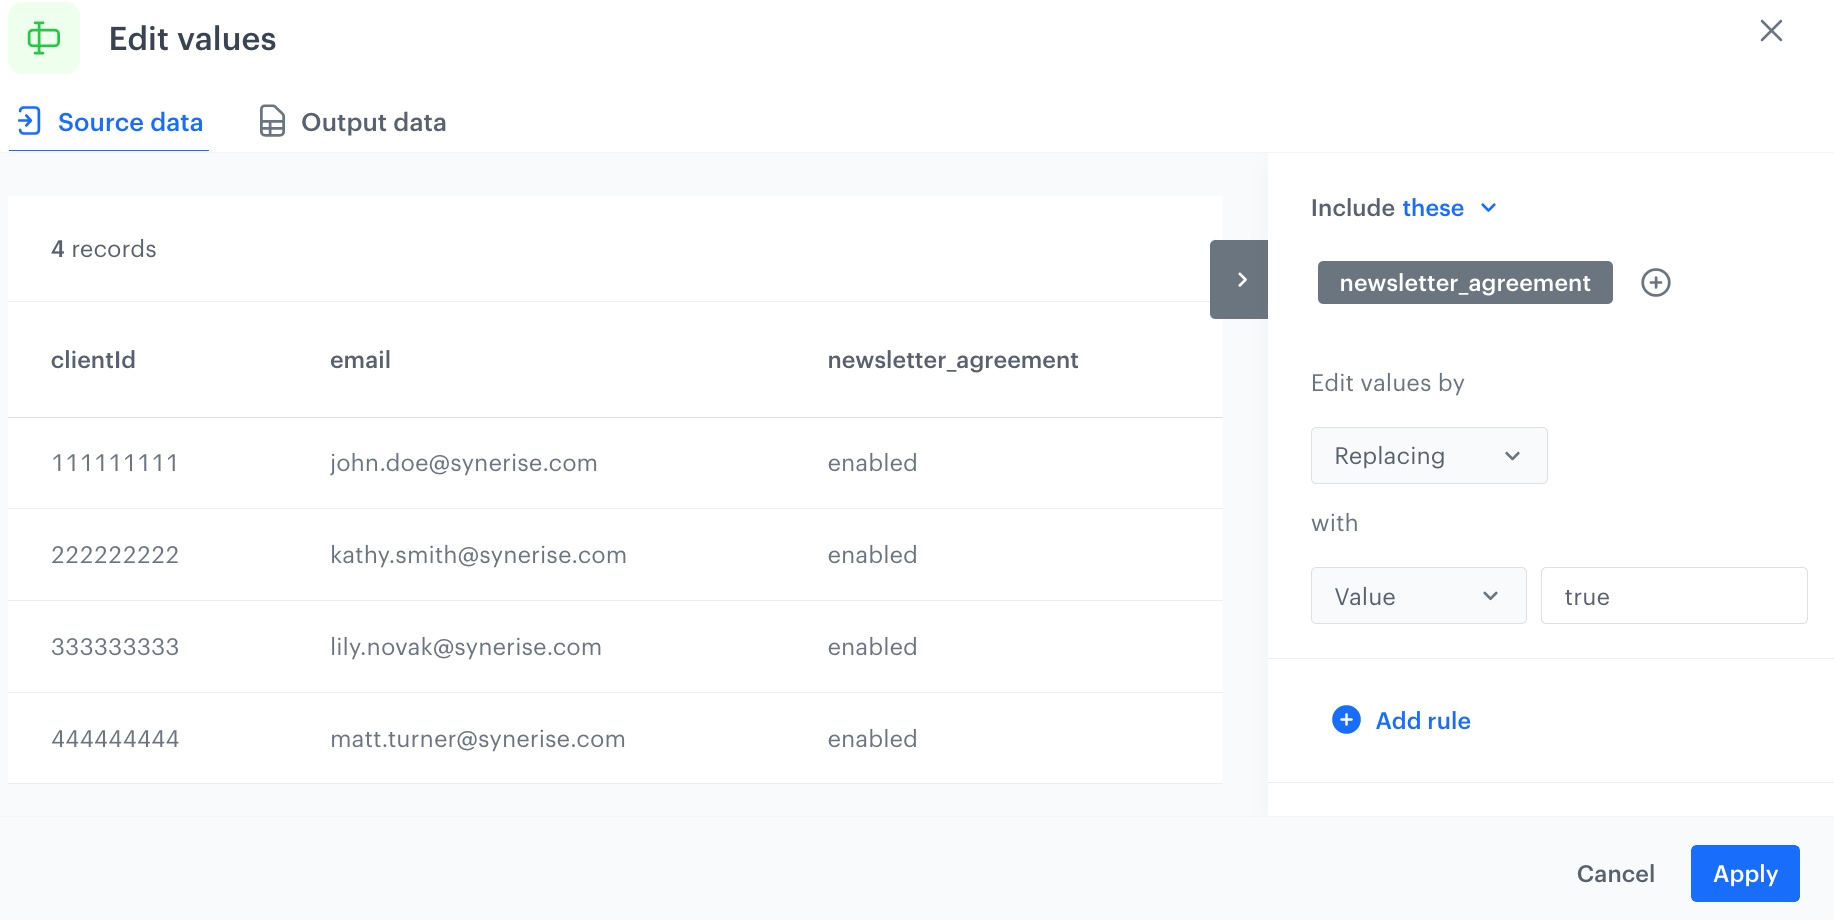
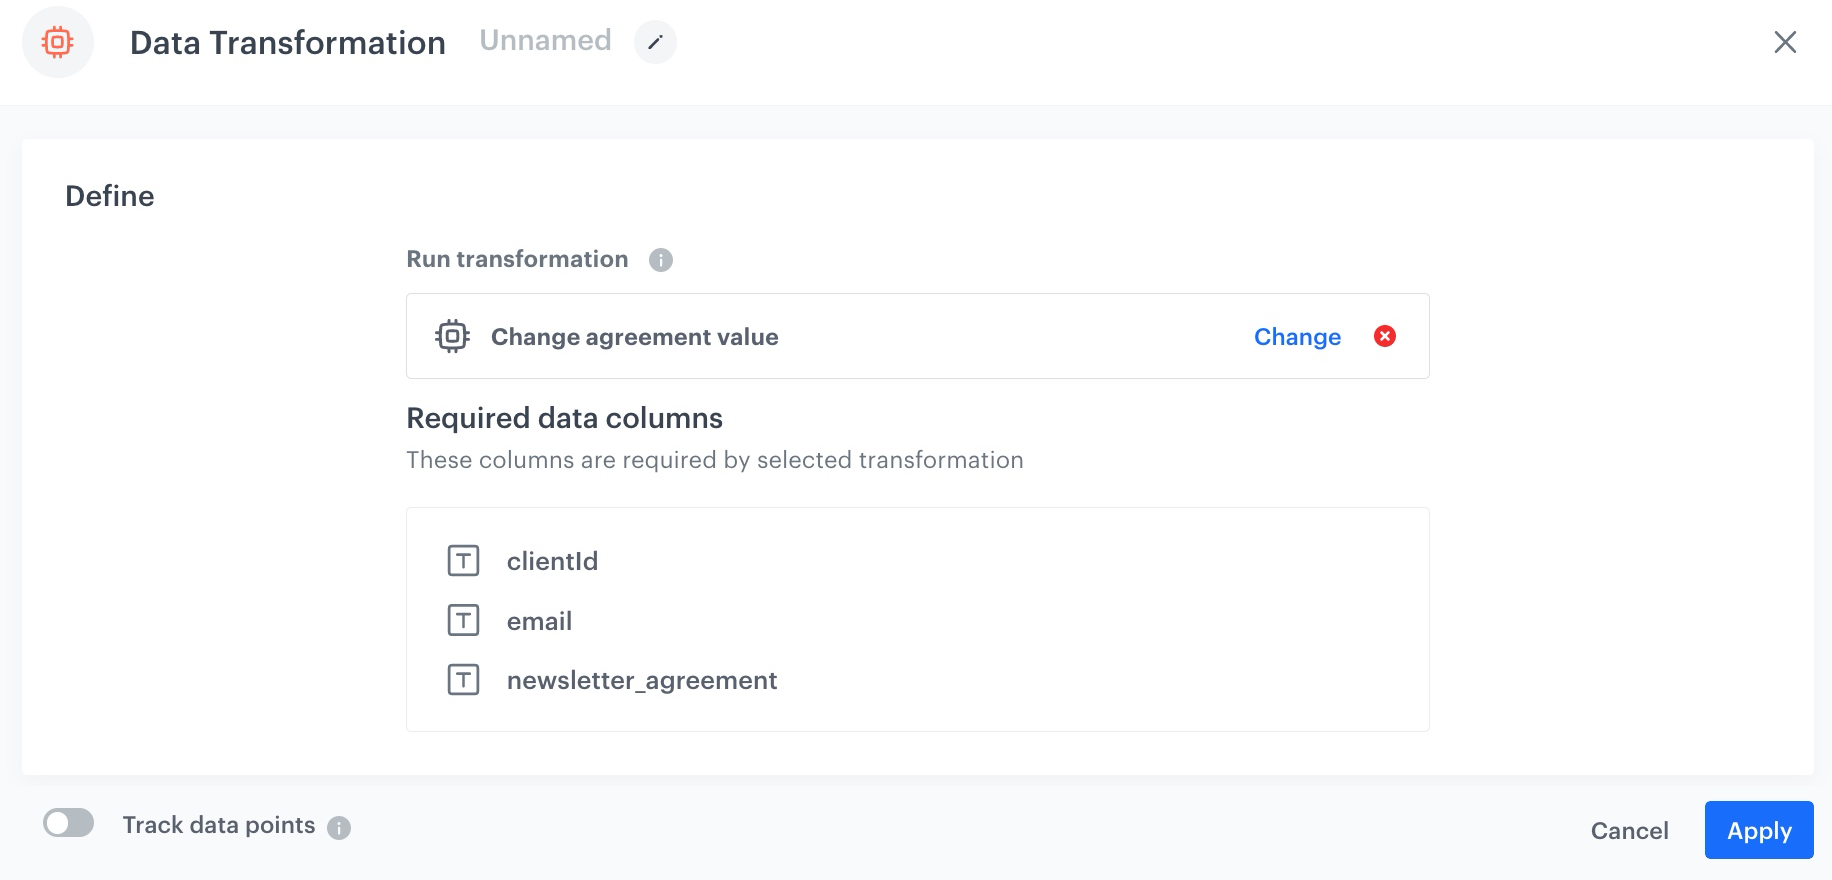
Edit the newsletter_agreement value
This node allows you to replace the enabled value of the newsletter_agreement attribute with true.
- On the canvas, click the right mouse button.
- From the dropdown list, select Edit values.
- Click the Edit values node.
- In the configuration of the node:
- Click Add rule.
- Click Add column.
- Select the newsletter_agreement column.
- Under Edit values by, from the dropdown list, select Replacing.
- In the left dropdown, leave the Value option at default.
- In the text field, enter
true. - Confirm by clicking Apply.
Add the parameter which marks data as imported
This node allows you to add a column to the data - in result, you can easily identify the import in the external source (the SFTP server).
-
On the canvas, click the right mouse button.
-
From the dropdown list, select Add column.
-
In the configuration of the node:
- In the Add column field, enter
importType. - In the dropdown, leave the Defined value.
- In the text field, enter
synerise_subscribers. - Confirm by clicking Apply.
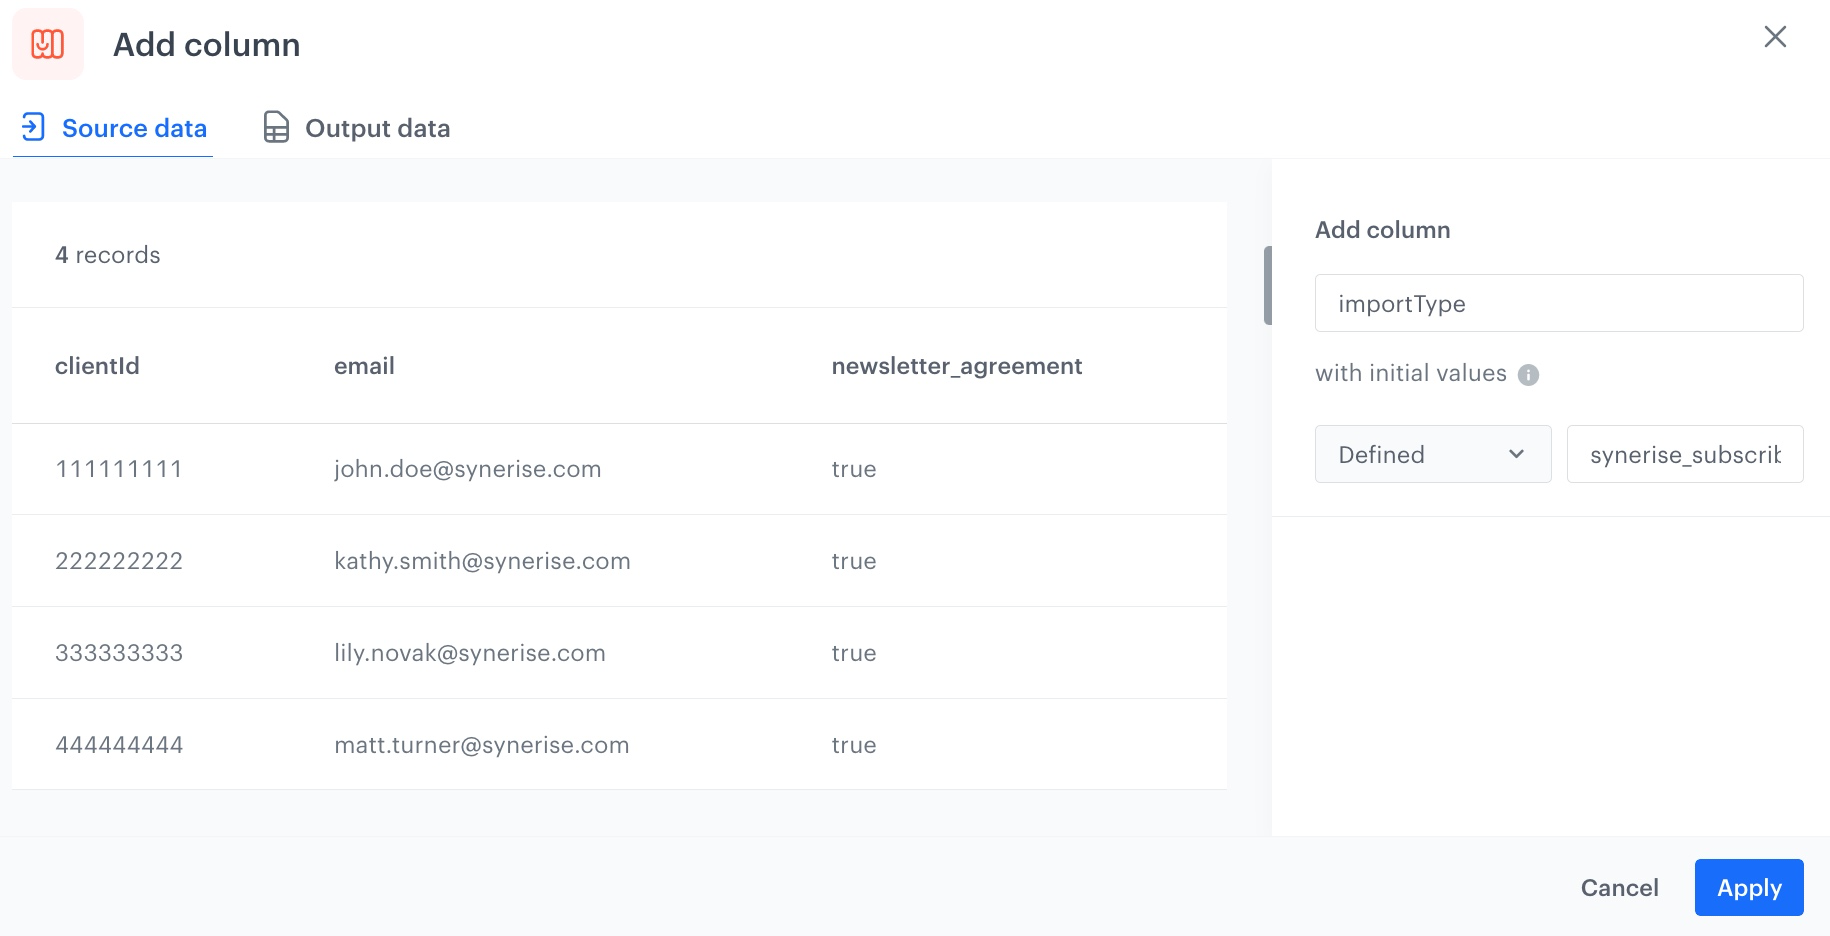
The configuration of the Add column node - In the Add column field, enter
Add the finishing node
This node lets you preview the output of the modifications to the sample data.
-
On the canvas, click the right mouse button.
-
From the dropdown list, select Data output.
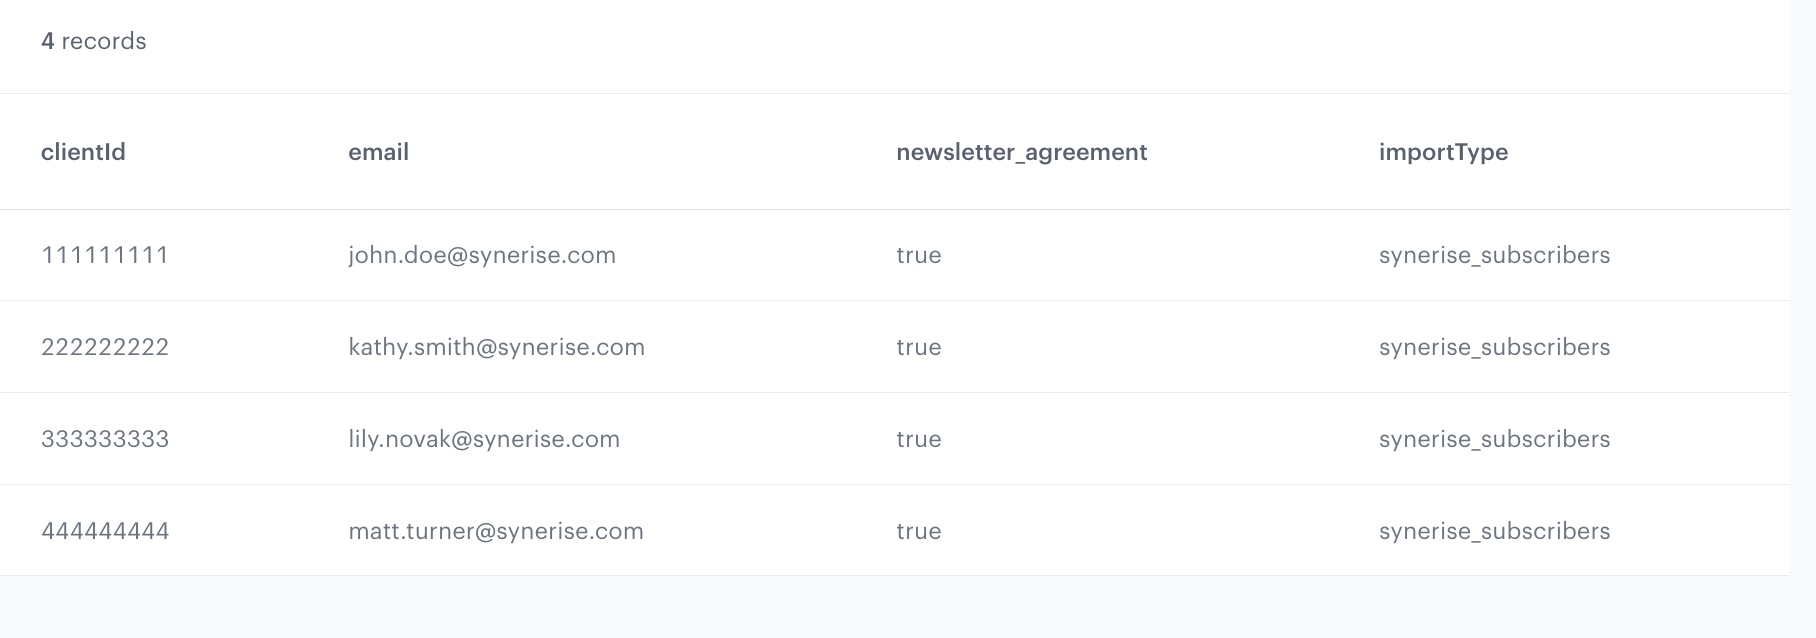
The preview of modifications to the file -
In the upper right corner, click Save and publish.
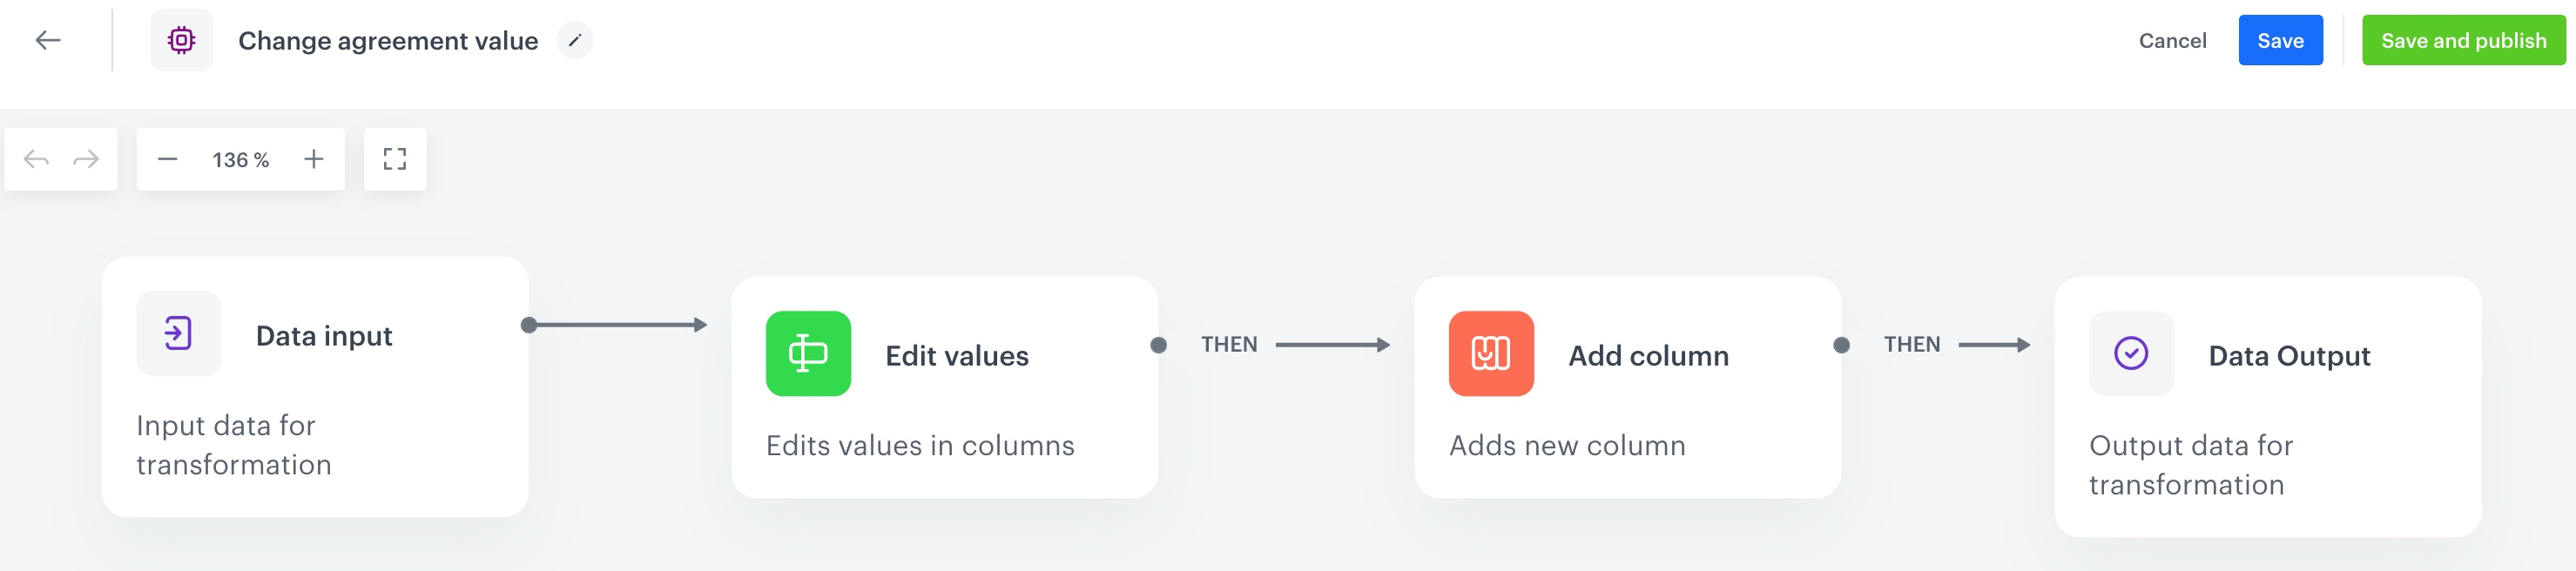
The diagram of data transformation
Prepare a workflow
As the final part of the process, create a workflow which sends the customers’ data every day to the external source using the SFTP protocol.
- Go to Automation > Workflows > New workflow.
- Enter the name of the workflow.
Define the launch date
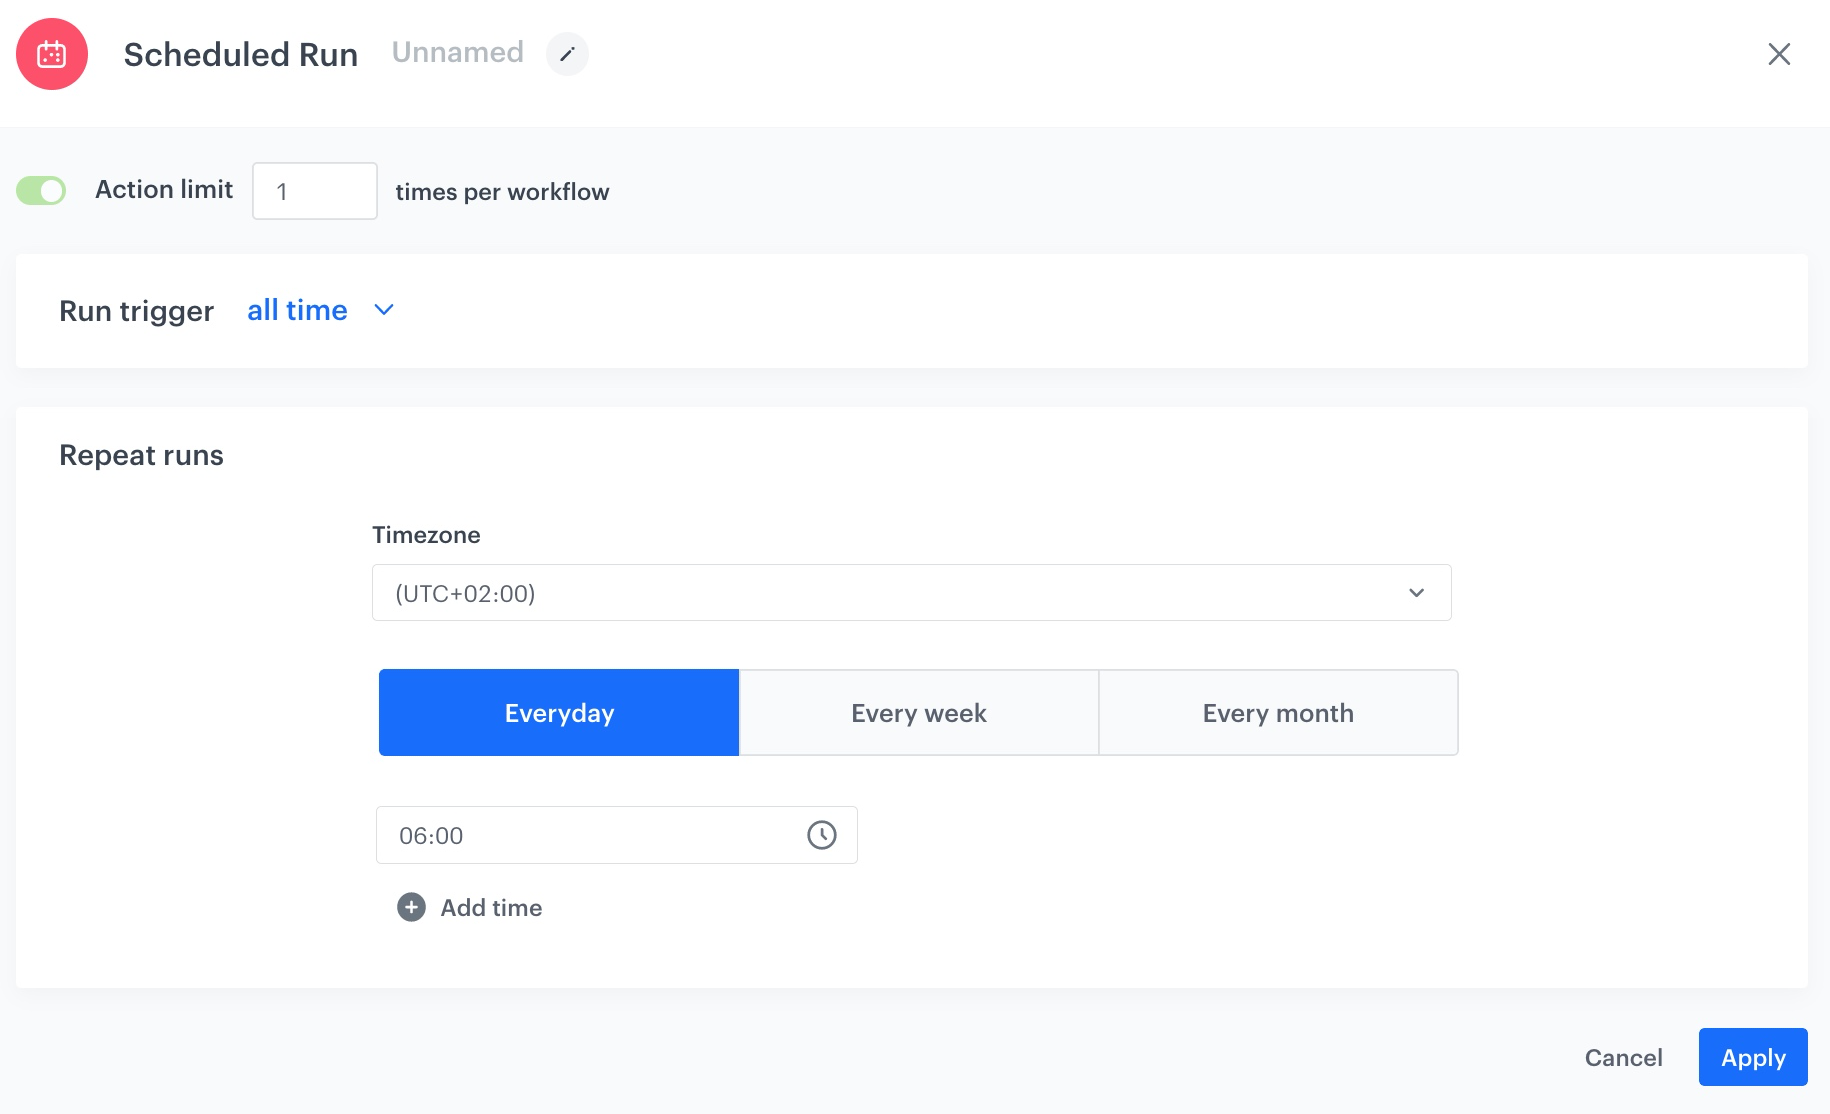
- As the trigger node, add Scheduled Run.
- In the configuration of the node:
- Leave the Run trigger option at default (all time).
- From the Timezone dropdown list, select the time zone consistent with the timezone selected for your workspace.
- Define the frequency of the workflow (for example, everyday at 6.00 A.M.).
The workflow will automatically launch everyday at 6.00 A.M. - Confirm by clicking Apply.
Select customers to export
-
Add a Get Profiles node.
-
In the configuration of the node:
- Select the segmentation you created in the first part of the process.
- In the Attributes section, select newsletter_agreement and email.
- Confirm by clicking Apply.
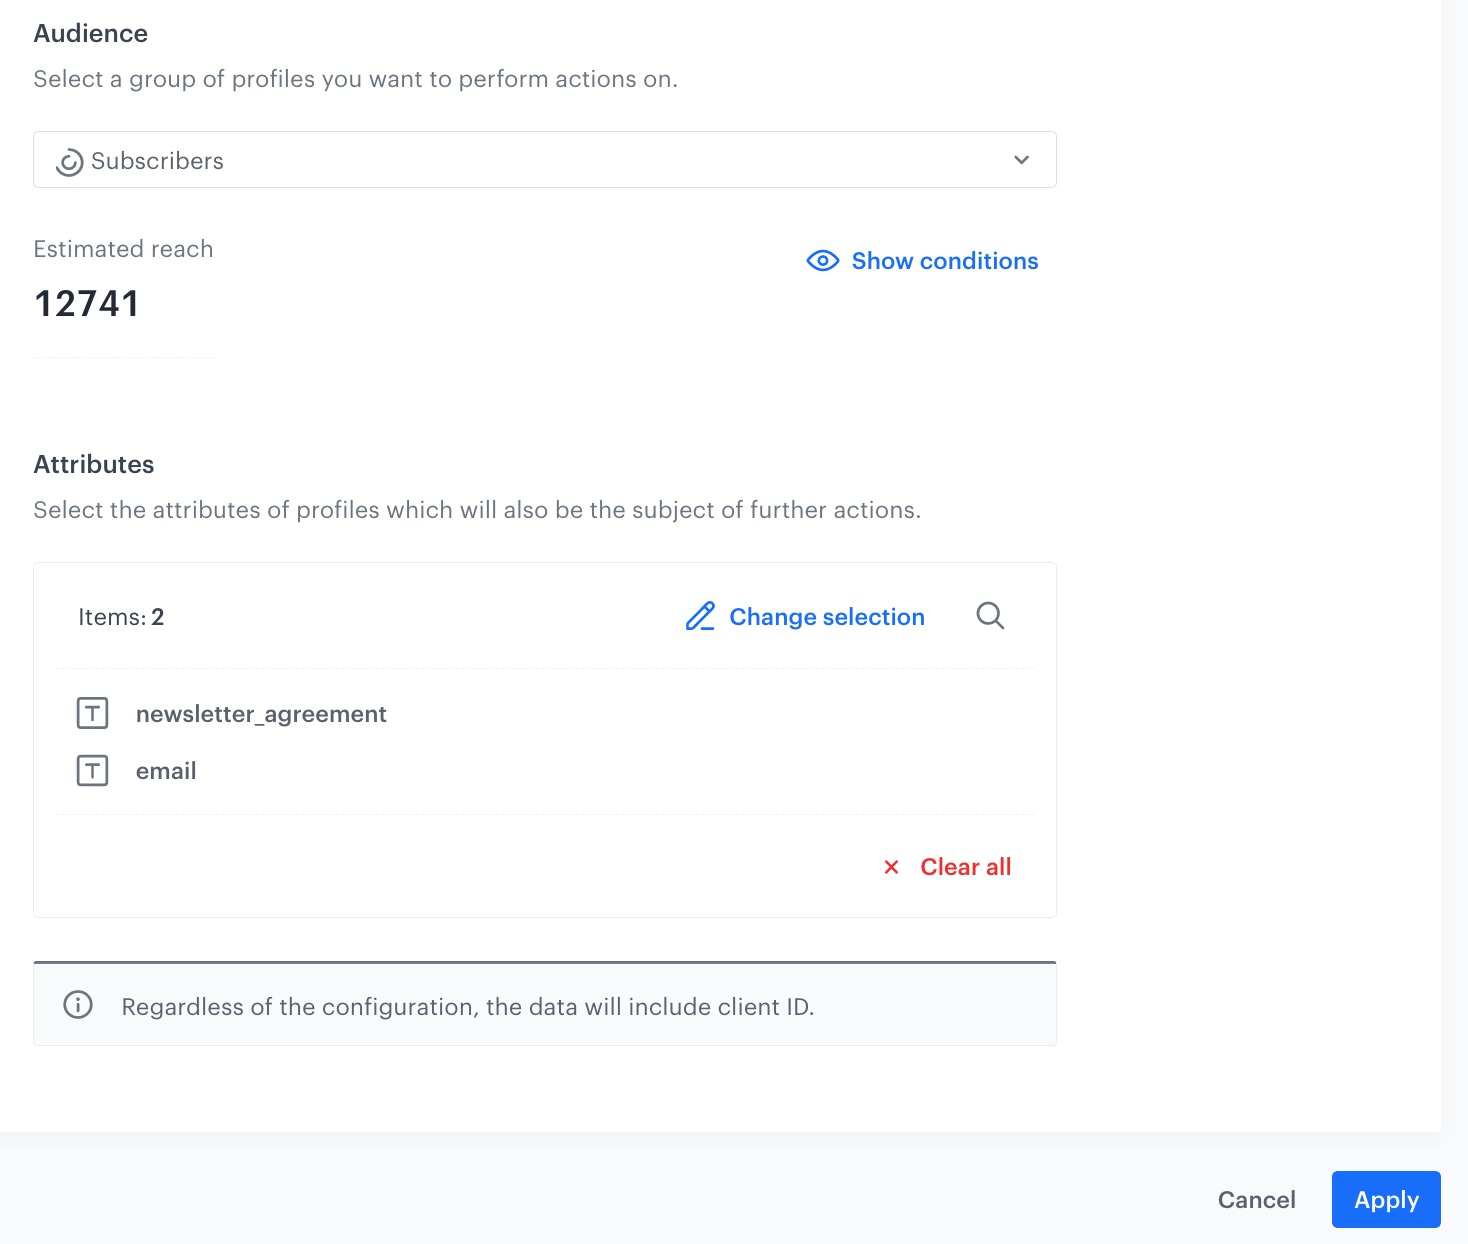
The configuration of the Get Profiles node
Select the data transformation rules
- Add a Data Transformation node.
- In the configuration of the node, select the data transformation you have created before.
- Confirm by clicking Apply.
Configure settings for SFTP protocol
-
Add the SFTP - Send file node.
-
In the configuration of the node:
- Enter the path to your server.
- Select the port.
- Enter the path to the directory.
- Enter the name of the file.
- If needed, in the File name suffix, select the suffix of the file name.
- From the File format dropdown list, select the CSV format.
- Verify and modify the delimiters if needed.
- In the Authentication section, select the method of authentication.
- Confirm by clicking Apply.
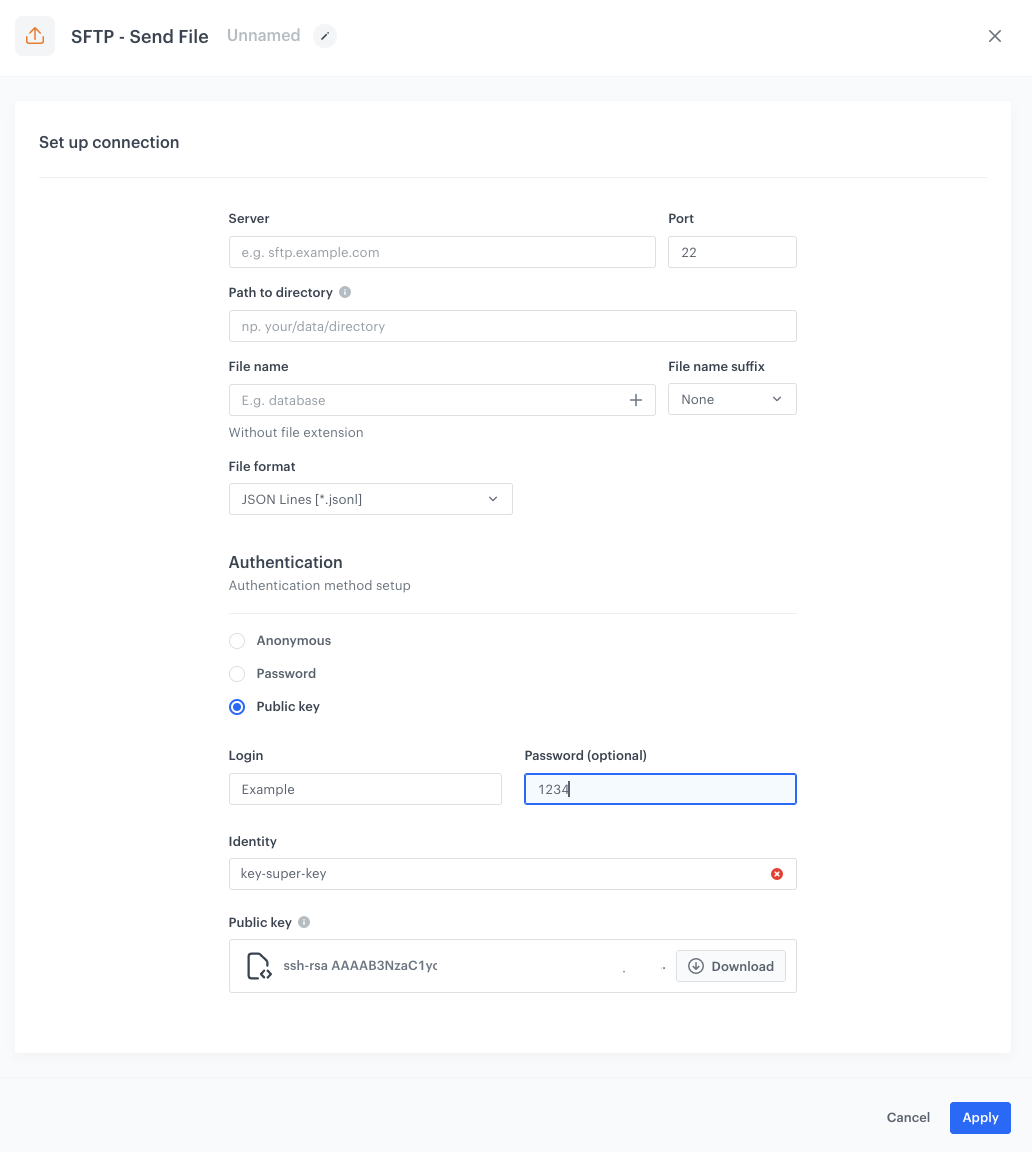
The configuration of the SFTP node
Add the finishing node
- Add the End node.
- In the upper right corner, click Save & Run.
Result: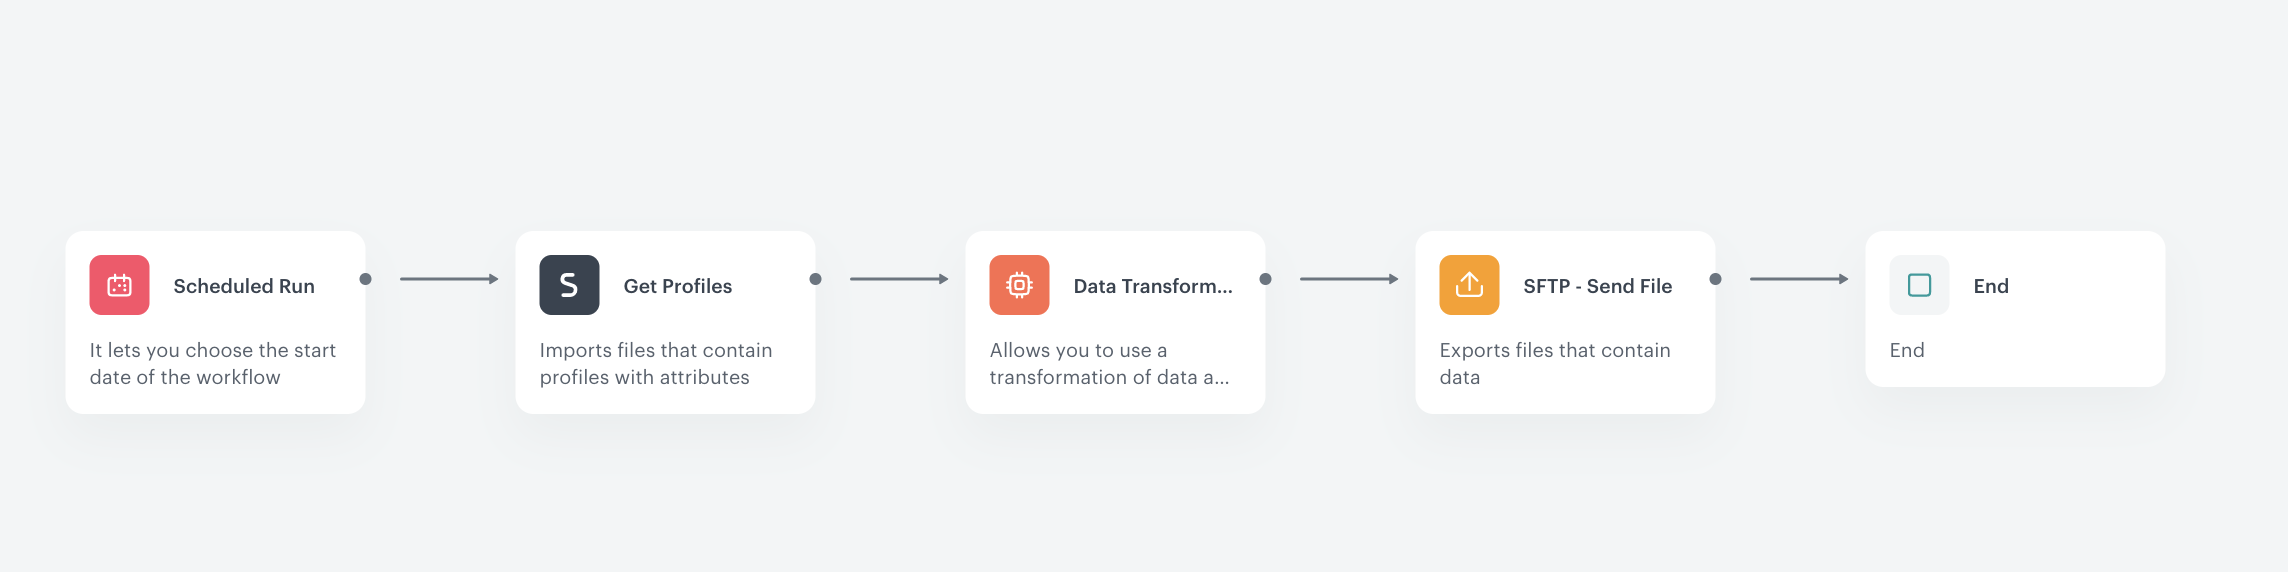
The workflow configuration
You can monitor the flow of the workflow in the Transformation logs tab. It contains information about each execution of the workflow.

Check the use case set up on the Synerise Demo workspace
You can check the configuration of each item created in this use case on our Synerise Demo workspace:
If you don’t have access to the Synerise Demo workspace, please leave your contact details in this form, and our representative will contact you shortly.