Landing page
A landing page is a place where users are redirected after clicking a link (e.g. link in an email, advertisement on Facebook, etc.). It can be an independent website which will contain useful information, a microsite that will be a part of a larger website, or it may serve as a tool in promotional campaigns, for example, in which you want to promote one of your products or services you offer. These various methods allow you to draw the attention of customers.
No matter which option you choose, Synerise makes it possible to create simple and functional landing pages that will meet your business goals. To create a landing page, you can use one of two wizards: a WYSIWYG wizard or a code editor.
Business profits
- Conversion increase
- Support of business goals
- Improvement of brand awareness
- Source of invaluable data and insights
Requirements
If you want to publish a landing page within your own domain, you must:
- Submit a request for configuring your domain in Synerise to the customer service.
- Send the SSL certificate or give an approval for generating a certificate through Let’s Encrypt.
- Configure DNS - add the
CNAMErecord and set it tolp.synerise.com
Create a landing page
In order to create a landing page, go to Communication > Landing Page.
Once you get to Landing Page, you will see the list of previously created landing pages.
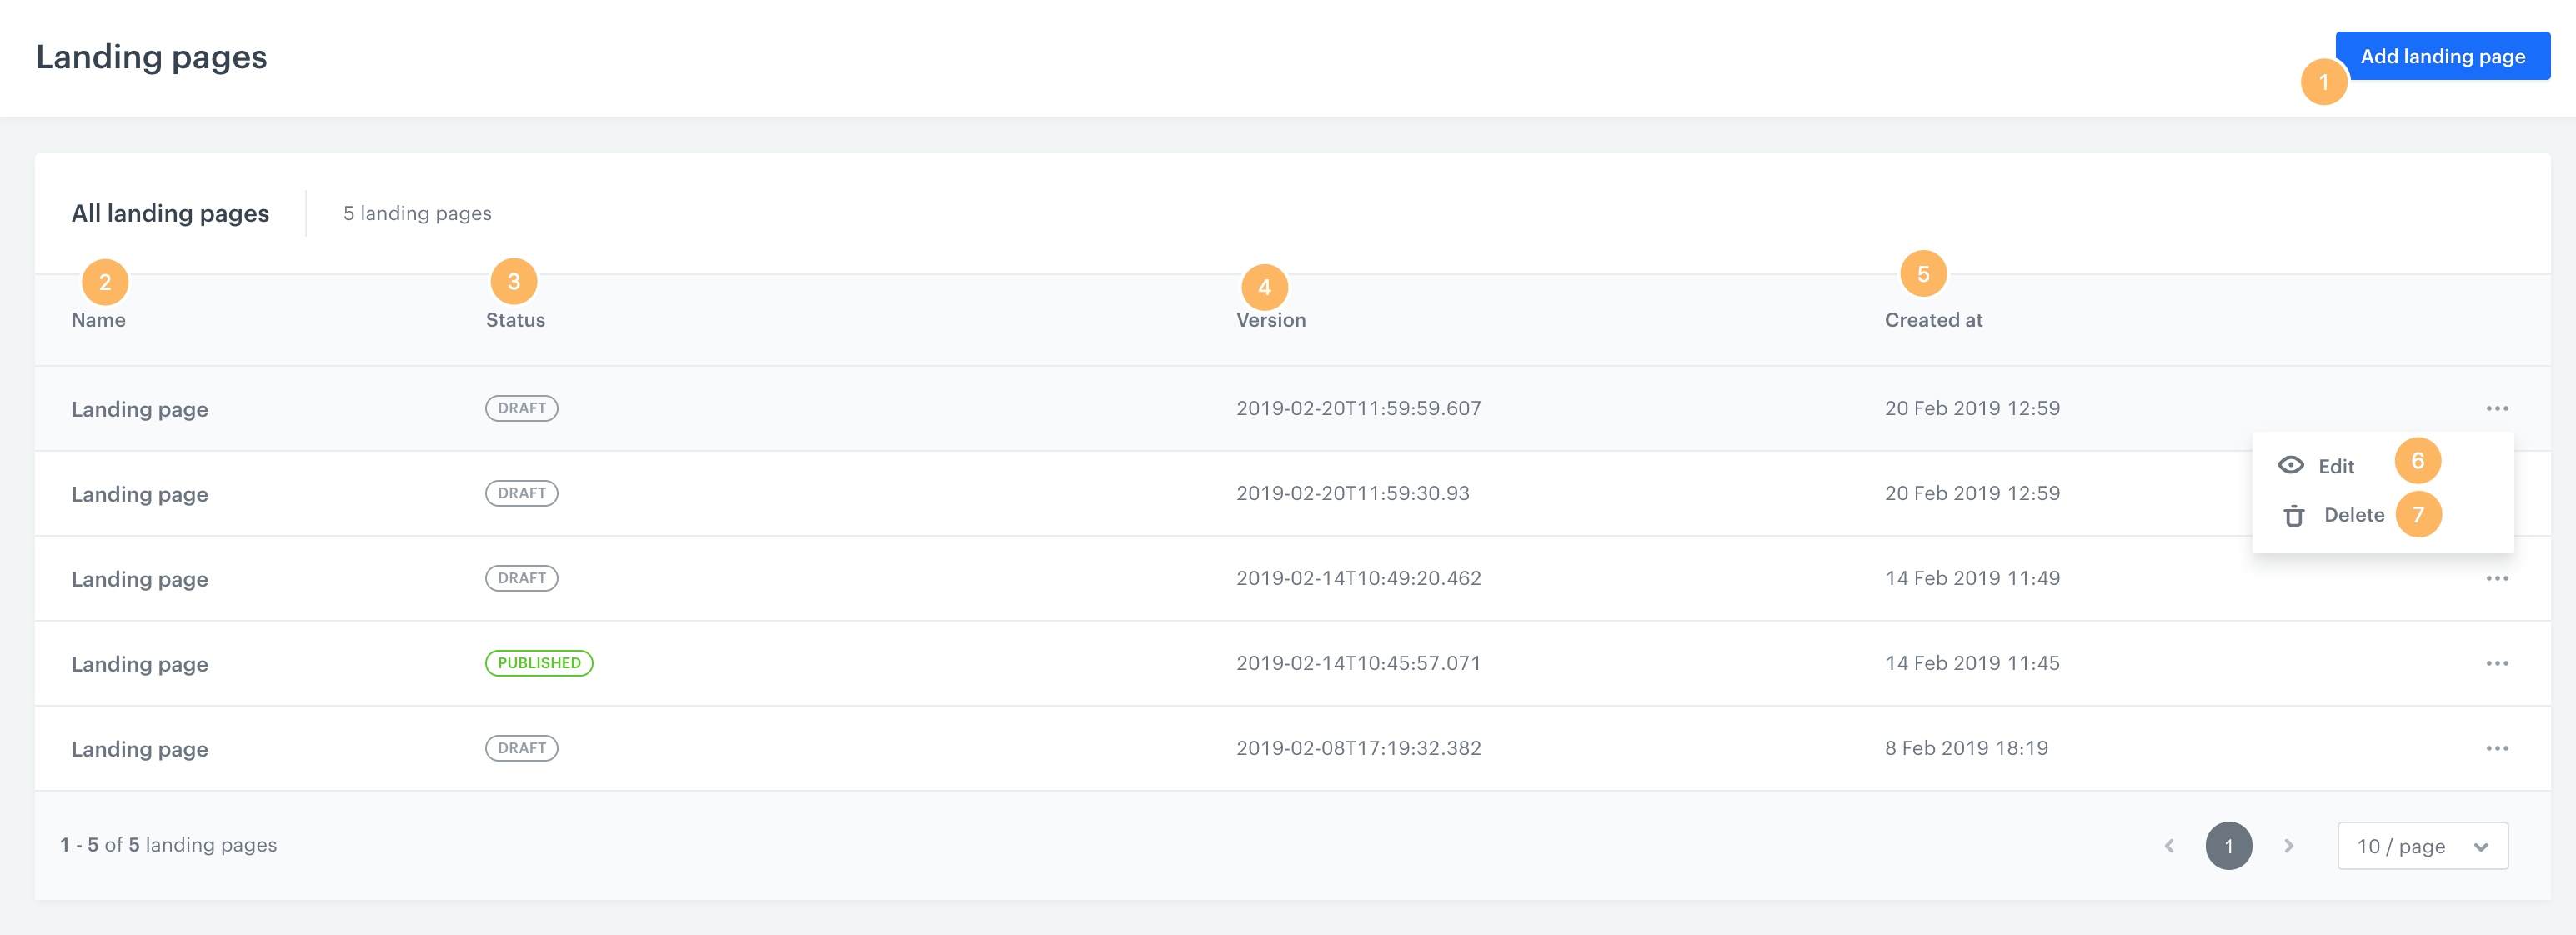
- Add landing page - Click the button to create the content of a landing page.
- Name - Under this column you can see the names of the landing pages you have already created.
- Status - See the status of each landing page. It can be either draft or published.
- Version -This indicator shows the date when a particular landing page was edited.
- Created at - The date when the landing page template was created.
- Edit - You can modify an existing landing page. The option is available after clicking the three-dot icon on the right side of the list.
- Delete - Remove the landing page.
In order to start the process of creating your landing page, click Add landing page.
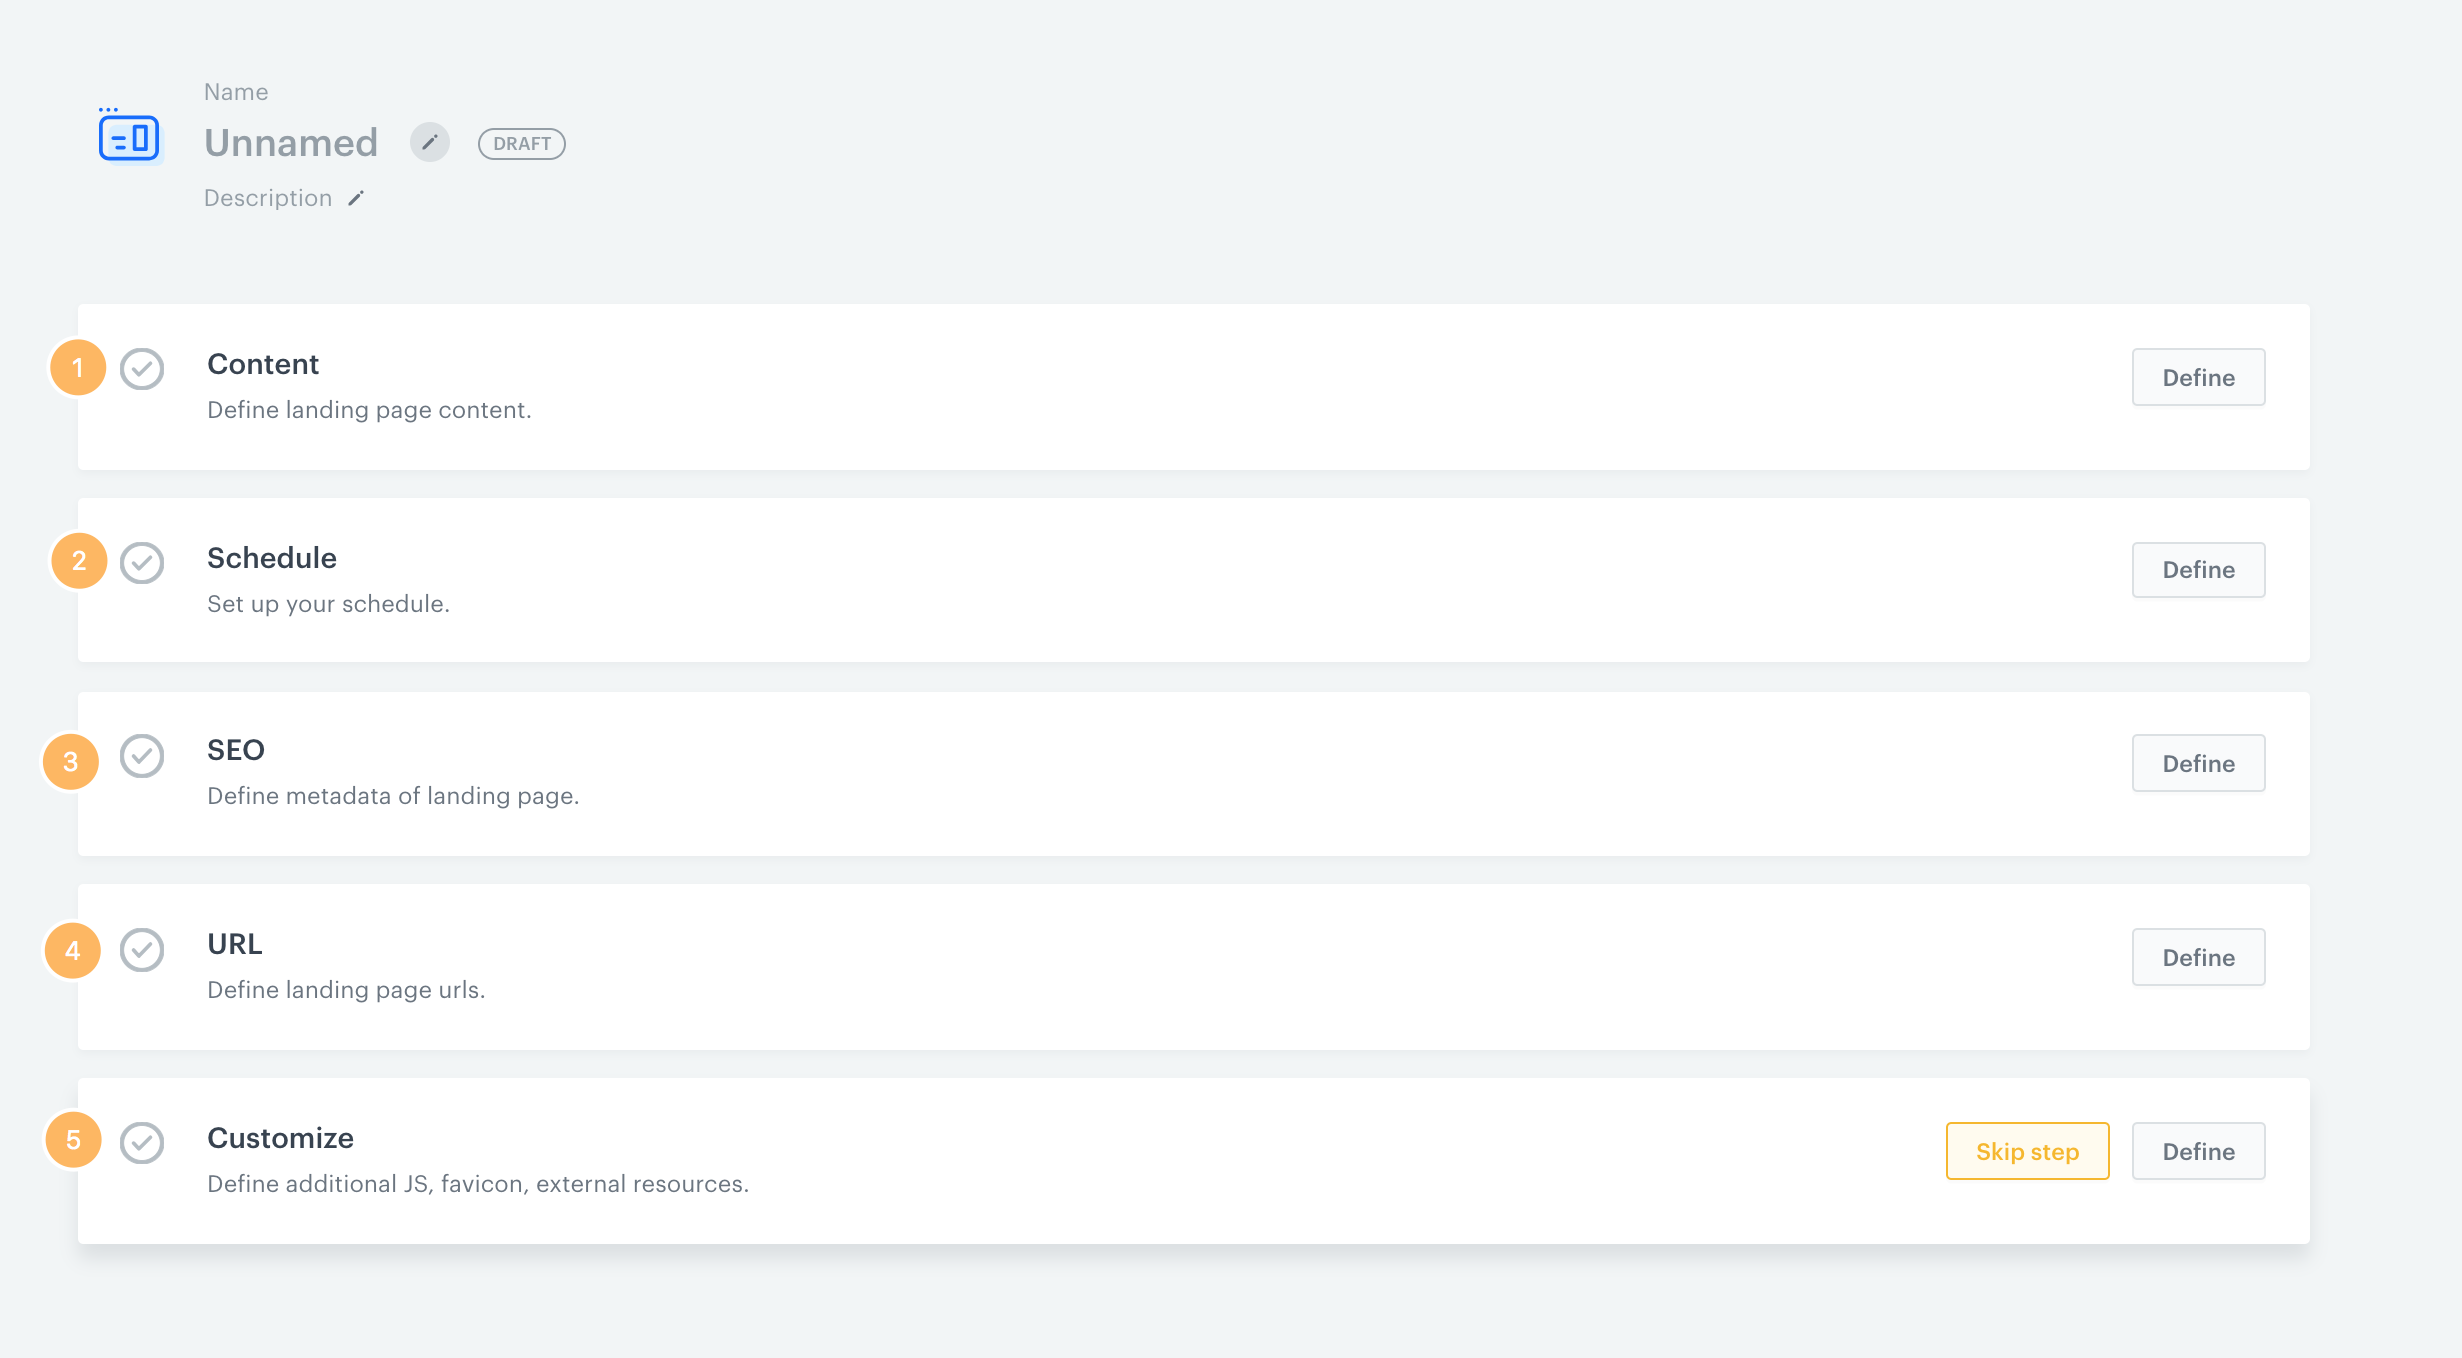
You can create a landing page in 5 steps.
Create content

-
Create the content for a landing page out of a new template:
- In the Code editor
- In the Landing Page Creator (the WYSIWYG type of wizard)
Code editor
If you want to create a landing page in HTML or other language (CSS or JS), you can use this editor.
This editor is particularly useful when you have a ready template encoded either in HTML. Then you only need to paste it in the section intended for the HTML code.
White sheet on the left side of the screen serves as a preview of the template.
Landing Page creator
Synerise enables the creation of landing page templates using ready-made elements and solutions that you choose according to your own needs and preferences.
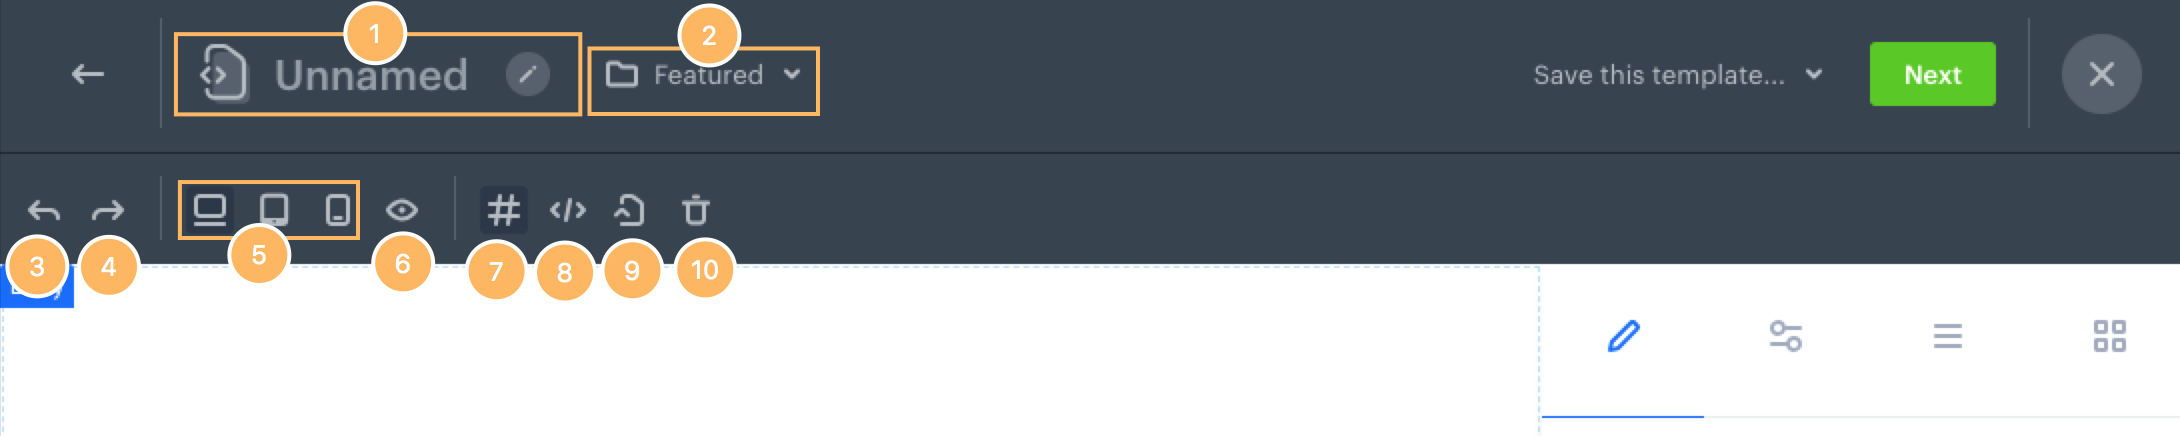
- Click the pencil icon to assign a name to a landing page.
- Choose in which folder you want to save your landing page.
- Undo - In case you want to reverse action, click the button.
- Redo - In case you want to restore deleted action, click the button.
- Landing Page template size selector - Adjust the template size of the landing page to desktop, mobile devices or tablets.
- Preview - You can generate the preview of the landing page.
- Show borders - Show the borders of each element in a template.
- Export - You can use the HTML code of the landing page you are creating and paste it to another template.
- Import - You can use an HTML code from another landing page and paste it to the template you are creating now.
- Clear every element of the template.
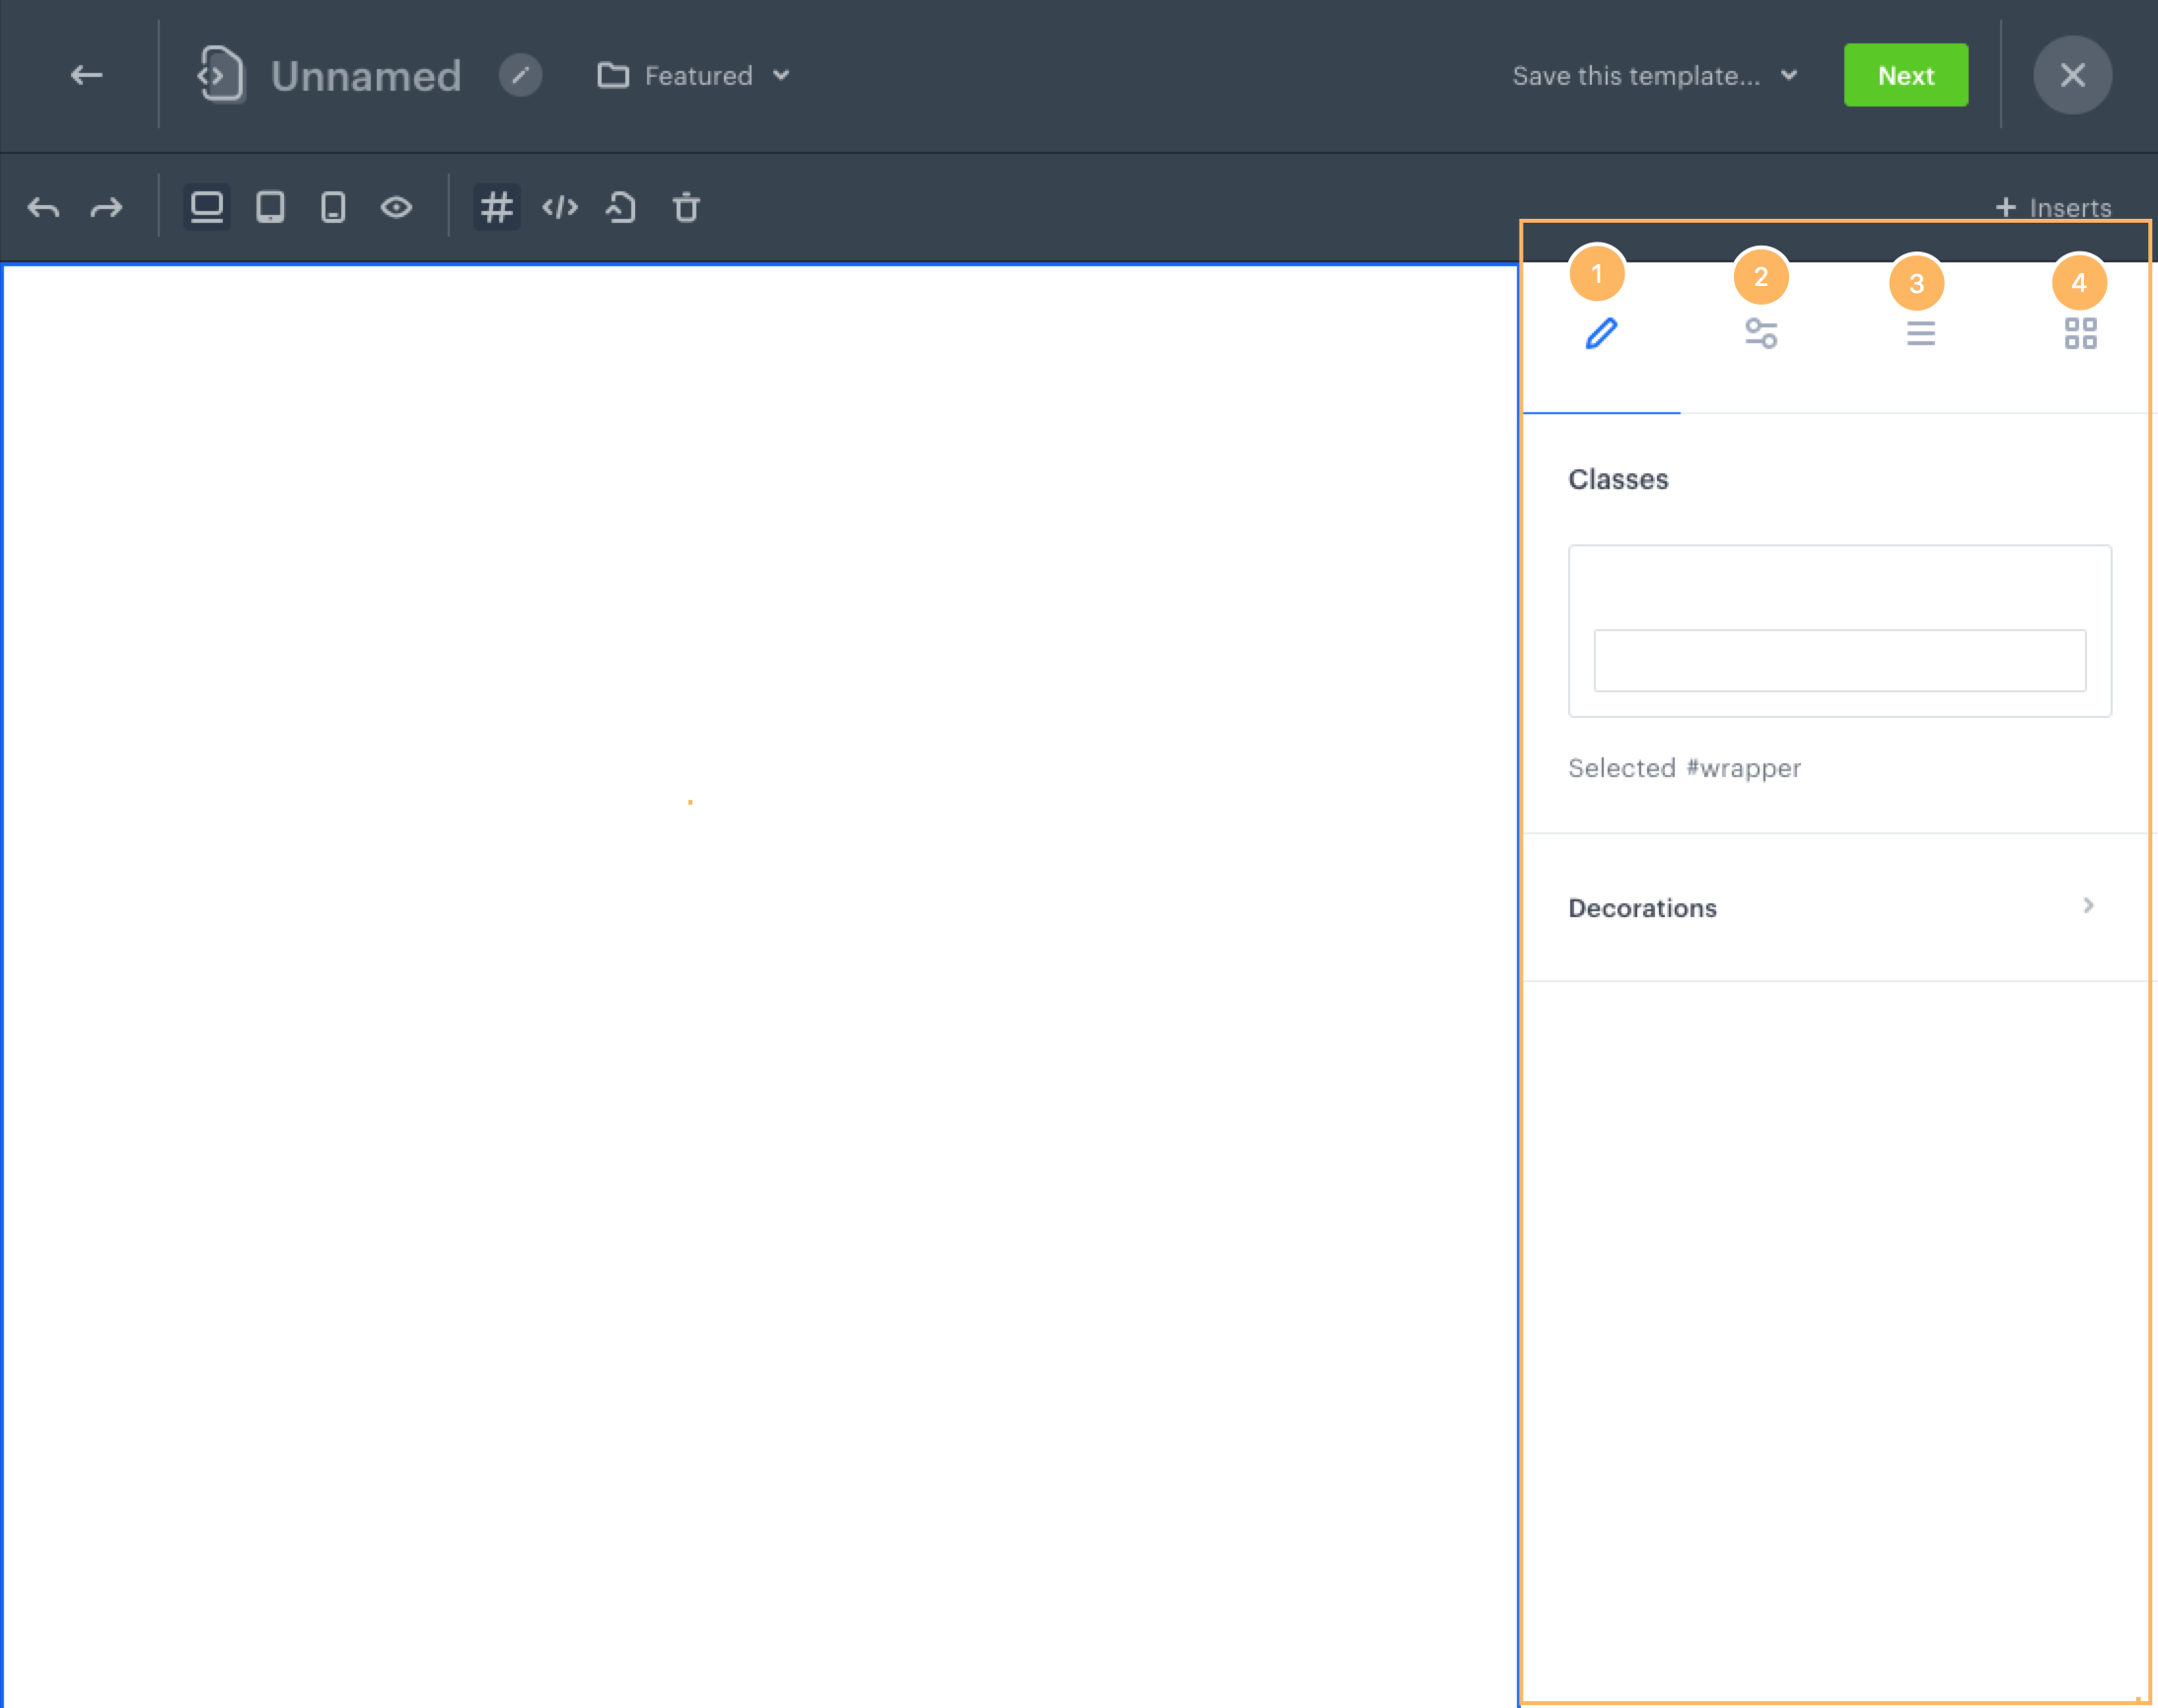
On the right side of the screen find the column with four buttons.
- Personalize - Edit every element of your landing page by adjusting margins, choosing fonts, and adding additional decorations.
- Component settings - Describe every element that you use, assign an ID and a title.
- Body - Check if elements are situated in the appropriate place in the template.
- Elements - Drag and drop the elements which you want to include in the template (e.g. text fields, buttons, separators, images, etc.). You can choose from basic and additional elements.
Personalize
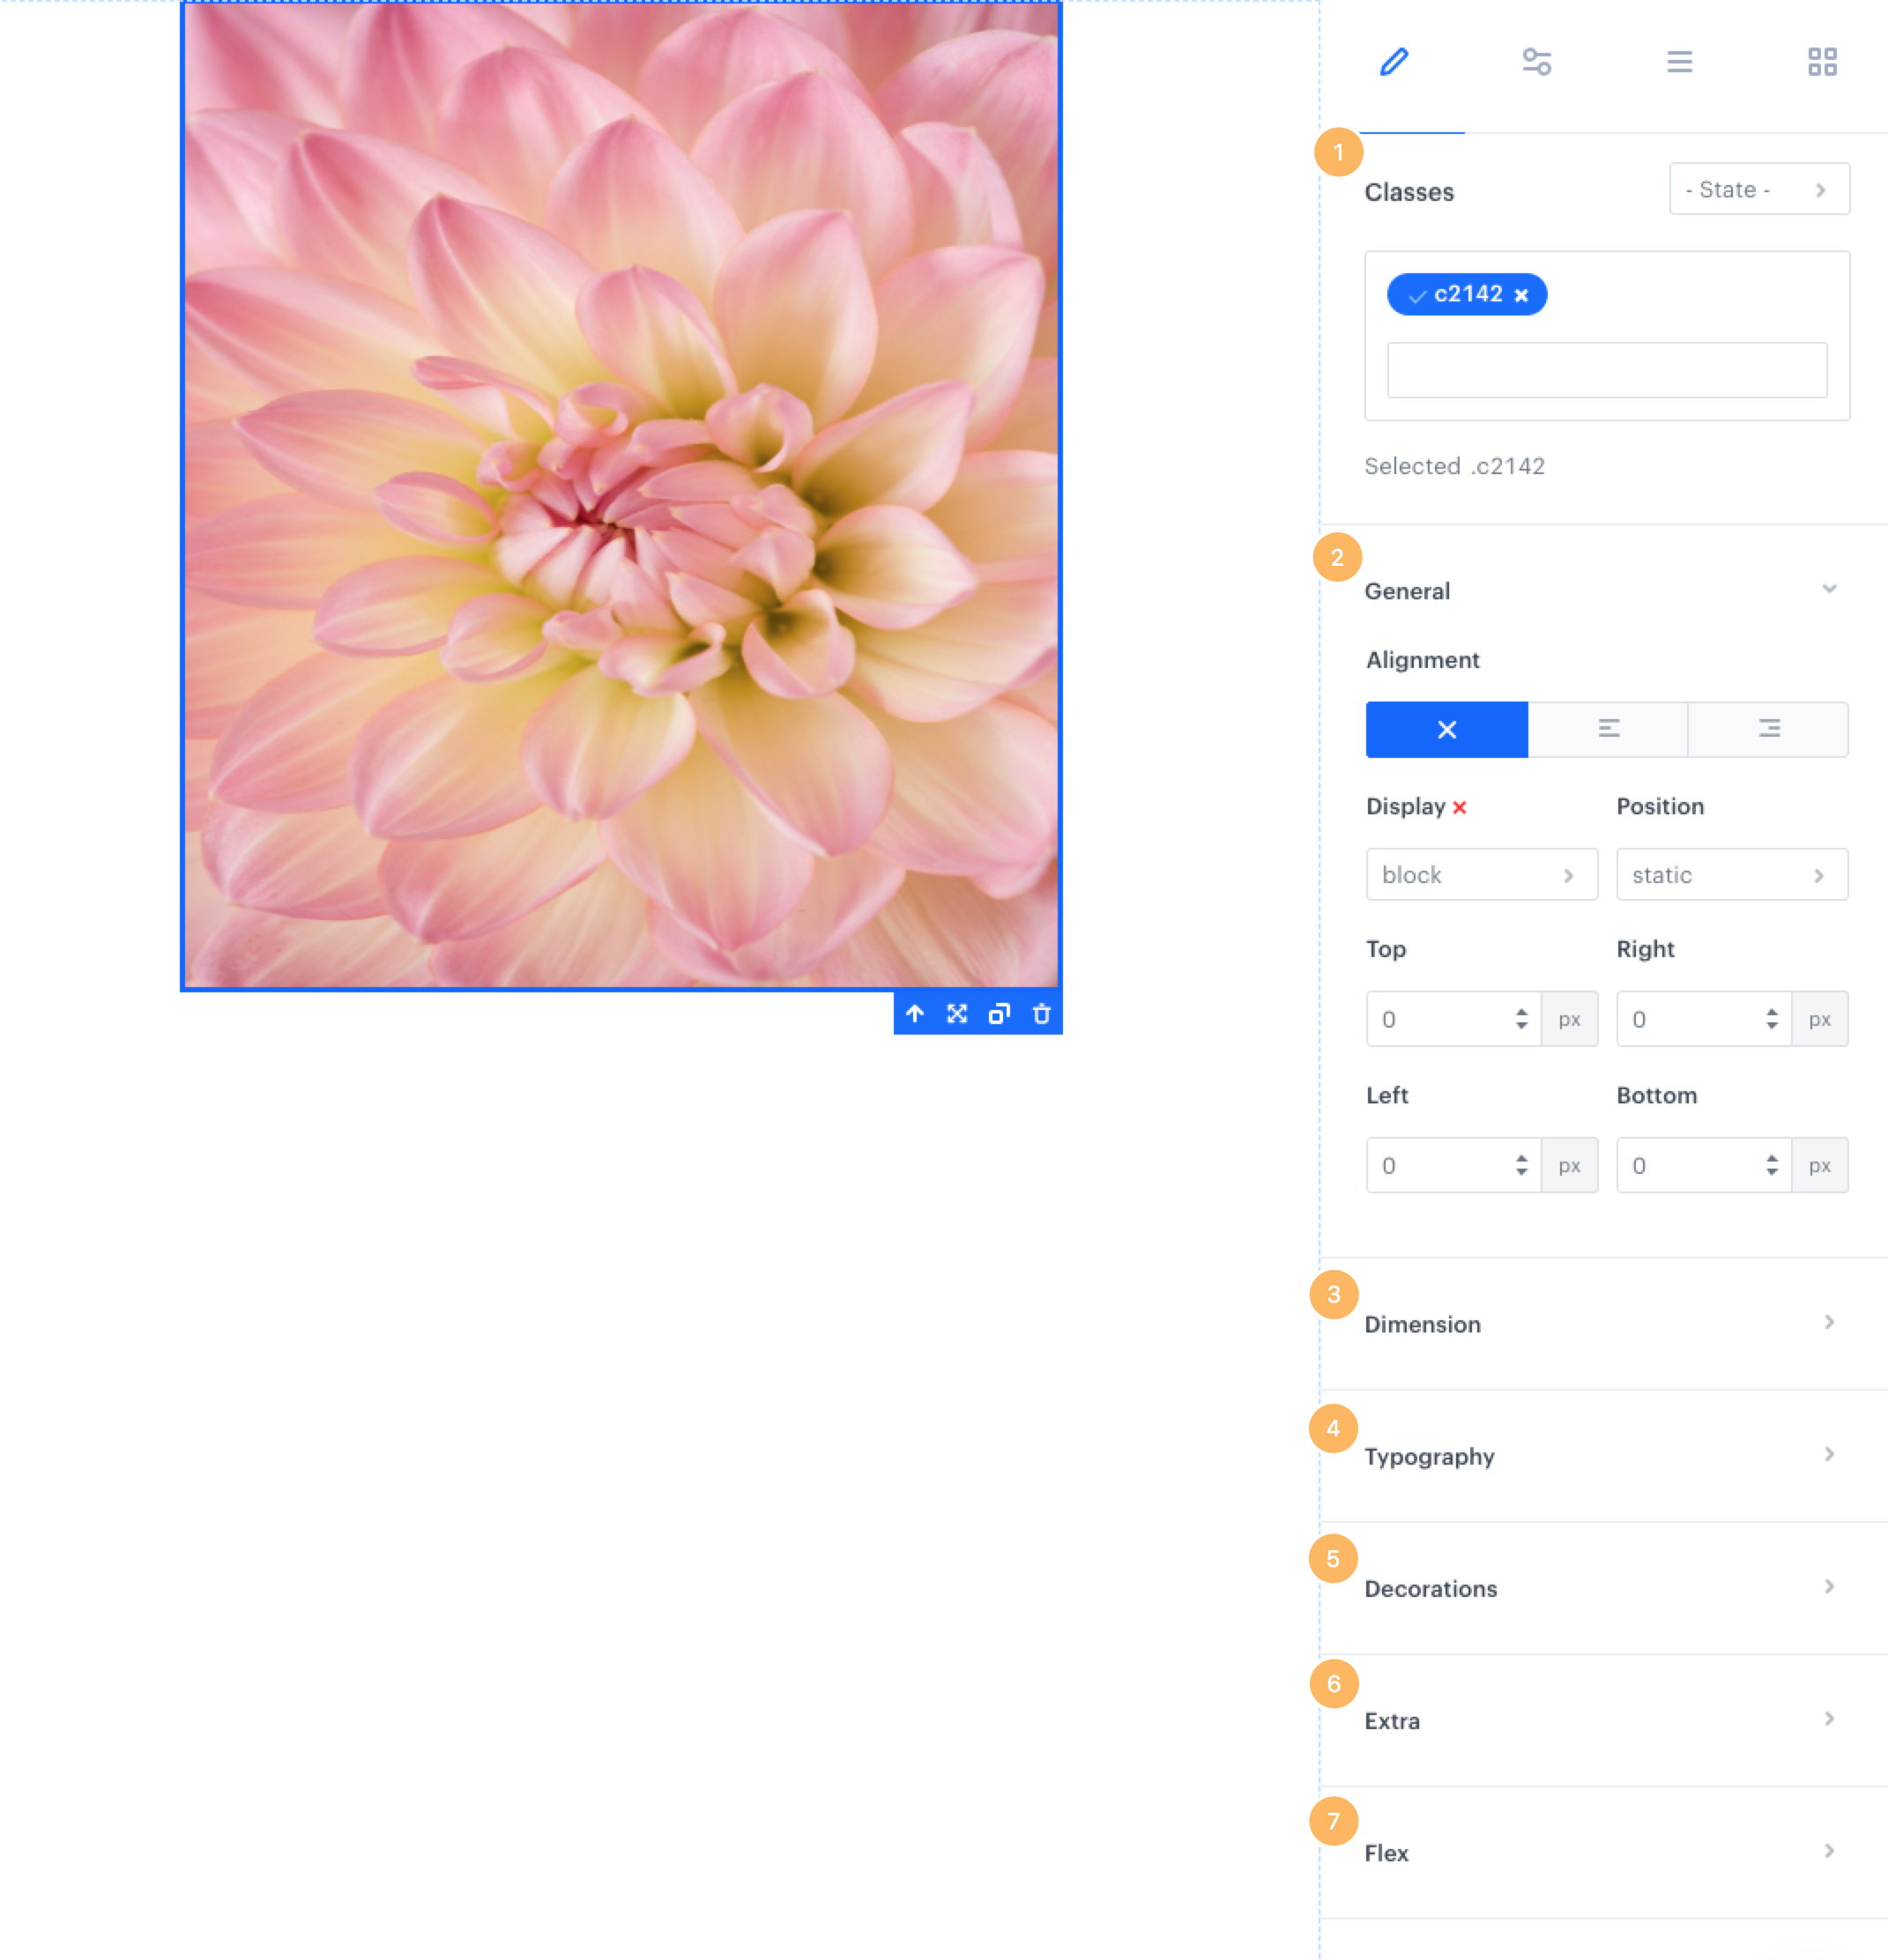
- Classes - Define a class of the widget you are editing.
- General - Adjust the position of the widget, define the size of the space between the widget and the top, bottom, left and right edges.
- Dimension - You can manipulate the size of the widget, changing its width and height, space between the widgets and padding.
- Typography - Adjust the font-related settings, you can change font type and size, its weight and letter spacing. Such options as text alignment, text shadow and text decoration will help you make the content on the landing page look more attractive.
- Decorations - Customize the widget by changing its opacity, background color or the rounding corners. You may find more advanced settings such as defining the width and border style and colors as well.
- Extra - You may manipulate the dimension of the widgets, by making them look tilted or turned upside down.
- Flex - This section enables creating a container of elastic blocks and enables manipulating those blocks in regard of their parent and children elements.
Component settings
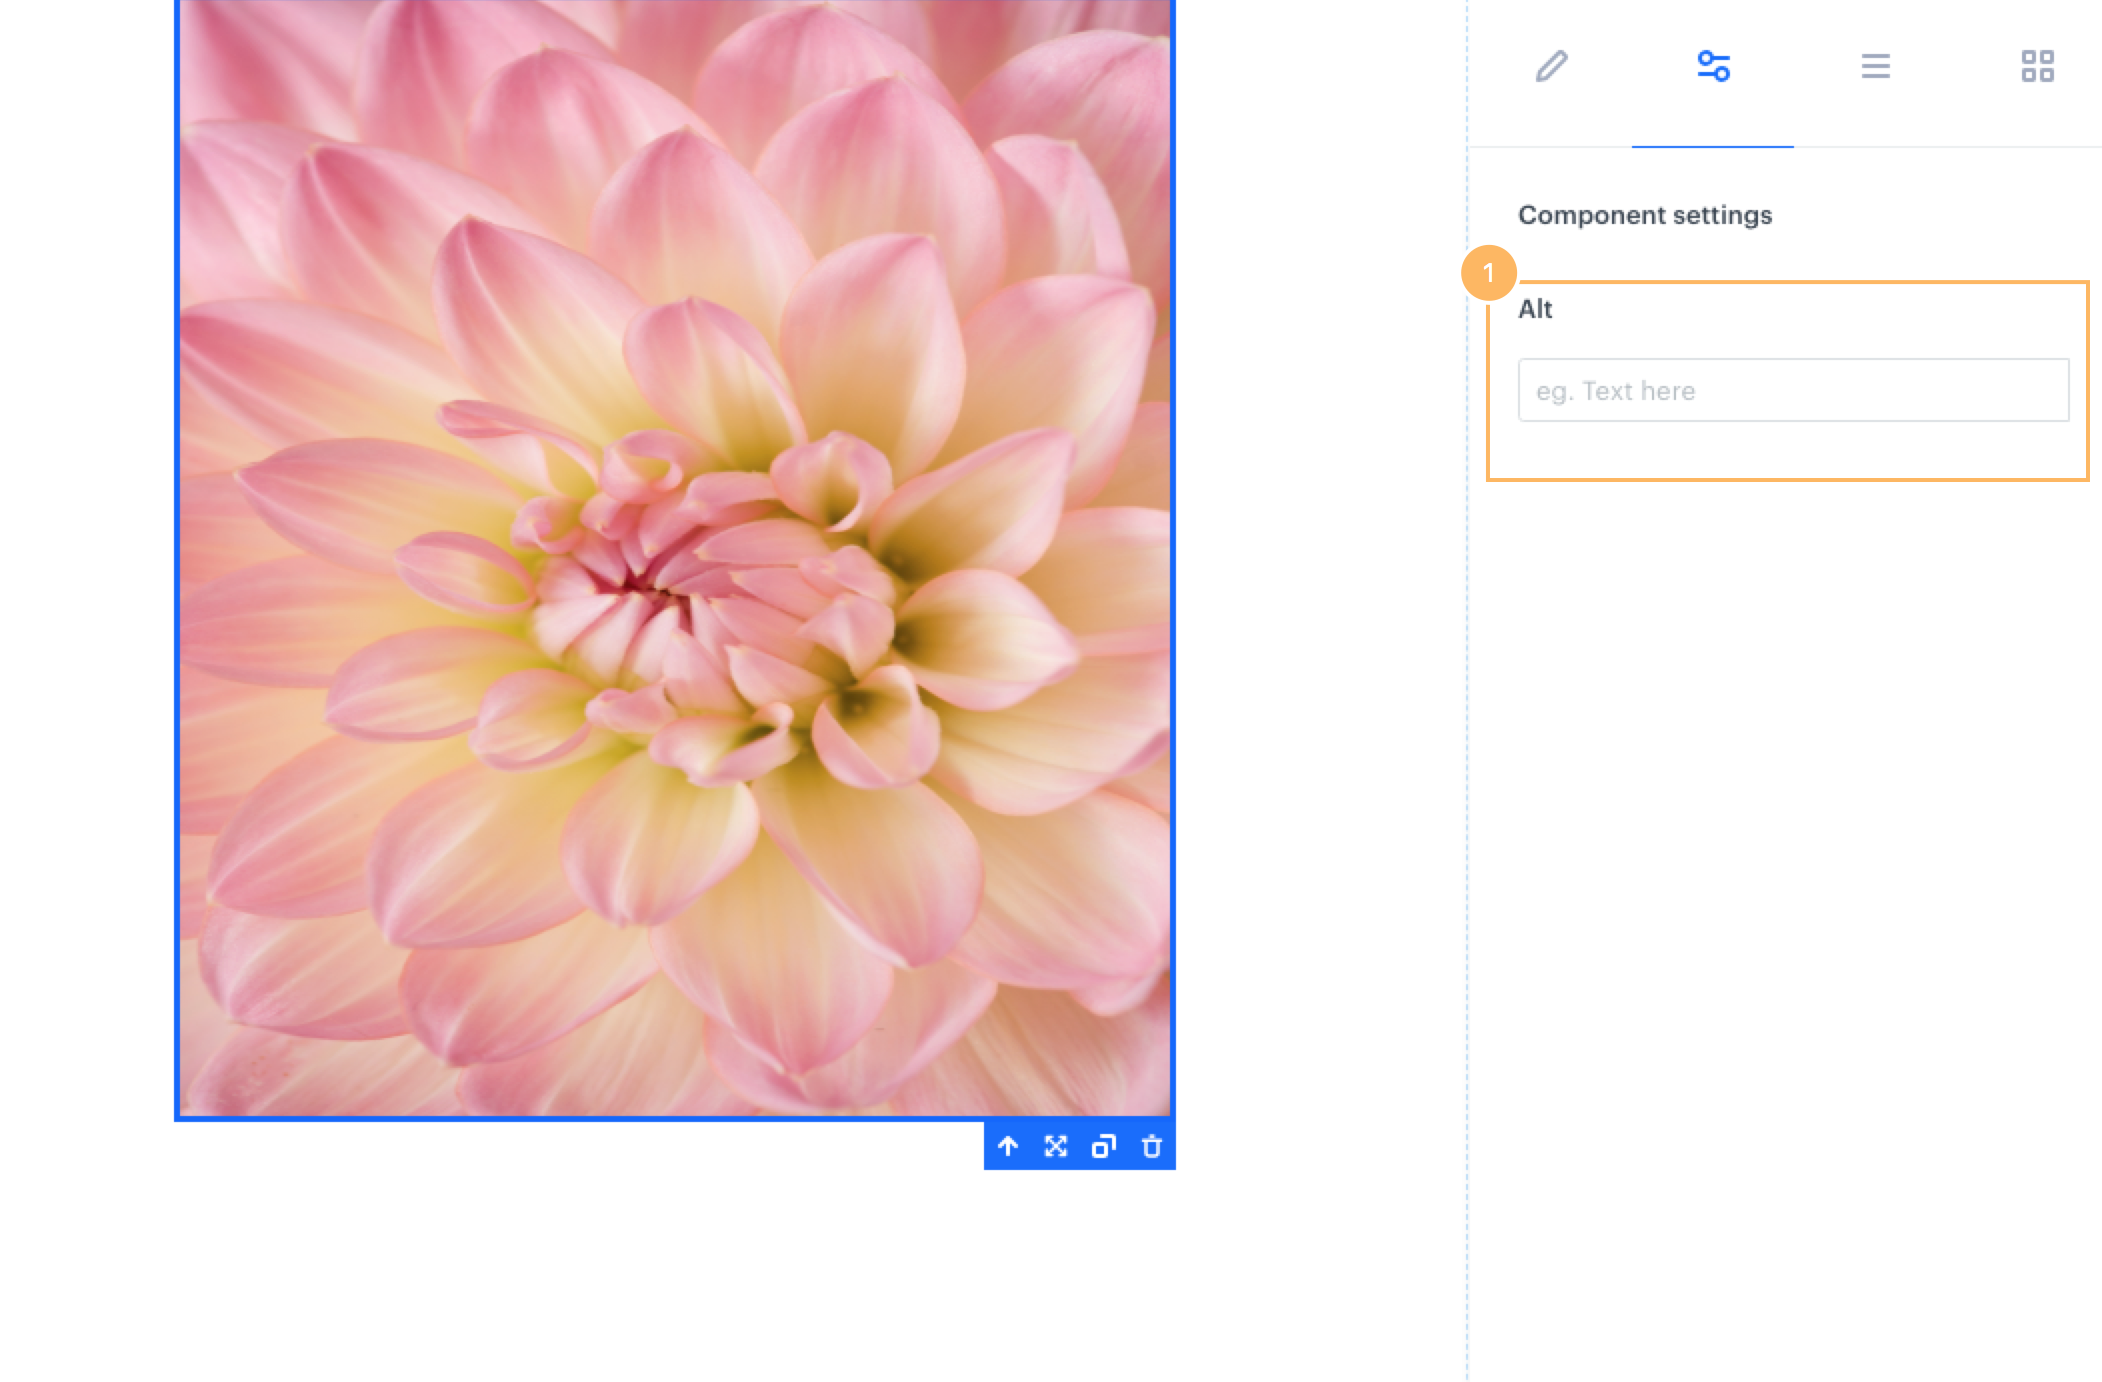
- Describe additional parameters of the widget you are editing. For example, for an image it will be an alternative description that will appear instead of an image if it cannot be correctly displayed in the browser. For a button it will be a link to a website and settings whether a website will open in a new window.
Body
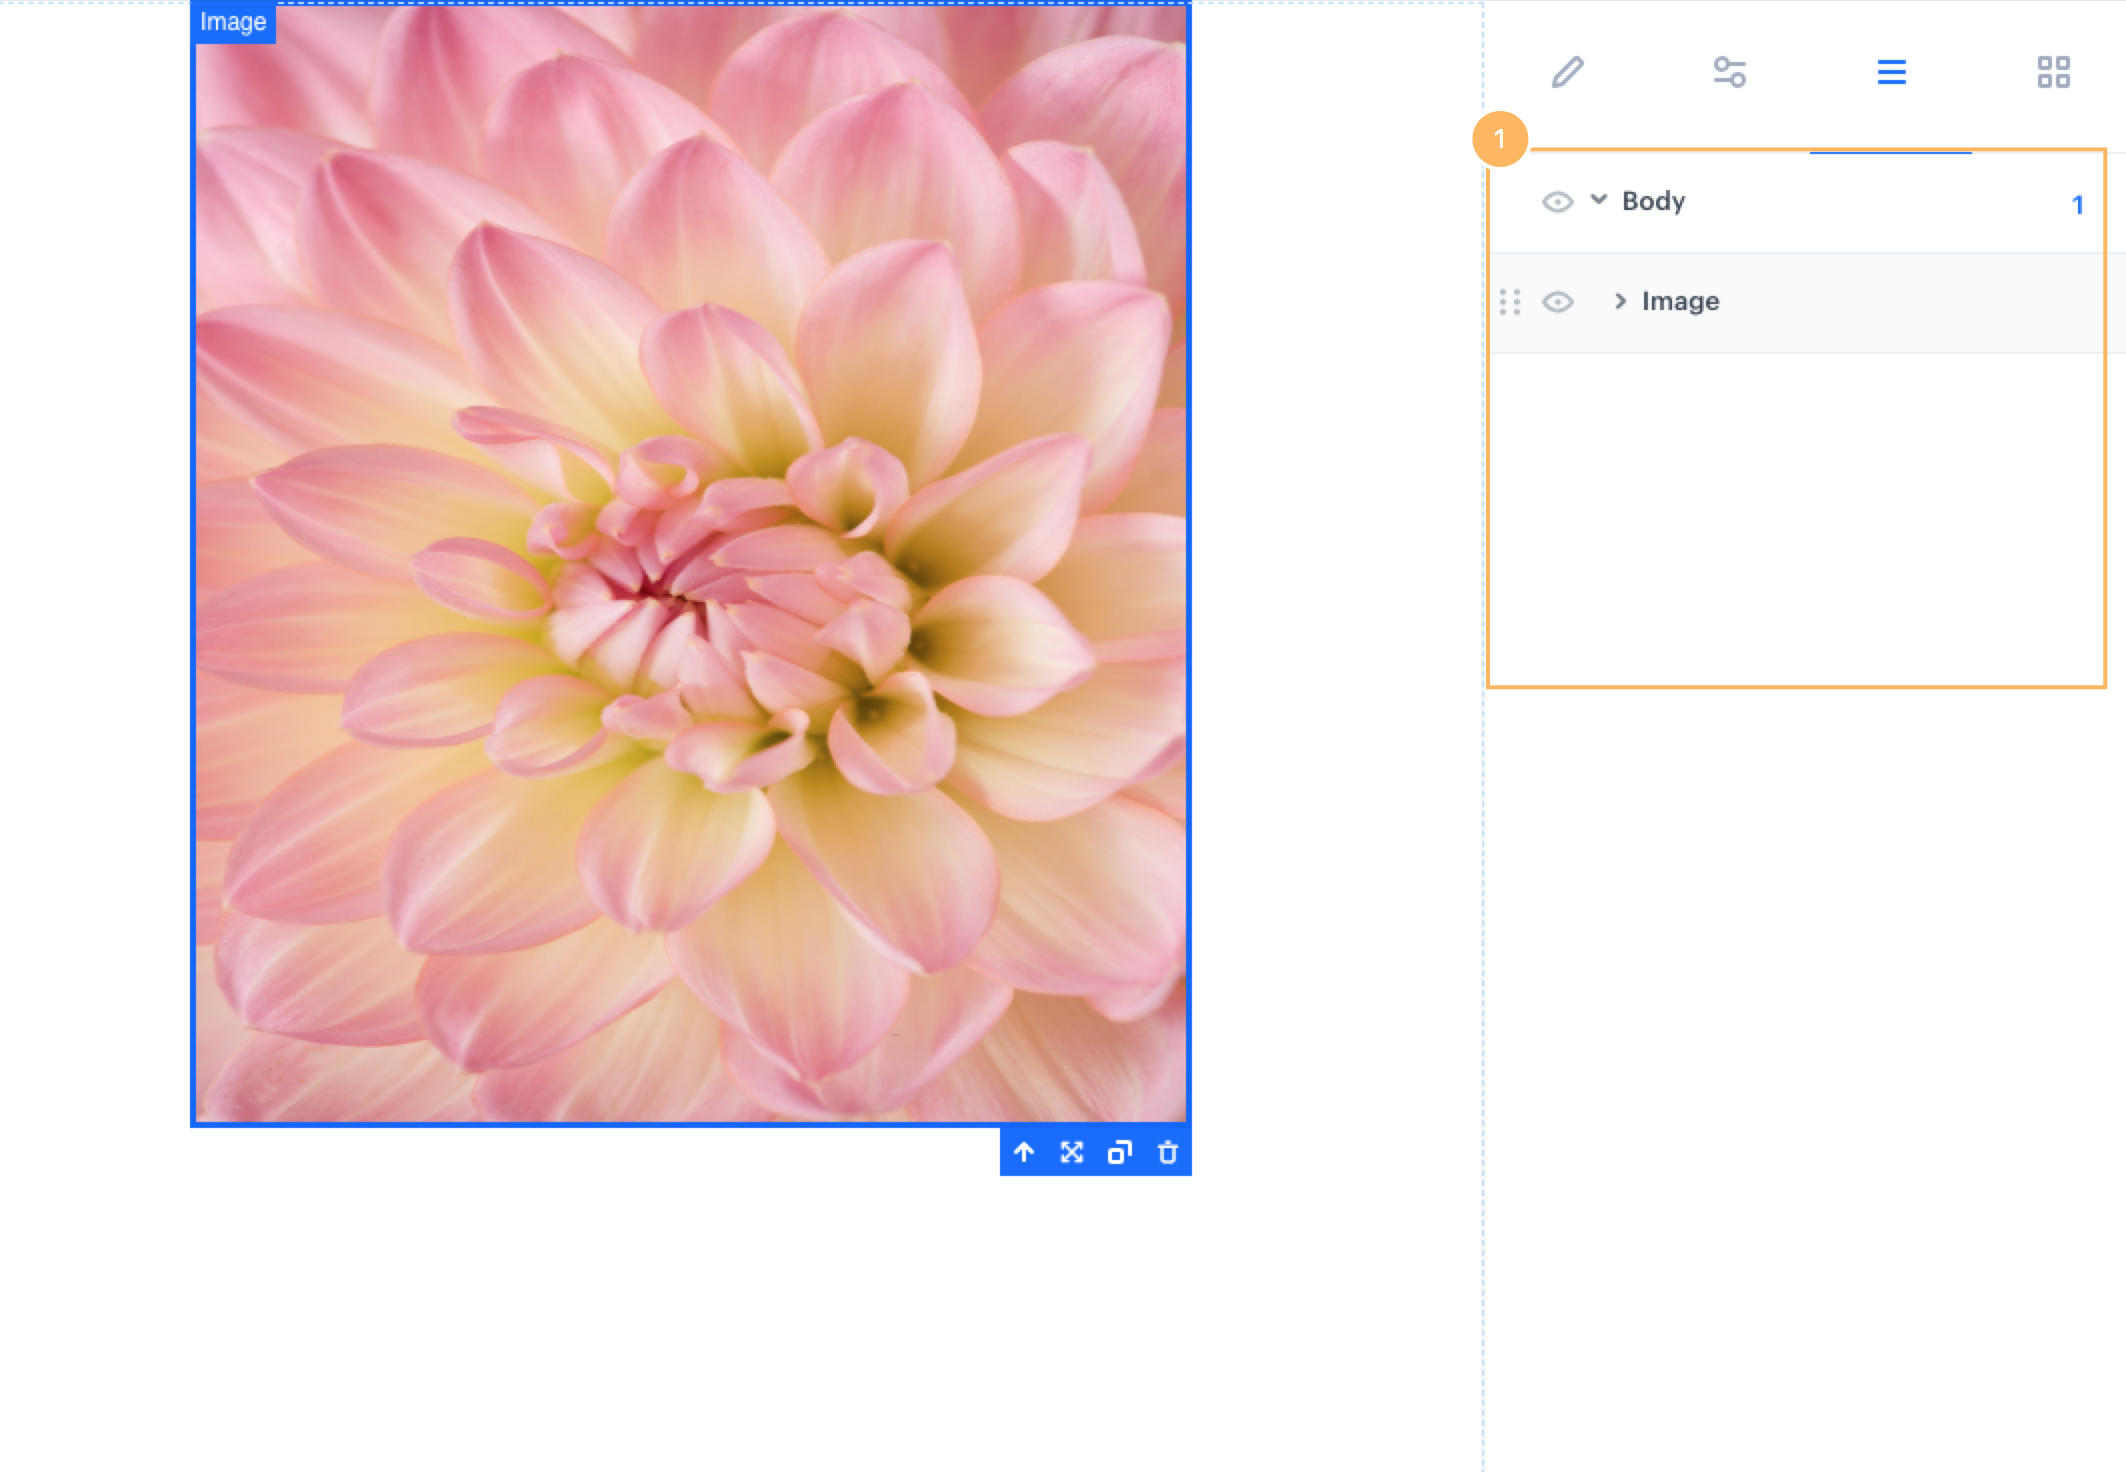
- You can check the structure of the landing page and change the position of widgets used in the landing page.
Elements
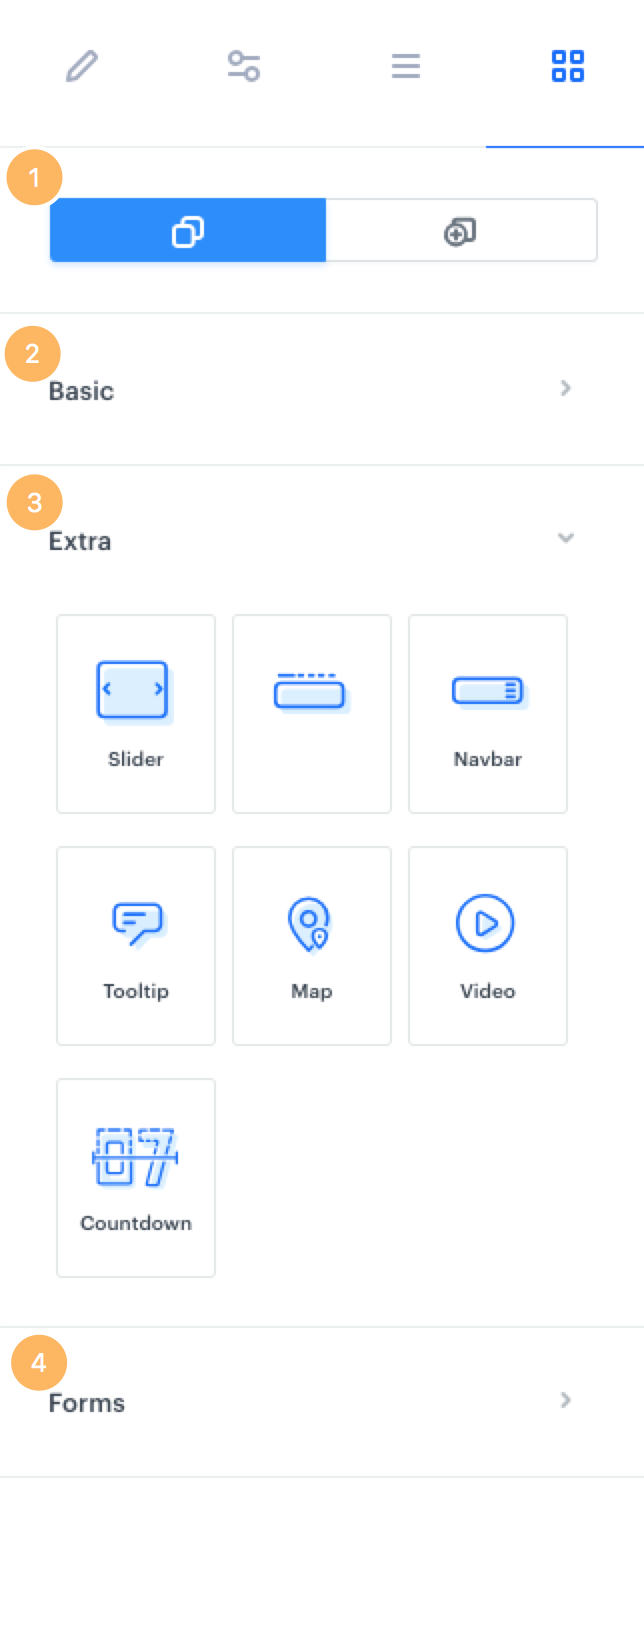
- You can choose elements which you need to customize on your own from scratch and build larger components or you can take advantage of ready-made elements such as footers, sliders, menu, headers, etc. which are already styled and you just need to customize them on your own.
- Basic - Drag and drop classic elements which are typically used in landing pages such as: sections, dividers, links, text field, images, button.
- Extra - Drag and drop more advanced elements to add esthetic values of the landing page with sliders, tables, navigation bar, tooltips, map, video or countdown clock.
- Forms - Drag and drop elements contact form related like inputs, text areas, labels, radio buttons, etc.
Once you’re done, make sure to click Save template in the right upper corner.
Schedule the display
In this step you can decide when your landing page will be active. You can switch it on immediately or schedule the landing page to launch for a particular date.

-
Timezone - Choose the time zone that will serve as a reference point while selecting the start and end date of a landing page.
-
Start date - Decide when the landing page will be launched.
- Immediately
- Scheduled
-
End date - Decide when the landing page will come to an end.
- Never end
- Select date
-
Type of period - Specify when your landing page will display during the time of the activity. For example, a landing page can appear during a specific time of the day, week or month. You can create several types of periods.
When you configure the settings in this step, make sure you click the Apply button in the upper right corner.
Adjust SEO
This is where you can adjust the technical details concerning search engine optimization.
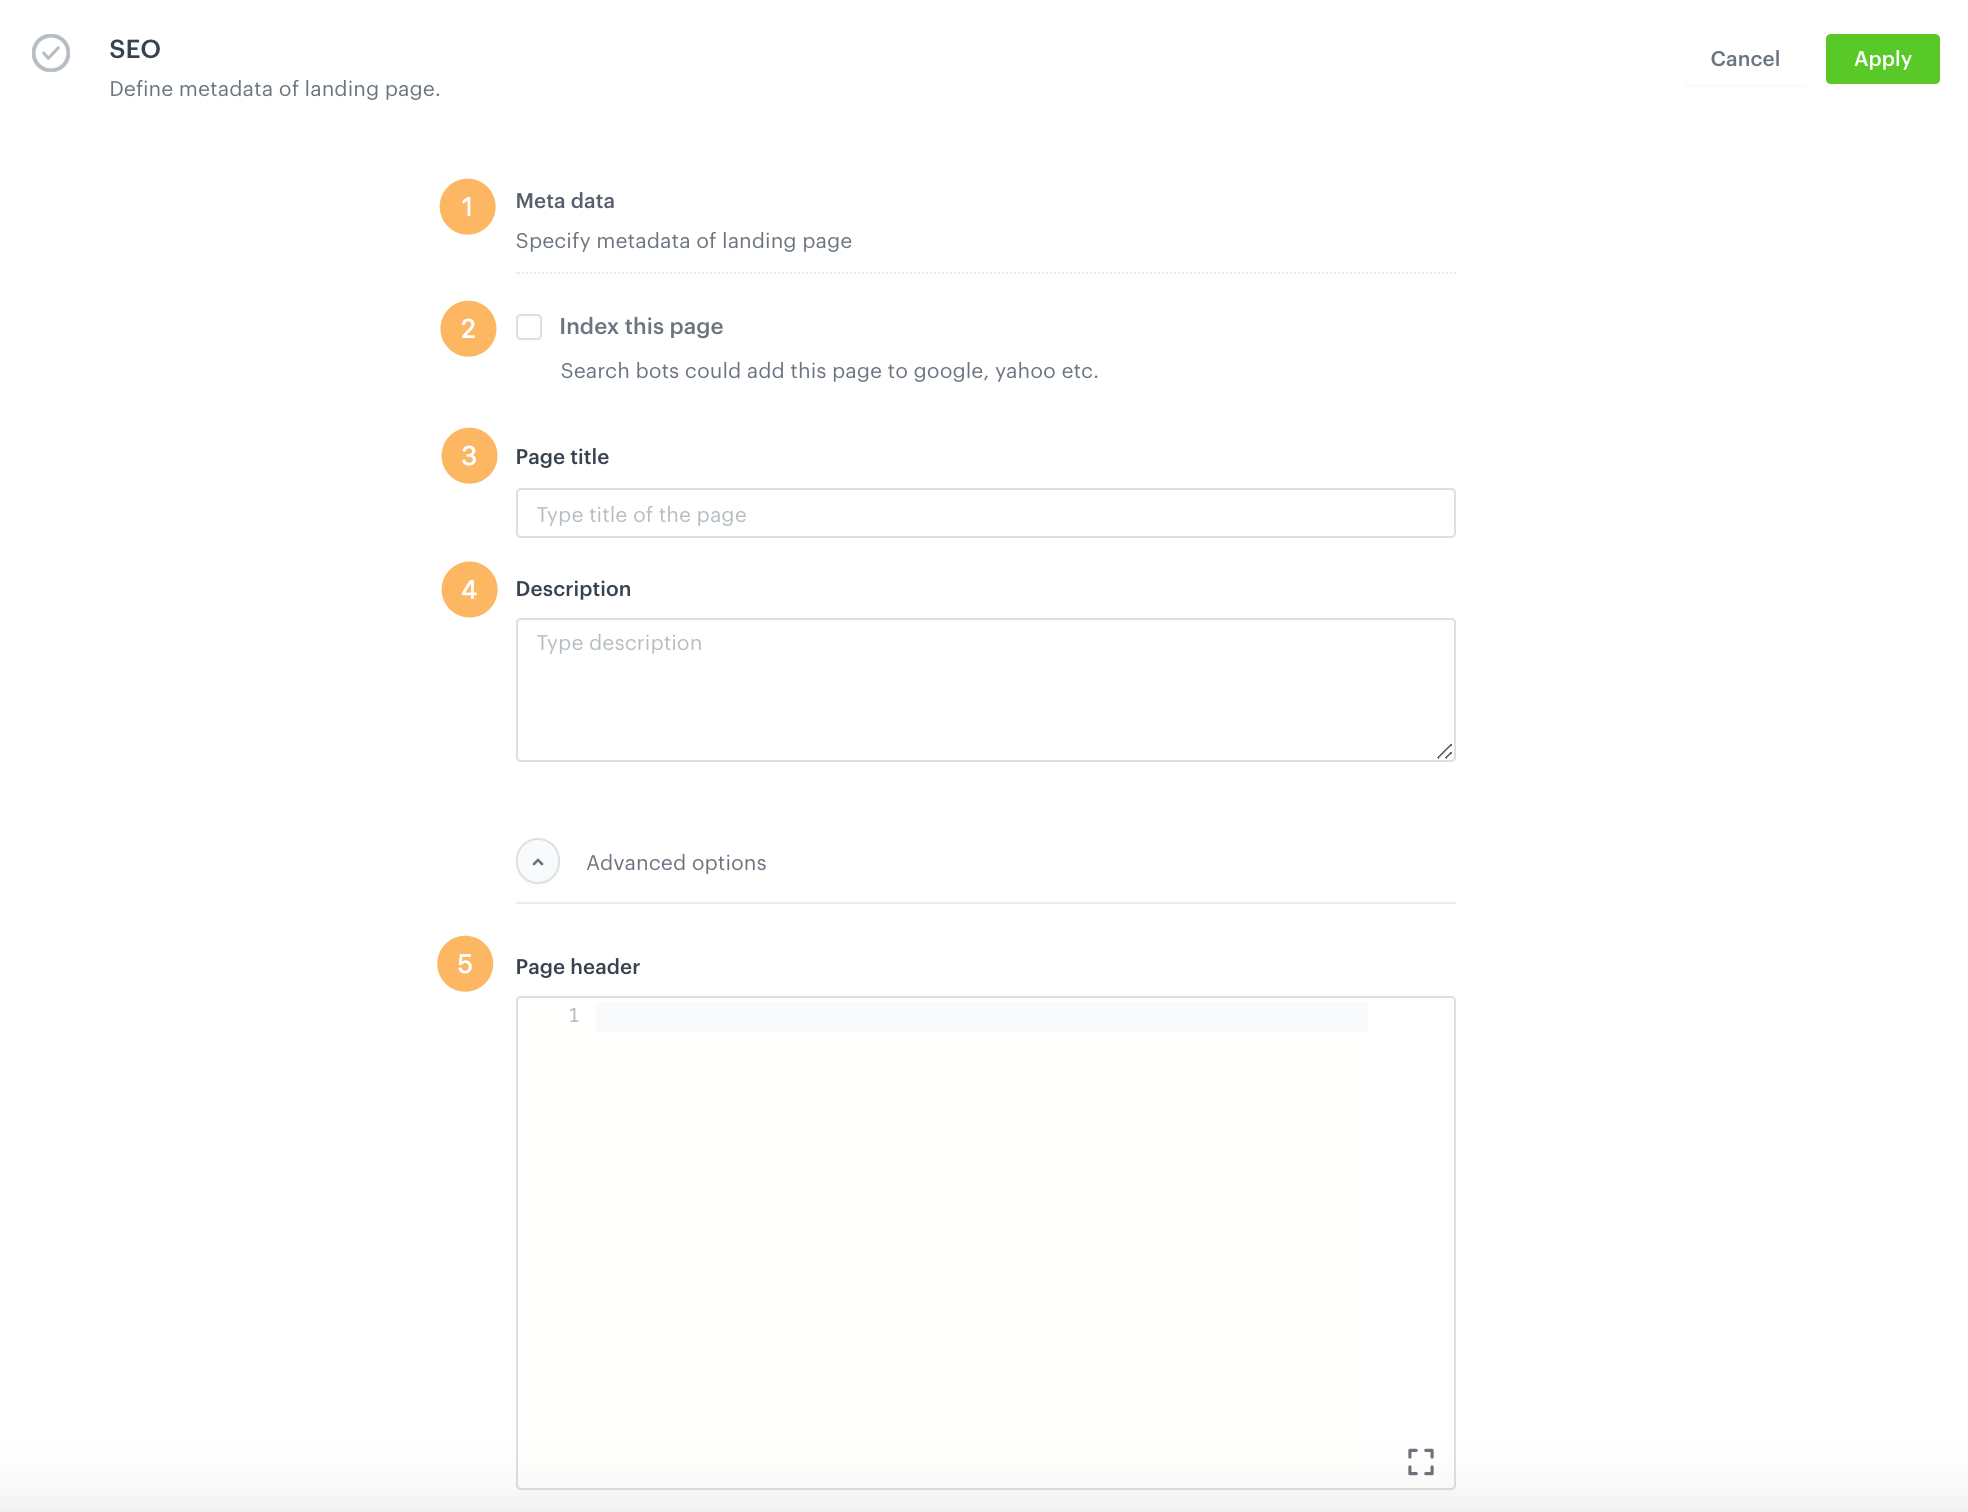
- Meta data - Adjust the settings connected with search engine optimization and increase the chances of placing high in search results.
- Index this page - Tick this option if you want this landing page to be available as a result in web search engines.
- Page title - Enter the title of the landing page. It will be displayed on the browser tab.
- Description - Paste the description of your landing page. This description will be visible in the results of search engines under the title of the website.
- Advanced options - You may enter additional details of your landing page, such as metadata (in other words the title and description of a landing page encoded into the page but invisible in the display).
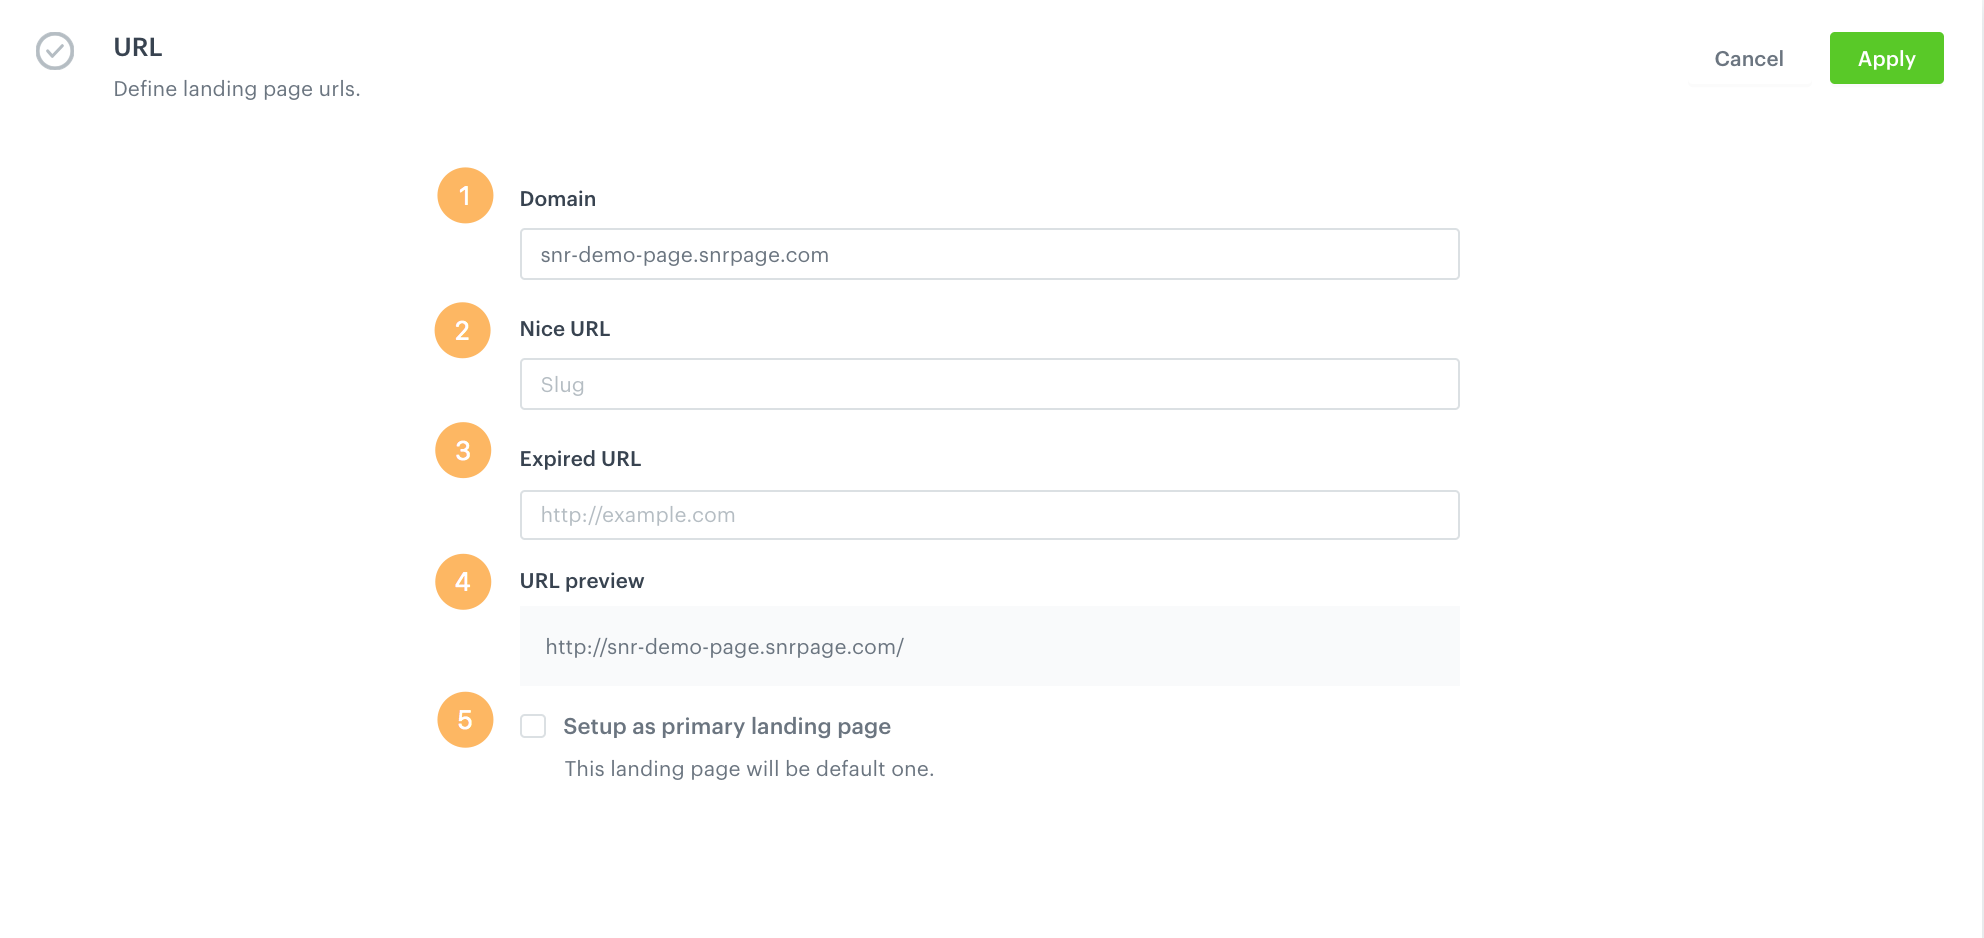
Define landing page URL
Set the URL address of your landing page.
By default, the landing page will be published within the Synerise domain (exemplary format: www.example.snrpage.com). If you want to use your domain, you must:
- Submit a request for configuring your domain in Synerise to the customer service.
- By default, Synerise will provide the Let’s Encrypt certificate and ensure it’s generated when needed.
- Configure DNS - add the
CNAMErecord and set it tolp.synerise.com - If you want to provide your own certificate, make sure it is in
X.509format and you must provide a private key.
- Domain - Enter the domain of the landing page, e.g.
http://example.com - Nice URL - Provide a part of the address right after domain, e.g. /dresses-and-skirts (don’t use slash, it is added automatically).
- Expired URL - This is an address where users will be redirected if a landing page expires.
- URL preview - You can see what the final landing page link will look like. The preview is in real time, so if you fill a domain or URL, you get the preview of the address simultaneously.
- Setup as primary landing page - To be used when you have several landing pages active in one place on a website, you may tick this option to make a particular landing page display first.
Customize
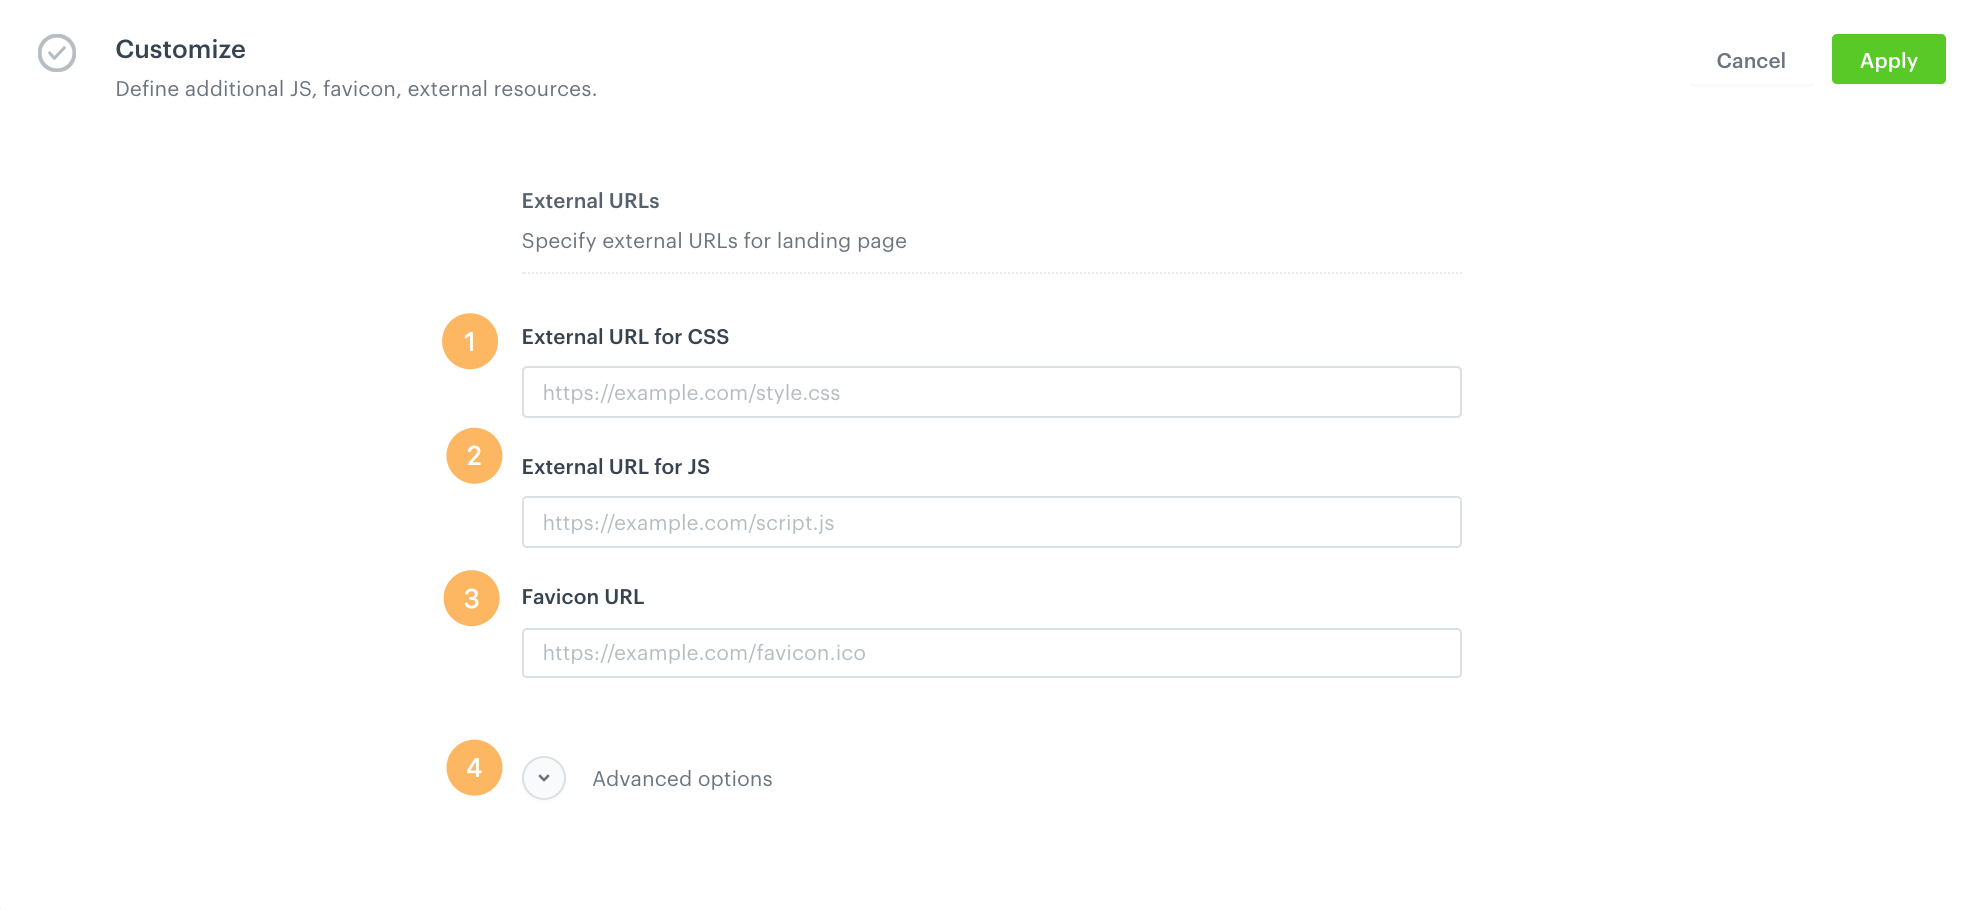
This is an optional step.
- External URL for CSS - If you want to make use of your own CSS, paste the external link to the CSS file.
- External URL for JS - If you want to make use of your own JS, paste the external link to the JS file.
- Favicon URL - If you want to use of specific icons, paste the external link to the Favicon file.
- Advanced options - If you have already created a landing page, you can paste its JS script.
Publishing a landing page
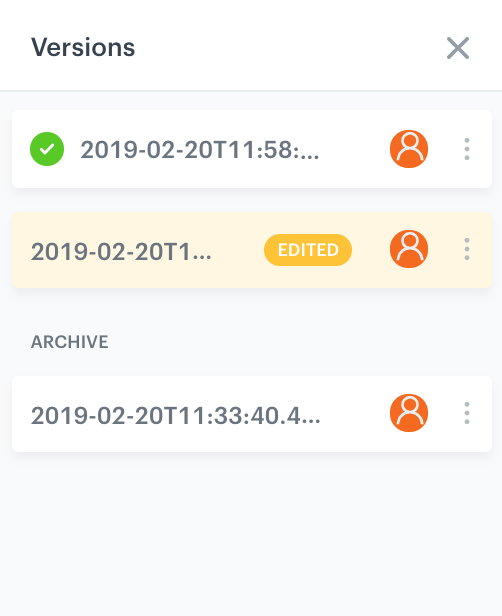
In Synerise you can manage the different versions of a Landing Page, so you can return to a previous version at any time.

In the upper right corner use these buttons:
- Finish later - If you want to save a landing page as a draft.
- Preview - If you want to see the final effect.
- Version - The system saves every change of the template of the published landing pages as a separate version. You can go back to previous versions if you want.
- Publish - When you click it, your landing page is active.
WARNING: Versions concern only landing pages which have been published. The system doesn’t save versions of landing page drafts.