
Campaign with registration for offline events
In this case study, we explore the successful implementation of an offline-to-online event registration system, enhancing the overall experience for attendees. Leveraging dynamic content, promotions, and coupons, this solution revolutionized the way people sign up, confirm reservations, and attend specific events. The integration of real-time analytics allows for comprehensive monitoring of all events through an intuitive dashboard.
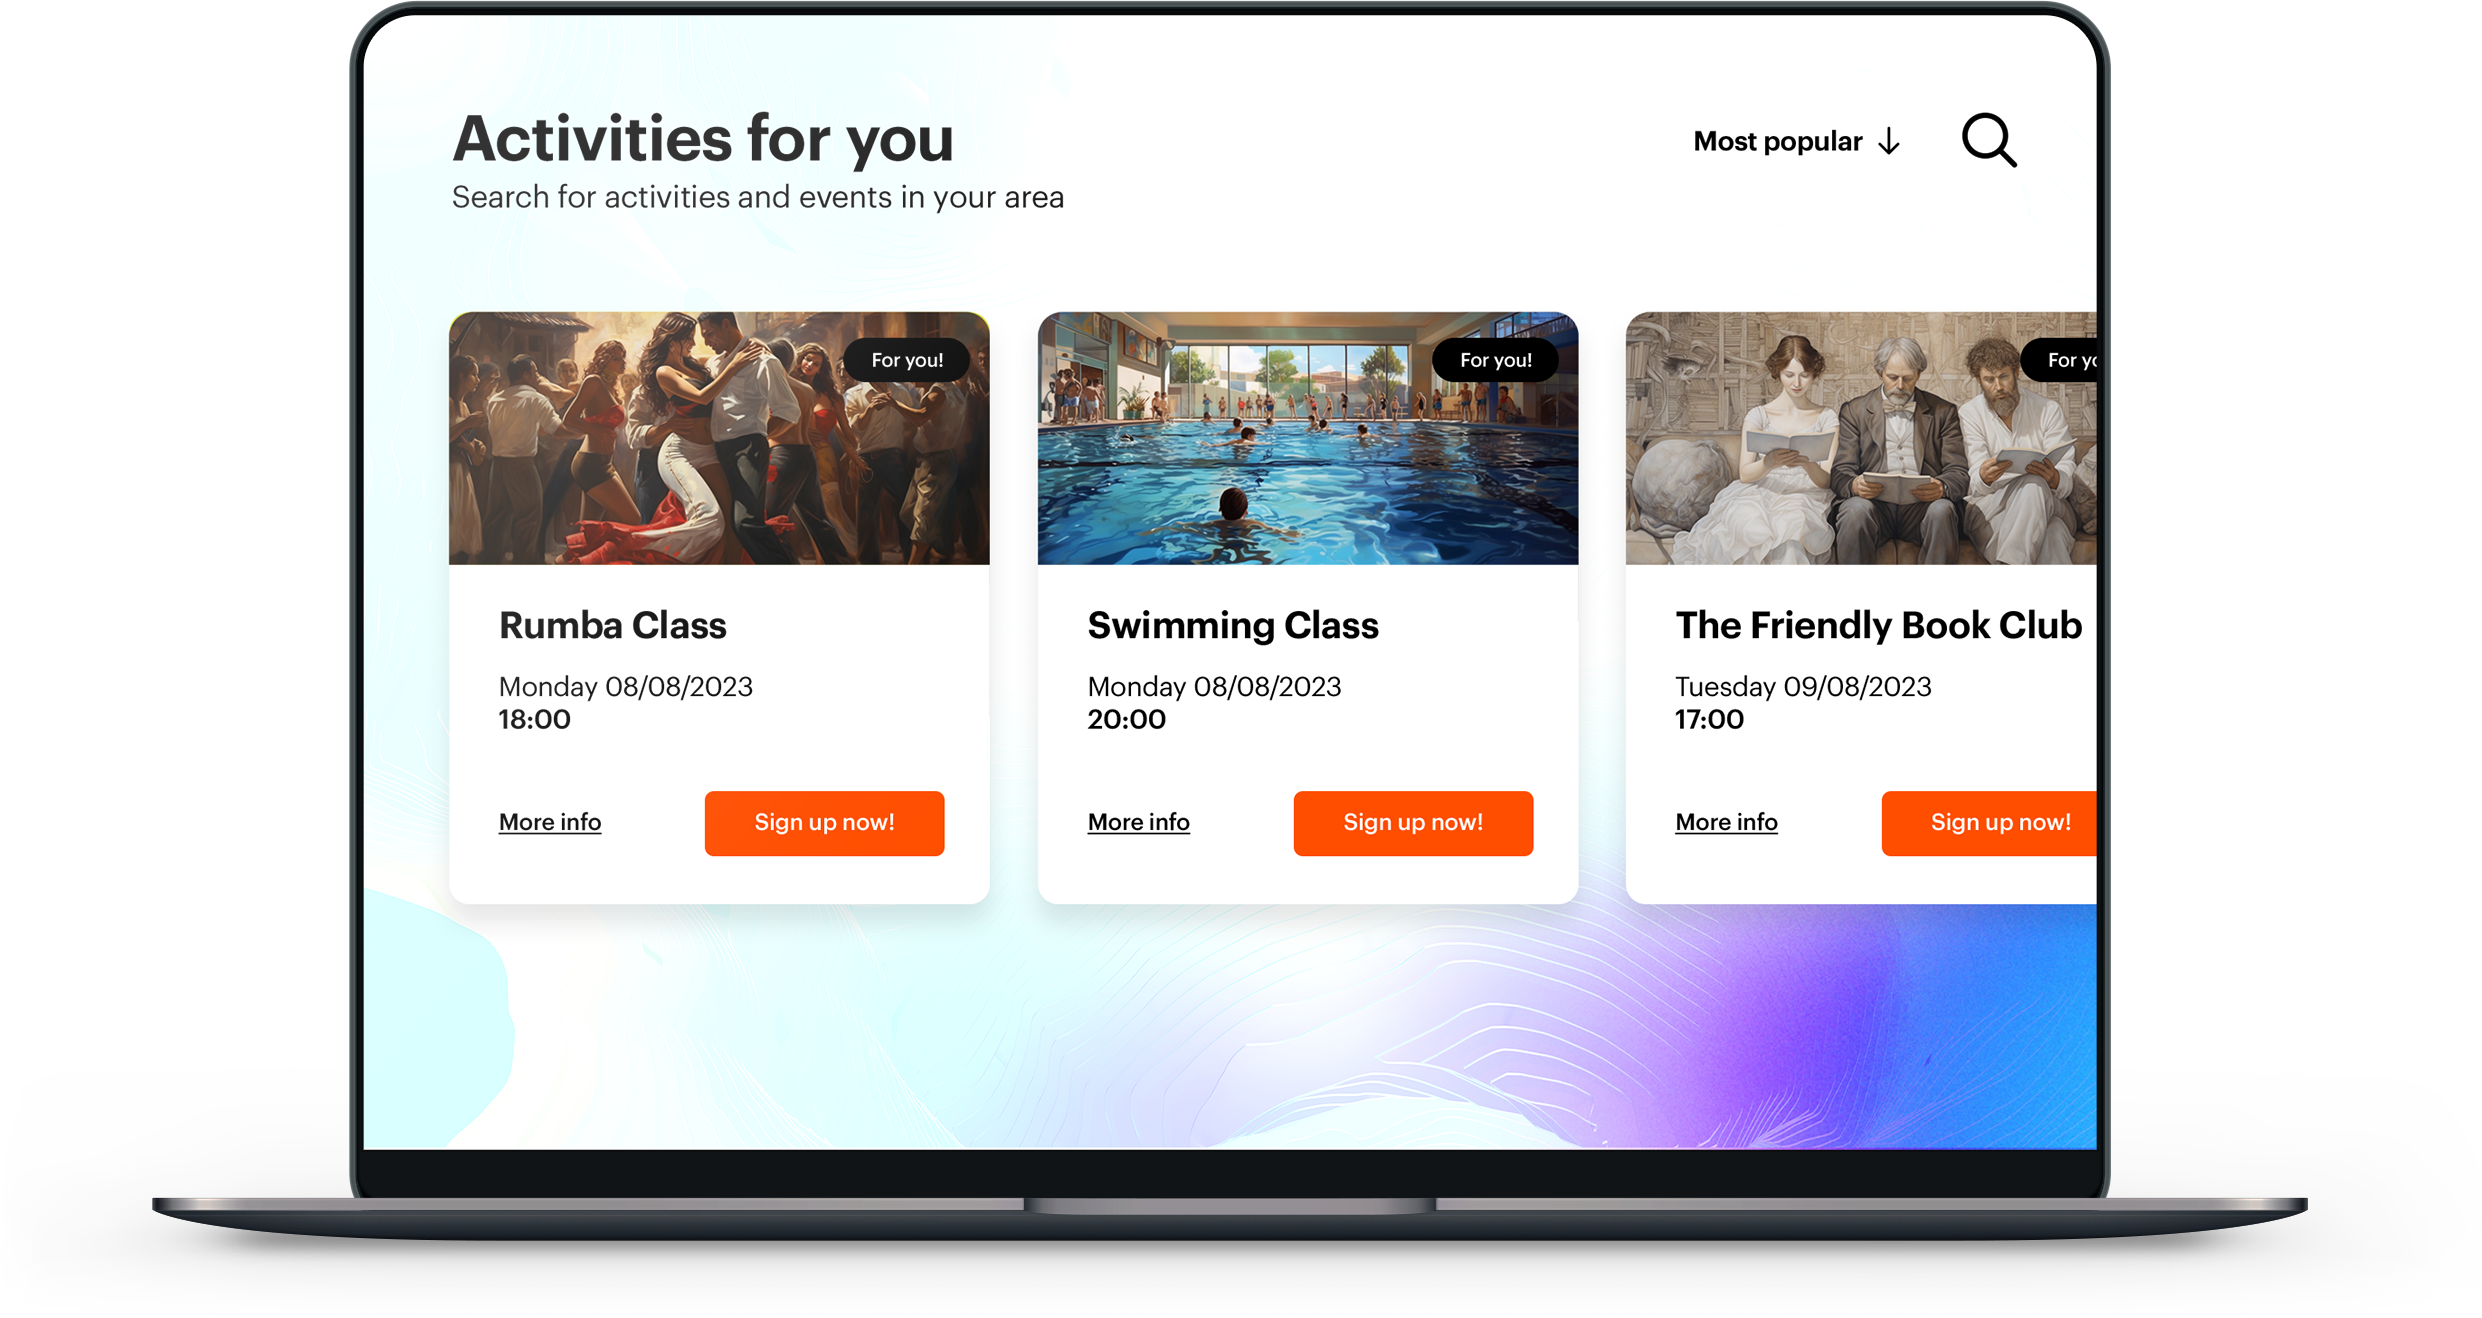
Using Dynamic Content, a special campaign appears, showcasing current events that users can conveniently sign up for by entering their email address and phone number. Agreeing to the terms and conditions, attendees can swiftly submit their registration. This seamless process ensures a hassle-free experience, driving higher engagement and participation.
Our solution helps organizers to effortlessly manage their events. The platform allows for real-time event creation, enabling organizers to add new events efficiently. Additionally, event managers can easily set the maximum capacity for each event. When the number of registered participants exceeds the set limit, registration is automatically closed, and information about that will be displayed.
To facilitate easy event management, we utilized promotional features. Event details, including event type, description, graphics, and additional information, are defined within a promotion. This information is automatically imported into the Dynamic Content campaign, using our API, streamlining the process. Moreover, seat management is facilitated through the use of coupon pools. Each event is associated with a specific coupon pool, allowing organizers to allocate a fixed number of coupons. Upon registration confirmation, the coupon is assigned to attendee.
In this use case we will describe how to manage the whole event registration process, using the power of Dynamic Content, promotions, and coupons.
Prerequisites
- Implement a tracking code.
- Configure an email account.
- Create an email template with the registration confirmation.
Process
In this use case, you will go through the following steps:
- Create a voucher pool necessary for seat management.
- Create promotion with additional information.
- Create a dynamic content which displays the promotion on the website .
- Create a workflow which sends your customers an email with confirmation after registration for a specific event.
Create a voucher pool
Seat management for an event is facilitated through the use of voucher pools. Each event is associated with a specific voucher pool, allowing organizers to allocate a fixed number of coupons. Upon registration confirmation, attendees receive a coupon.
In this use case, every pool is connected with one event and the number of coupon codes reflects the number of seats available for the event. You can add as many events as you want.
- Go to Settings > Voucher pools and click Add pool.
- In the voucher pool configuration form:
- In the Pool name field, enter the name of the event.
- Select the dates for the Emission start and Emission end fields.
- Complete the form by clicking Apply.
Result: The pool is created.
- Open the voucher pool by clicking its name.
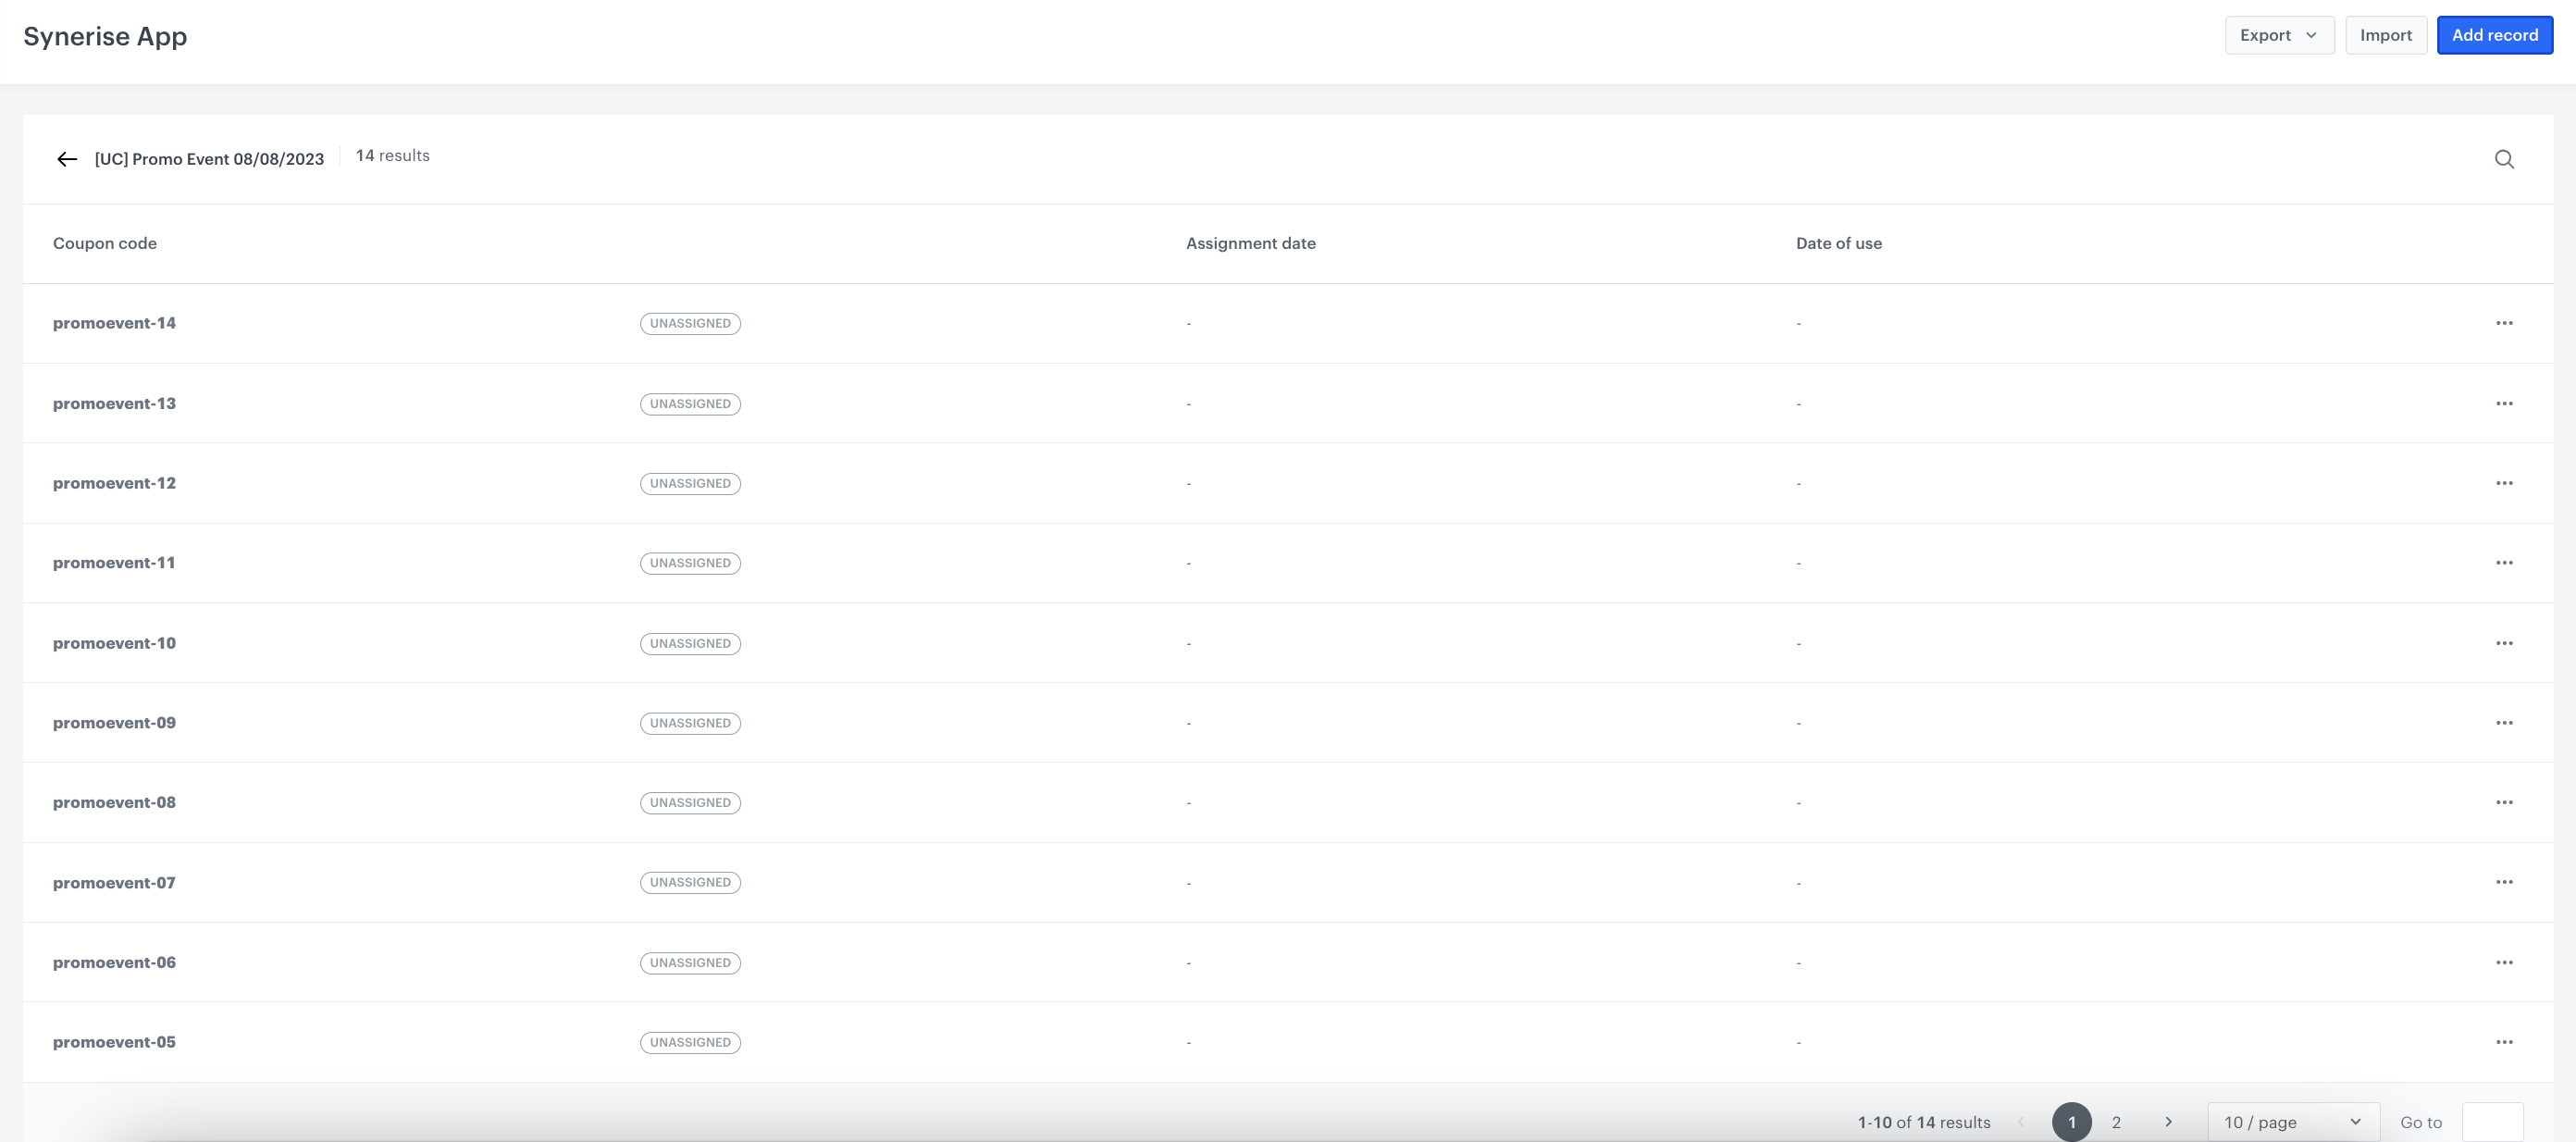
- Add codes to the voucher pool by clicking Add record button.
- One code represents one seat for the event.
- Add a number of coupons equal to the expected number of seats for this event.
- As coupon codes, we recommend to use ordinal numbers.
Create a promotion
In this step, prepare a promotion which lets you display each event with additional information. Each event is treated as a single promotion. You can add as many events as you want. Promotions will be displayed in a dynamic content campaign.
- Go to Communication > Promotions > Add promotion.
- Enter a name for the promotion.
- Select the For selected items type of promotion.
- In the Audience section, choose Everyone.
- In the Content section:
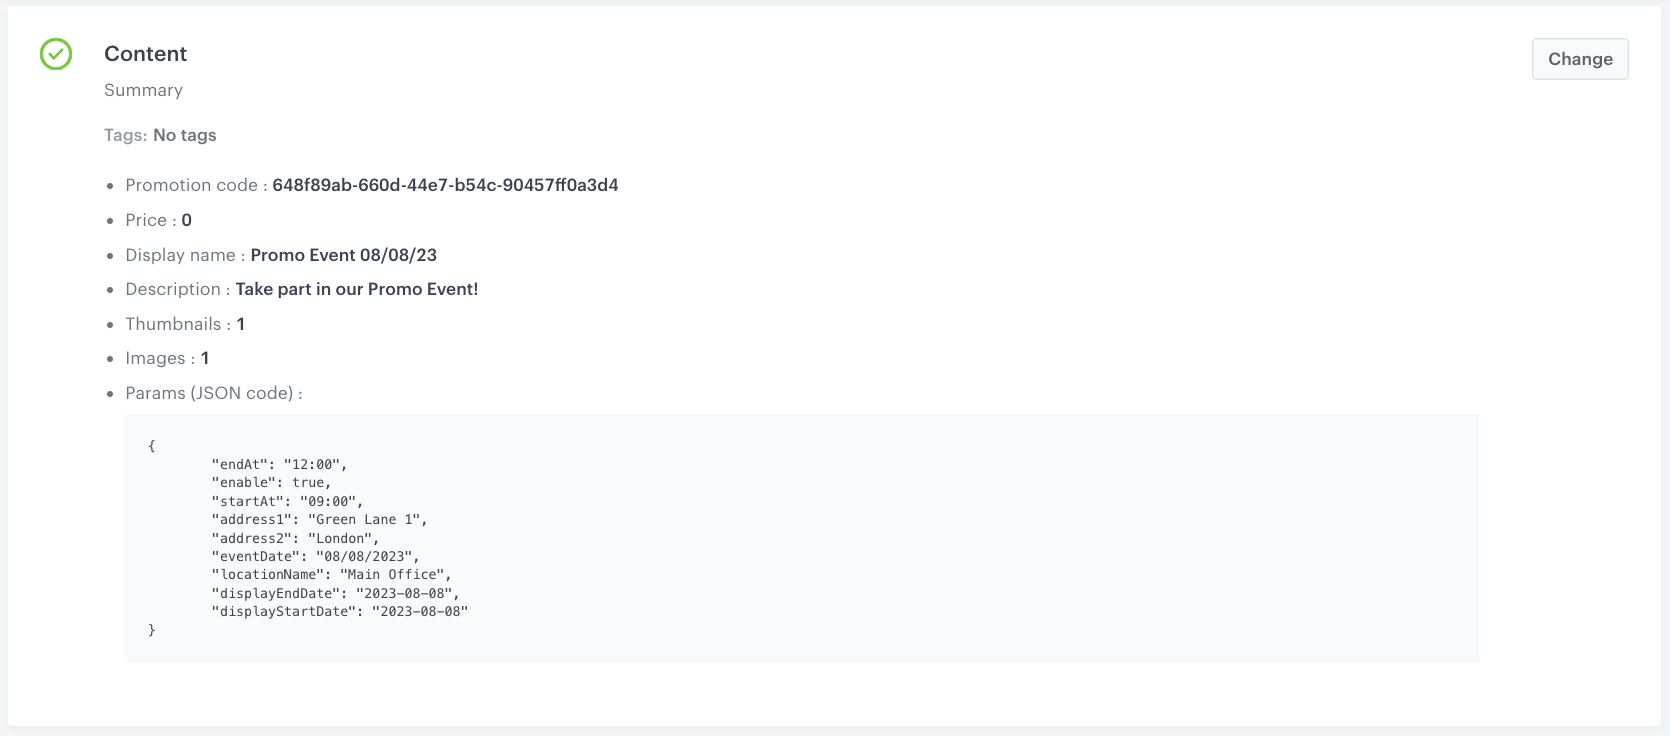
- Define the name, description, and image of the promotion.
- Prepare a JSON code that includes basic information about the event. Check the example code below. This date is later used in the dynamic content campaign. You can add different data to the given event.
 {
  "endAt": "19:00",
	"enable": true,
	"startAt": "18:00",
	"address1": "Green Lane 1",
	"address2": "London",
	"eventDate": "08/08/2023",
	"locationName": "Main Office",
	"displayEndDate": "2023-08-08",
	"displayStartDate": "2023-08-08"
}
- Confirm the settings by clicking Apply.
- Fill out the Type and limits section according to your business needs.
- In the Schedule section, define the promotion distribution period according to your business needs.
- To run the promotion, click Publish.
- To create the second promotion, repeat all the steps.
Create a dynamic content
Create a dynamic content campaign. This dynamic content will be displayed on your site with information about the promotion, link to the form, and information about the lack of seats if all of them are taken. This dynamic content also generates the experience.subscribe event, which is generated after signing up to an event and assigning the code from the voucher pool to the specific user.
- Go to Communication > Dynamic content > Create new.
- Enter the name of the dynamic content.
- Choose Insert Object type.
- As the audience, select everyone.
- In the Content section, select Simple message, and specify the CSS selector where you want to insert your campaign.
- In the Content tab, click Create Message.
- In the code editor, create a dynamic content campaign based on your preferences and your own CSS styles. Below you will find technical elements of the campaign which you should add to the code to make sure that the mechanism of assigning codes and checking the amount of them in the pool works correctly.
Below you will find the instruction for developers, which describes how to assign the code from the voucher pool created in the previous step to the specific user.
To assign a voucher to a person who signs up through a form, you need to use this endpoint. The API call includes the user’s UUID. If the user does not already have a voucher from a specific pool, it will be assigned to them. However, if the user already has a voucher assigned from that pool, the API will return the existing voucher without assigning a new one. If the pool is already filled (all vouchers are assigned), you receive a response with status 416, indicating that the pool is empty, expired, not found, or the user’s profile is not found. At this point, you need to handle the error and display the information to the user.
Below you will find instructions for developers on how to - in case of lack of coupons in the pool - display information in the dynamic content that signing in to this event is currently not possible.
To implement the dynamic content that informs when there are no coupons available in the pool, you can use the following endpoint. You pass the poolUuid to check, and in the response, you get information about the number of coupons available that can be assigned (activeCount) and the the number of coupons already assigned (assignedCount). Based on this information, you can inform users about seat availability.
experience.subscribe. To do it check the basic method for tracking events. You will find there information how to add custom events.- Save the template.
- In the Schedule section, select the date when the dynamic content is activated.
- In Display settings, configure the settings based on your business needs.
- Confirm by clicking Apply.
- In the UTM & URL parameters section, click Skip step.
- Activate the dynamic content.
Create an automation
In this step, create a workflow which sends your customers an email with confirmation after registration for a specific event.
- Go to
 Automation > Workflows > New workflow.
 - Enter the name of the workflow.
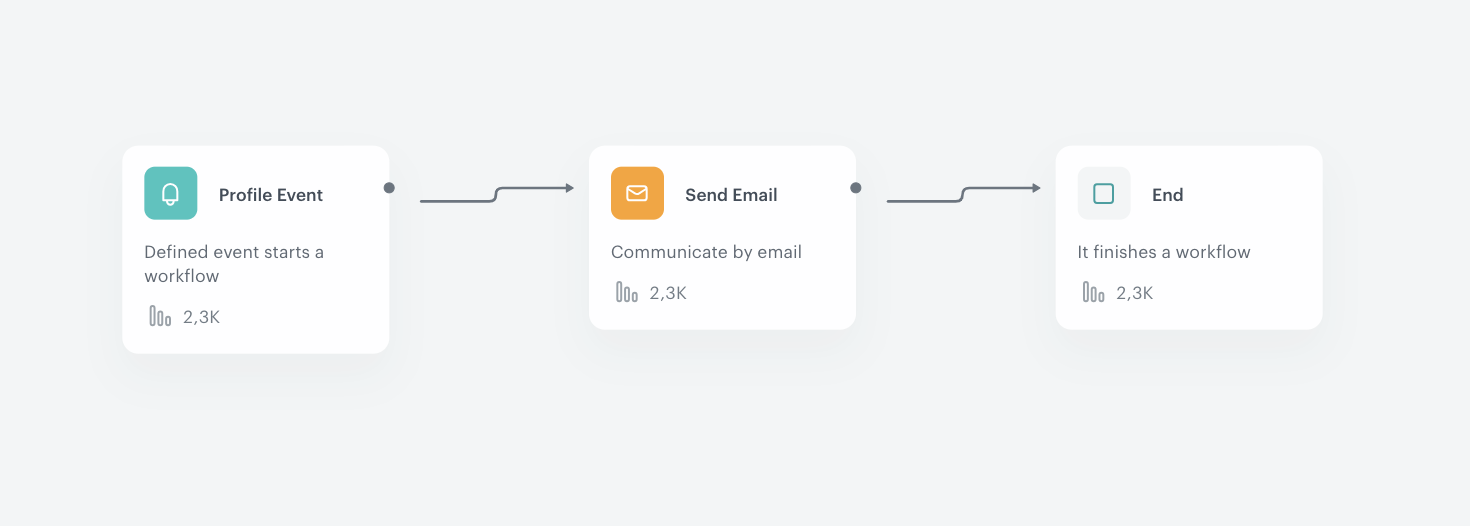
Define the Profile Event trigger node
At this stage, you will configure conditions that launch the workflow. As a trigger, we will use the experience.subscribe event, which is generated after registration.
- As the first node of the workflow, add Profile Event. In the configuration of the node:
- From the Choose event dropdown menu, choose
experience.subscribeevent. - Confirm by clicking Apply.
Configure settings for email
At this stage, you will send an email with confirmation for users who fill out the form and register for a specific event.
- As the next node, add Send Email. Configure it according to your business needs.
- Configure the sender details section.
- Configure the Content section.
- In the Subject field, enter your message subject.
- In the Template section, choose the template email template prepared earlier in the prerequisites.
- You can define UTM & URL parameters.
- Confirm by clicking Apply.
experience.subscribe event. Read more about the basic method for tracking events. You will find there information ow to send custom events.Add the finishing node
- Add the End node.
- In the upper right corner, click Save & Run.
What’s next
In the basic version, this use case focuses on allowing users to sign up for an event. However, it can be extended with additional mechanisms to enhance user experience and functionality.
- One such extension is the “Unsubscribe” mechanism, which enables users to cancel their registration and reassign their spot to another participant.
- Another extension is the “Waiting List” feature, where users can automatically join a waiting list if the event’s capacity is exceeded. When a spot becomes available, individuals from the waiting list will receive a reminder and have the opportunity to register for the event.
- To further improve user engagement, the system can implement “Reminders” for participants, notifying them a certain number of days before the event. This ensures participants don’t miss the event and can make necessary preparations.
- Moreover, after the event concludes, the system can send out “Surveys” to gather feedback and assess participant satisfaction. These surveys can help organizers make improvements for future events based on the received evaluations.
In addition to the mentioned extensions, there are many other potential enhancements that can be incorporated into this use case to cater to specific requirements and deliver a more comprehensive and user-friendly event management solution.
Dynamic Dashboard
Additionally, to measure the effectiveness of the campaigns and track the results, Synerise provided a comprehensive dashboard. It might be treated as an inspiration for a further analysis. This dashboard offered valuable analytics, including:
First part - dynamic, with the dynamic key based on the eventHash for a specific event.
- Report with the details of the event (name, start and end date, place)
- Report with a final guest list for a specific event
- Metric with the total number of users subsribed for an event
Second part - common for all events. You can adjust the date/time range for the whole dashboard.
- Report with all events - presented from most popular based on number of subscriptions
- Total (and unique) number of users registered
Those analytics are inspirational and can be used as a base for creating your very own dashboard to summarize the campaign results.
Check the use case set up on the Synerise Demo workspace
You can check the configuration of every element of this process directly in Synerise Demo worksp,ace:
- Voucher pool
- Promotion
- Dynamic content campaign
- Automation If you don’t have access to the Synerise Demo workspace, please leave your contact details in this form, and our representative will contact you shortly.