Web push with last visited product
You can use web push notifications to remind customers of their last viewed products, helping them pick up where they left off and complete their purchase journey. Personalized push notifications can increase customer engagement, retention, and ultimately, sales. Reach your customers in a non-intrusive way and provide a seamless shopping experience that keeps your brand top of mind.
In this use case, you will create a workflow sending a personalized web push with product recently viewed by customer.
Prerequisites
- Implement a tracking code.
- Implement OG tags. Make sure that items include an image so webpush can render.
- Configure web push notifications.
Process
In this use case, you will go through the following steps:
- Create aggregates returning the tile, image and link of the last visited product.
- Create a web push template with aggregate inserts.
- Create a workflow to send customers a webpush.
Create aggregates
In this part of the process, create three aggregates that return title, image, and link of the last product customer had visited.
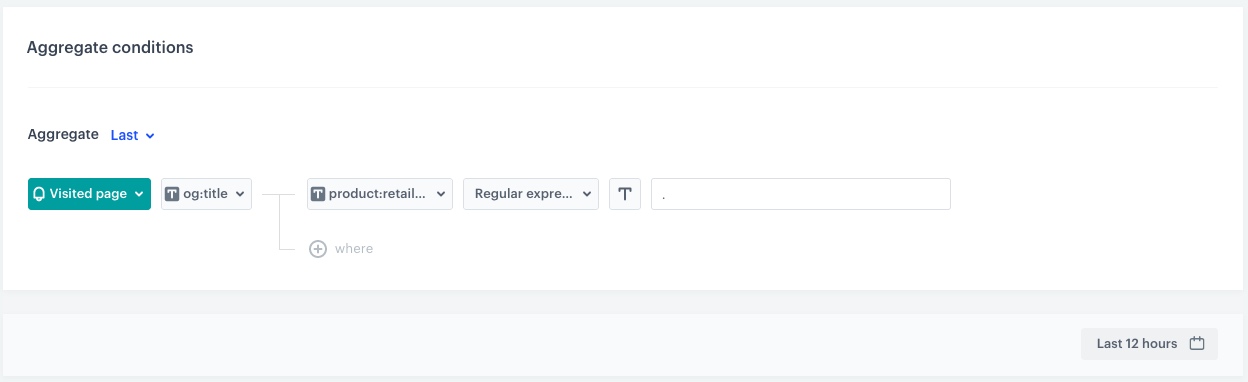
Aggregate returning the title of the last visited product
- Go to
 Analytics > Aggregates > New aggregate.
 - Enter the name of the aggregate.
- As the type of the aggregate, select Last.
- From the Choose event dropdown list, select the Visited page event.
- As the event parameter, select og:title
- Click the + where button.
- From the Choose parameter drop-down list, select the product:retailer_part_no parameter.
- From the Choose operator drop-down list, select Regular expression (String).
- In the text field type
.Note: This regular expression is necessary to exclude page visit events with noproduct:retailer_part_noparameter. - Using the date picker in the lower-right corner, set the time range to Custom > Last 12 hours. Confirm your choice with the Apply button.
- Click Save.
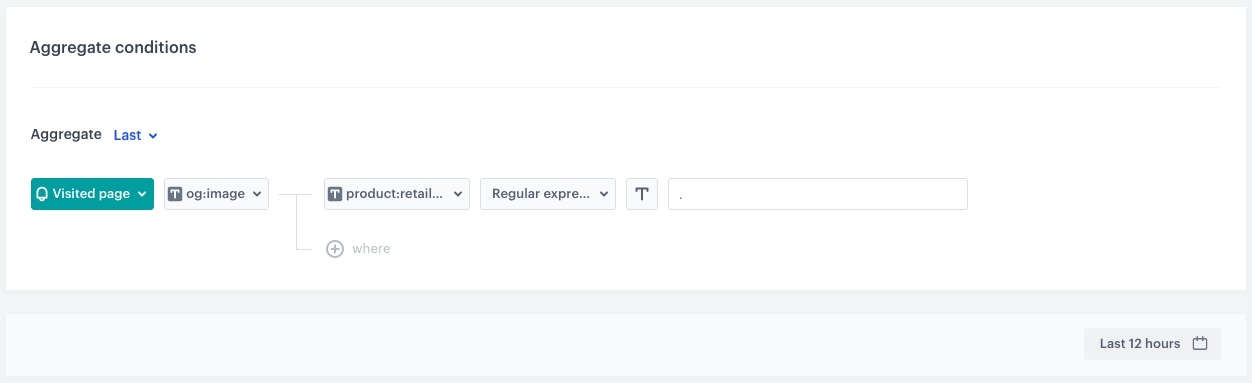
Aggregate returning the image of the last visited product
- Go to Analytics > Aggregates > New aggregate.
- Enter the name of the aggregate.
- As the type of the aggregate, select Last.
- From the Choose event dropdown list, select the Visited page event.
- As the event parameter, select og:image
- Click the + where button.
- From the Choose parameter drop-down list, select the product:retailer_part_no parameter.
- From the Choose operator drop-down list, select Regular expression (String).
- In the text field type
. - Using the date picker in the lower-right corner, set the time range to Custom > Last 12 hours. Confirm your choice with the Apply button.
- Click Save.
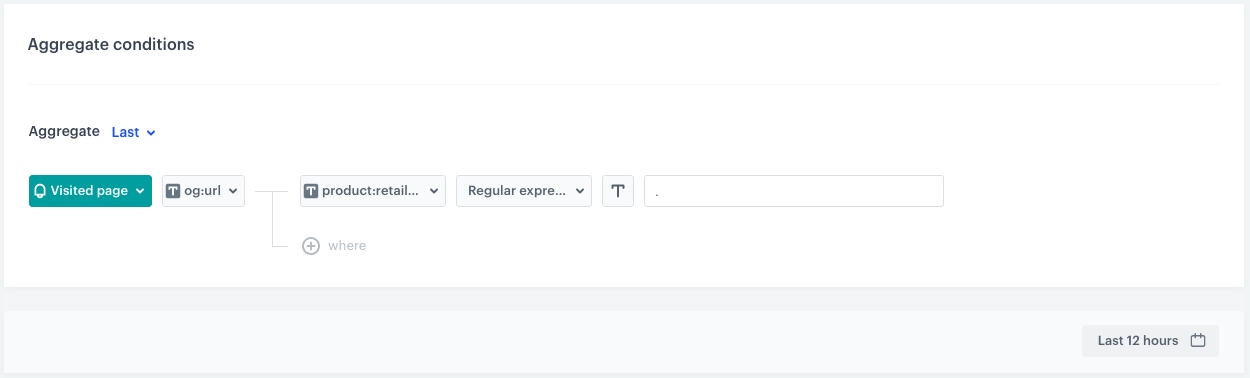
Aggregate returning the link of the last visited product
- Go to Analytics > Aggregates > New aggregate.
- Enter the name of the aggregate.
- As the type of the aggregate, select Last.
- From the Choose event dropdown list, select the Visited page event.
- As the event parameter, select og:url
- Click the + where button.
- From the Choose parameter drop-down list, select the product:retailer_part_no parameter.
- From the Choose operator drop-down list, select Regular expression (String).
- In the text field type
. - Using the date picker in the lower-right corner, set the time range to Custom > Last 12 hours. Confirm your choice with the Apply button.
- Click Save.
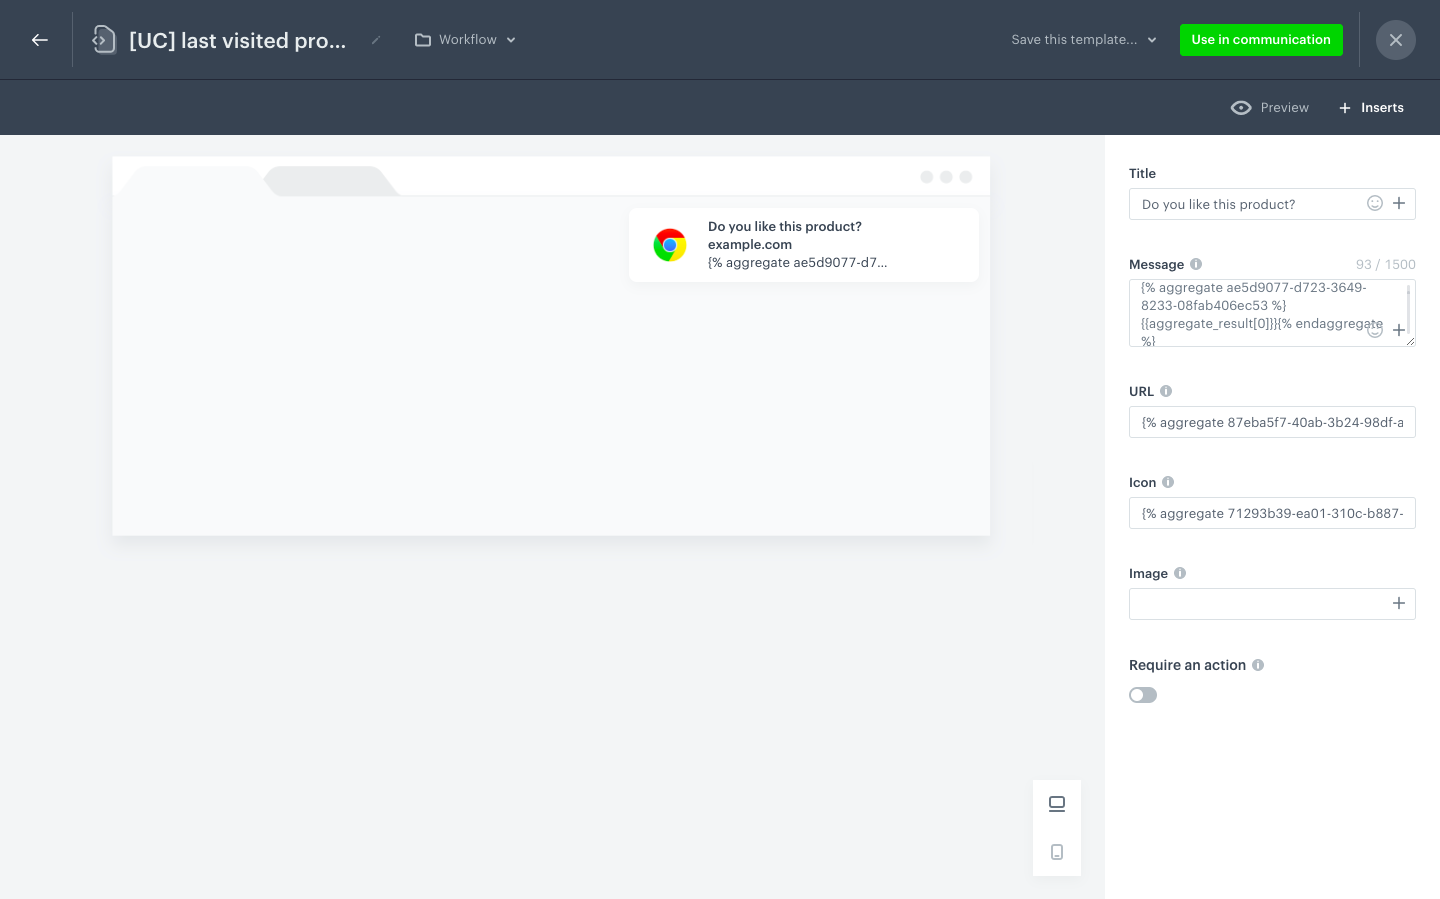
Create a web push template
In this part of the process, you will create a web push template with aggregate inserts you created in the previous part of the process.
- Go to
 Communication > Web Push > Templates > Create new.
 - Click Drag&drop builder.
- Enter the name of the template.
- In the Title field, define the title you want to display in the web push.
- In the Message field, define the copy you want to appear in the web push. In our case it will be an insert with aggregate returing the product title, created in the previous step. Enter the following code:
{% aggregate ae5d9077-d723-3649-8233-08fab406ec53 %}{{aggregate_result[0]}}{% endaggregate %}Note: Aggregate IDs are used as examples for the purpose of this use case. - In the URL field, define the link you want to display in the web push. In our case it will be an insert with aggregate returing the product link, created in the previous step. Enter the following code:
{% aggregate 87eba5f7-40ab-3b24-98df-ae2ac6263474 %}{{aggregate_result[0]}}{% endaggregate %} - In the Icon field, define the image you want to display in the web push. In our case it will be an insert with aggregate returing the product image, created in the previous step. Enter the following code:
{% aggregate 71293b39-ea01-310c-b887-3cb91b6645e3 %}{{aggregate_result[0]}}{% endaggregate %} - Optionally, you can define an image in the Image field.
Create a workflow
The workflow will be triggered by the session.end event. The delay is set to 2 hours, after this time customer will receive a web push with the last seen product.
- Go to
 Automation > Workflows > New workflow.
 - Enter the name of the workflow.
Define the trigger node
- As the first node, add the Profile Event. In the settings of the node, select the session.end event.
- Click Apply.
Configure the Delay node
- Add the Delay node. In the node settings:
- In the Delay field, type
2. - From the Unit dropdown list, choose Hour.
- In the Delay field, type
- Click Apply.
Configure the Send Webpush node
- Add the Send Webpush node. In the node settings:
- In the Content section, from the Webpush template dropdown, select the template you created in the previous step.
- In the Schedule section, set the Webpush lifespan (TTL) according to your business needs.
- You can describe campaigns with additional parameters.
- Click Apply.
Add the finishing node
- Add the End node to the Send Webpush node.
- In the upper right corner, click Save & Run.

Check the use case set up on the Synerise Demo workspace
You can check the all the configurations directly in Synerise Demo workspace:
- Aggregate returning the name of the last visited product
- Aggregate returning an image of the last visited product
- Aggregate returning a link of the last visited product
- Workflow
If you don’t have access to the Synerise Demo workspace, please leave your contact details in this form, and our representative will contact you shortly.