Promotion with an early preview
Create a buzz around your product and draw attention to your store, while attracting a larger audience by offering significant discount for a limited time. Build anticipation and excitement among your loyalty and future customers with an early preview of the remarkable discount opportunity.
This use case describes how to create a high discount promotion for one product with an early preview. The customer will receive a 70% discount for a specific product three days in advance, which can be redeemed only on the weekend.
Prerequisites
- Implement the Promotion module in your mobile application, website or through API
- Implement transactional events.
- Import the product feed to a catalog.
Create a promotion
Create a straightforward weekend promotion for a specific product with a substantial discount rate (for example 70%). The promotion will be previewable three days prior to its activation.
-
Go to
 Communication > Promotions > Add Promotion.
 -
Enter a name for the promotion.
-
Select the For selected items type of promotion.
-
In the Audience section, choose Everyone.
-
In the Content section:
- Define the name, descriptions, thumbnail, and image of the promotion.
- Optionally, you can add tags to the promotion and JSON code with additional promotion parameters.
- Confirm the settings by clicking Apply.
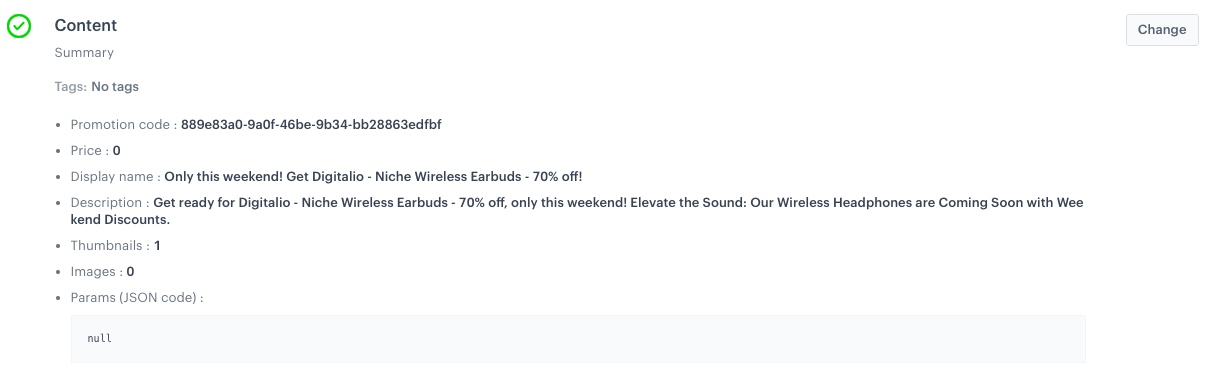
Content configuration -
In the Type and limits section:
- Leave General in the Type section.
- In the Type section field, select General (default option).
- In the Priority, enter a number that defines the priority of the promotion.
Note: Priority defines the order of display in the customer’s view. 1 is the highest priority. If two or more promotions applicable to a customer have the same priority, the order of display is determined by the date of creation. The one that was created earlier takes the priority over the other promotion.
- Select the Single tab (default choice).
- In the Limit per profile field, type
1. - From the Discount type dropdown list, select Percentage.
- In Discount mode, leave the default option (Static).
- In the Value field, type
70. - Confirm the settings by clicking Apply.

Type and limits configuration
-
In the Schedule section:
- In the Display time section, choose Scheduled.
- Pick the dates in the Start and End fields, in this case the promotion should start three days before the weekend and end on Sunday.
- In the Activity time section, deselect Same as display time.
- Set a date range when the promotion can be activated. Pick the dates in the Start and End fields, in this case promotion should be active on a selected weekend.
- In the Lasting field, you can enter the time (in seconds) that a promotion remains redeemable after it is activated.
0is interpreted as infinity. - Confirm the settings by clicking Apply.
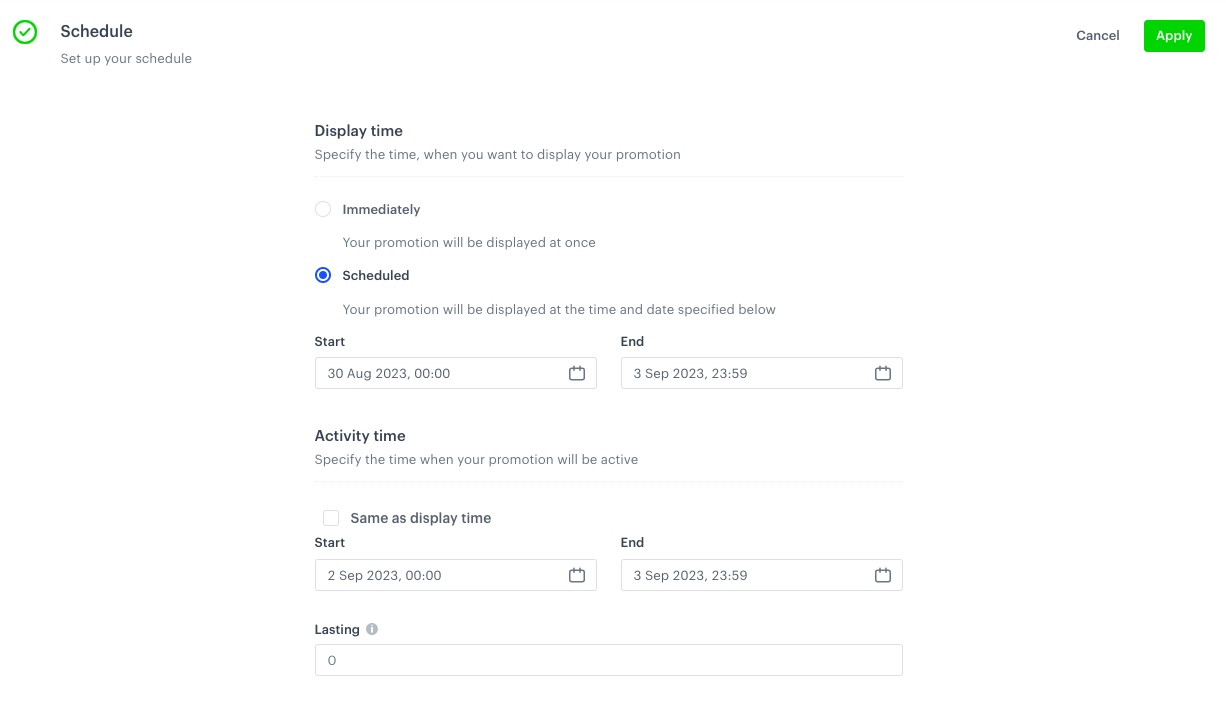
Schedule configuration
-
In the Items section:
- From the Source catalog dropdown list, select a catalog of items.
- In the Include items section, choose Selected items.
- Click Select items and select the product you want the discount to apply to.
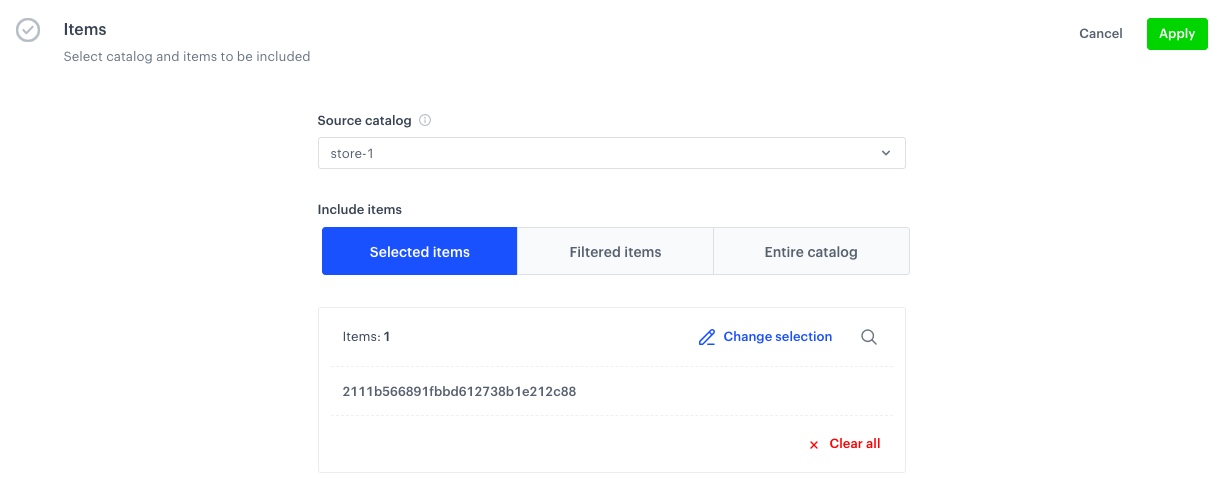
Items configuration -
To apply configuration and run the promotion, click Publish.
Check the use case set up on the Synerise Demo workspace
You can check the promotion configuration directly in Synerise Demo workspace.
If you don’t have access to the Synerise Demo workspace, please leave your contact details in this form, and our representative will contact you shortly.