Change date format for analytics
It may happen that your implementation sends additional date information, such as the date of first time an app was launched, in the custom attributes of customers. If that date has a different format than the one required by Analytics, you can use Expressions to transform it.
The example in this article explains how to transform a date in dd.mm.yyyy format into a timestamp that can be used in Analytics. In the custom attributes of the customer profile, the parameter that stores the date is called app_first_started. If you’re an advanced user, you can modify the regular expressions in the article to work with different formats of dates in the parameter.
Prerequisites
- Implementation of tracking code on your website.
- The attribute with the date (in this example, it’s
app_first_started) must be defined. This can be done in one of the following ways:- Add the attribute in Params Manager.
- Create or update a customer with the attribute (using the API or SDK).
Process
The process consists of three stages:
- Create expressions to extract elements of the date.
- Create an expression to re-arrange the elements of the date into a format that can be converted into a timestamp.
- Convert the date into a timestamp.
Create expressions to extract elements of the date
Three separate expressions are used to extract the day, month, and year. The only difference between them is the regular expression used.
- Go to
 Analytics > Expressions > New expression.
 - From the Expressions for dropdown list, select Attribute.
- In the Formula definition section, click Select.
- From the list that opens, select Function > Regexp.
- In the brackets, click the left Select button and from the list, select Customer.
- Click the unnamed node that appeared.
- At the bottom of the page, click Choose attribute.
- In the list of attributes, find and select
app_first_started(you can use the search field). - In the brackets, click the right Select button and from the list, select Constant.
- Click the 0 node that appeared.
- At the bottom of the page, in the input field, paste the regular expression that extracts the day:
(?<=^)(\d*?)(?=\.) - Above the formula creator, enter a meaningful name for the expression.
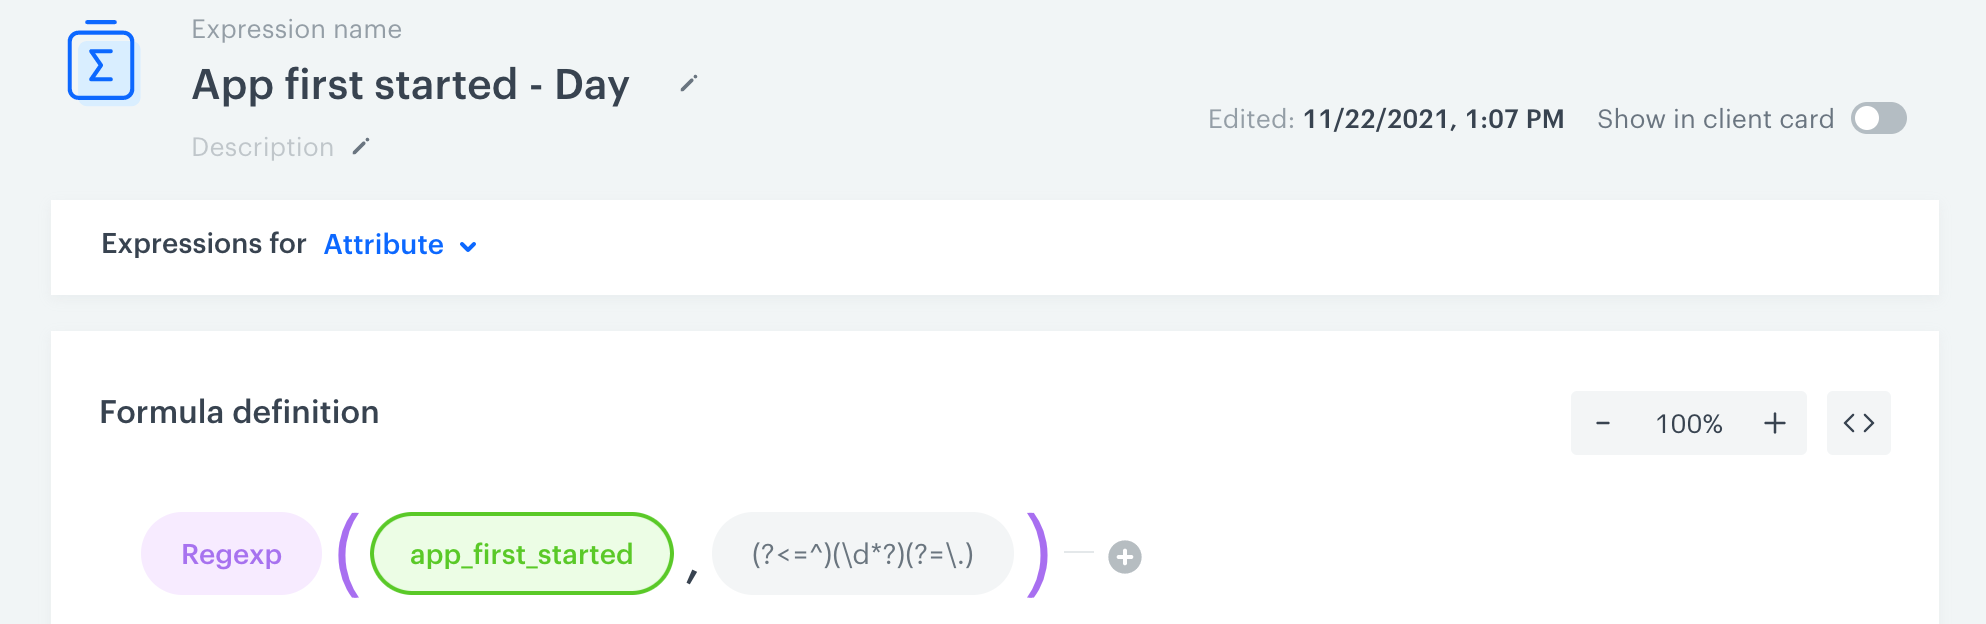
Expression to extract the day from a date in dd.mm.yyyyformat - In the upper-right corner, click Save.
- In the upper-right corner, click Publish.
- Create the month and year expression by performing the following steps twice:
- Return to the list of expressions and locate the expression you created.
- To the right, click the
 icon and select Duplicate.
 - Click the duplicated expression to open it for editing.
- Change the name of the expression.
- In the Formula definition section, click the node with the regular expression.
- Change the regular expression to:
- For month:
(?<=\.)(\d*?)(?=\.) - For year:
(?<=\.)(\d*?)(?=$)
- For month:
- Click Publish.
Create an expression to re-arrange the elements of the date
In this stage, you create an expression that concatenates (joins) the results of the three expressions above into a single string in yyyy/mm/dd format. This format can later be converted into a timestamp.
-
Go to
Analytics > Expressions > New expression. -
Create the following attribute expression:

Expression to concatenate the elements of a date Explanation:
- Concat is a function.
- Expression results (green nodes) are treated and inserted like customer attributes.
/is a constant.
The expression takes three strings (year, month, day) that are the results of the expressions you created before and joins them into one string with
/as the separator. -
Click Save.
-
Click Publish.
Convert into a timestamp
In this stage, convert the yyyy/mm/dd date into an Analytics-compatible timestamp.
-
Go to
Analytics > Expressions > New expression. -
Create the following expression:
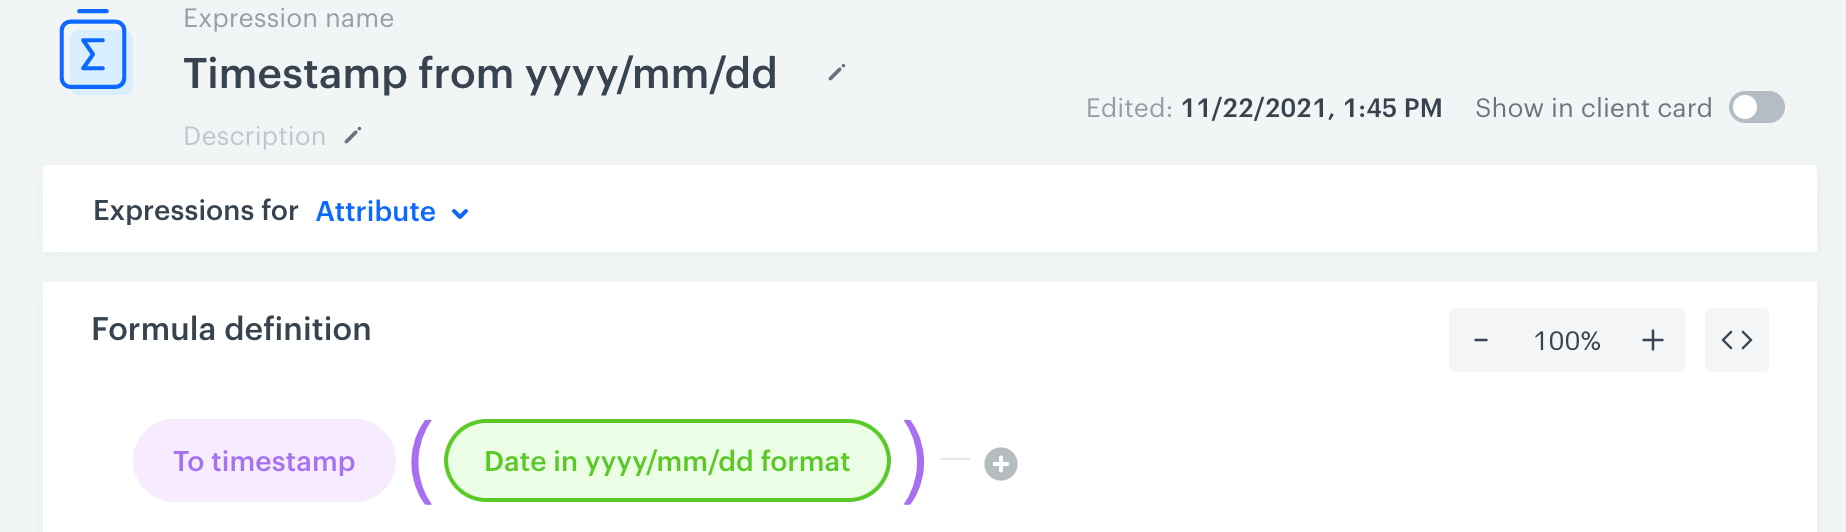
Expression that converts yyyy/mm/ddinto a timestampExplanation:
- To timestamp is a function.
- Expression results are treated and inserted like customer attributes.
-
Click Save.
-
Click Publish.
What’s next
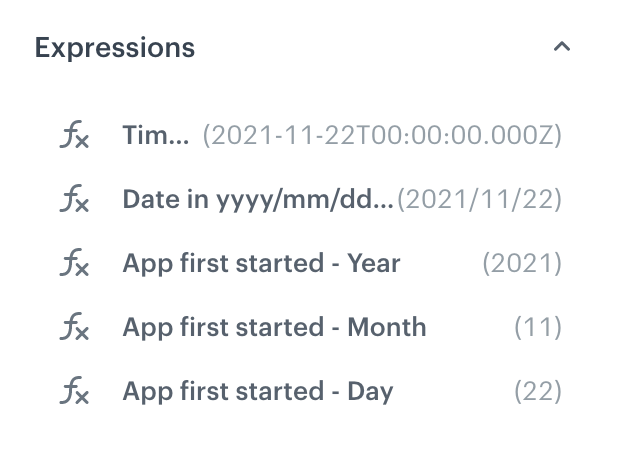
You can now use the result of the last expression (called “Timestamp from yyyy/mm/dd” in this example) as a timestamp in analytics, for example to create a segmentation of customers who first started the app after a certain date or to find the transactions that a customer made before they first started the application.
If you enabled the Show in profile card toggles, the expression results are visible in the right panel of a customer card in Profiles:
Check the use case set up on the Synerise Demo workspace
You can find five expressions created in this use case in our Synerise Demo workspace at the links listed below:
- expression used to extract the day
- expression used to extract the month
- expression used to extract the year
- expression to re-arrange the elements of the date
- expression for timestamp from yyyy/mm/dd
If you don’t have access to the Synerise Demo workspace, please leave your contact details in this form, and our representative will contact you shortly.