Installation and configuration
What is Synerise Web SDK
Synerise Web SDK (Software Development Kit) is a JavaScript library that allows you to integrate Synerise on your website. This library (SDK) is responsible for data exchange between Synerise and the website into which it is implemented. Thanks to the SDK, we not only send data (events) but also download data to show dynamic content campaigns. The SDK is also responsible for customer identification, which means that SDK assigns a UUID for anonymous users on your website, if they already have a UUID, it recognizes them.
How to implement Synerise Web SDK?
By adding a tracking code into the source code of your website.
Benefits of implementing the tracking code
Implementing Synerise Web SDK on a website you allows you to:
- Use all methods provided by Synerise SDK:
- Identify users on your website
- Show dynamic content campaigns
Creating a tracking code
- Go to
 Settings > Tracking Codes > Add tracking code.
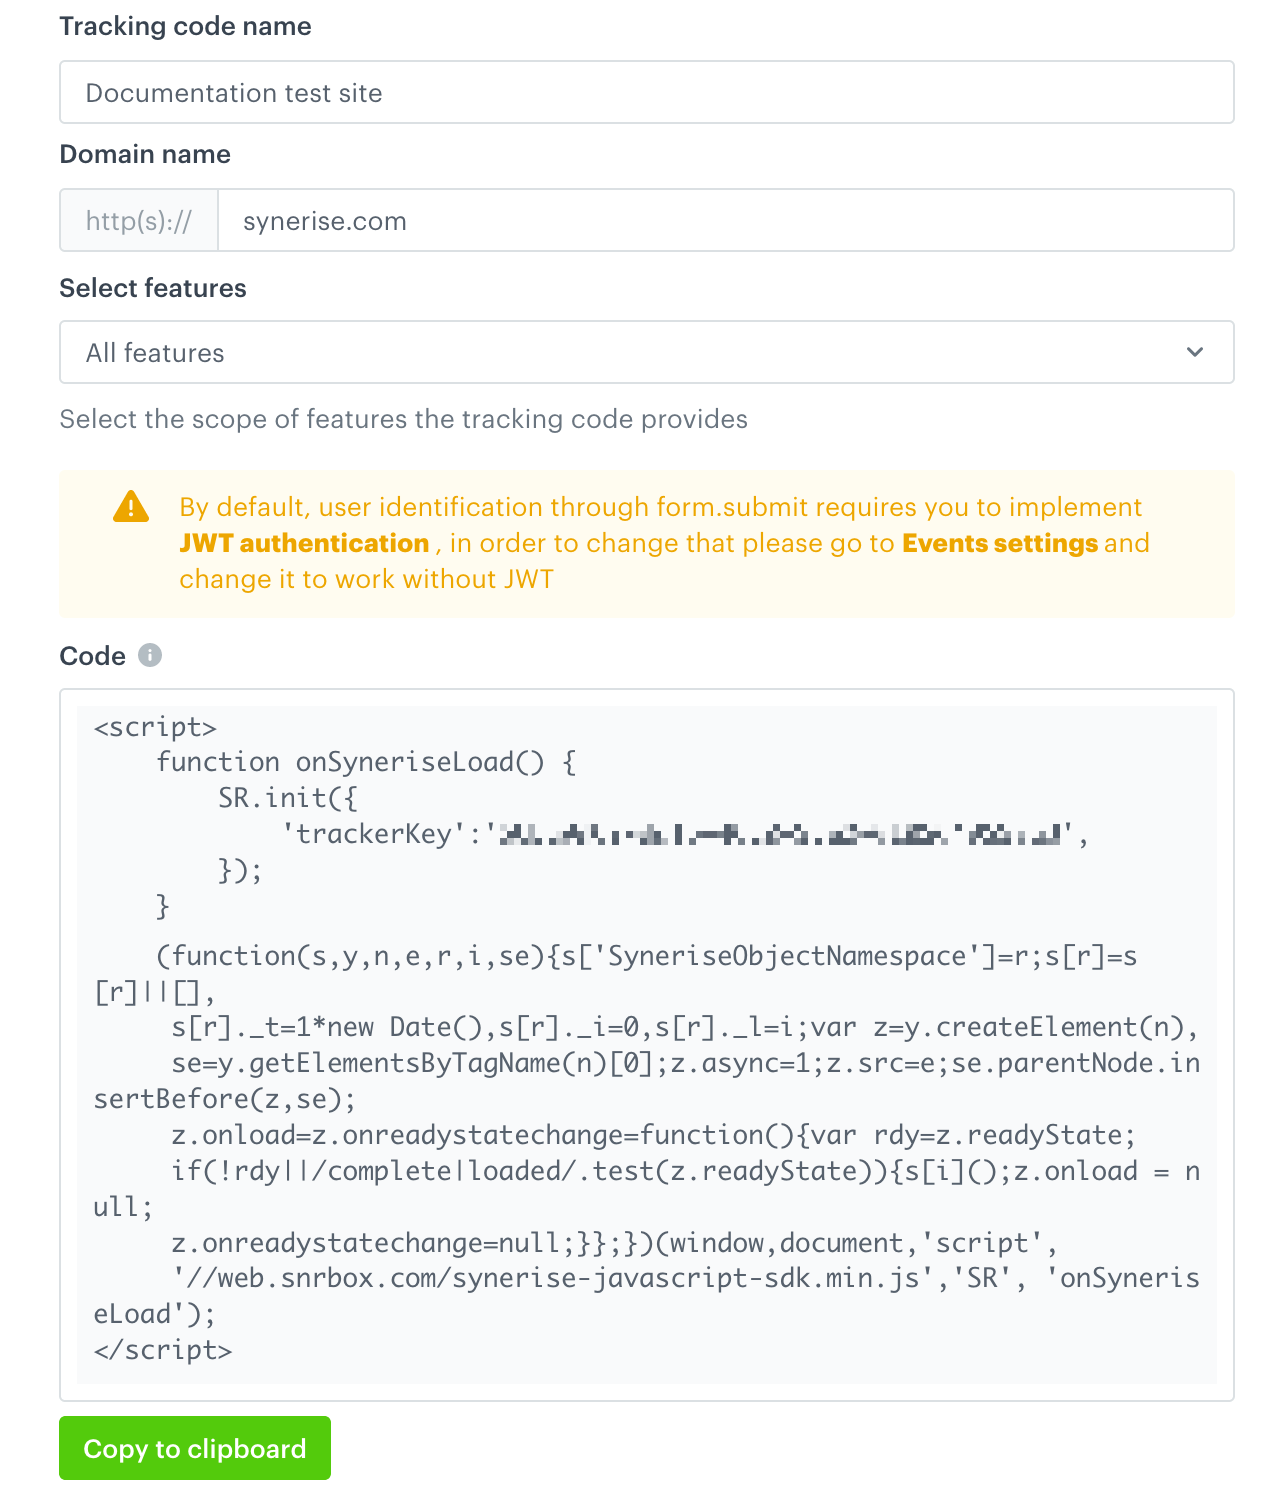
An example tracking code form - In the Tracking code name field, enter the name. It’s used for identifying the code on the list of tracking codes.
- In the Domain name field, enter the URL of the domain (without the protocol).
- From the Select features dropdown list, define the scope of features the tracking code will cover.
You can find more information about possible tracking code variants further in this article. - Copy the code.
- Save the configuration by clicking Save.
- Paste the copied code into the source of your web pages before the closing
</body>tag.Important: If you want to use a custom domain to treat Synerise tracking as first-party, see First-party and third-party tracking.
To apply the custom domain, in the tracking code, replace the default URL of the JS SDK script (//web.snrbox.com/synerise-javascript-sdk.min.js) with the one you received from the Synerise Customer Success & Implementation team. - If you are creating a single page application, modify the tracking code according to this section.
Tracking code in Single Page Applications
If your website is a Single Page Application (SPA), the tracking code must be modified. The modification changes the mechanism of sending page visit events and retrieving dynamic content.
-
Add the highlighted parameters to the tracking code you created:
Result:function onSyneriseLoad() { SR.init({ 'trackerKey':'XXXXXXXX-XXXX-XXXX-XXXX-XXXXXXXXXXXX', 'customPageVisit': true, 'dynamicContent': { 'virtualPage': true } }); }
The additional initialization parameters disable page visit events and dynamic content retrieval. -
Re-enable page visit tracking and dynamic content retrieval by implementing the following methods in the page:
SR.event.pageVisit() .then(function () { SR.dynamicContent.get(); })Important:Page visits and dynamic content retrieval must be implemented according to the following rules:
- og:tags must be loaded first, regardless of the method that is used to load them
- page visits and dynamic content must be requested whenever the page is loaded, reloaded, and when the view changes
Tip: You can use Google Tag Manager to implement the methods. To do so, triggerSR.event.pageVisit();andSR.dynamicContent.get();methods on events that indicate a page or DOM being loaded.SR.initis only called when DOM is loaded.
Tracking script variants (no custom domain)
We have several variants of our Javascript SDK that you can use depending on the required features.
Fewer features usually result in smaller page size and shorter load times.
| Script version | URI |
|---|---|
| default: Script with all functionalities |
synerise-javascript-sdk.min.js |
| no-wp: Script without WebPush |
synerise-javascript-sdk-no-wp.min.js |
Additional tracking configuration parameters
The only required parameter during the initialization of the tracking code is the trackerKey parameter.
By using the additional parameters described below, you can modify the configuration of the tracking code.
Google dataLayer
If you use Google Data Layer, you can connect it with Synerise.
To track transactions, you need to use Universal Analytics enhanced e-commerce or Google Analytics 4 e-commerce.
SR.init({
    'trackerKey':'XXXXXXXX-XXXX-XXXX-XXXX-XXXXXXXXXXXX',
    'dataLayer':dataLayer,
    'gaVersion': 'CHOOSE_VERSION'
});
The gaVersion parameter is used to set the Google Analytics version.
- If you only use one GA version on your website, you don’t need to add this parameter.
- To send events to Universal Analytics, set the value to
UA - To send events to Google Analytics 4, set the value to
GA4
Subdomains
If you have several subdomains with different tracking codes, they generate cookies with their own domains.
If you want the sub-domains to create cookies for another domain instead, declare the domain in the subdomains’ tracking codes.
Example: If your site is docs.example.com, it would generate cookies with the docs.example.com domain. To generate cookies with the root domain, the tracking code needs the following parameter:
SR.init({
    'trackerKey':'XXXXXXXX-XXXX-XXXX-XXXX-XXXXXXXXXXXX',
    'domain':'.example.com'
});
Automatic tracking of page visits
You can turn off the automatic collection of page visit events with the customPageVisit parameter.
In this case, events should be sent manually using the SDK methods.
SR.init({
    'trackerKey':'XXXXXXXX-XXXX-XXXX-XXXX-XXXXXXXXXXXX',
    'customPageVisit':true
});
Synerise webpush worker scope
If you use Synerise webpush and need to set a custom service worker scope (registration path), you can enter that path as a parameter.
SR.init({
    'trackerKey':'XXXXXXXX-XXXX-XXXX-XXXX-XXXXXXXXXXXX',
    'webpush':{
        'service_worker_scope':'/pl/'
    }
});
Disabling modules
Additionally, if you need to disable some Synerise modules on a specific sub-page or domain, you can do it by specifying the parameters as below:
SR.init({
    'trackerKey':'XXXXXXXX-XXXX-XXXX-XXXX-XXXXXXXXXXXX',
    'disableWebPush':true,
    'disableDynamicContent':true,
});
Customizing metadata
You can add <meta> tags to the website or modify existing ones. The new values are added to page.visit events. They can also be used with other features based on metadata, such as communication, recommendations, personalization, and so on.
To do it, add a customizeMetadata function to SR.init().
Example:
SR.init({
    'trackerKey': 'XXXXXXXX-XXXX-XXXX-XXXX-XXXXXXXXXXXX',
    'customizeMetadata': function (metadata) {
        metadata.size = 8;
        metadata.isExample = true;
        metadata['og:title'] = 'Sneakers';
        metadata['product:retailer_part_no'] = '1a4d3380-04d1';
        return metadata;
    }
});
Syntax usage:
- If the name of the meta key doesn’t contain special characters, use the
metadata.keyName = 'keyValue'syntax. - If the name of the meta key contains special characters, use the
metadata['key_name'] = 'keyValue'syntax. - Up to 20 meta parameters can be returned.
- The following value types are allowed:
- string
- number
- boolean
- array
Cookie expiration
By default, the _snrs_p, _snrs_uuid, and _snrs_puuid cookies expire after 400 days. You can change this by using the cookieExpiration parameter. The value is the number of days after which the cookies expire.
- If a browser’s cookie expiration limit is lower than your setting, your setting is ignored.
- The expiration time of the
_snrs_saand_snrs_sbcookies is 30 minutes and cannot be changed.
The following example sets cookie expiration time to 60 days:
SR.init({
    'trackerKey': 'xxxxxxxx-xxxx-xxxx-xxxx-xxxxxxxxxxxx',
    'cookieExpiration': 60
});
Authentication
Requests to the SDK may require customer authentication. For more details, see this article.