Display seasonal promotions in a mobile application
Seasonal promotions are a great way to boost sales and engagement for your business during special occasions, such as Christmas. By creating specific promotions and marketing campaigns tailored to these holidays, you can catch the attention of your customers and encourage them to make a purchase.
The Synerise Documents feature facilitates distributing seasonal promotions in your mobile application thanks to the ability of grouping them into specific categories. For example, you can create multiple documents that contain Christmas promotions and assign them to a single Seasonal group, then create a screen view campaign which will display all documents assigned to the Seasonal group. You can schedule this screen view campaign to be displayed in the specific time of year.
In this use case, we’ll show you how to create two documents with Christmas promotions and adding them to the Seasonal group. This group will be used while creating a screen view campaign, presented for your all users of the mobile application.
Prerequisites
- Implement Synerise SDK in your mobile app.
- Create Christmas promotions
- Meet the screen views requirements
- Meet the documents requirements
Process
In this use case, you will go through the following steps:
- Create two documents with basic Christmas promotion targeted to all application users, create a
Seasonalgroup and add these two documents to this group. - Create a screen view that will display the documents from the
Seasonalgroup to all mobile application users.
Create a document
As the first part of the process, you will create two documents with the promotions you created in Synerise. You will also create a Seasonal group and assign these two documents to this group.
-
Go to
 Data Management > Documents > Add document.
 -
Enter the name of your document.
-
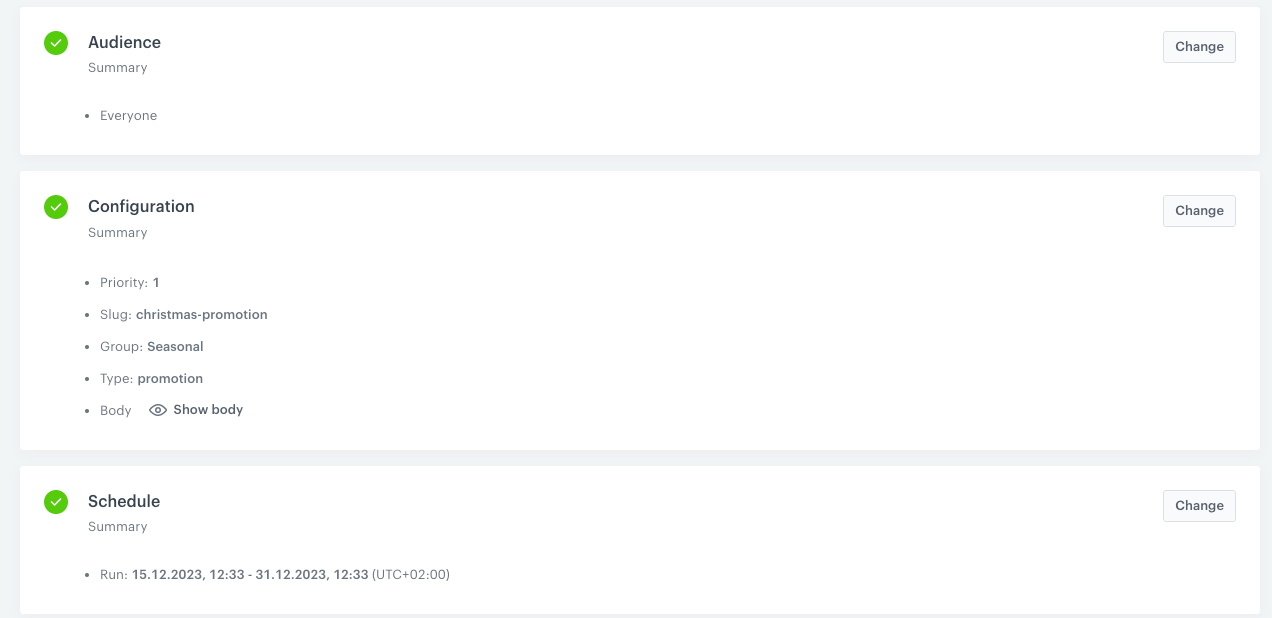
In the Audience section, choose to whom the document will be displayed. Select Everyone.
-
In the Configuration section:
-
In the Slug field, enter the slug of the document, we recommend using the following name convention:
this-is-slug-name. -
In the Priority field, use a number to define the document priority. The order of documents is defined by the priority value (1 is the highest, 100 is the lowest).
-
From the Group dropdown list, click Add group.
-
On the pop-up, in the Group name field, enter
Seasonal. Result: The group is added and selected. -
From the Type dropdown list, select a document type. Document type defines how the document is validated by your mobile application. To create a new type, from the dropdown list, click Add type.
Note: Full explanation of the type is available here. -
In the Body field, add the content of the promotion in the JSON format. Below you will find an easy examples of the document body that contains the promotion created in Synerise. You can add more elements to your JSON code like for example buttons, colors, tags, and so on.
{
  "content-type": "promotion",
  "background-color": "#123321",
  "title": "Christmas Promotion",
  "promotion": "{% promotion fields=uuid,name,discountType,discountValue,code,params,tags,type,price,images,description,expireAt %} 3a3750b0-c00b-4c57-9c5f-d55652b417a0 {% endpromotion %}"
}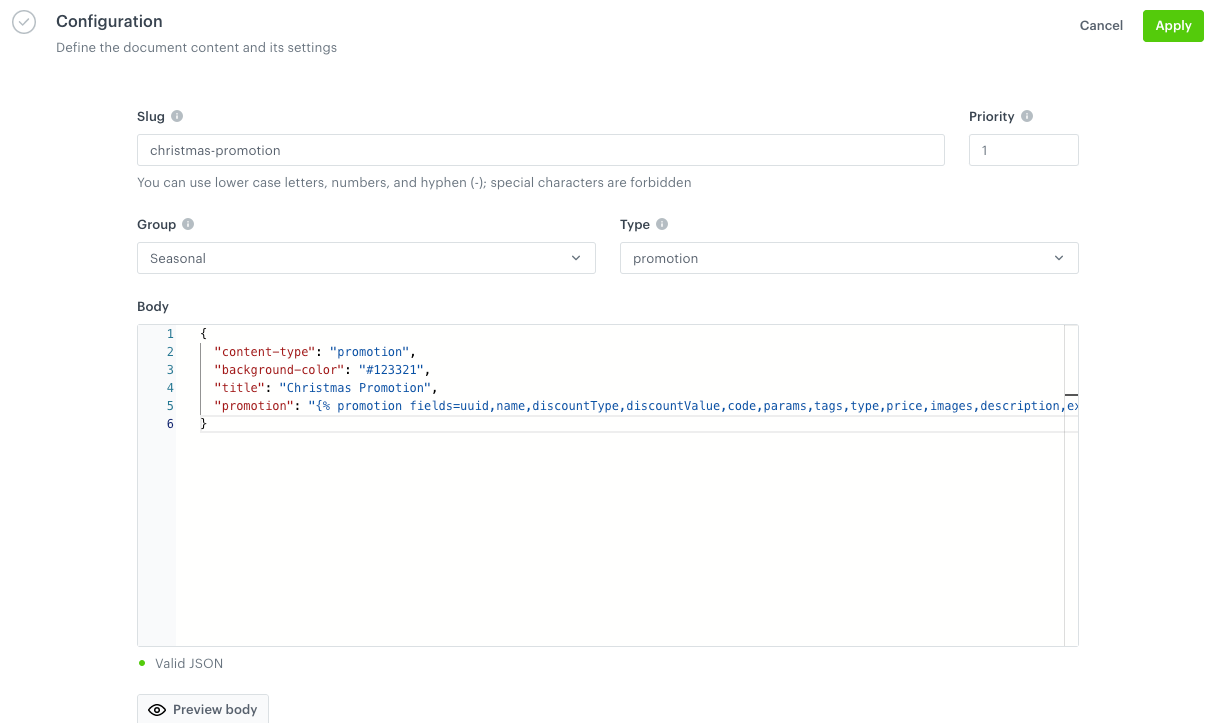
Document configuration -
Optionally, to check the document display for a specific customer, use Preview body.
-
To save your changes, click Apply.
-
-
In the Schedule section, set up when the document will be active. 2. Select the Scheduled tab. 3. Select the date and time when the document will be active. 2. Click Apply to save your changes.
-
Click Activate.
Document configuration -
Create another document with the Christmas promotion in the same way as described previously. Change the visual project and JSON code for this document. Remember to add this promotion to the
Seasonalgroup. Additionally, you can change the schedule for this second promotion, based on your business needs.
Create a screen view
Create a screen view campaign for the group of documents created in the previous part of the process.
-
Go to
 Communication > Screen views > New Screen View.
 -
Enter the name of the screen view.
-
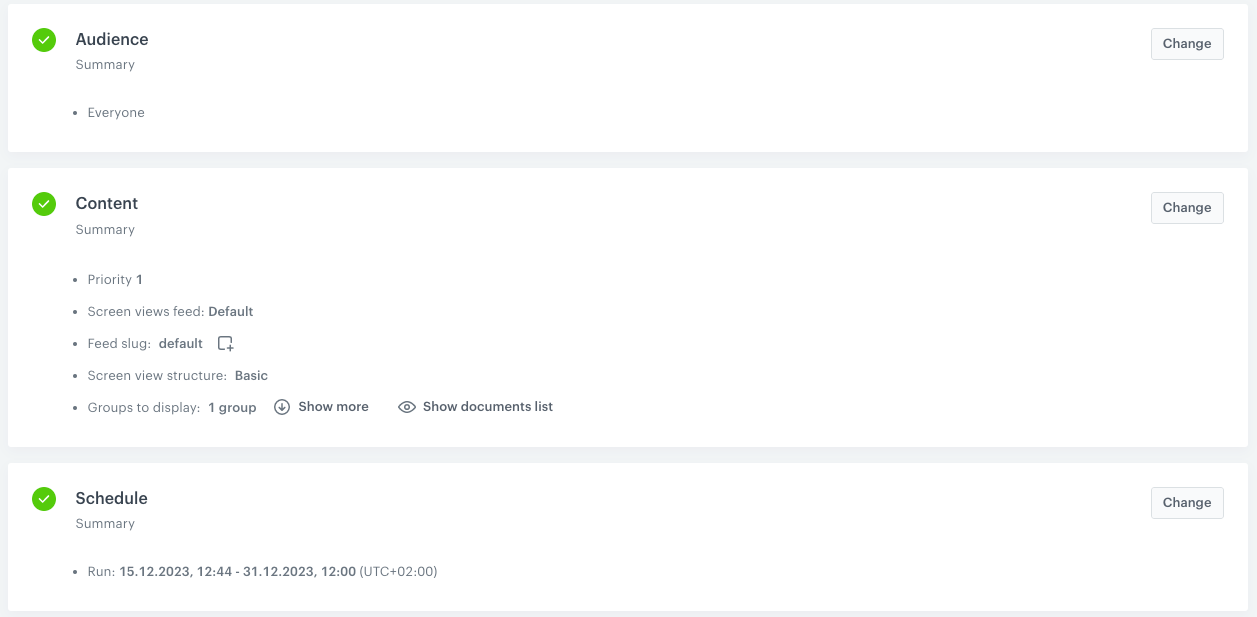
In the Audience section, choose to whom the message will be displayed. In this case, select Everyone.
-
Confirm your choice by clicking the Apply button.
-
To create the content of your screen view, in the Content section click the Change button.
-
In the Screen views feed, select the general feed to display.
-
Set up the Priority. If multiple screen views match the conditions, the one with the higher priority is displayed (1 is the highest, 100 is the lowest).
Note: You can learn more about the order of displaying multiple screen views here. -
In the Documents to display section, click Groups.
-
Select the
Seasonalgroup.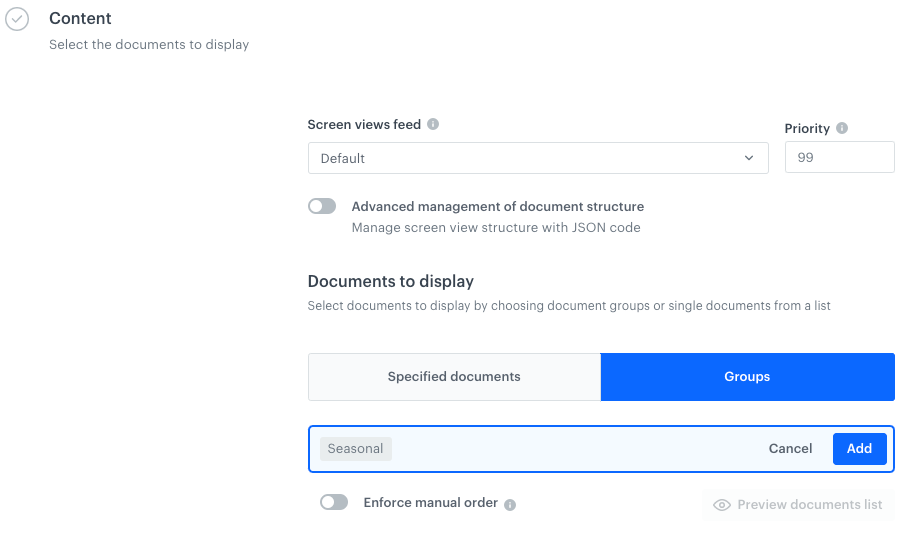
The configuration of the screen view -
Confirm the choice by clicking Add.
-
To save your changes, click Apply.
-
-
Go to the Schedule section and click the Change button.
- Set up when campaign will be active using the Run immediately option or schedule the display of the screen view using the Scheduled option.
- To apply your changes, click Save.
-
To run your screen view campaign, click Activate.
What’s next
For a screen view to be visible in a mobile application, you must fetch it using the appropriate SDK method for: