Smart alerts about problems with campaign display
Synerise workflows allow you to create customized mechanisms, thanks to which you can monitor any campaign you create and see if it is properly displayed, what results it generates, whether it is clickable, etc. One of such types of campaigns are recommendation campaigns displayed on the website or in the application, which let you prepare fully personalized content for your audience. The key element during creating recommendation campaigns is controlling if they are displayed correctly for your customers.
Problems with campaign display might occur in case of:
- changes on the website (for example in HTML structure or CSS selectors),
- problems in settings of campaign filters (too narrow),
- errors in product feed.
Alerts are very efficient in cases that require immediate actions. When an incident occurs, you can use a workflow which generates an alert message and sends it to your Slack channel with information that your campaign does not work. In this situation, you can react immediately and check the campaign settings.
In our use case, we will create a workflow that starts hourly and checks if the recommendation campaign on the website was generated any and displayed during the last 60 minutes. If not, the workflow sends an alert message to the Slack channel. When counting how many times the recommendation was displayed, we will use events generated in the customer’s profile every time it happens.
Prerequisites
- Implement a recommendation campaign on your website that you want to monitor. Check our use cases to learn more how to do it step by step.
- Create an incoming webhook in Slack.
Process
In this use case, you will go through the following steps:
- Create a metric which counts how many times a campaign was displayed during the last 60 minutes.
- Create a workflow that sends an alert message.
Create a metric
In this part of the process, you create a metric which counts how many times a recommendation was displayed during the last 60 minutes.
- Go to
 Analytics > Metrics > New metric.
 - Enter the name of the metric.
- As the metric type, select Simple metric.
- As the aggregator, set Sum.
- As the occurrence type, set All.
- From the Choose event dropdown list, select dynamicContent.show.
- Click
 button.
 - Click the Choose parameter button.
- From the dropdown list, select id.
- Click the Choose operator button.
- From the dropdown list, select Equal.
- As the value of the operator add the ID of your dynamic content campaign. To find it, go to Communication > Dynamic content, find your campaign on the list and click the three-dot button. Hover over the ID of the campaign and click Copy ID.
- Click Save.
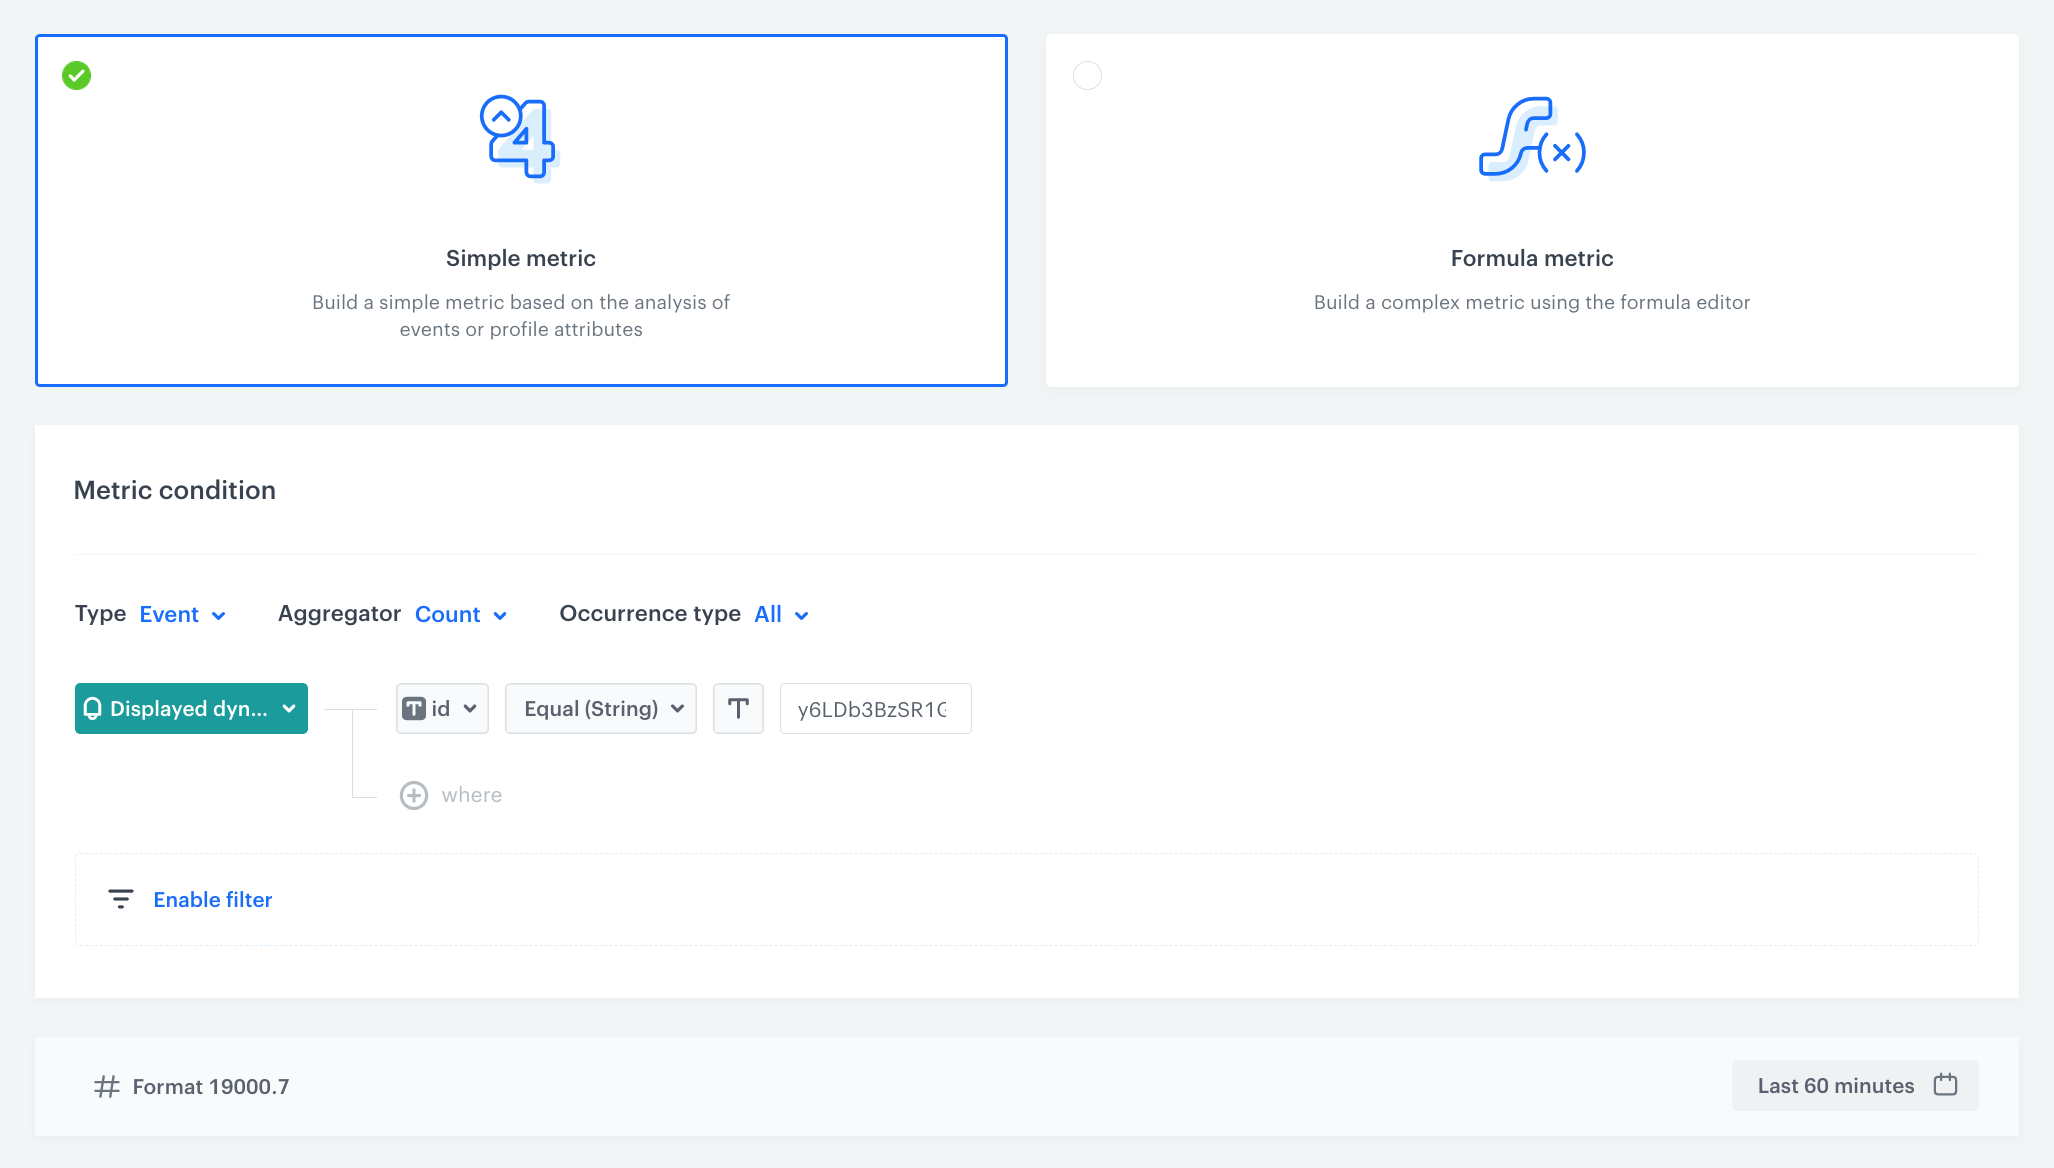
dynamicContent.show event when the campaign is displayed on the website. This event has an id parameter which specifies the ID of the dynamic content campaign. However, this metric can be based on any other event, depending on how the campaign is implemented.Create a workflow
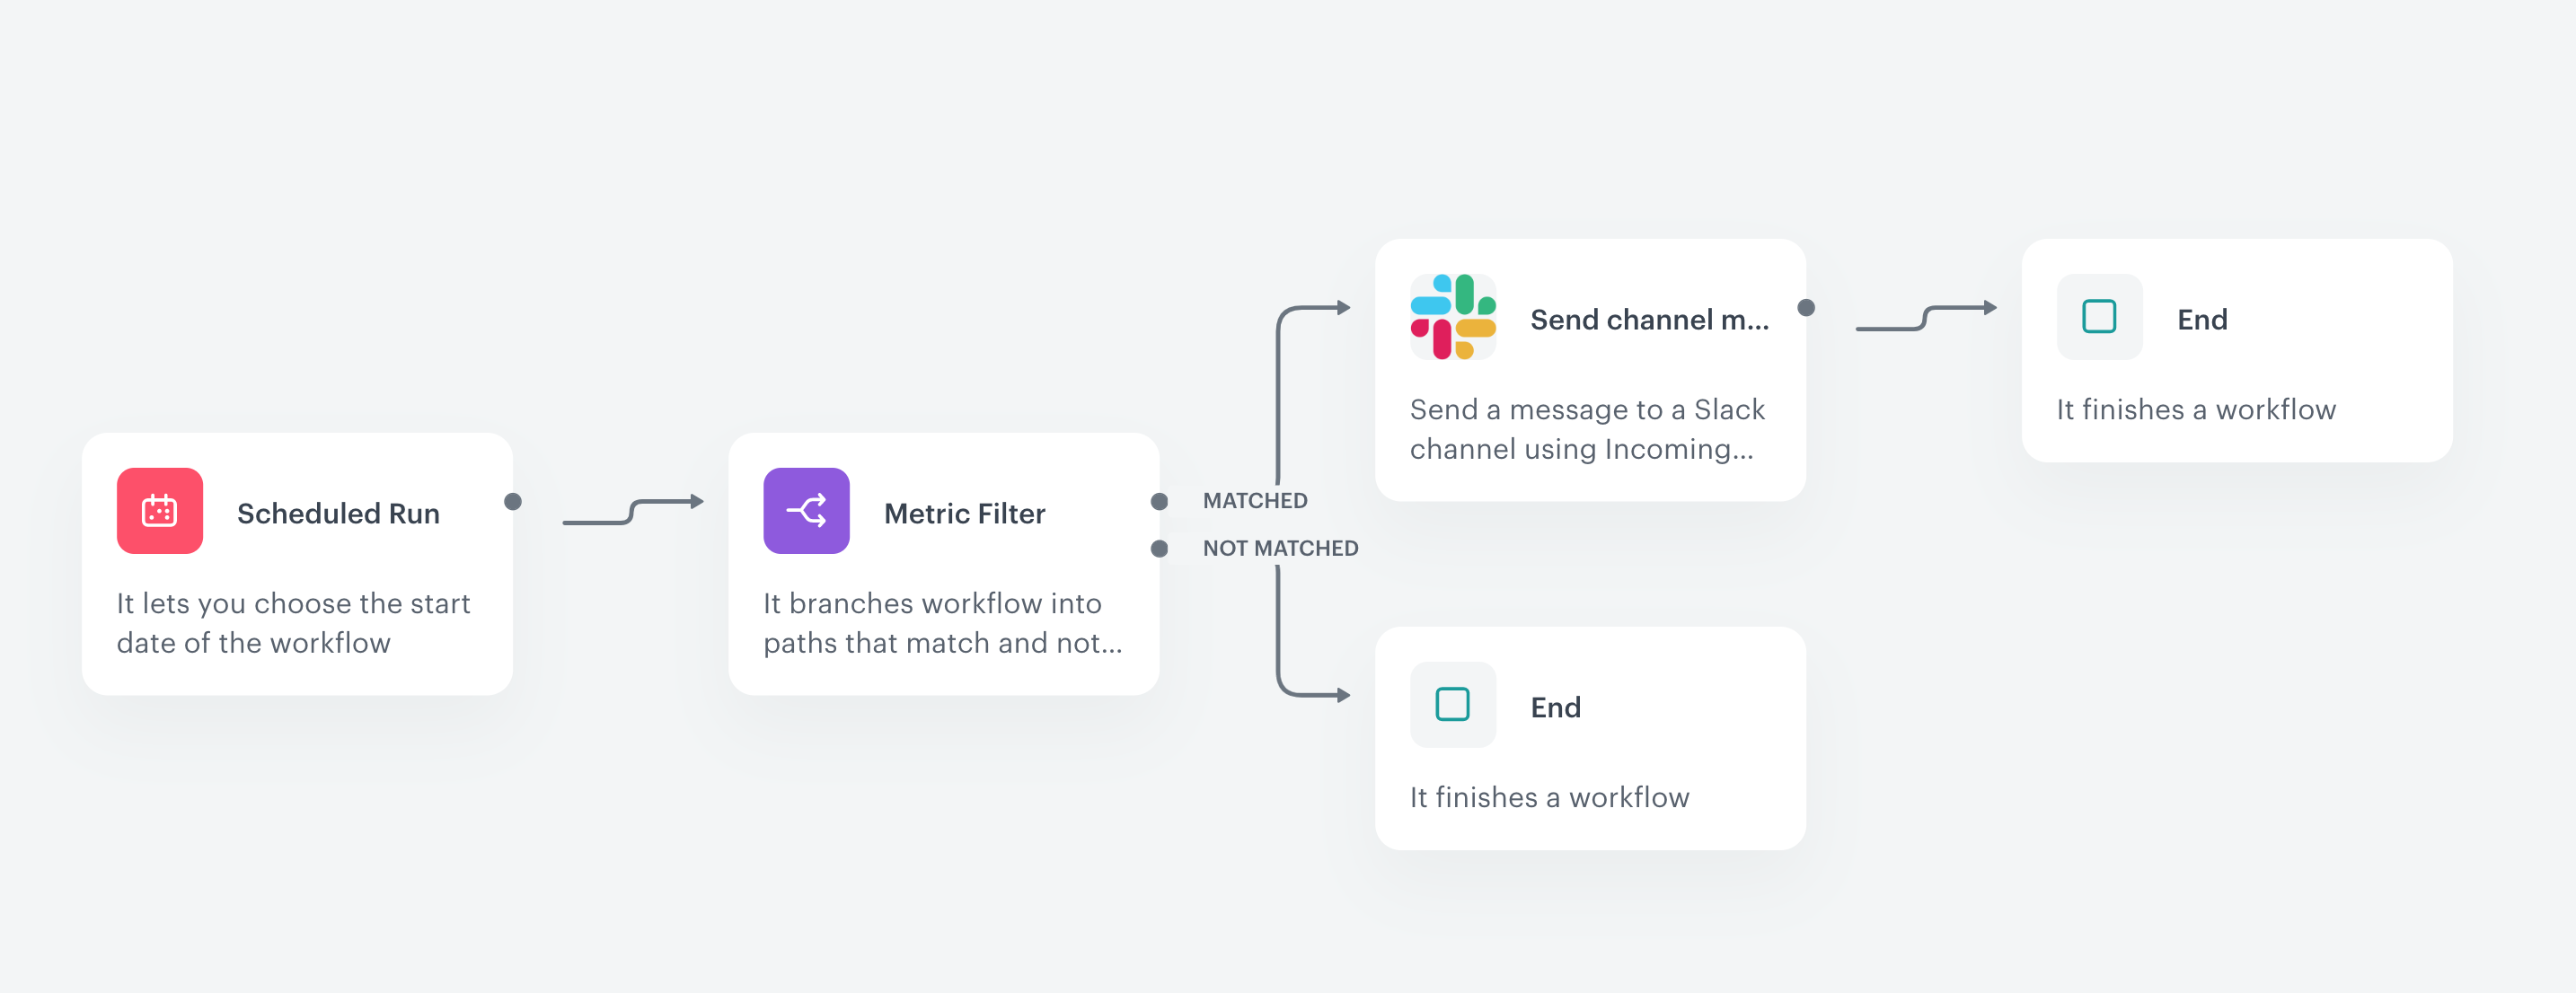
In this step, you will create a workflow which triggers every hour and checks if the campaign was displayed in the last 60 minutes. If not - it sends an automatic alert to your Slack channel.
- Go to
 Automation > Workflows > New workflow.
 - Enter the name of the workflow.
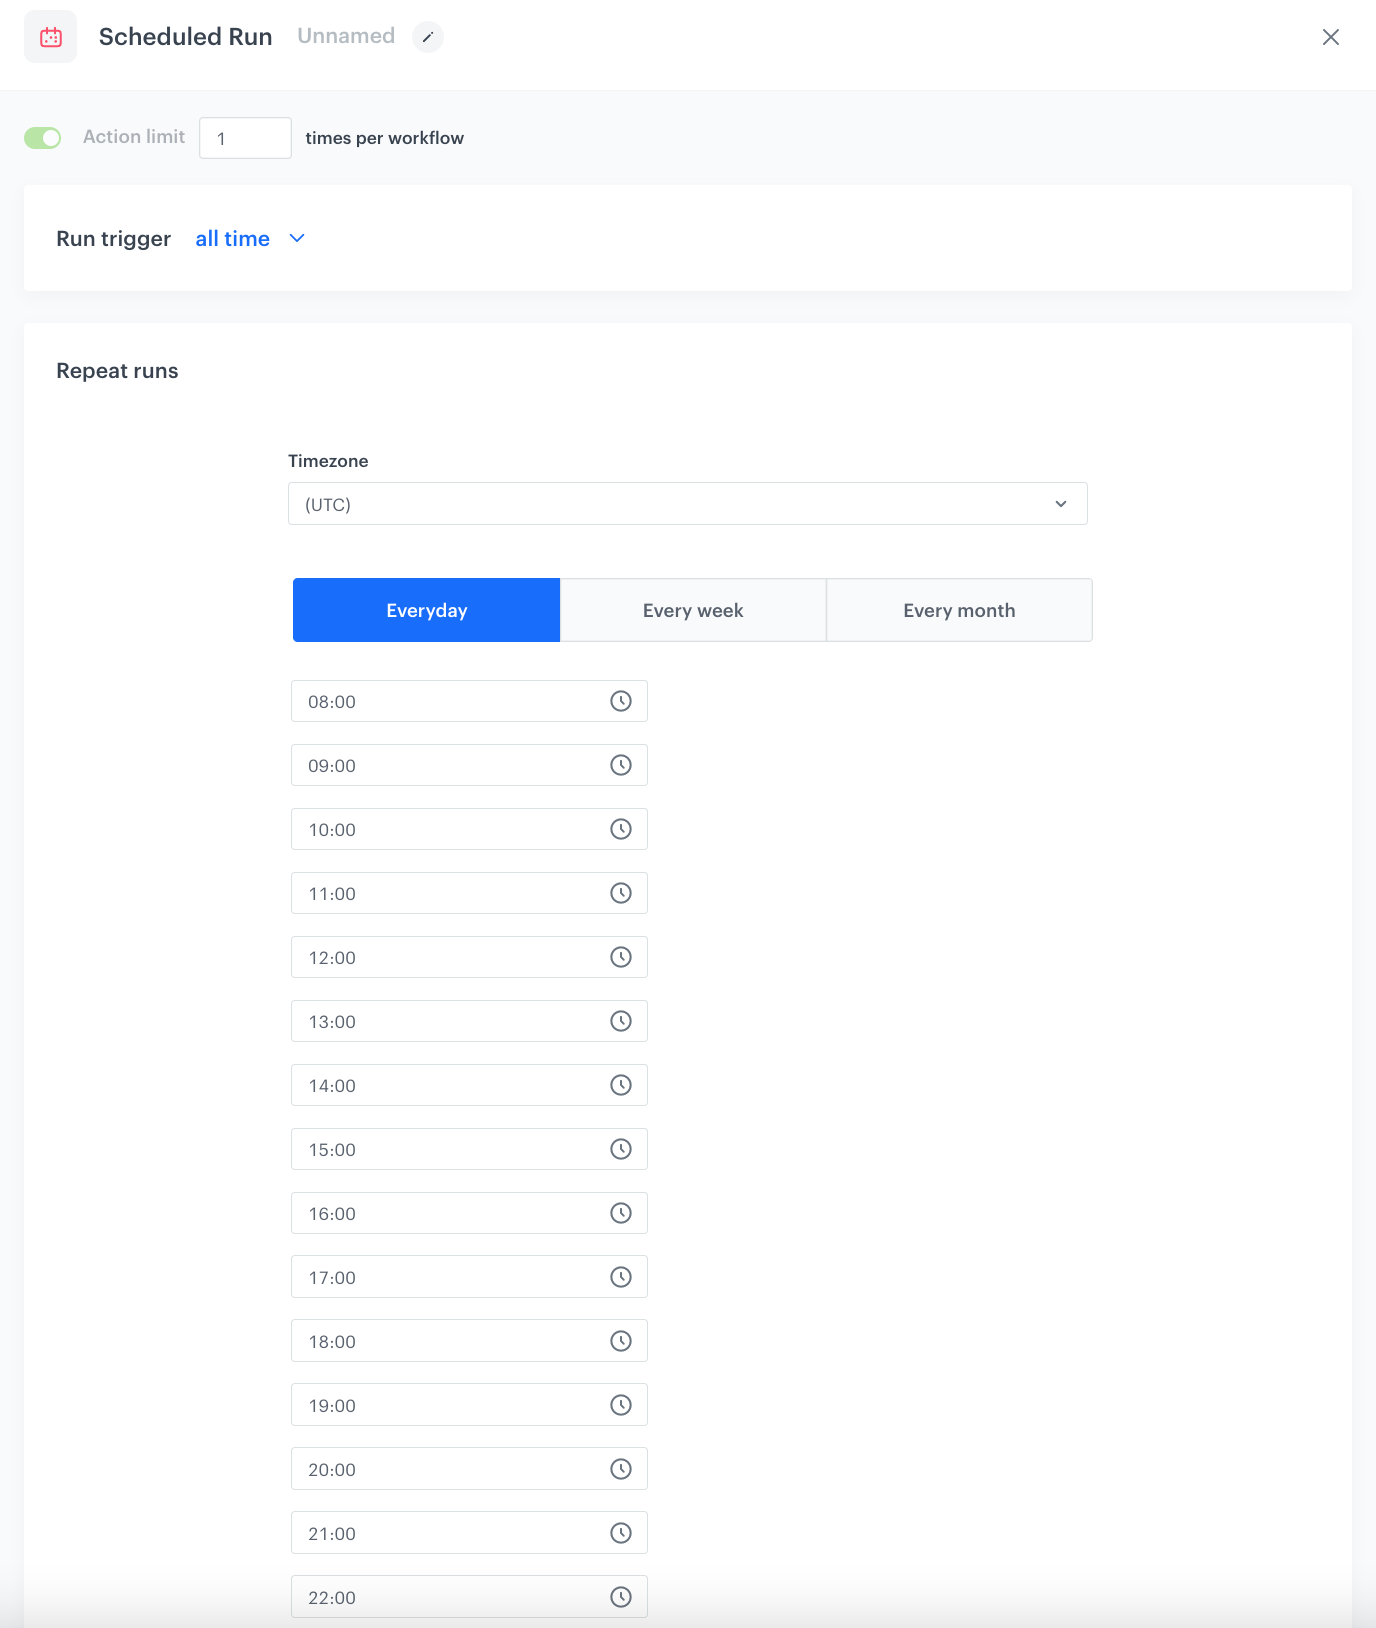
Define the Scheduled Run trigger node
At this stage, you configure the conditions that trigger the workflow.
- As the trigger node, add Scheduled Run.
- In the configuration of the node:
- Leave the Run trigger option at default (all time).
- From the Timezone dropdown list, select the time zone consistent with the timezone selected for your workspace.
- Define the frequency of the workflow. In this use case, it’s every day, every hour from 8:00 to 22:00.
- Confirm by clicking Apply.
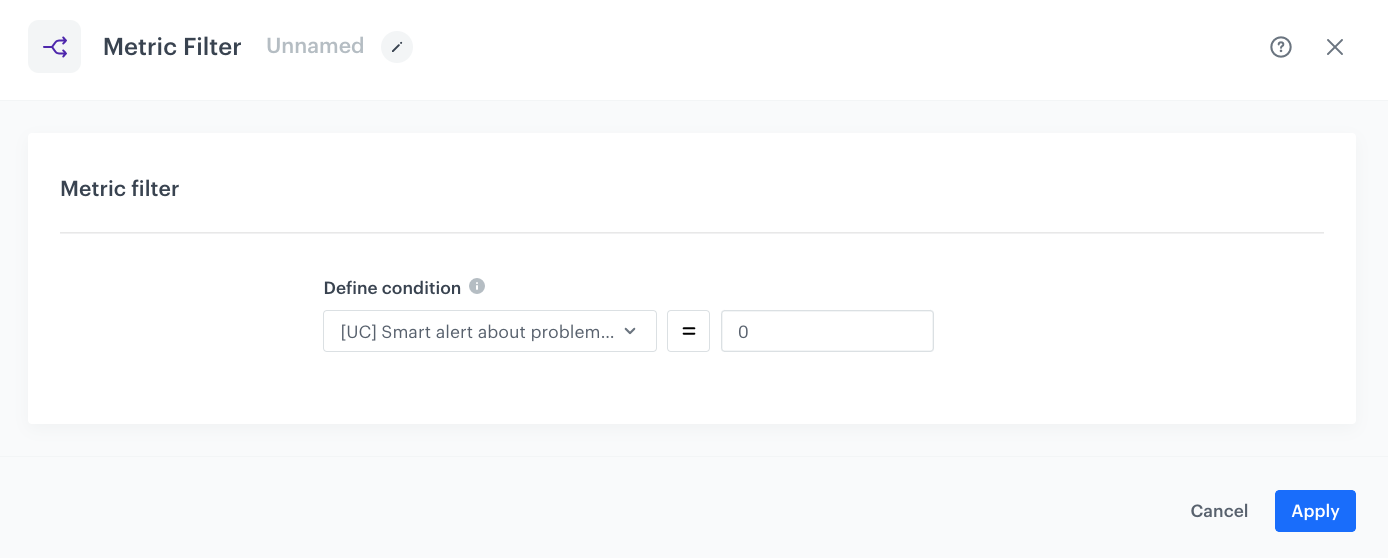
Define the Metric Filter node
In the Metric Filter node, you will select the metric prepared in the previous part of the process. The continuation of the workflow will depend on the result of the metric. If the metric result is equal to or less than 0, an alert will be sent to a Slack channel.
- After the trigger node, add Metric Filter.
- In Define condition, choose the metric created in the previous step.
- As the condition, by using the mathematical operators, set the metric result as equal to
0. - Click Apply.
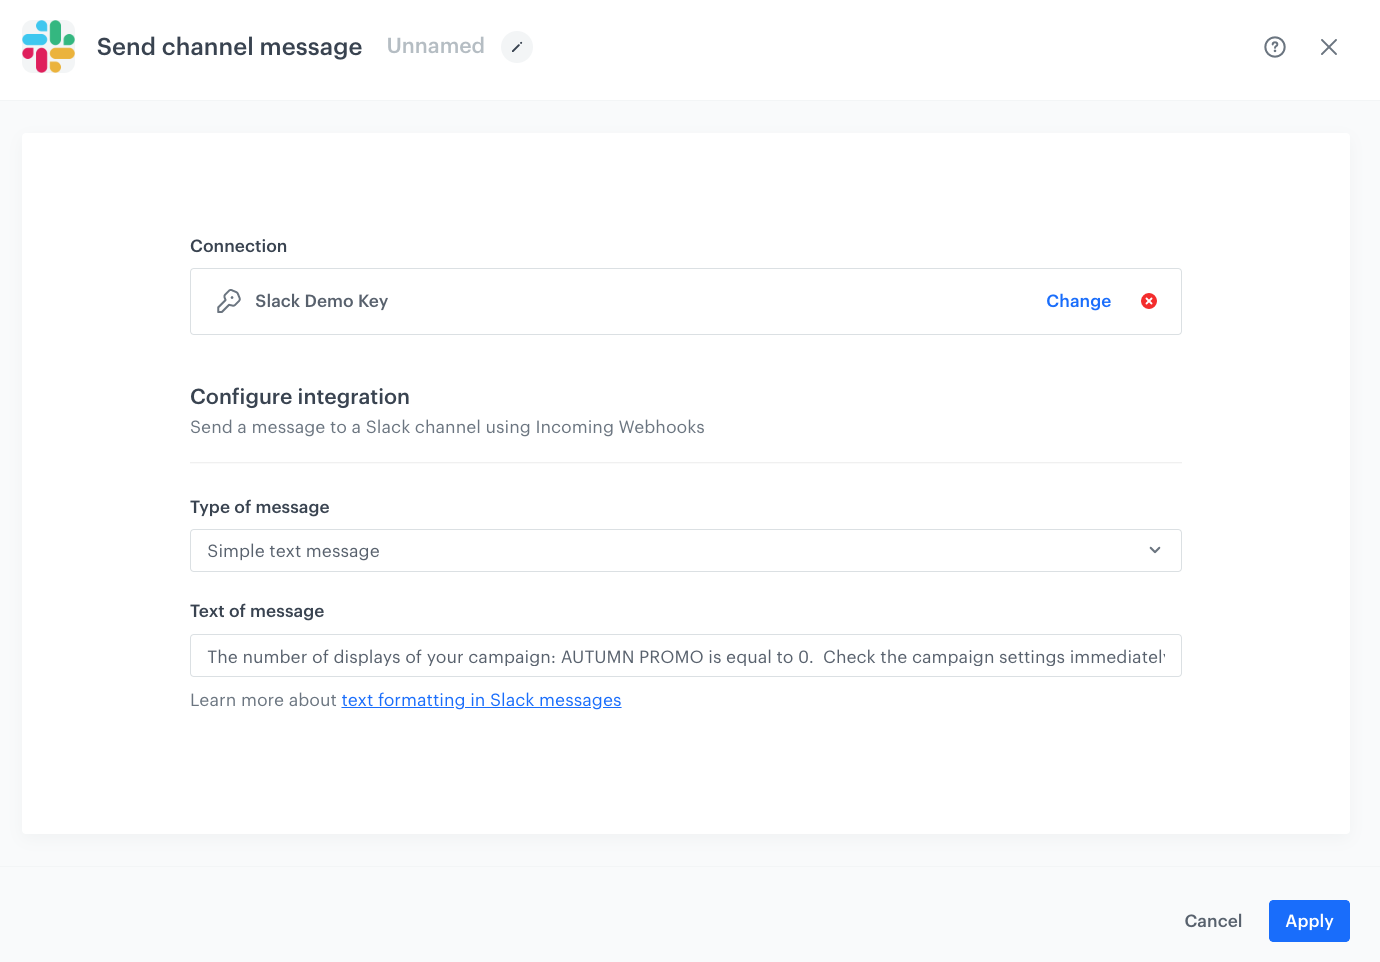
Define the Send channel message node
In this step, you will configure the settings of the outgoing integration that sends the alert message to a Slack channel.
Create a connection
- As the matched path after the Metric Filter node, add the Slack > Send channel message node.
- In the configuration of the node:
- If you already have created a connection, select the connection from the list.
- If you haven’t created any connection yet:
- At the bottom of the dropdown list, click Add connection.
- In the Incoming Webhook URL field, enter the incoming webhook URL you created as a part of prerequisites.
- Click Next.
- In the Connection name field, enter the name for the connection you created.
- Click Apply.
Result: A connection is created and selected.
Define the integration parameters
- In the Type of message field, choose Simple text message.
- Below, in Add text message, add the content of the message which should be sent to the Slack channel.
- Confirm by clicking Apply.
Prepare the final settings
- Add End nodes where the workflow should finish for users.
- Optionally, define capping.
- Optionally, add titles to each node so the workflow will be more understandable to your colleagues.
- Name the workflow.
- To save it as a draft, click Save, or activate the workflow by clicking Save & Run.
Check the use case set up on the Synerise Demo workspace
You can check the metric and workflow configuration directly in Synerise Demo workspace.
If you don’t have access to the Synerise Demo workspace, please leave your contact details in this form, and our representative will contact you shortly.