
Send segmentations from HubSpot to Synerise
This use case demonstrates the integration between Synerise and HubSpot. The integration allows you to send any data collected in HubSpot to Synerise. In this way, you can supplement the data you collect in Synerise with additional information you gather in HubSpot, unlocking the full potential of your data.
In this use case, we will focus on creating an integration that imports customer’s data from HubSpot into Synerise.
Prerequisites
- A HubSpot Pro account is required.
- Your workspace must have API key permission for creating profiles:
API_BATCH_CLIENT_CREATE
Process
- Create an incoming integration for HubSpot clients data.
- Create a workflow for handling incoming data from HubSpot.
Create an incoming integration for HubSpot customer data
In this part of the process, create incoming integrations in Synerise to which you will send customer’s data from Hubspot.
-
Go to
 Automation > Incoming > New integration.
 -
On the pop-up, select Without authentication.
-
Enter the name of the webhook.
-
In the Endpoint section, click Define.
Important: The URL field is already filled in with the endpoint to which the data from HubSpot will be sent. -
Optionally, you can add an icon to this integration.
-
Confirm by clicking Apply.
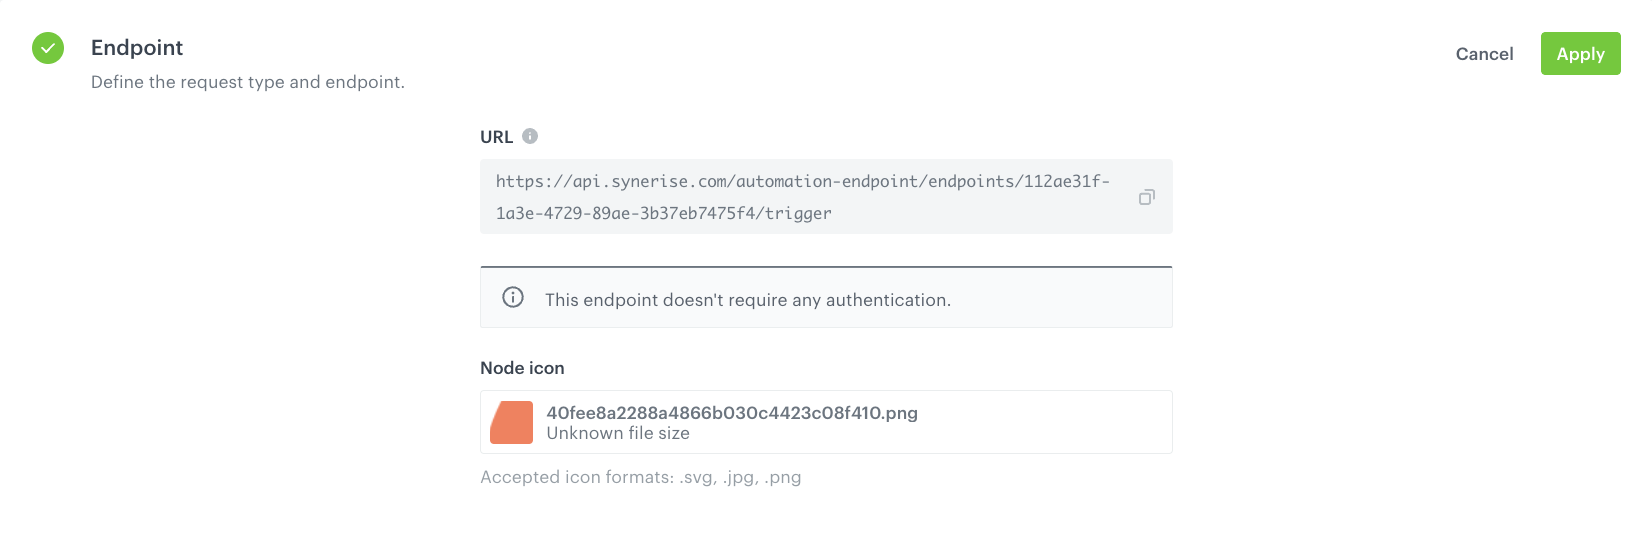
Configuration of the Endpoint section -
In the Incoming data section, click Define.
-
Click Retrieve data.
There are two ways of retreving data:-
You can send direct cURL request.
Click to expand the instruction on sending cURL requestRight after you click the button, send a request to the endpoint in the Endpoint section with the sample of data that will be sent through HubSpot. The system waits for the incoming request for 1 minute and 30 seconds.
Important: Replace the endpoint URL from the example below with the endpoint URL from step 4.An example of cURL request:
curl --location 'https://api.synerise.com/automation-endpoint/endpoints/112ae31f-1a3e-4729-89ae-3b37eb7475f4/trigger' \ --header 'Content-Type: application/json' \ --data-raw '{ "associated-company": { "company-id": 43535242, "portal-id": 123413, "properties": { "address": { "value": "NYC 123 Main Street, US" }, "city": { "value": "NEW YORK" }, "cliente": { "value": "123413" }, "closedate": { "value": "1519039262794" }, "country": { "value": "USA" }, "createdate": { "value": "1519038967696" }, "associated-owner": { "email": "joedoetesthb@example.com", "first-name": "", "hubspot-user-id": 123454321, "last-name": "", "type": "PERSON" } , "canonical-vid": 11 } } }' -
You can send Webhook from HubSpot to the endpoint you created earlier in the process.
Click to expand the instruction on sending webhook from HubspotNavigate to the Workflows in the HubSpot and create a new workflow that will send a webhook with the selected clients segments to Synerise.
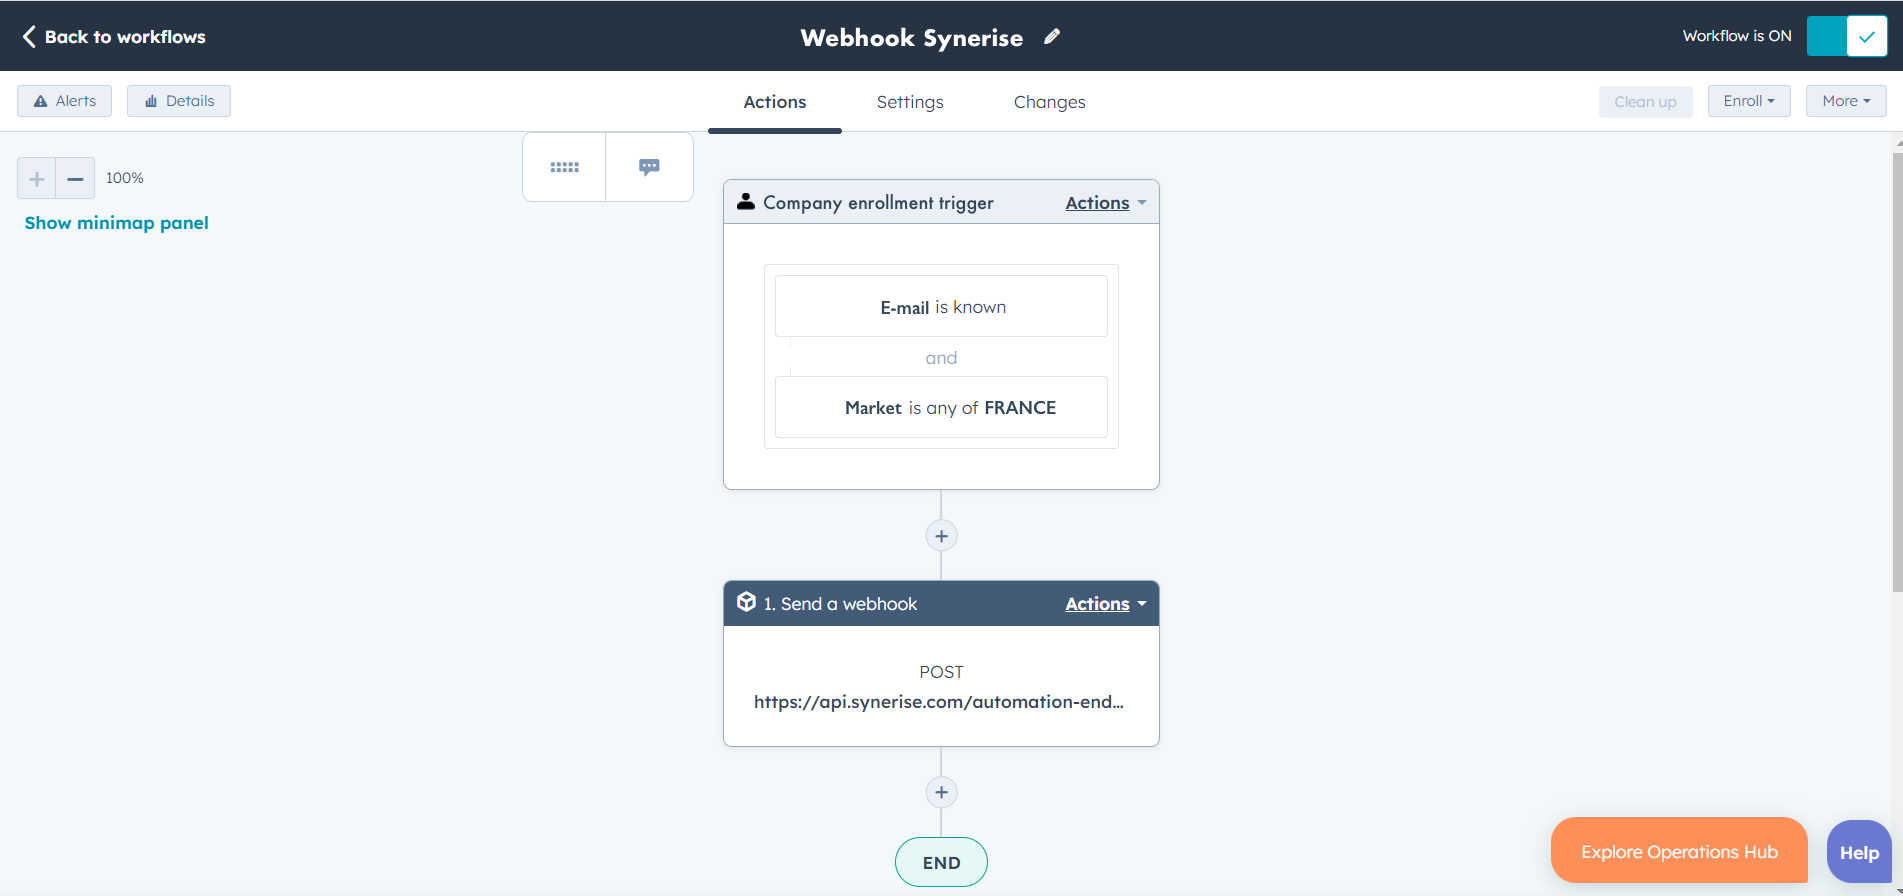
HubSpot workflow configuration - Define the workflow trigger, which in our case should be a segment of clients which data will be send to Synerise.
- Configure the webhook:
- Select POST method.
- Enter the webhook URL (the endpoint you created earlier in the process).
- Select the appropriate authentification type.
- Choose the properties you want to include in the webhook request body.
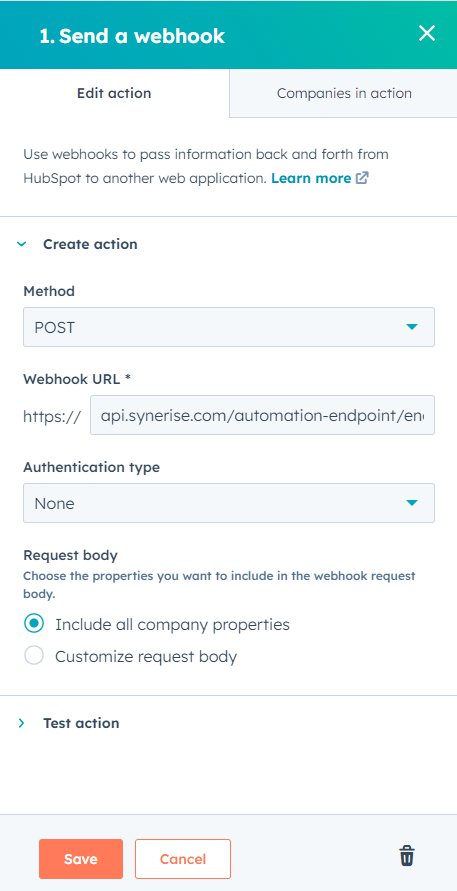
Webhook configuration - Test your webhook to see the response and be able to select which fields to output for use later in your workflow.
- Save your configuration and finish the workflow.
-
-
When the endpoint receives data from the request, verify the list of variables. If the variables include those which are in the payload, click Define. If not, to re-send the request, click Start again, and wait for the results.
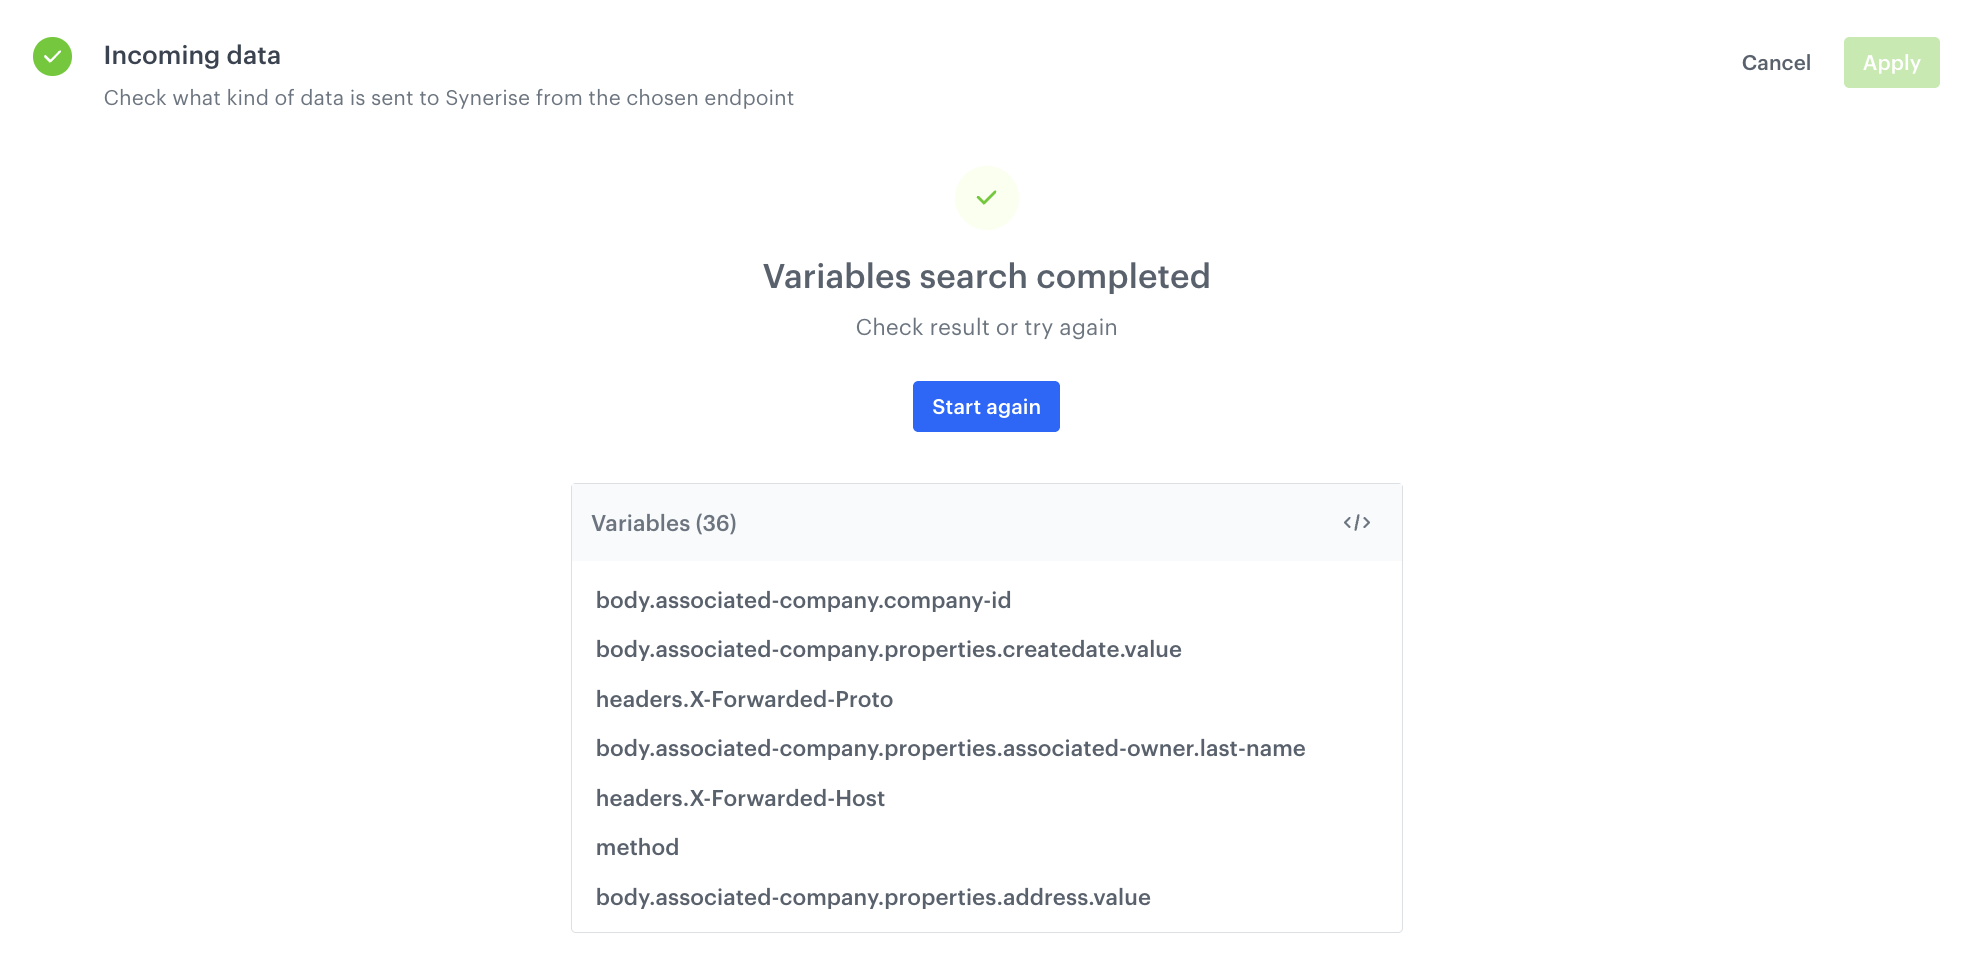
Collected variables from the request -
Click Save & publish.
Create a workflow for handling incoming data from HubSpot
As the final part of the process, create a workflow which captures data sent to the incoming integration you created in the previous part of the process and creates customer’s profiles with the attributes defined earlier in the process. The workflow starts with the business event trigger (for customer’s data) that is launched every time the data from HubSpot is sent to Synerise. In response to that, customer’s profiles are created.
- Go to Automation > Workflows > New workflow.
- Enter the name of the workflow.
Define the business event node
-
As the trigger, select Business Event. In the configuration of the node, select the incoming integration for customer’s data you created as the first part of the process.
-
Confirm by clicking Apply.
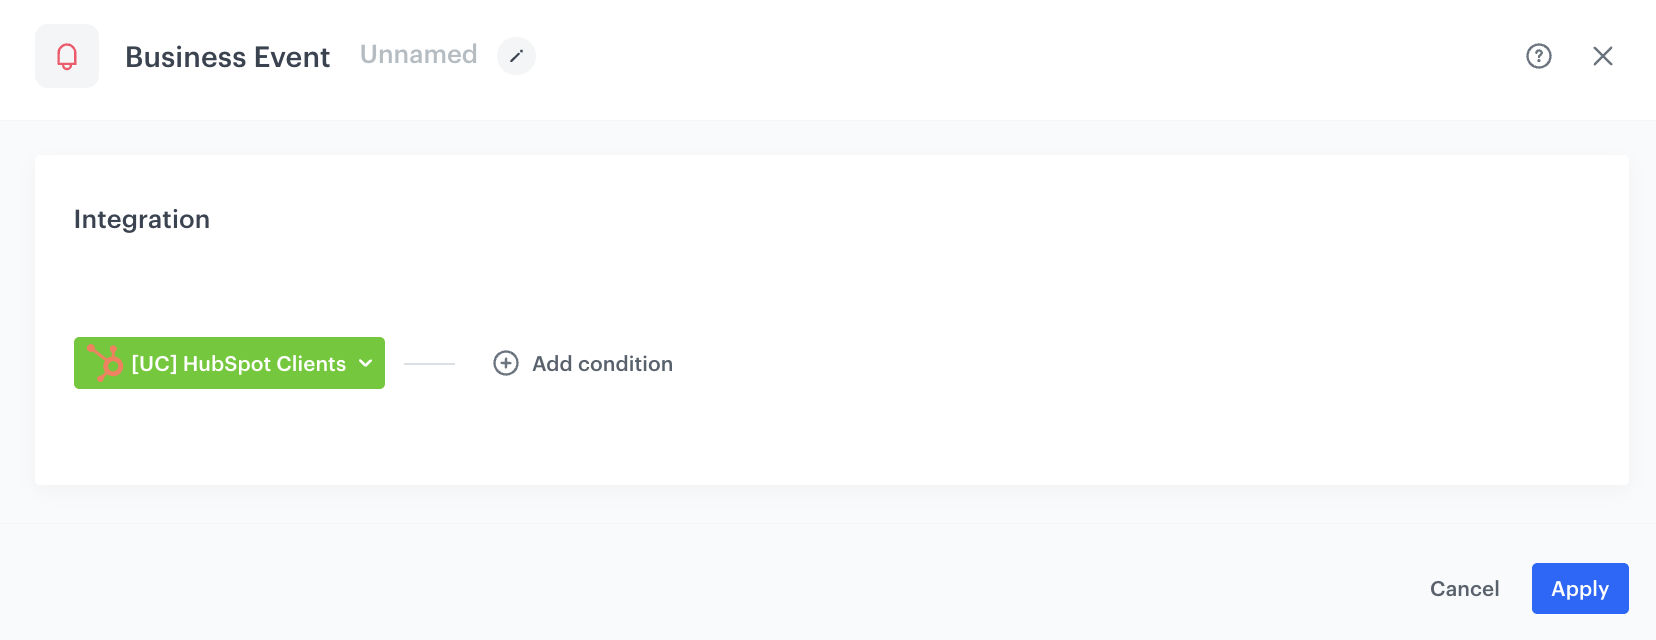
Business event node configuration
Define the Outgoing integration node
In the Outgoing Integration node, create a webhook that will create a customer’s profile with the selected attributes sent from HubSpot.
-
From the dropdown list, select the Outgoing integration node.
-
Click the node. In the configuration of the node:
-
Select the Custom webhook.
-
Enter the name of the webhook.
-
Select the POST method.
-
Enter the endpoint URL:
https://api.synerise.com/v4/clients/batch -
Enter the following headers:
- set the
content-typeheader toapplication/json(default), - set the
api-versionheader to4.4
- set the
-
Enter the request body. For the scenario described in this use case, the body is as follows:
        [
  {

    "email": "{{request.body['associated-company'].properties['associated-owner'].email }}",
    "city": "{{request.body['associated-company'].properties.city.value}}",

    "attributes": {
      "closedDate":"{{request.body['associated-company'].properties.closedate.value}}",
      "createdate": "{{request.body['associated-company'].properties.createdate.value}}"
    },
    "tags": [
      "hubspot integration"
    ]
  }
]
Note: This is just an example, you can create JSON according to your business needs. You can use any attribute that comes in the request from HubSpot. You can read more about it here. -
In the Authorization section, select By API key.
-
From the dropdown list, select API key that has permissions to create customer’s profile.
-
-
Confirm by clicking Apply.
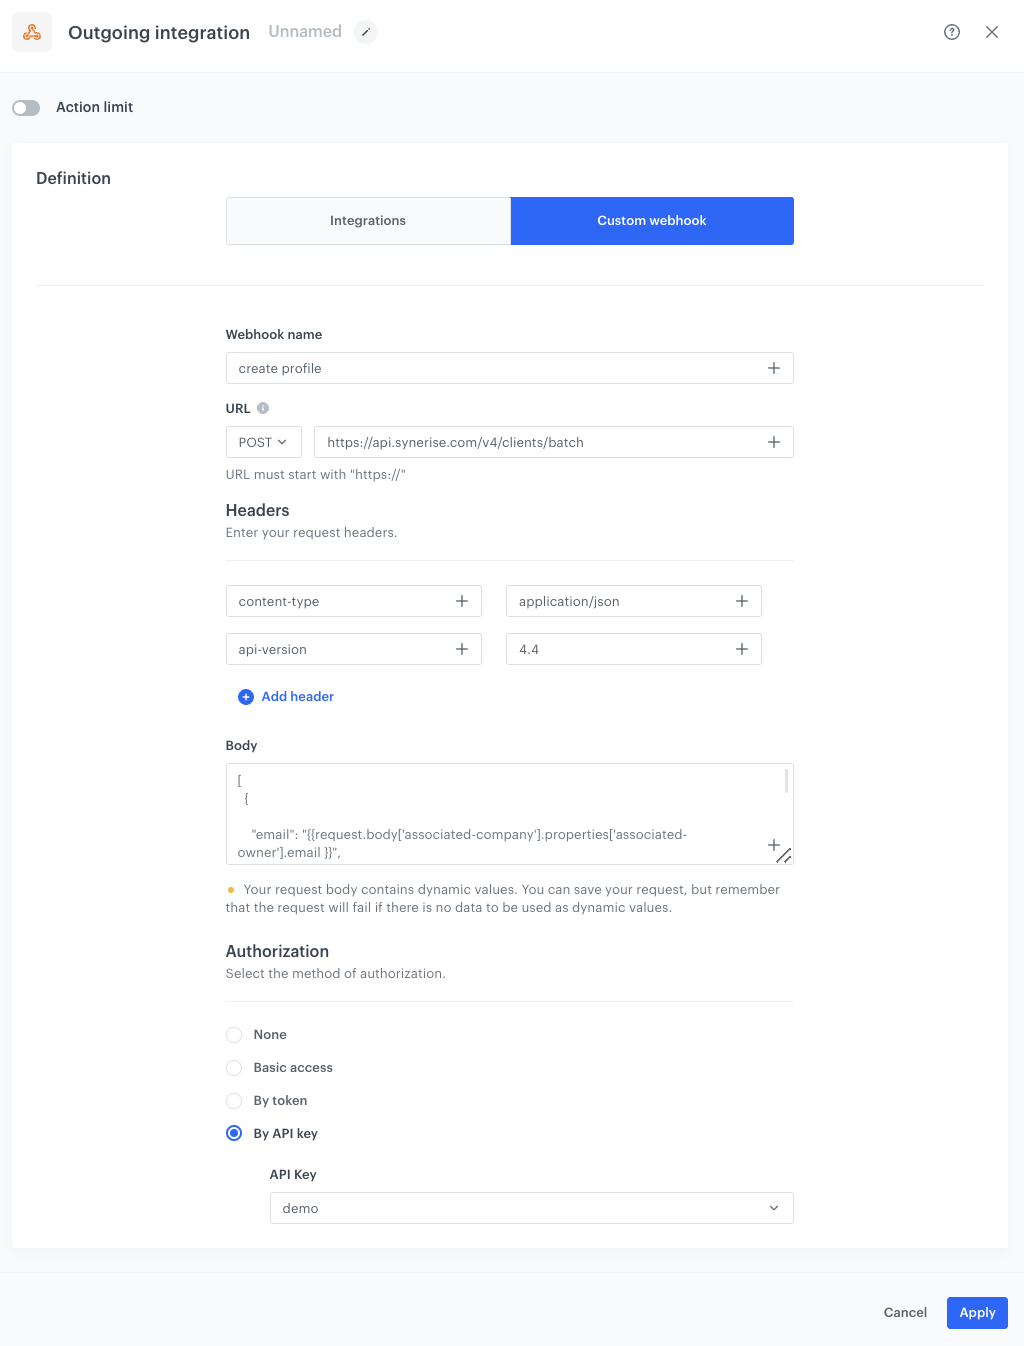
Final configuration of the Outgoing integration node
Add final setting to your workflow
-
Add the End node.
-
Launch the workflow by clicking Save&Run.

Final view of the workflow configuration
Check the use case set up on the Synerise Demo workspace
You can check the configuration of all steps described in the use case directly in Synerise Demo workspace:
If you don’t have access to the Synerise Demo workspace, please leave your contact details in this form, and our representative will contact you shortly.