API Keys
API keys are implemented in order to track and control the use of the API. Create the keys and assign permissions required for specific actions. They are essential when you integrate Synerise with other systems that you use in your daily work.
- We highly recommend changing API keys every 3-6 months for improved security.
- Changes made to API keys (creating, deleting, modifying the settings) may take a few minutes to apply after saving.
Permissions
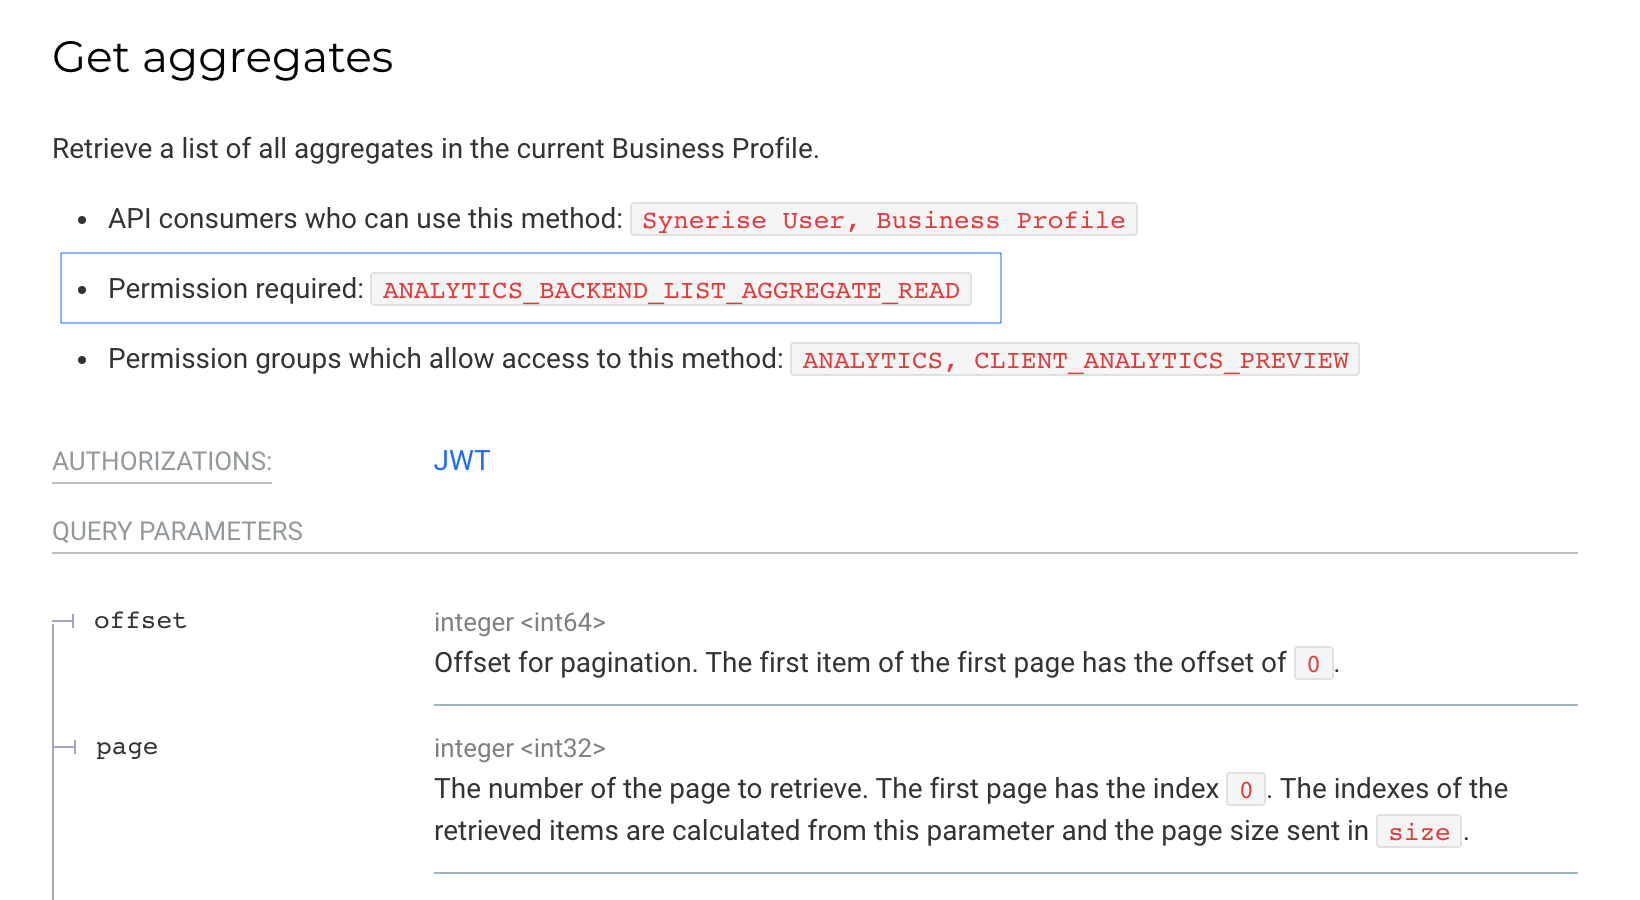
Permissions allow you to define what kind of API methods are allowed when using an API key (the API methods are available at the link here). This allows users to create customized API keys for the needs of a particular integration. Such a structure provides you with safety when a key is stolen. As an additional form of protection, there is a possibility of defining IP addresses where the given API key can be used.
Allowlist and denylist
Allowlisting and denylisting in API keys allows you to configure which types of events can be sent to the event APIs when using that key. Events that manage promotions, transactions, loyalty points can be denylisted (or not included in the allowlist) for client-type API keys unless your business requires them to be allowed. Sensitive custom events used by your integration can be blocked too, to increase protection against fraud.
Prerequisites
- Plan the API key permission structure.
- Your account’s permissions must allow access to the API keys section.
Adding API keys
- Go to Settings > API keys.
- Click Add API key.
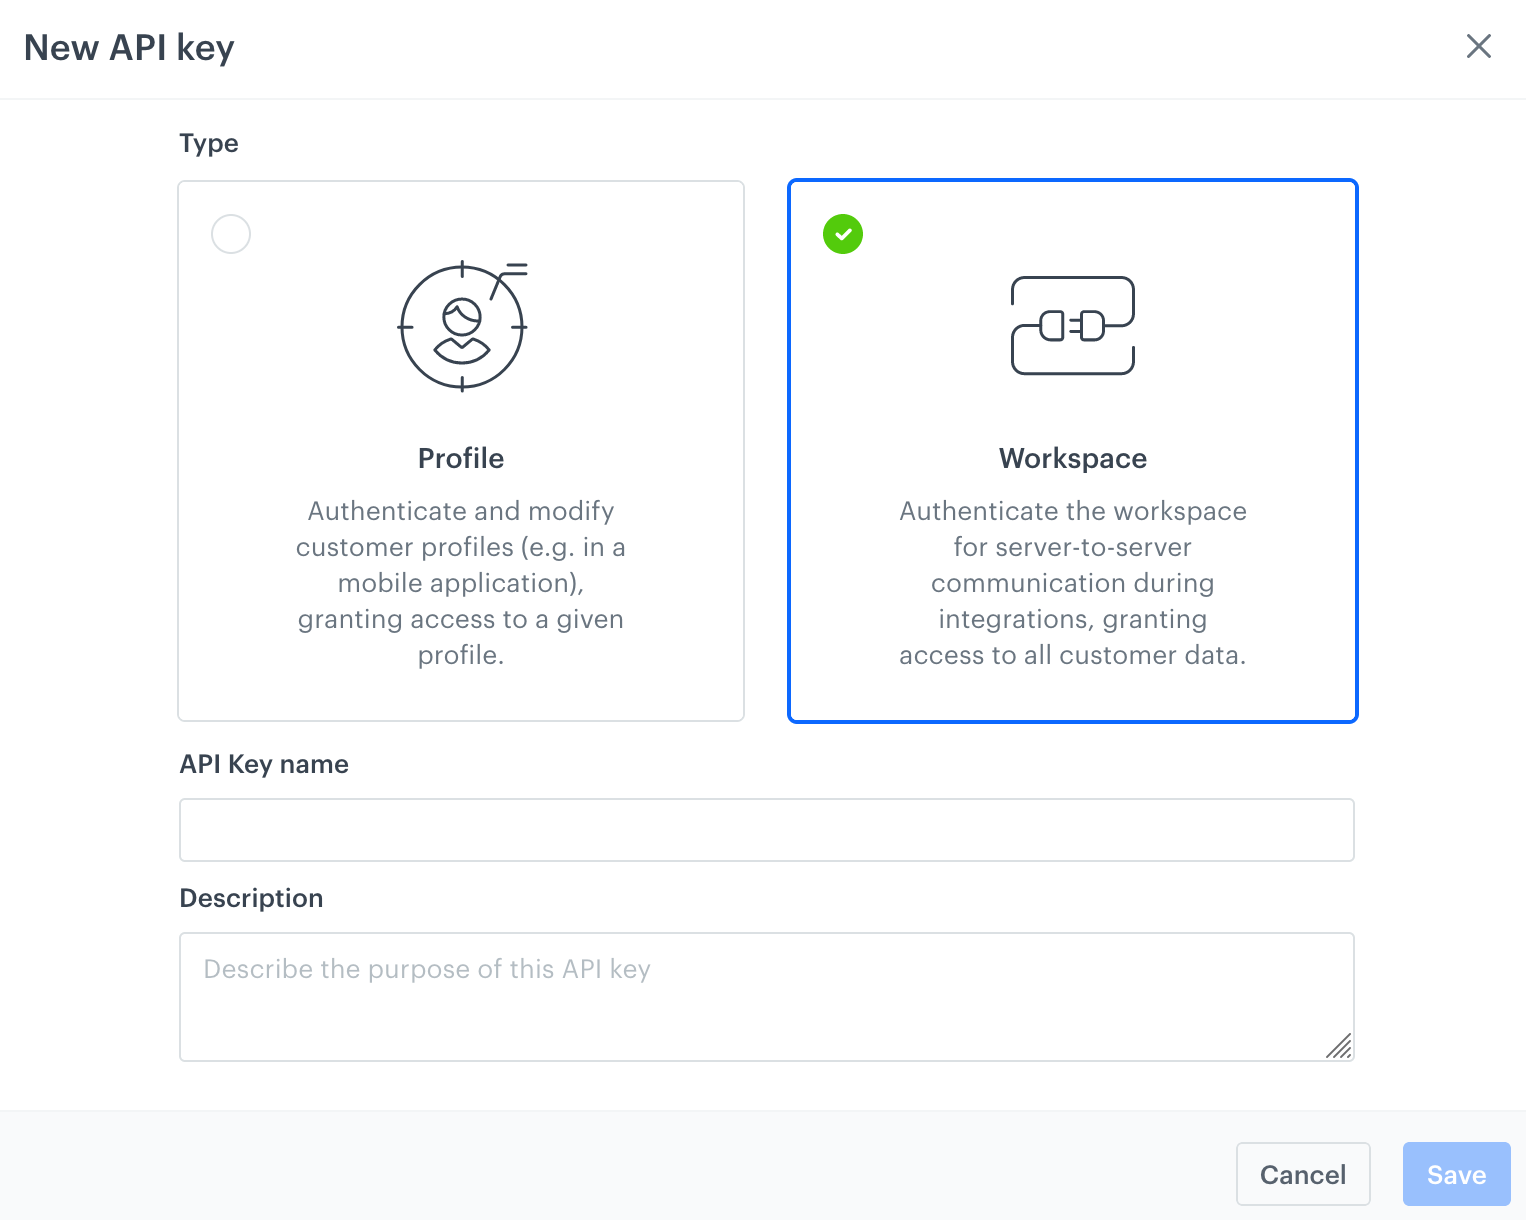
- On the pop-up:
- Select the type of the key:
- Profile - Used to authenticate profiles (for example, users of your mobile application). Allows them to register events, manage their accounts, get recommendations, and more. When authenticating with such a key, it’s only possible to access the data of the profile that is authenticated.
- Workspace - Used to authenticate as a workspace, usually for integrations such as sending batches of data. These keys are used for server-to-server communication and can be used to access all customer data, workspace settings, analytics, and more. Workspace keys require stricter security and can’t be published or included in the code of your applications and websites.
- In API key name, enter the name of the key.
- Optionally, enter a description of the key to let other users know what it is for.
Adding a new API key

A new API key on the list - Select the type of the key:
- Open the API key for editing and configure the settings.
Editing API keys
Open the settings of an API key by clicking the key in the list.
The scope of options to configure depends on the type of the API key:
- General: general settings and information about the key.
- Permissions: the types of operations that can be accessed with this key.
- Allowlist: a list of events that can be created with this key.
- Denylist: a list of events that can’t be created with this key.
- Simple authentication: a type of simplified authentication without a password.
- Profile modification allowlist: a list of profile attributes and tags that can be modified with this key.
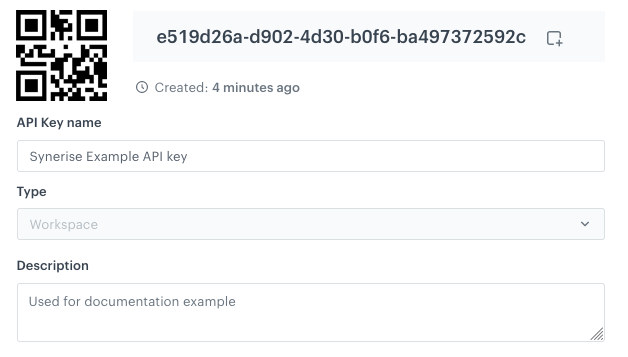
General settings
In this section, you can get your API key and change its name and/or description.
Permissions
In this section, you can select the range of permissions for a single API key.
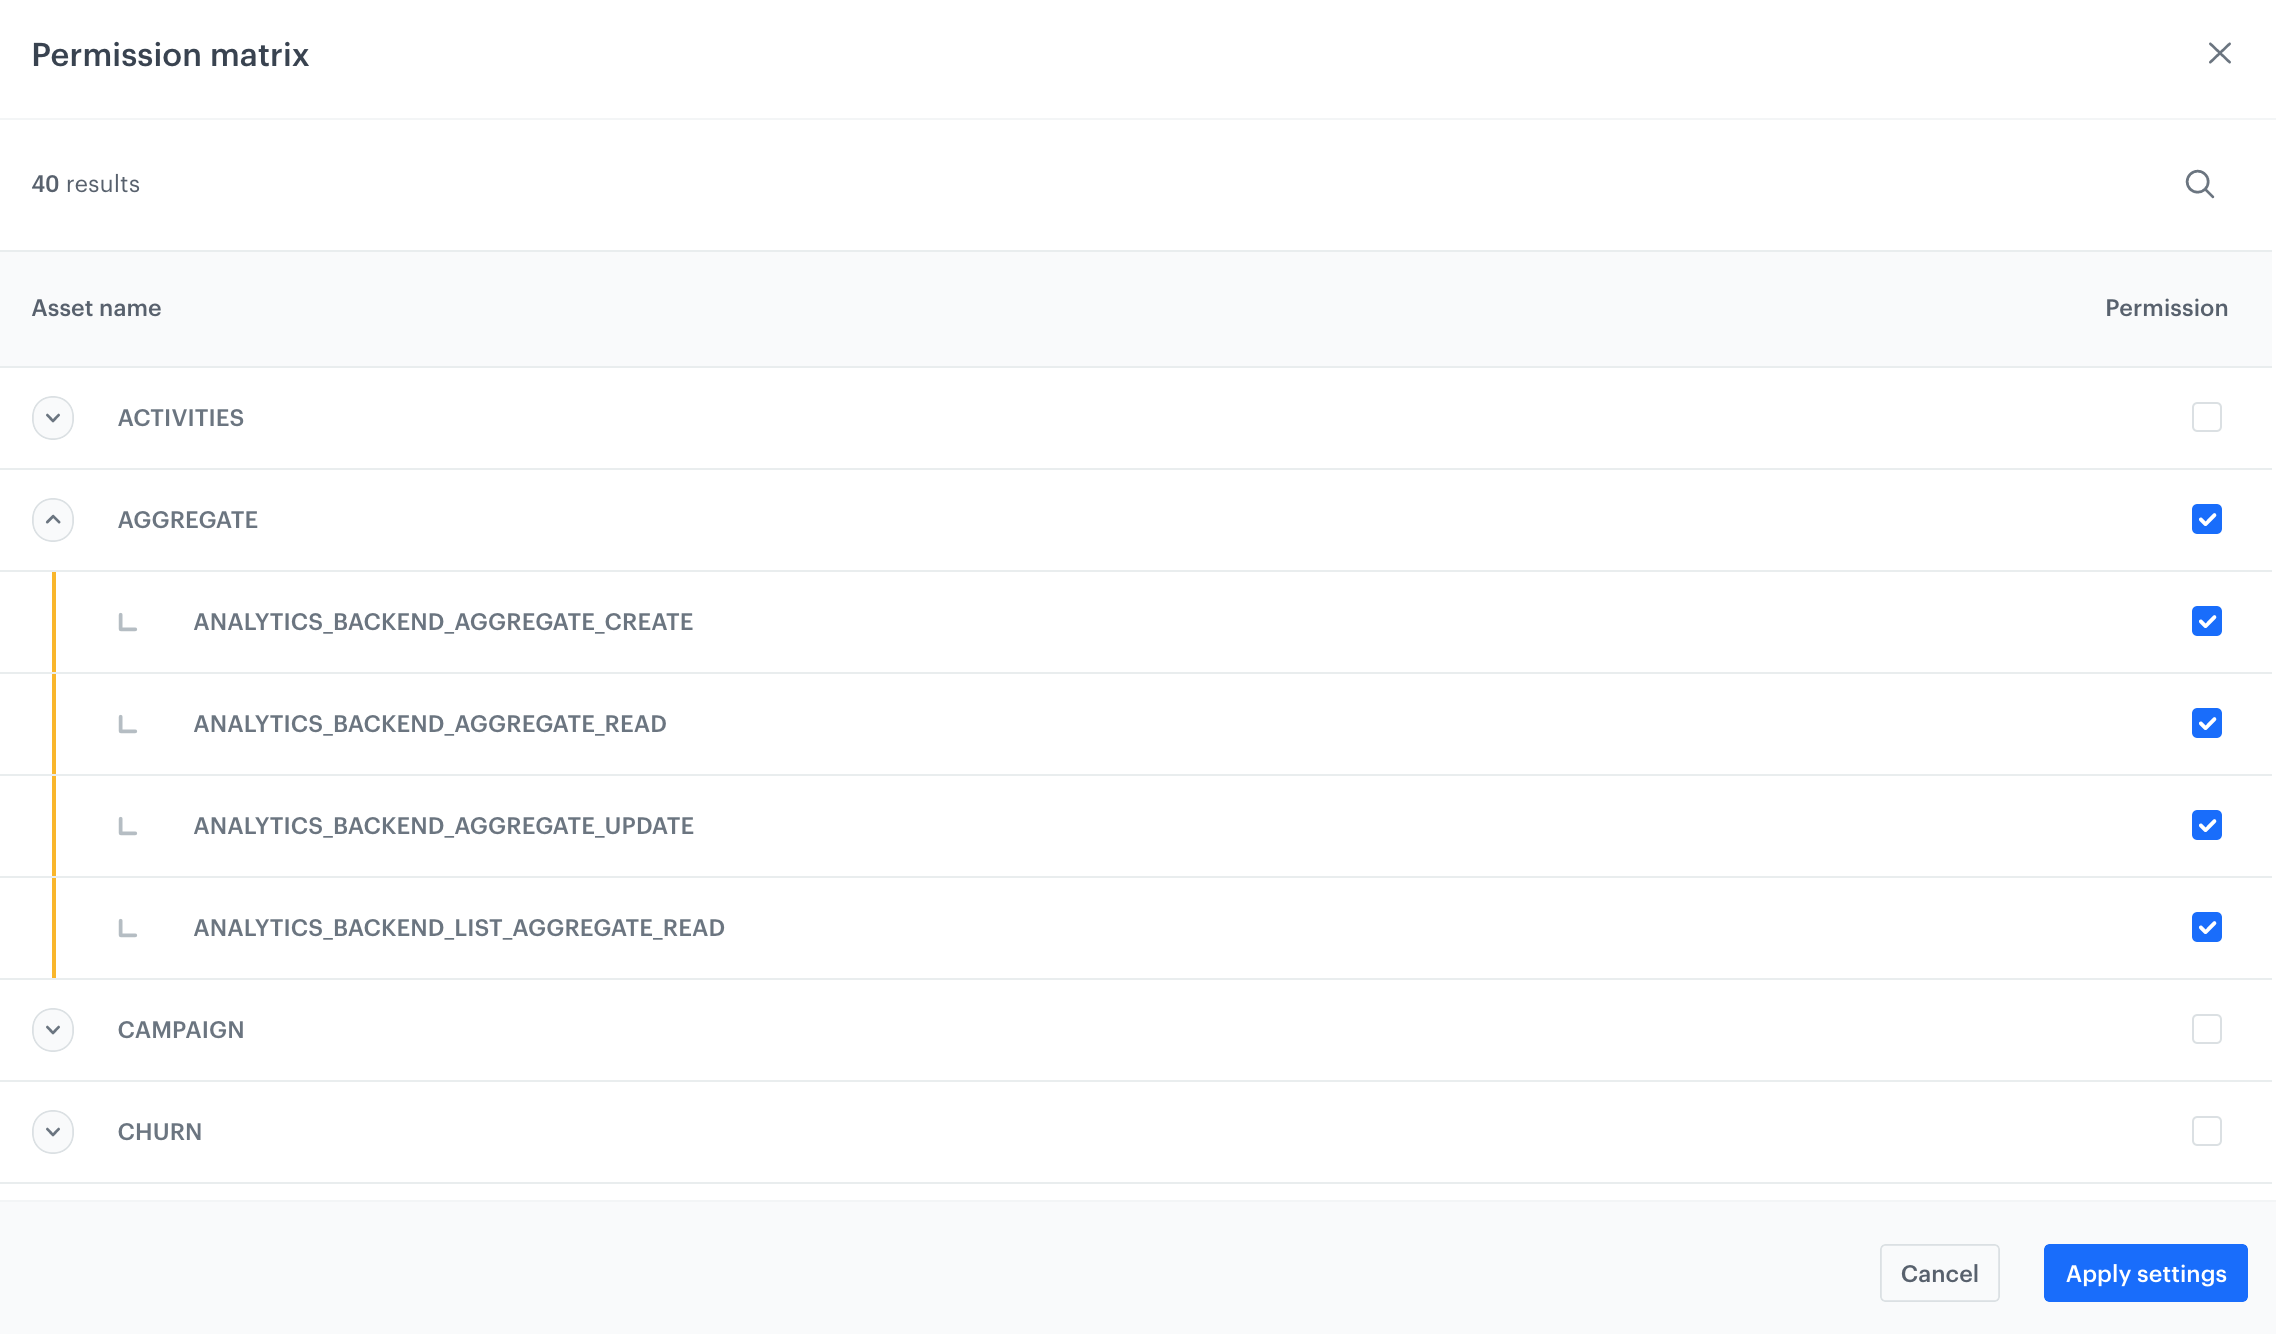
The permission matrix is divided into modules. To grant specific permissions within a module, select the checkbox. The name of the permission corresponds with the name of permissions required for the API method in the API documentation.
Allowlist
In this section, you can create a list of events which can be authenticated with the API key.
- This setting only affects the events sent through mobile SDK and custom events generated through API. Events generated by the Synerise backend will be accepted regardless.
- The allowlist should only include events that are necessary for your integrations to work.
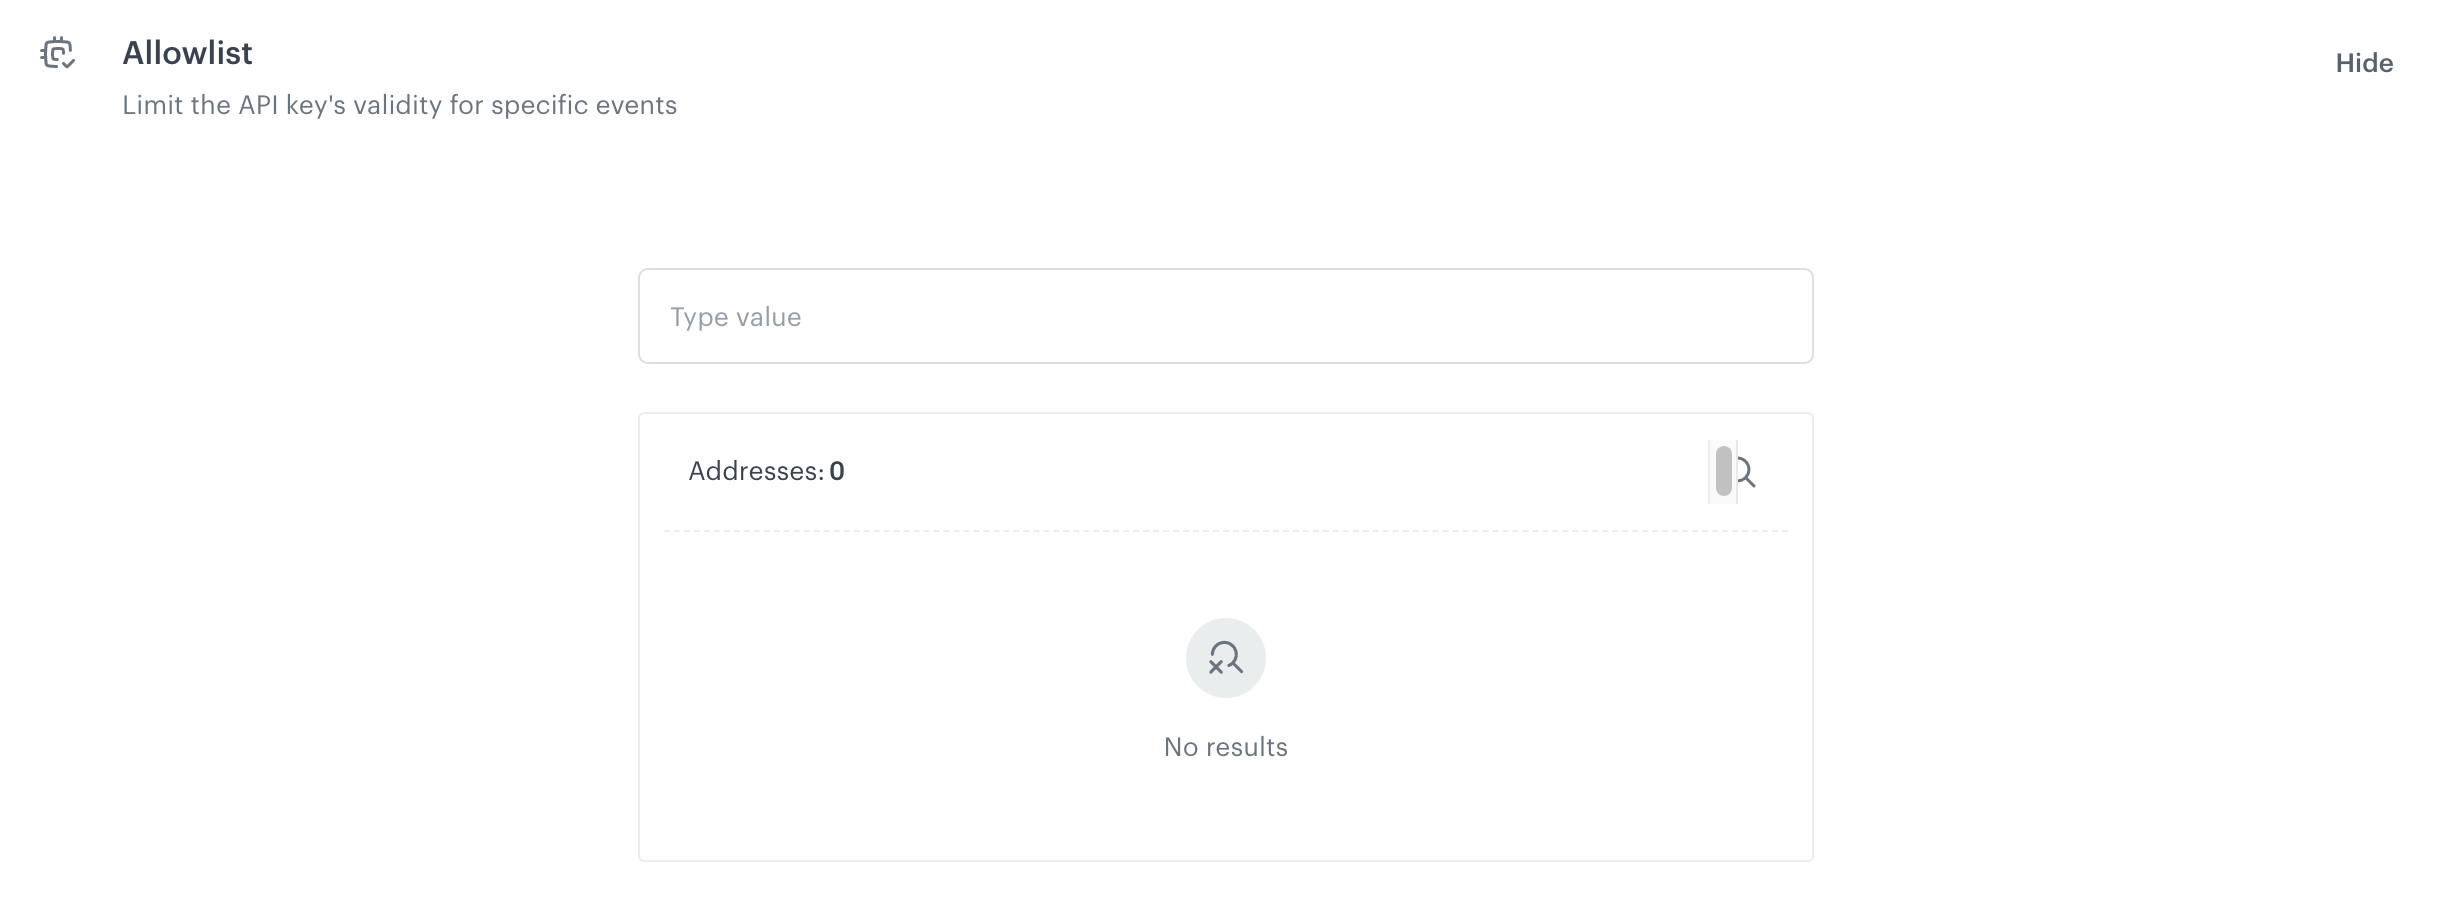
To add an event to the list:
- Enter the name of the event in the text field.
- From the dropdown list, you can select more events.
- Confirm your choice by clicking Add.
Denylist
In this section, you can create a list of events which cannot be authenticated with the API key. This setting affects only the events sent through mobile SDK and custom events generated through API. Events generated by the Synerise backend will be accepted regardless.
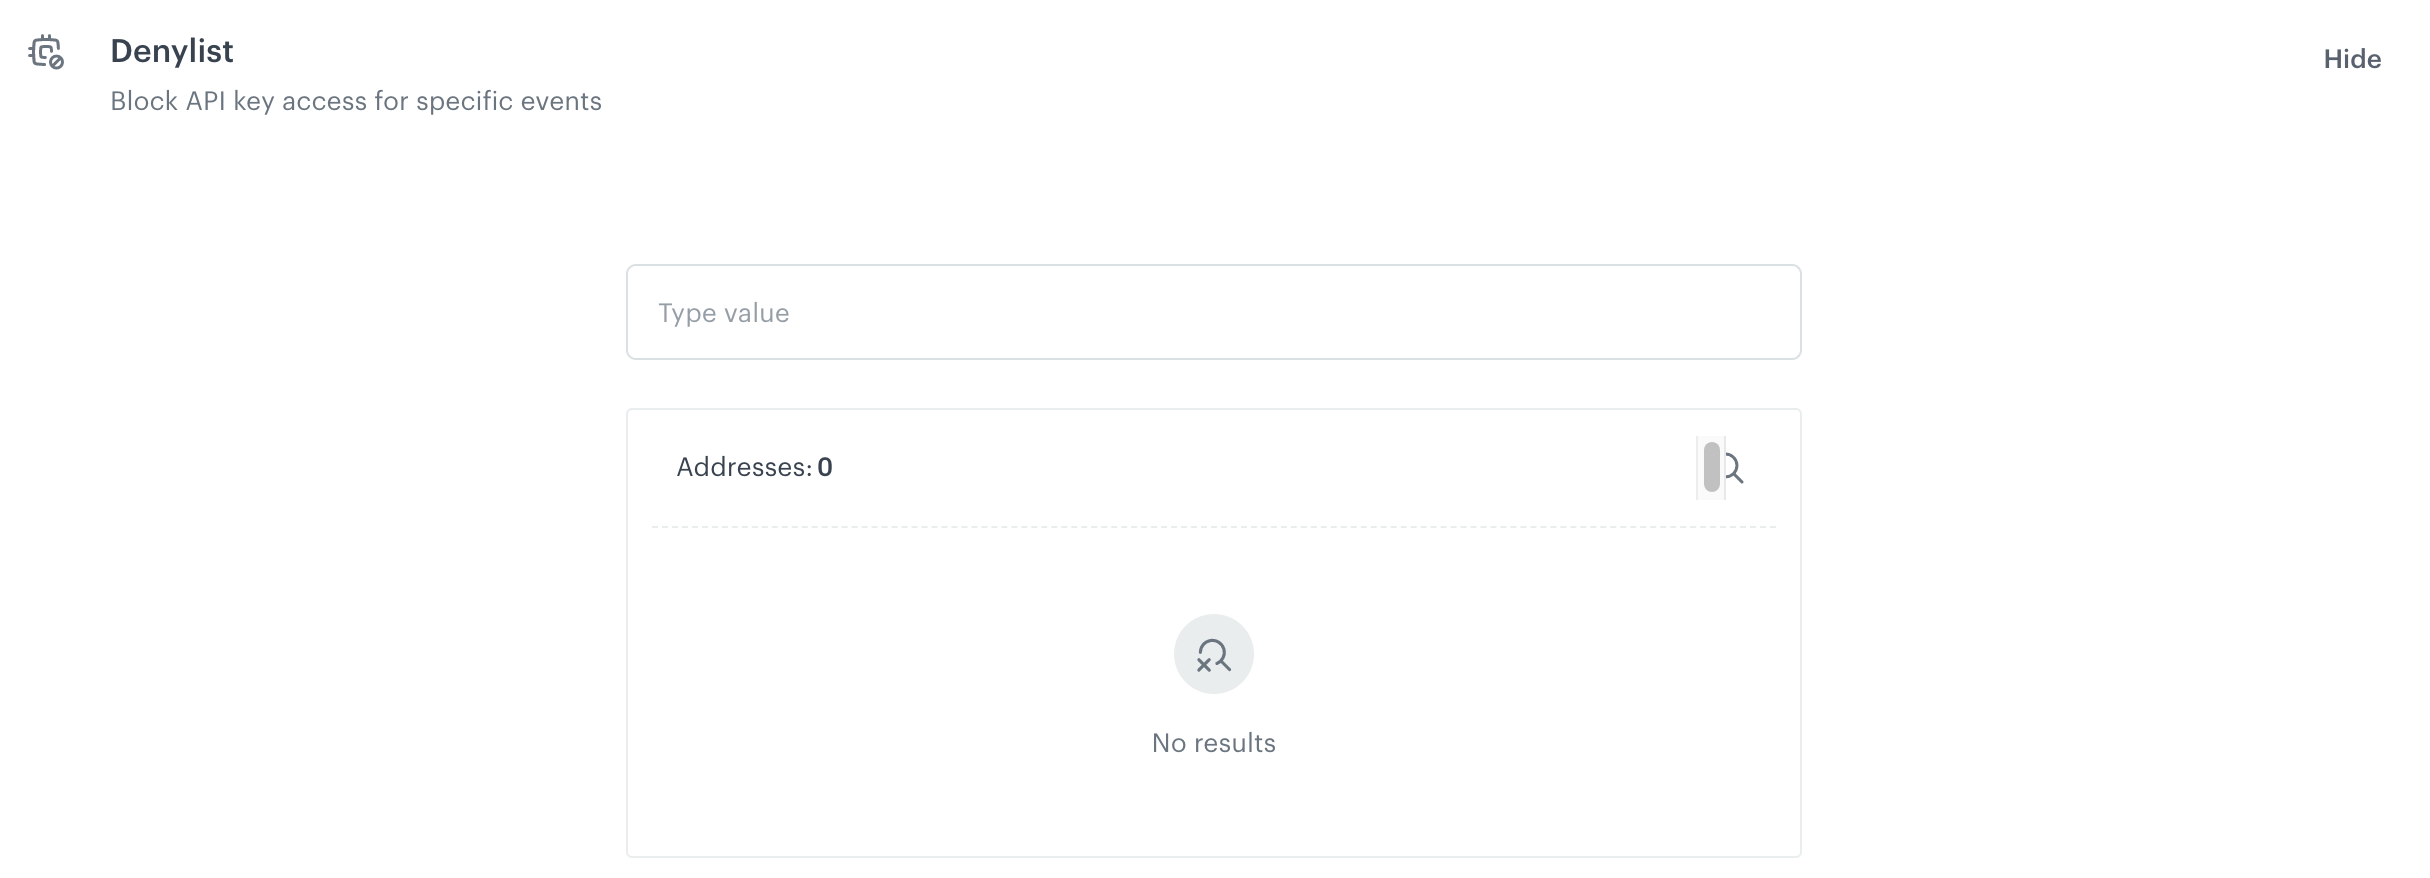
To add an event to the list:
- Enter the name of the event in the text field.
- From the dropdown list, you can select more events.
- Confirm your choice by clicking Add.
IP access restriction
This list allows you to define IP addresses from which requests with JWT generated with the API key will be accepted. This way, when an API key is stolen, and the fake requests are sent with JWT generated with the stolen key, they will be blocked because they are sent from a non-accepted IP address.
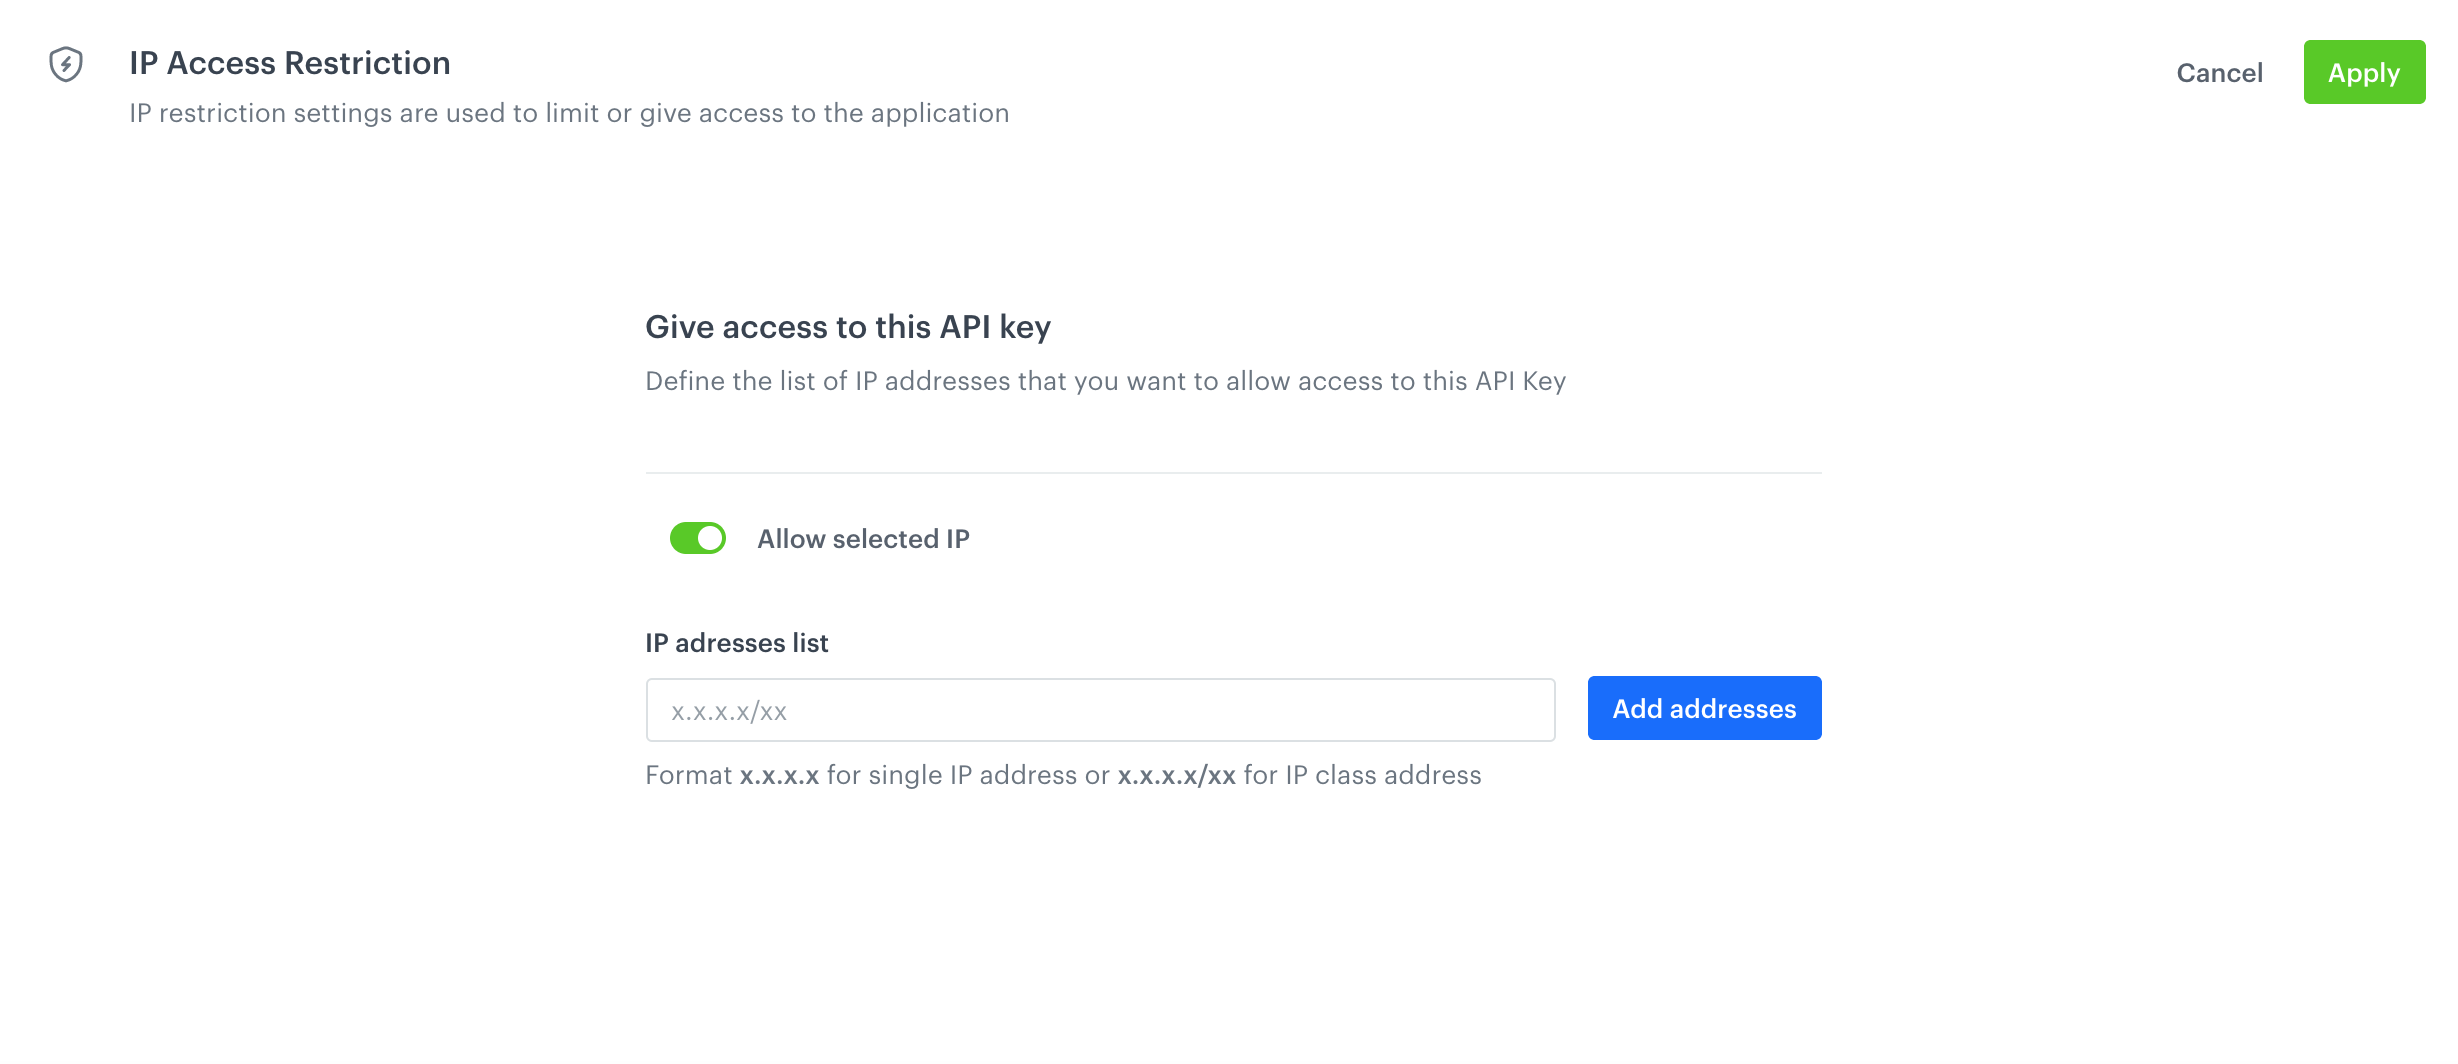
- In the text field, enter an IP address.
- Confirm by clicking Add address.
- To add more addresses, repeat steps 1 and 2.
Basic access authentication (workspace)
This option is only available for workspace API keys.
It allows you to simplify API integrations, but requires additional security measures compared to JWT. For more details, see “Basic API authentication with API keys” in “Workspace authorization”.
If you need to enable basic access authentication:
- Switch the Enable basic access authentication option on.
- On the confirmation pop-up that appears, click Apply.
Result:
Basic authentication is enabled. You can copy the workspace’s GUID (used as the login part of the authentication) from the settings:

You can now use basic authentication in API endpoints that are available to workspaces.
Simple authentication (profile)
This option is available only for profile API keys.
Simple authentication is a method available in Mobile SDK and it authenticates customers based on email address or custom ID.
In this section on the interface, you can generate a salt by enabling the Simple authentication toggle which is required in the integration process for the simple authentication method in Mobile SDK. The salt will be available in the Salt field and it must be added to the initialization script and kept encrypted in the code.
Profile modification allowlist
Profile modification allowlist is an option that lets you specify which profile attributes and tags can be changed when using a specific API key for authentication and updating profiles. This helps you control and limit the scope of modifications that can be made using that API key. For example, the request for changing the first name and address will be rejected (403 error will be returned in response) if these attributes aren’t selected in the profile modification allowlist.
To be able to choose from any attributes, properties, and/or tags, you must either create them in Data Management > Params Manager and Data Management > Profile Tags respectively or send them through API.
If you use simple authentication, the attribute allowlist must include:
UUIDemailorcustomId(depending on the identifier you will use in this method)
Copying API keys
- In the list of keys, find the key and click the
 icon.
icon. - In the menu that opens, click the key.
Result: The key is copied into the clipboard.
Alternatively, you can copy the key or scan its QR code in the key’s General settings.
Deleting API keys
When you delete an API key, it stops working. Any integrations that use the key will be disabled.
Leaked or compromised keys should be deleted.
- Before deleting a key, make sure that it’s not used in any integrations.
- Deleting API keys is irreversible.
- In the list of keys, find the key and click the icon.
- In the menu that opens, click Delete.
- In the pop-up that opens, confirm by clicking Delete.
Result: The key is deleted. It can no longer be used to authenticate and access data.