Google Firebase
WARNING: In June 2024, legacy FCM APIs will be shut down. You must migrate to HTTP v1 before June. For instructions on migrating, see Migrating to Firebase HTTP v1 API.
Google Firebase is used for notifications in mobile apps and websites.
Integrate Firebase with Synerise
- Go to Firebase Console website.
- If you don’t have a Firebase project:
- Click Create project.
- Follow the instructions on the interface.
- When your account is created, proceed to step 3.
- Go to Project Settings.
- From the General tab, copy the Project ID and save it in the text editor.
- Go to the Cloud Messaging tab.
- Scroll down to the Web Push certificates section.
- In the Web Push certificates sub-section, click Generate key pair.
- Save the keys in the text editor.
- Go to the Service accounts tab, select the JSON option and click Generate new private key.
Result: A warning pop-up opens. - On the pop-up, click Generate key.
Result: The key is downloaded to your device. - Proceed to Enabling Firebase in Synerise.
Enabling Firebase in Synerise
- Go to
 Settings > Apps & Services.
 - In the list of integrations, click Firebase.
Result: The Firebase settings expand. - Click Add connection.
- Switch the Enable integration toggle on.
- Fill in the following fields:
- FCM - Sender ID
Filling out this field is required to implement web push mechanism into your website. You can find the ID on your Firebase account (Settings > Cloud Messaging). - FCM - Project ID (Firebase V1)
If you haven’t copied it earlier in the process, you can find it in your Firebase account settings, on the General tab. - FCM - private key JSON (Firebase V1)
Paste the contents of the whole.jsonfile with the private key. If you haven’t copied it earlier in the process, you can find it in your Firebase account settings, on the Service accounts tab.
- FCM - Sender ID
- If you want to enable encryption, perform the following actions:
- Switch on the Push encryption toggle.
Result: Push notifications are encrypted.WARNING:- You must implement decryption in your mobile applications. Client apps without decryption implemented receive no push messages at all. See the following articles:
- You must provide the VAPID keys (see below). If you do not provide the keys, web push messages are not sent at all.
- Fill in the following fields:
- Public VAPID key
If you haven’t copied it earlier in the process, you can find it in your Firebase account settings, on the Cloud Messaging > Web Push Certificates tab. - Private VAPID key
If you haven’t copied it earlier in the process, you can find it in your Firebase account settings, on the Cloud Messaging > Web Push Certificates tab.
- Public VAPID key
- Switch on the Push encryption toggle.
- Click Apply.
Migrating to Firebase HTTP v1 API
Use the following procedure to migrate from an older version of Firebase legacy FCM APIs (deprecated in June 2023, to be removed in June 2024) to HTTP V1.
- Go to Settings > Apps & Services.
- On the list of integrations, find Firebase and click it.
Result: A list of fields appears. - In the FCM - Project ID (Firebase V1) field, enter the project ID.
How to find the project ID
- Log in to Firebase Console.
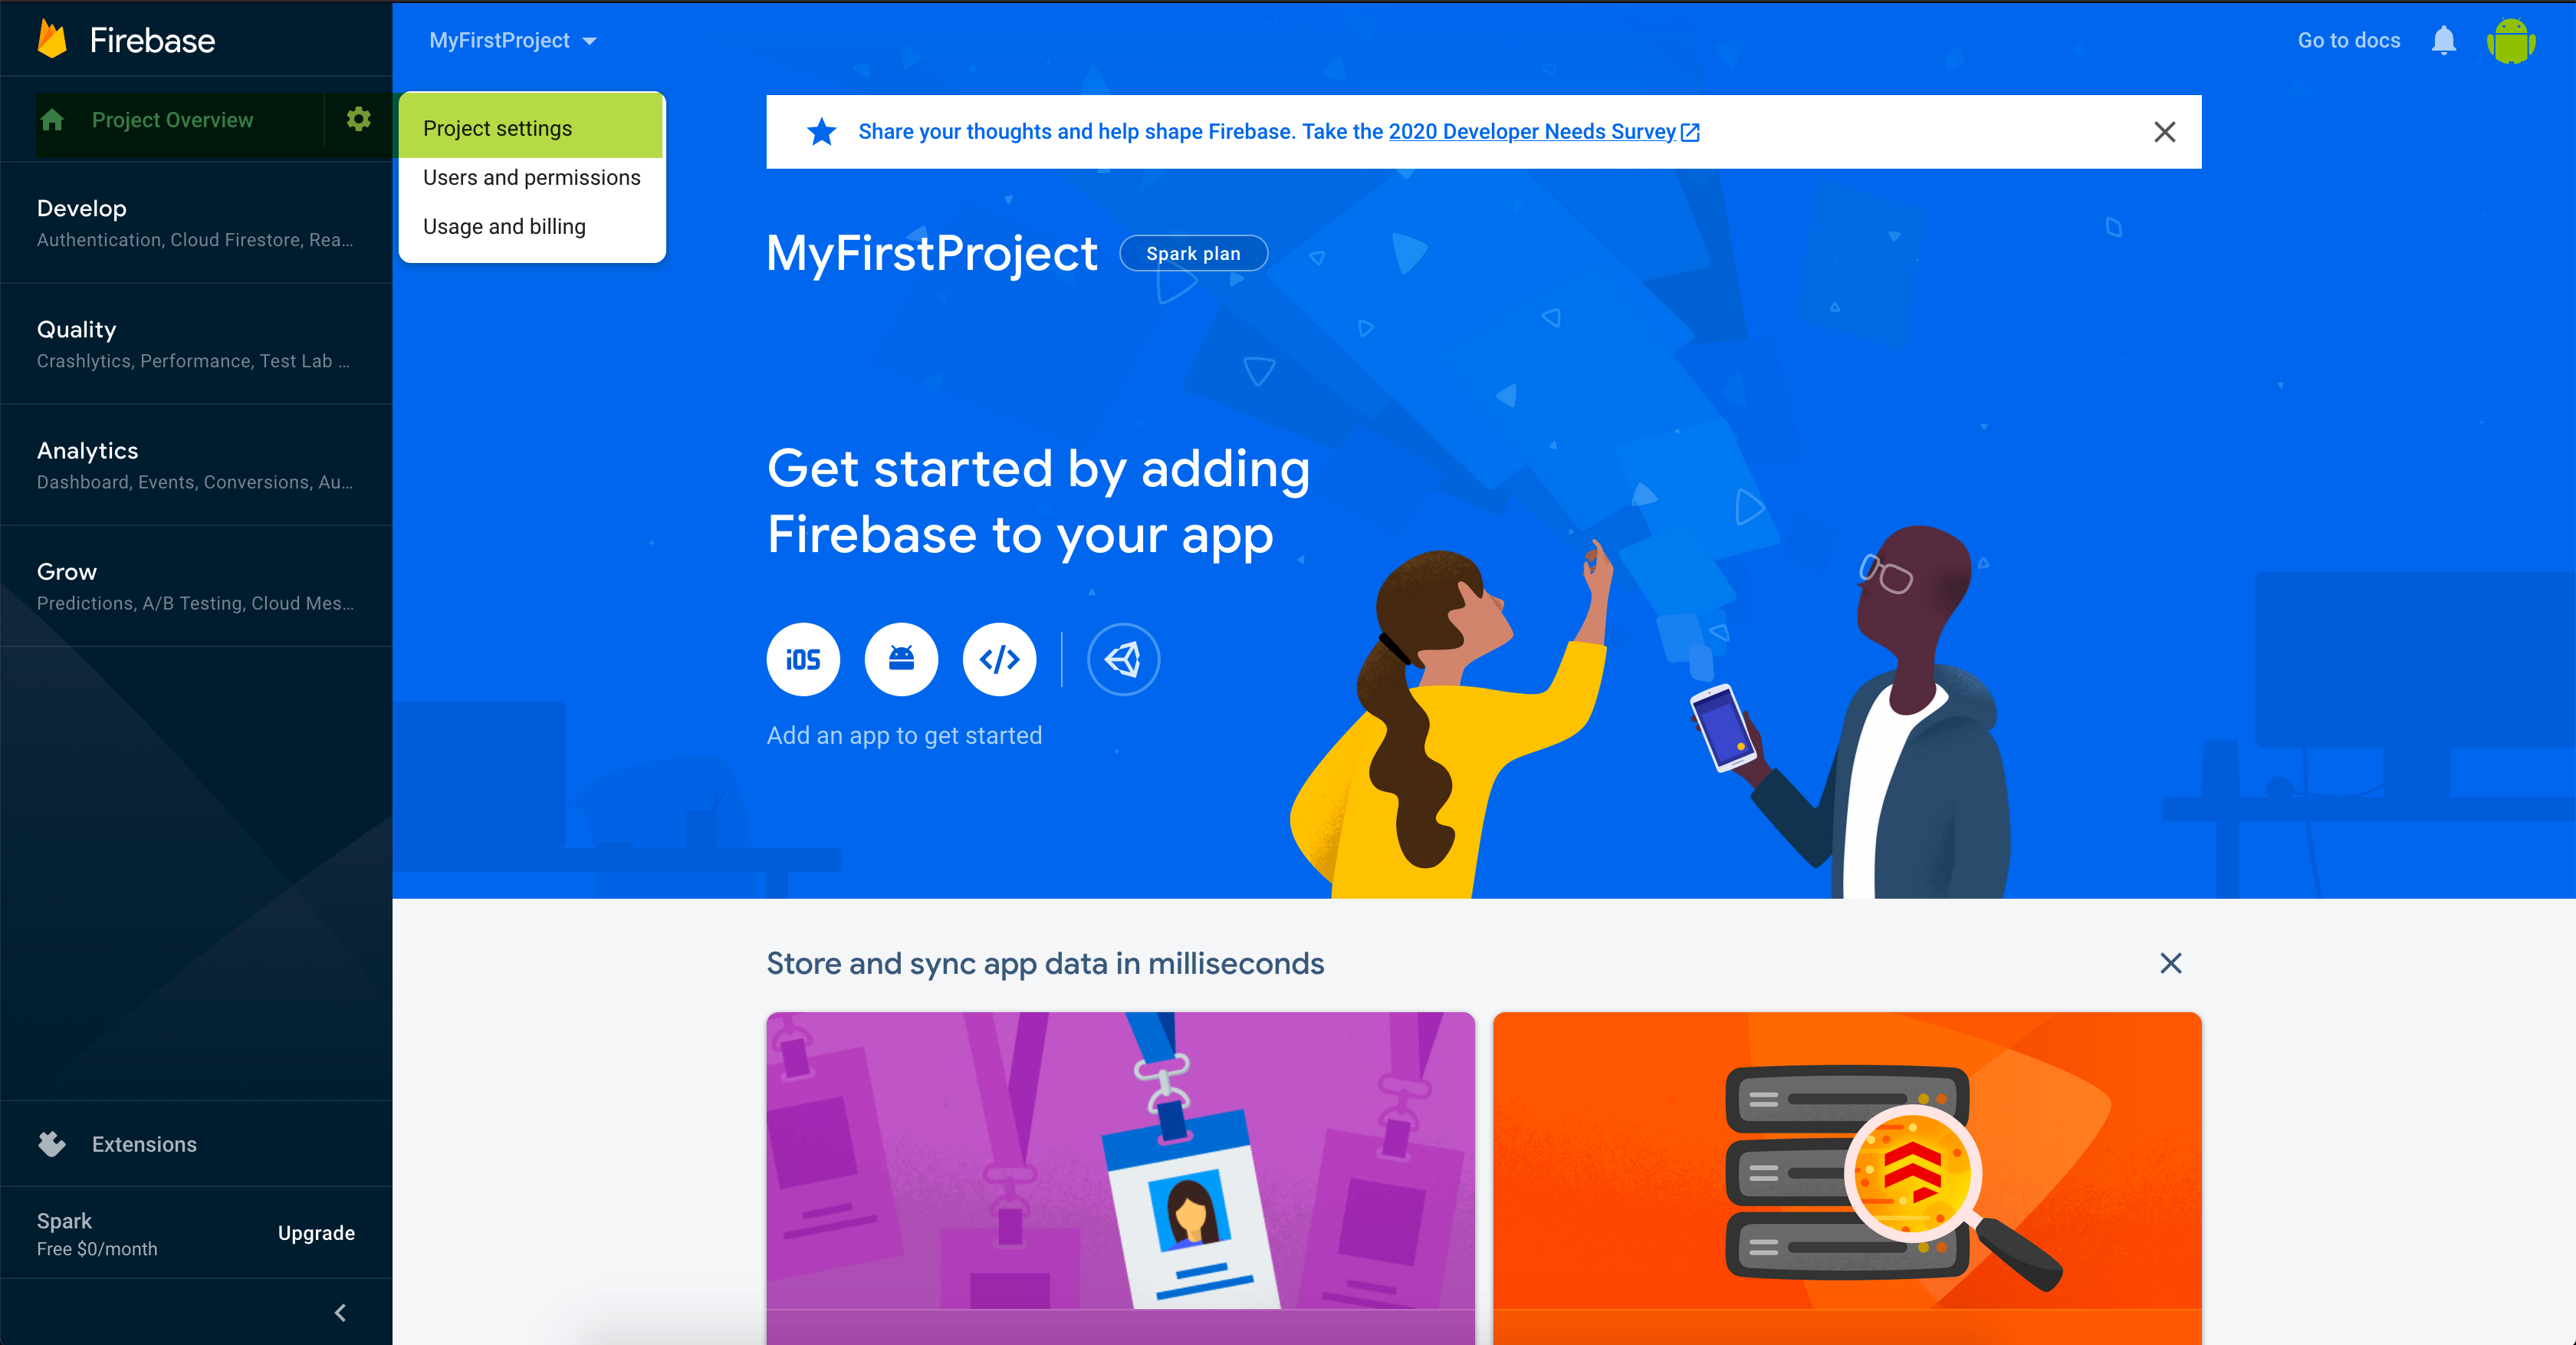
Main panel in Firebase Console - Go to Settings > Project settings > General.
- In the General tab, find the project ID.
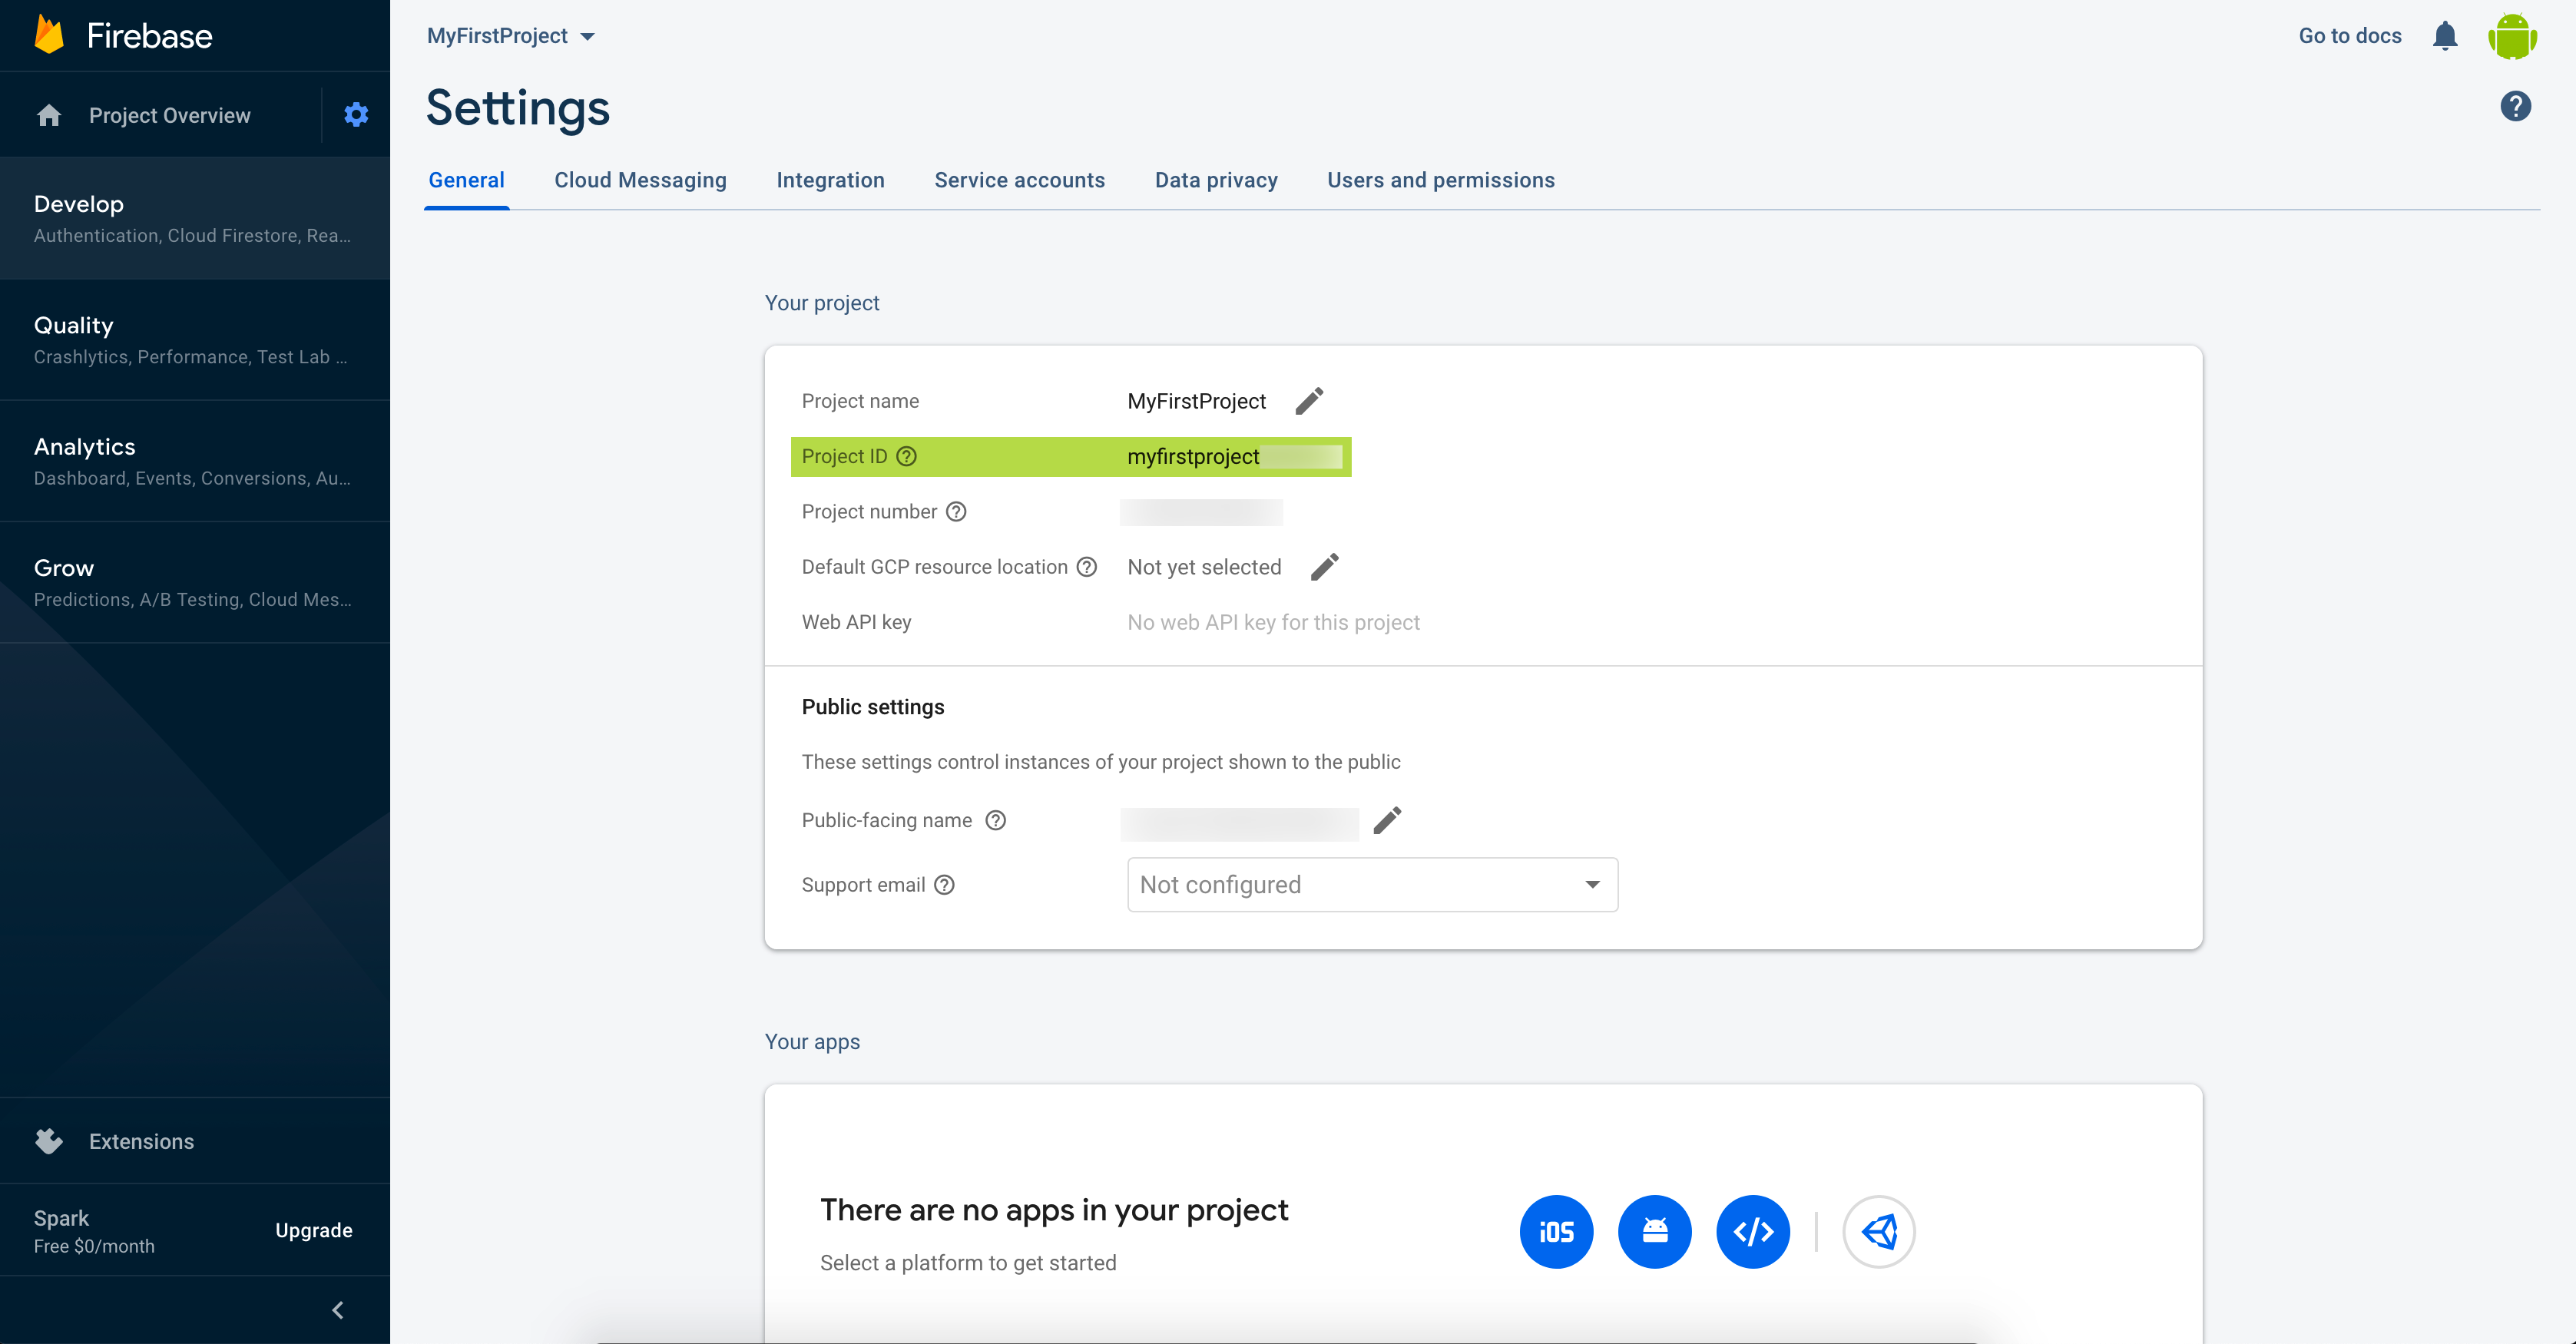
Project ID is marked green in the image - Copy the ID and paste it to the FCM - Project ID (Firebase V1) field in Synerise application.
- Log in to Firebase Console.
- In the FCM - Private key JSON (Firebase V1) field, enter the contents of the whole file with the private key.
How to generate a private key file
- Log in to Firebase Console.
Main panel in Firebase Console - Go to Settings > Project settings > Service accounts.
- In the Service accounts tab, click Generate new private key.
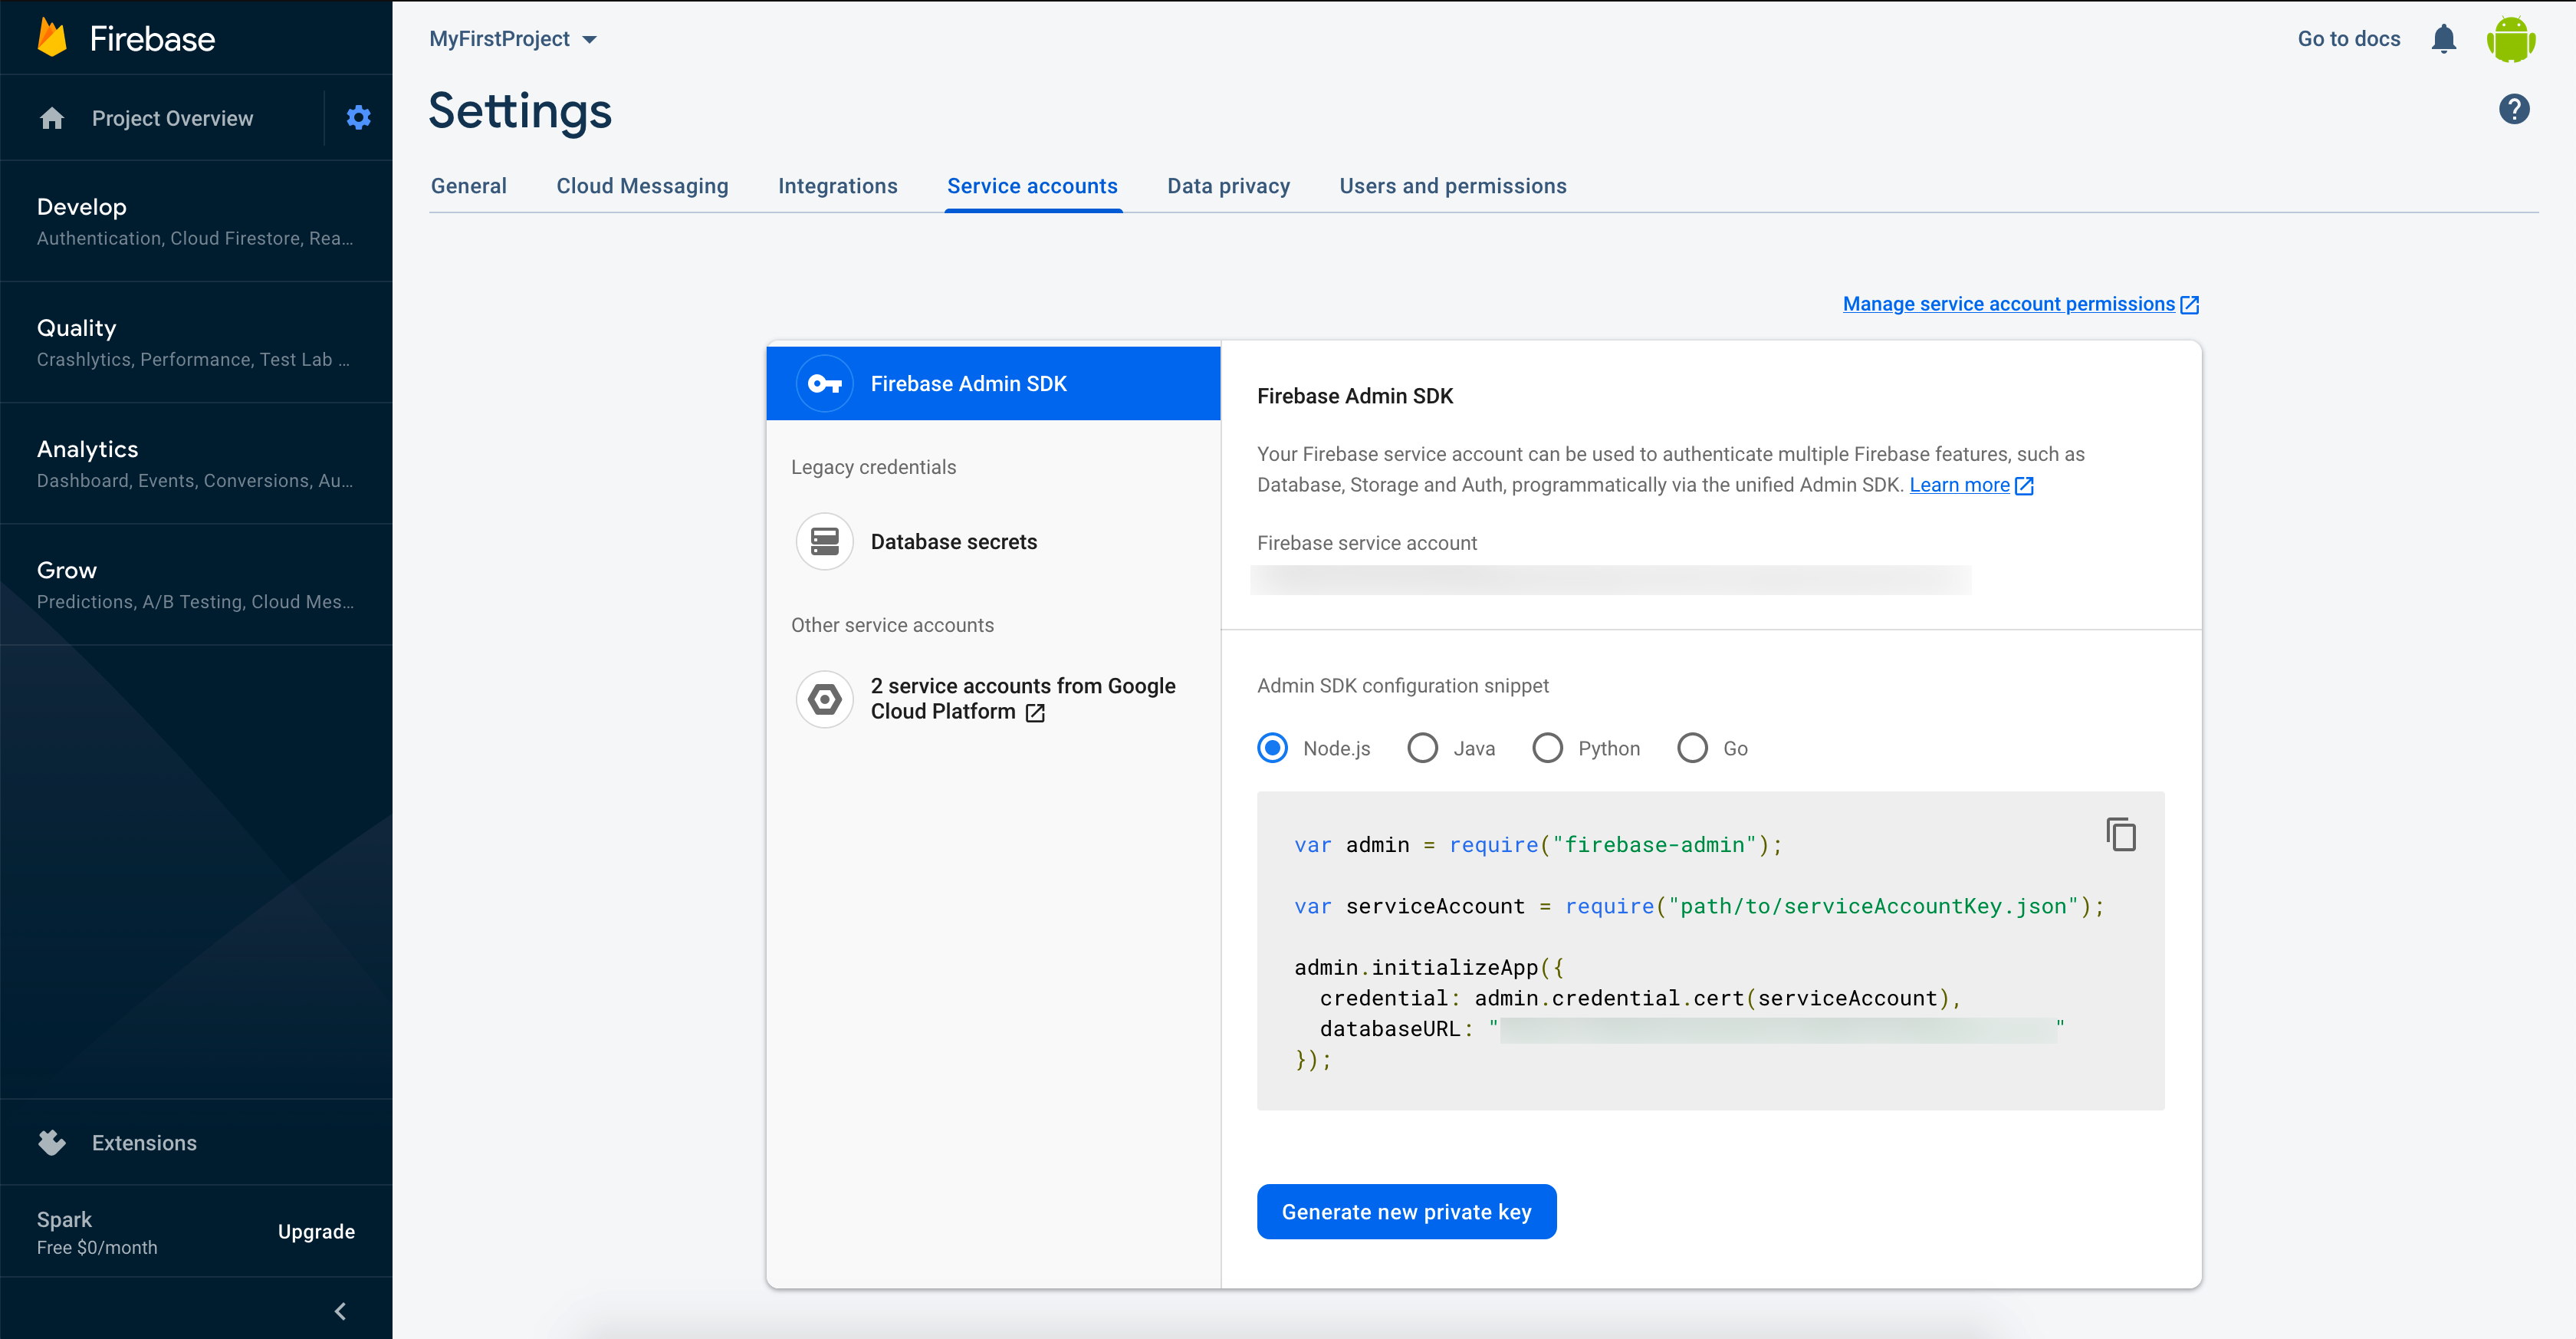
Service accounts section in Firebase Console - Confirm by clicking Generate key.
- Store it securely on your device.
- Open the file your json file in text editor (notepad) or in any code editor.
- Copy the whole configuration.
- Paste it in the FCM - Private key JSON (Firebase V1) field in Synerise application.
Important: After you finish, please make sure the configuration is correct by sending a test web push or mobile push campaign. - Log in to Firebase Console.
- Confirm by clicking Apply.