Recommend last seen items through email
Boost your sales and strengthen customer relationships by providing personalized product recommendations based on customers’ browsing history. By suggesting last seen items, you can enhance the shopping experience and drive engagement with a simple email.
This example explains how to create a set of product recommendations with recently seen items for customers who have visited a page and have not made a purchase within the last 48 hours and send these recommendations through email. In this use case, we will use a ready-made email template and show you how to use HTML block in this template to make the whole process of creation easier.
Scenario described in this use case refers only to WEB integration.
It’s worth noting that in this use case, the aggregate returns recently viewed products, but it can also be any other interactions, such as recently added to the cart, recently purchased, and so on. This predefined HTML block will work well regardless of the logic of the aggregate. Thanks to the HTML block, you can benefit from both the drag-and-drop builder, which allows you to create a creative and personalized email layout from scratch. At the same time, it simplifies the process of enriching such an email with dynamic elements, such as ready-to-use product frames, which already have built-in logic for how and what should be displayed. All you need to configure here is the aggregate responsible for selecting products for the customer. Everything is designed so that you can fully customize the email and display products according to your business needs.

Prerequisites
- Implement Synerise tracking code on your website.
- Add product Feed.
- Implement the transaction events using SDK or API.
Process
In this use case, you will go through the following steps:
- Create an aggregate returning the ID of the last visited product, it will be used in the template configuration.
- Prepare an email template with the usage of the predefined template and predefined HTML block.
- Create an aggregate which counts the number of products visited by customer.
- Prepare a workflow which sends an email to users.
Create an aggregate
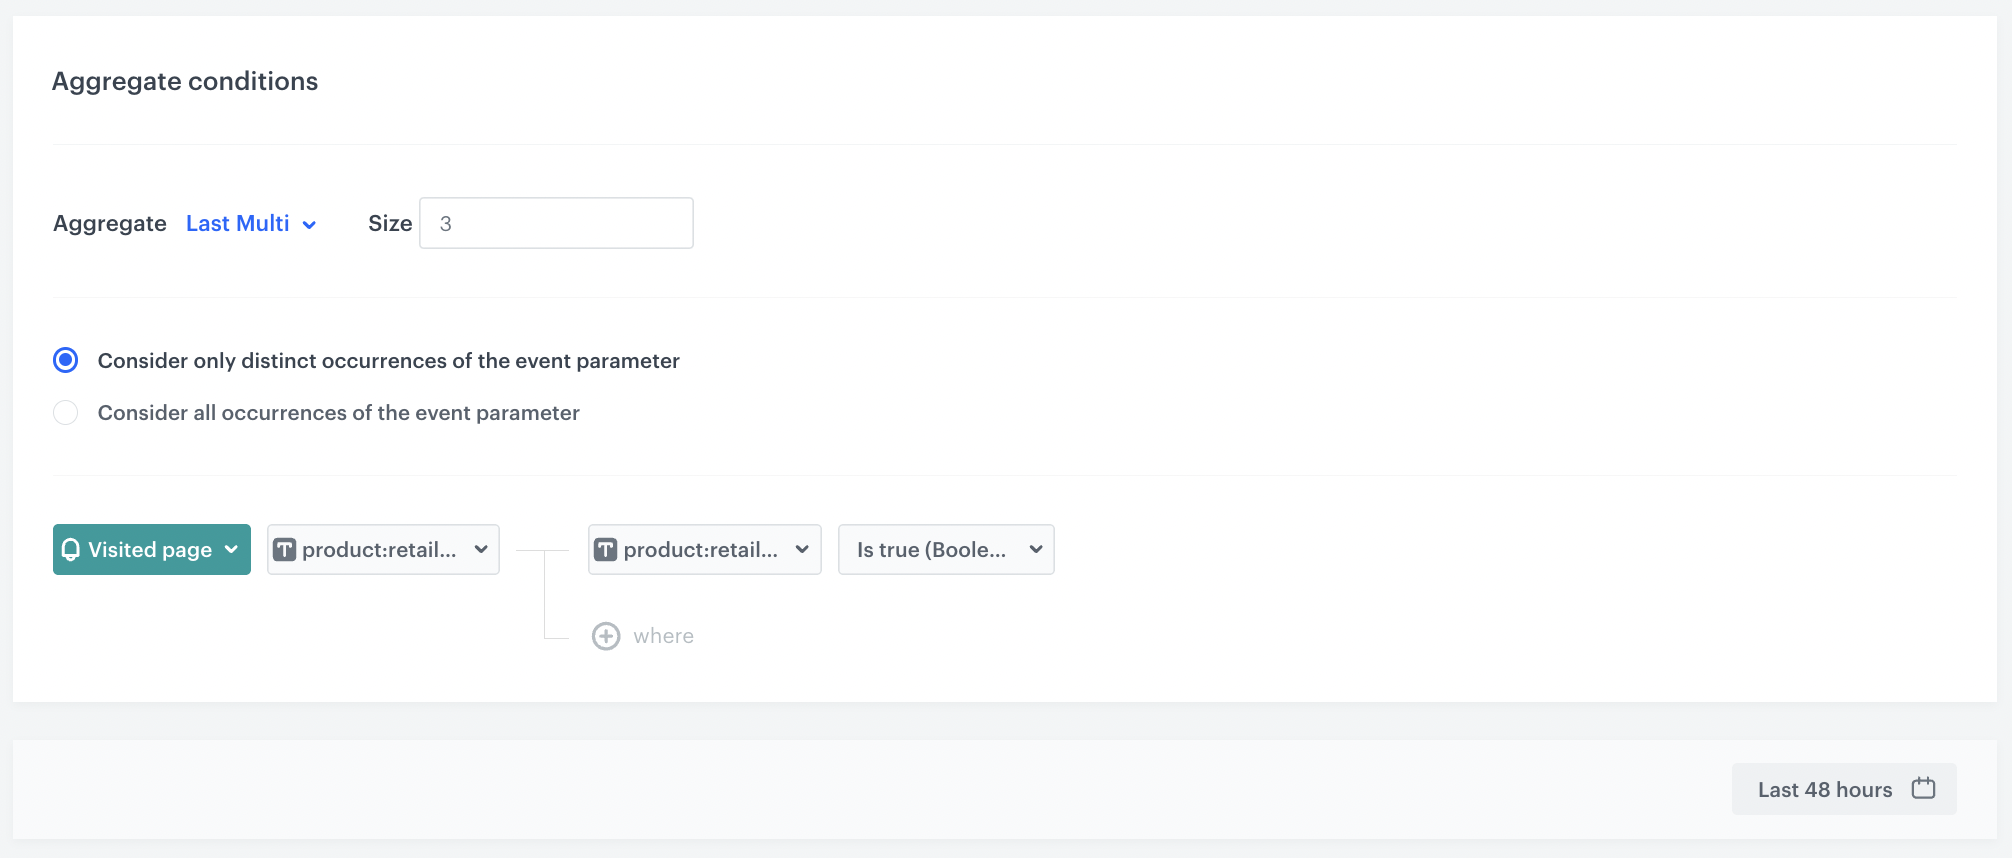
In this part of the process, create an aggregate that returns the IDs of the last 3 product a customer has visited.
- Go to
 Analytics > Aggregates > New aggregate.
 - Enter the name of the aggregate.
- As the type of the aggregate, select Last Multi.
- Select the Consider only distinct occurrences of the event parameter radio button.
- From the Choose event dropdown list, select the Visited page event.
- As the event parameter, select product:retailer_part_no.
- Click the + where button.
- From the Choose parameter dropdown list, select the product:retailer_part_no parameter.
- From the Choose operator dropdown list, select Is true (Boolean).
- Using the date picker in the lower-right corner, set the time range to Last 48 hours. Confirm your choice with the Apply button.
- Click Save.
Prepare an email template
In this part of the process, create an email template. You can use a predefined template or create your own template from scratch. In this case, we will use a predefined template. You will also use a specific HTML block which will let you configure the section with context recommendations in an easy way. In the configuration, we will use the aggregate created in the previous steps.
- Go to
 Communication > Email.
 - On the left pane, click Templates and from the list of template folders, select Predefined simple templates.
- Select any template that mostly fits the campaign assumptions.
Result: You are redirected to the code editor. - Edit the template according to your needs.
Add the HTML block
-
From the Content section, click HTML block and add pull it to the chosen place in your template.
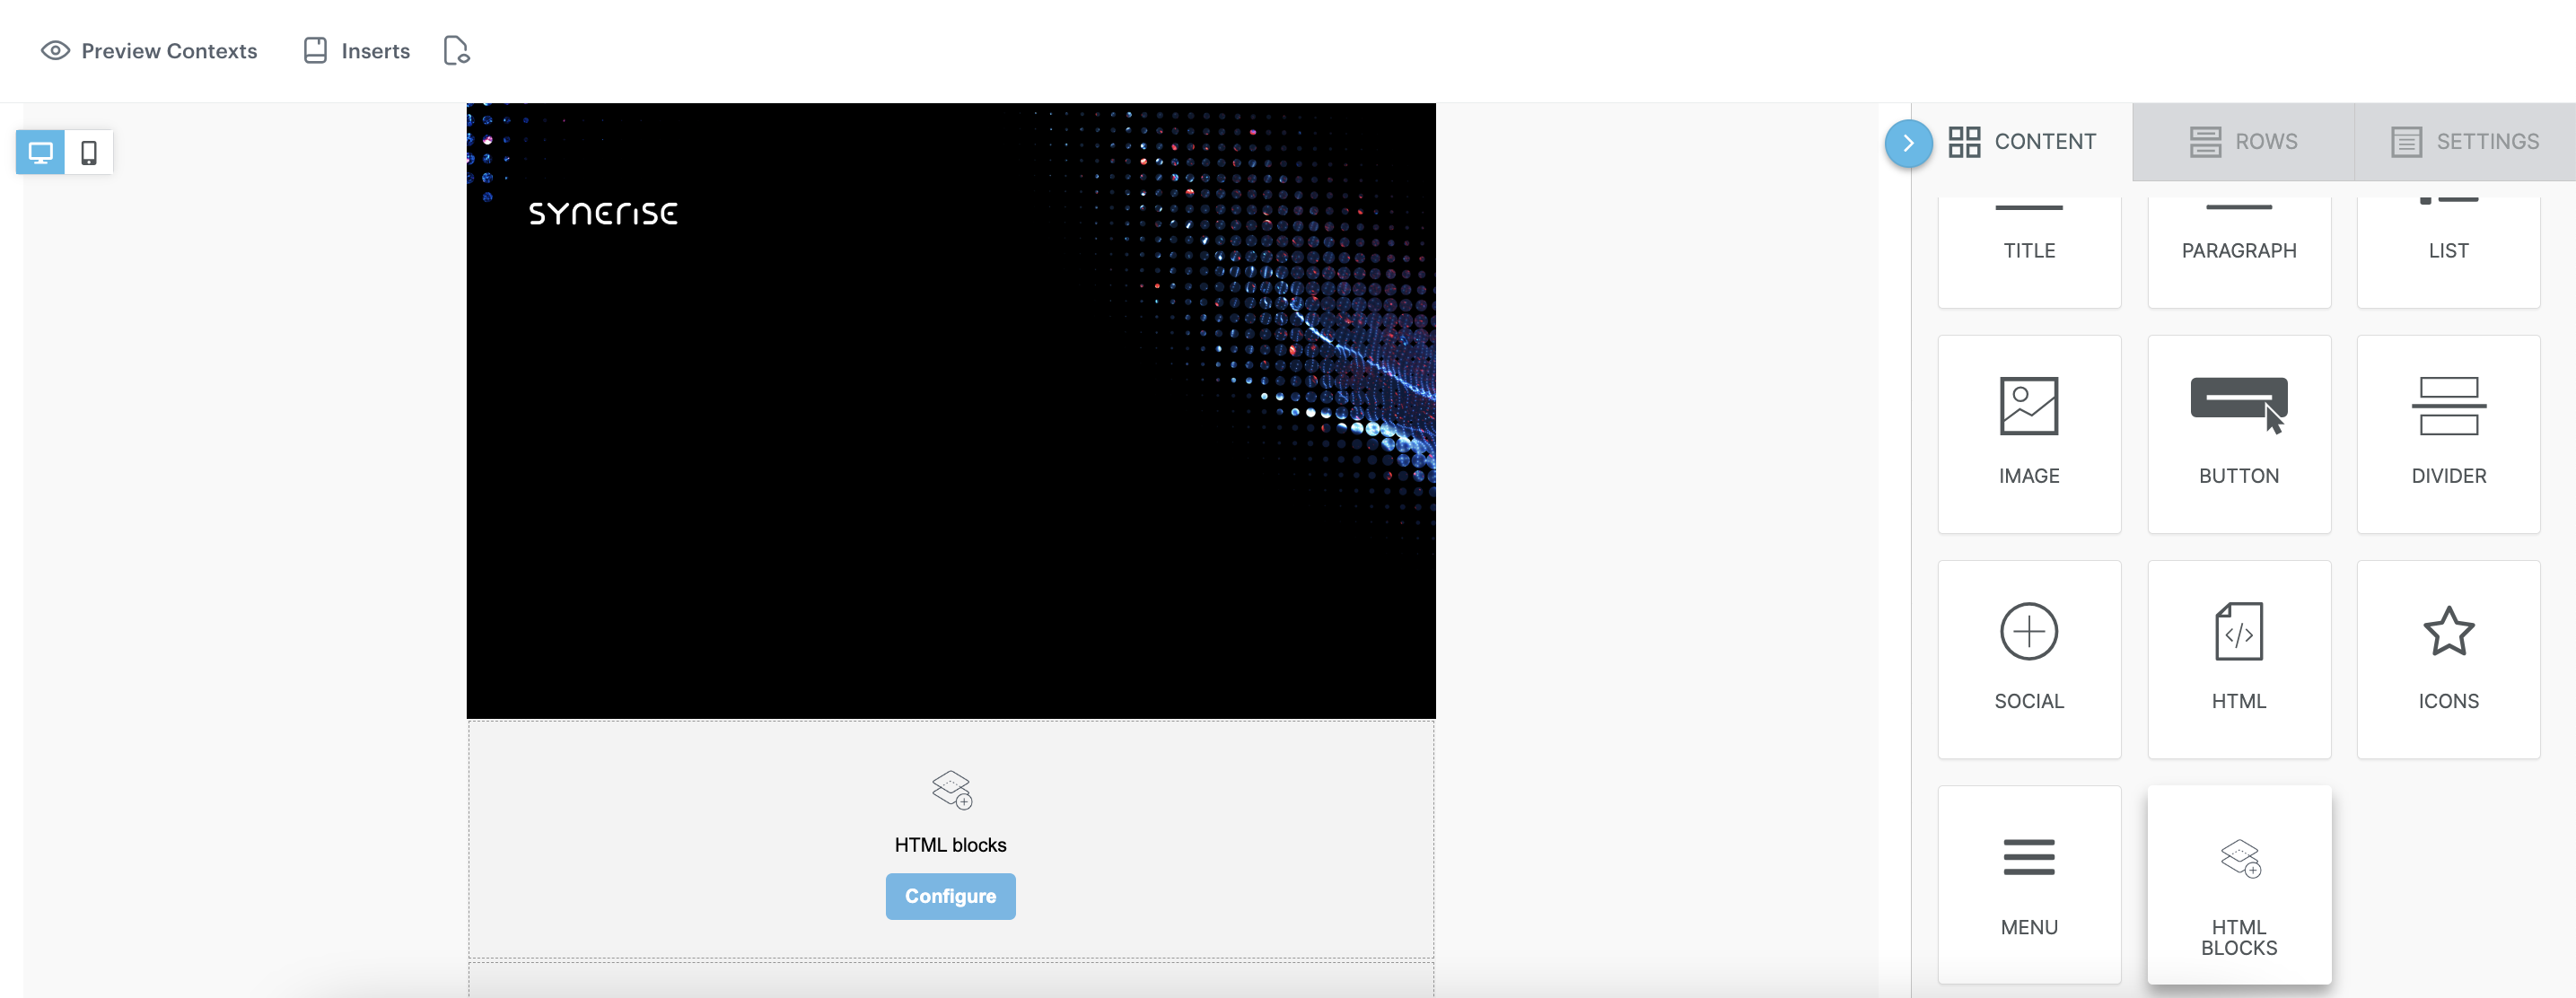
Email context preview -
Click the Configure button.
-
Choose the Predefined blocks folder where you will find the list of all predefined templates. In this case choose Products with recent interactions 1.
Edit the form in the Config tab
The form in the Config tab is already filled in with default values. You can keep them or change them to fit your business needs.
-
In the Aggregate ID with recently interacted products, add the Aggregate that returns SKUs of recently interacted products. Use the aggregate created in the previous step. You can find it by typing its name or ID in the search box.
-
In the Catalog name add the name of the main catalog with your product feed.
Note: If the catalog you’re using has a custom structure, you’ll need to change the attribute names in the code. -
Change the Mail width or leave it at default values.
-
Change Number of product in row or leave it at default values (recommended amount is 3 or less).
-
Define the style settings if you need (Product title font color, Button background color, Button font color and Button border radius).
-
In the Button text field, enter the text that will be displayed on the button.
-
Optionally, you can add more options to your block using HTML tab.
-
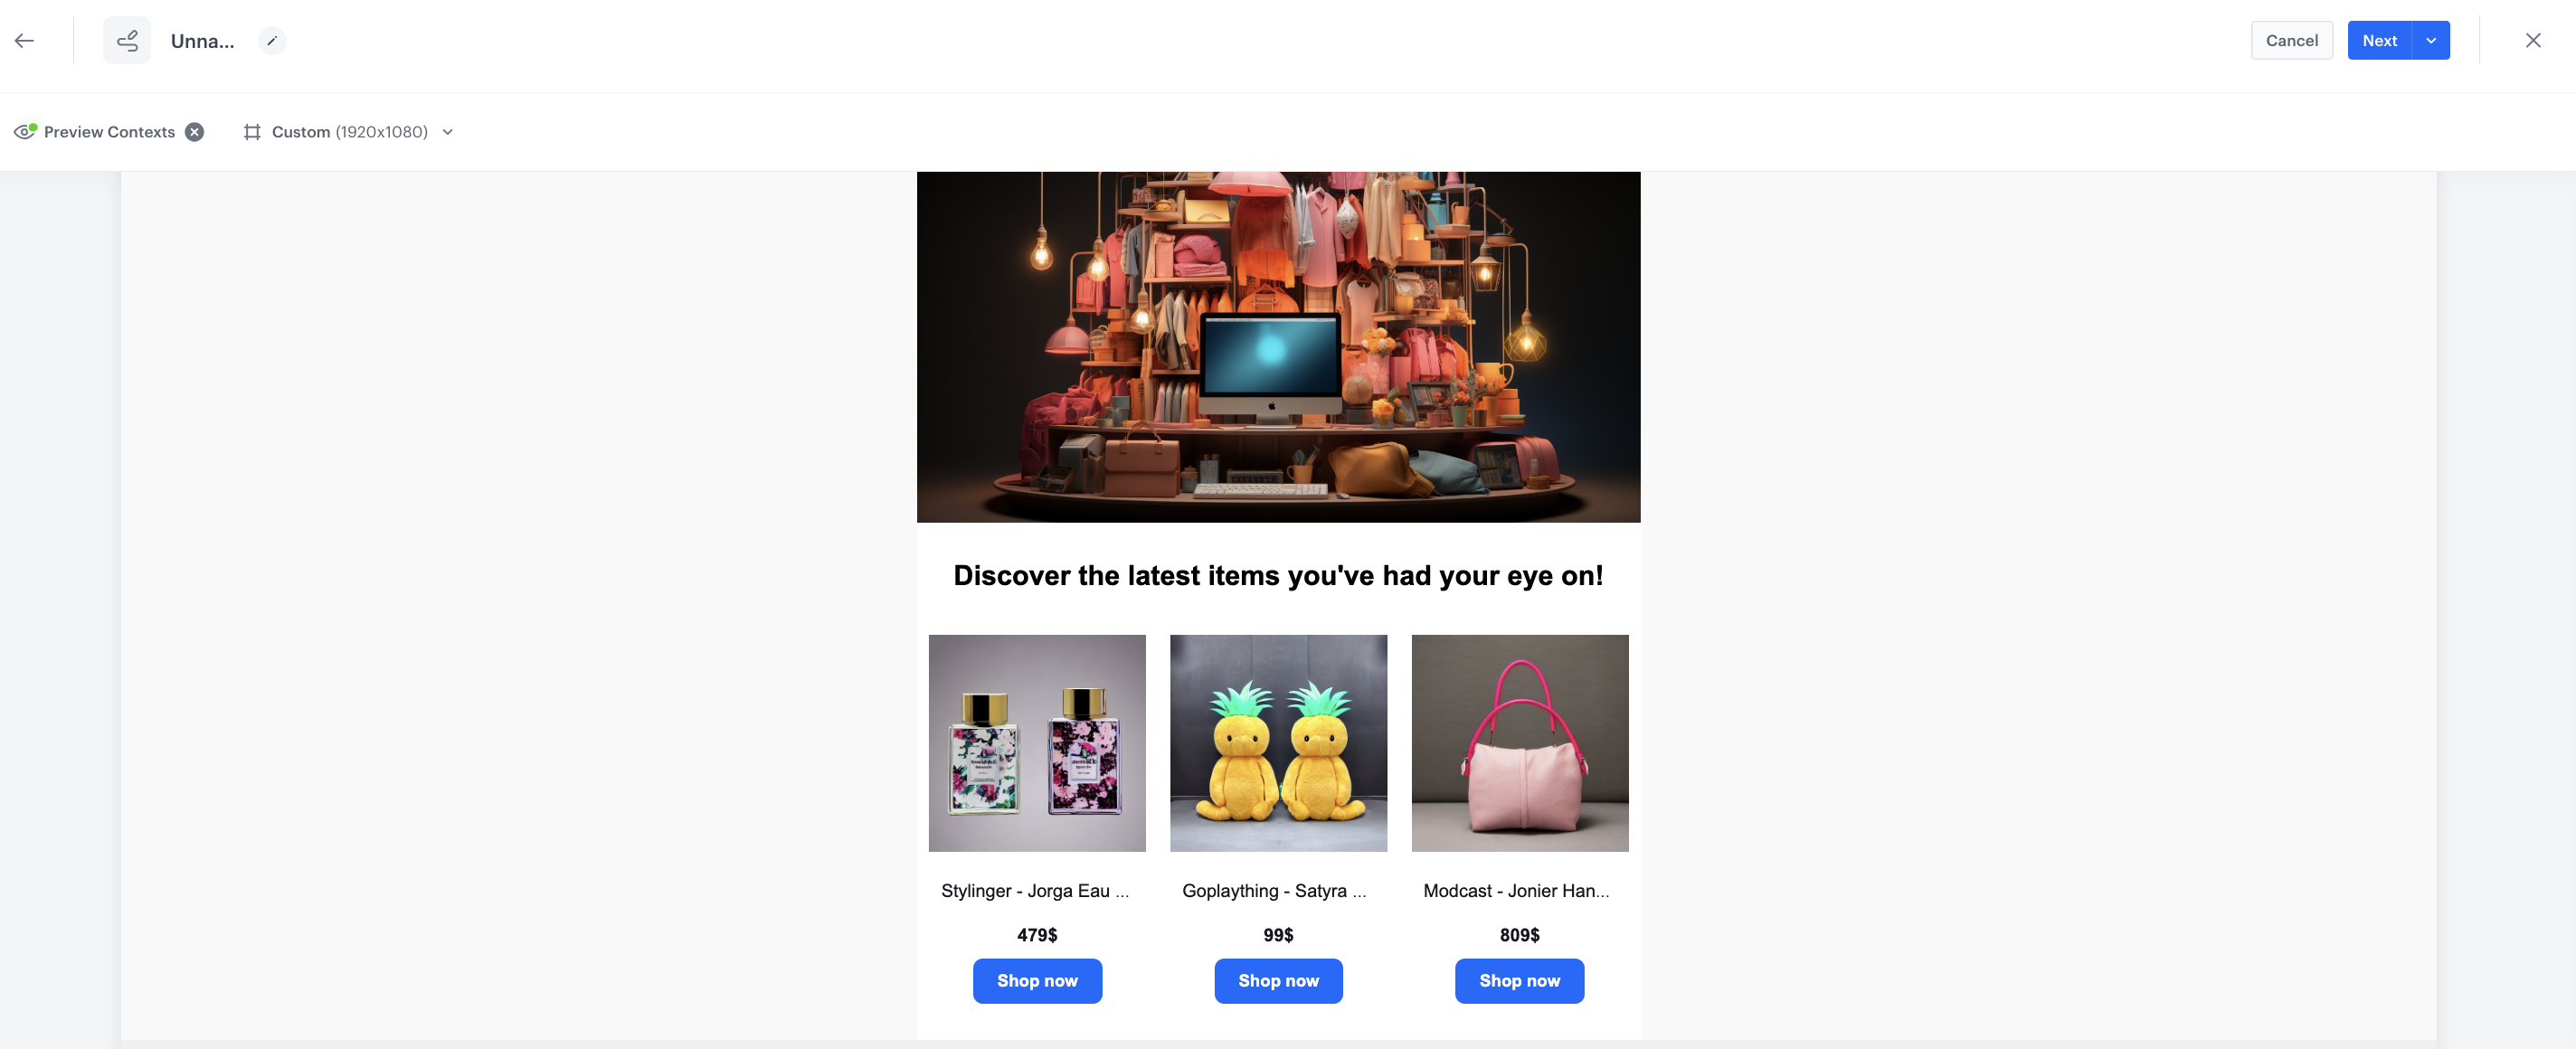
After you make changes to the template, you can check the preview.
- On the upper left side, click the Preview Contexts button.
- Enter the ID of a customer and define the product context.
- Click Apply.
-
If the template is ready, in the upper right corner, click the arrow next to Next, and from the dropdown select Save as.
-
On the pop-up:
- In the Template name field, enter the name of the template.
- From the Template folder dropdown list, select the folder where the template will be saved.
- Confirm by clicking Save.
Below you can find an example of the preview for the HTML block with the last seen products.
Final settings
- Add final elements to your email template.
- After you make changes to the template, you can check the preview of the whole template.
- On the upper left side, click the Preview Contexts button.
- Enter the ID of a customer.
- Click Apply.
- If the template is ready, in the upper right corner, click the arrow next to Next, and from the dropdown select Save as.
- On the pop-up:
- In the Template name field, enter the name of the template.
- From the Template folder dropdown list, select the folder where the template will be saved.
- Confirm by clicking Save.
Create an aggregate
In this step you will create an aggregate which counts the number of products visited by customer. It will be used later in the workflow.
- Go to
 Analytics > Aggregates > New aggregate.
 - Enter the name of the aggregate.
- As the type of the aggregate, select Count.
- From the Choose event dropdown list, select the page.visit event.
- As the event parameter, select product:retailer_part_no.
- From the Choose operator dropdown list, select Is true (Boolean).
- Using the date picker in the lower-right corner, set the time range to Lifetime. Confirm your choice with the Apply button.
- Click Save.

Prepare a workflow
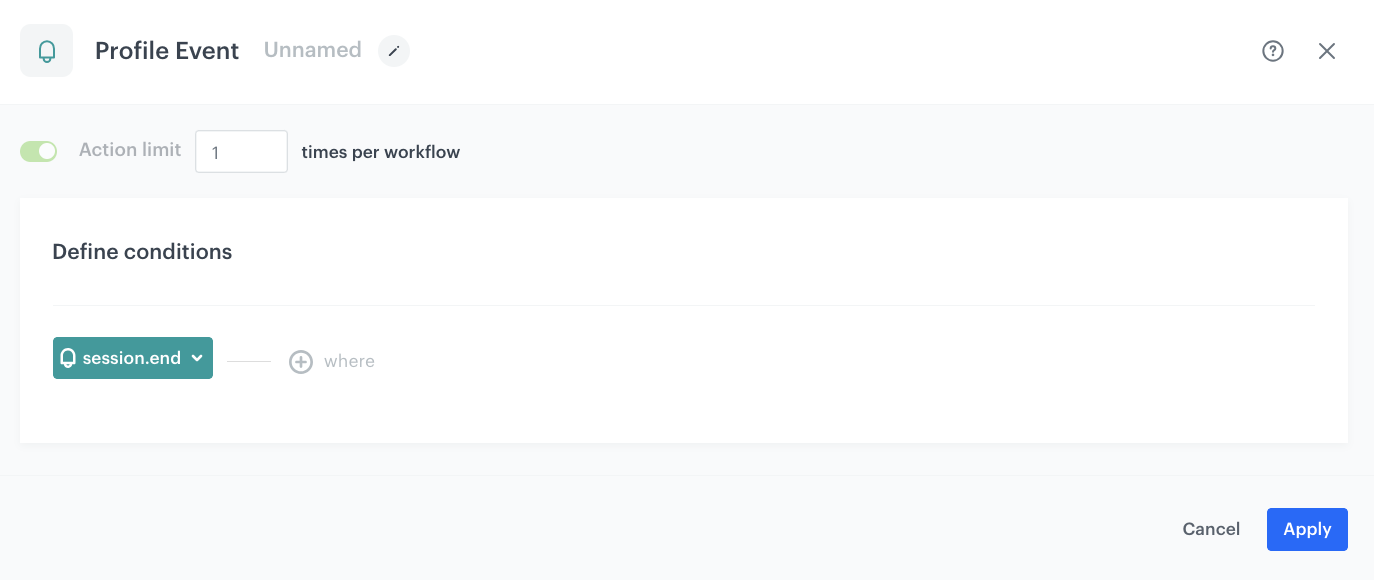
The workflow will be triggered by the session.end event. The delay is set to 48 hours, after this time customer will receive an email with 3 last seen products.
- Go to
 Automation > Workflows > New workflow.
 - Enter the name of the workflow.
Define the trigger node
- As the first node, add the Profile Event. In the settings of the node, select the session.end event.
- Click Apply.
Configure the Delay node
-
Add the Delay node. In the node settings:
- In the Delay field, type
48. - From the Unit dropdown list, choose Hour.
- In the Delay field, type
-
Click Apply.
The Trigger node configuration
Configure the Profile filter node
As this step, add the Profile Filter node, to check two conditions:
- if the customer competed a transaction within the last 48 hours,
- if the customer has browsed at least three different products.
Only customers who fulfill both criteria will be sent an email featuring the last products they looked at. Customers with fewer product views will not receive tailored recommendations because of the lack of data.
-
Add Profile Filter node.
-
In the settings of the node select
transaction.chargeevent. -
Set the time range as the
last 48 hours. -
Change the condition to “Profiles
not matchingfunnel”. -
From the Choose filter dropdown list select the aggregate created in this part of the process.
-
From the Choose operator dropdown list, select More or equal to.
-
On the input field type
3. -
Click Apply.
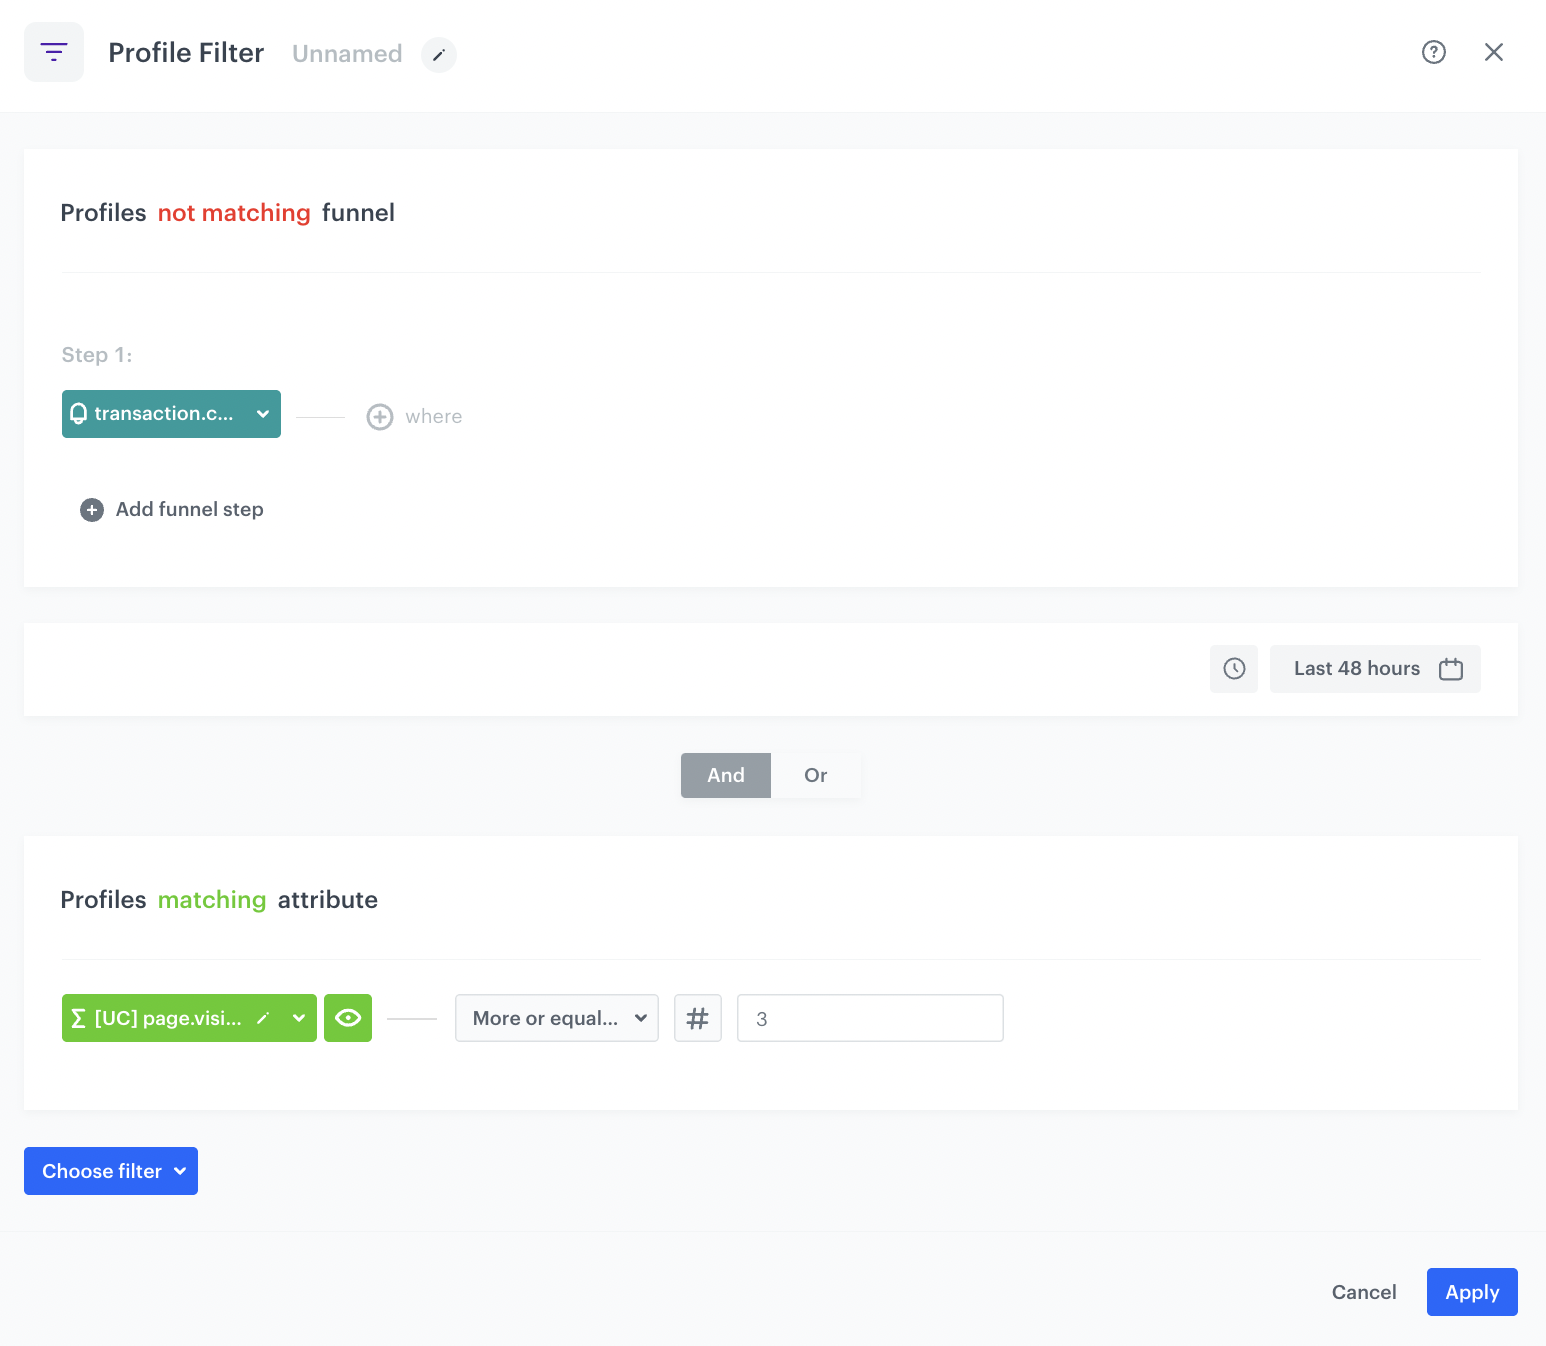
The Profile Filter node configuration -
To the Matched path, add a Send Email node.
Configure the Send Email node
- Add the Send Email node. In the node settings:
- In the Sender details section, choose the email account from which the email will be sent.
- In the Content section, in the Subject field, enter the subject of the email and from the Template dropdown, select the template you have prepared in the previous step.
- In the UTM & URL parameters section, you can define the UTM parameters added to the links included in the email.
- In the Additional parameters section, you can optionally assign parameters. which will be added to every event generated by this communication.
- Click Apply.
Add the finishing nodes and set capping
- Add the End nodes after Send Email node and to the Not matched path after the Profile Filter node.
- In the upper right corner, click Set Capping and define the limit of workflows a profile can start.
- Confirm by clicking Apply.

Check the use case set up on the Synerise Demo workspace
On Synerise Demo workspace, you can check:
If you don’t have access to the Synerise Demo workspace, please leave your contact details in this form, and our representative will contact you shortly.