Third-party authentication
You can let you users authorize to you application through third party solutions. Synerise offers authorization through:
- Apple
- OAuth
Sign in with Apple
Before configuring the Sign in with Apple authentication, you must implement Sign in with Apple in your application.
- Go to
 Settings > IAM for applications.
 - In the Third-party authentication section, click Show.
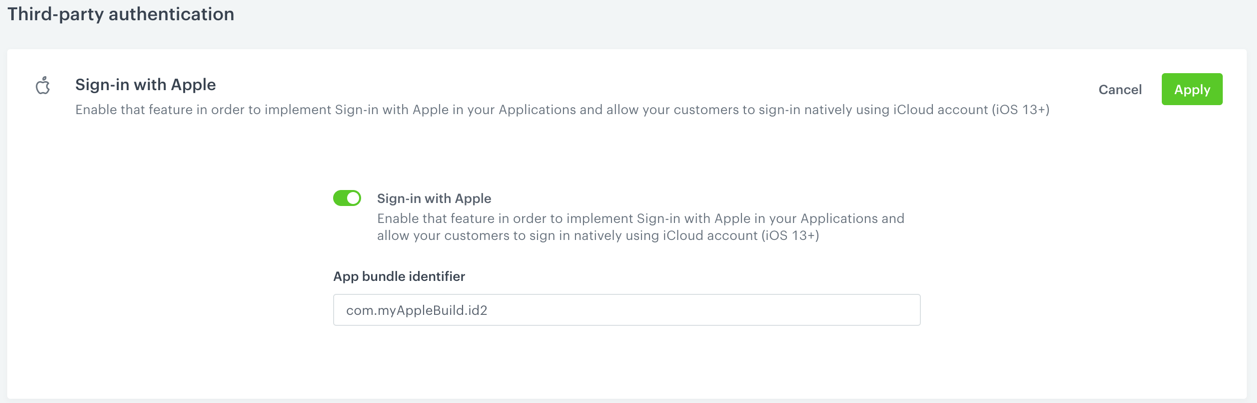
- Switch the Sign-in with Apple toggle on.
- In the App bundle identifier field, enter the bundle identifier (it’s a reverse domain name notation).
Important:
It’s NOT the AppleID. - Confirm by clicking Apply.
Before you configure Facebook authentication in Synerise, you must implement it in your application.
Currently, there are no dedicated settings related to Facebook authentication on the interface. You just have to implement RESTful API or SDK methods to authenticate through Facebook.
OAuth
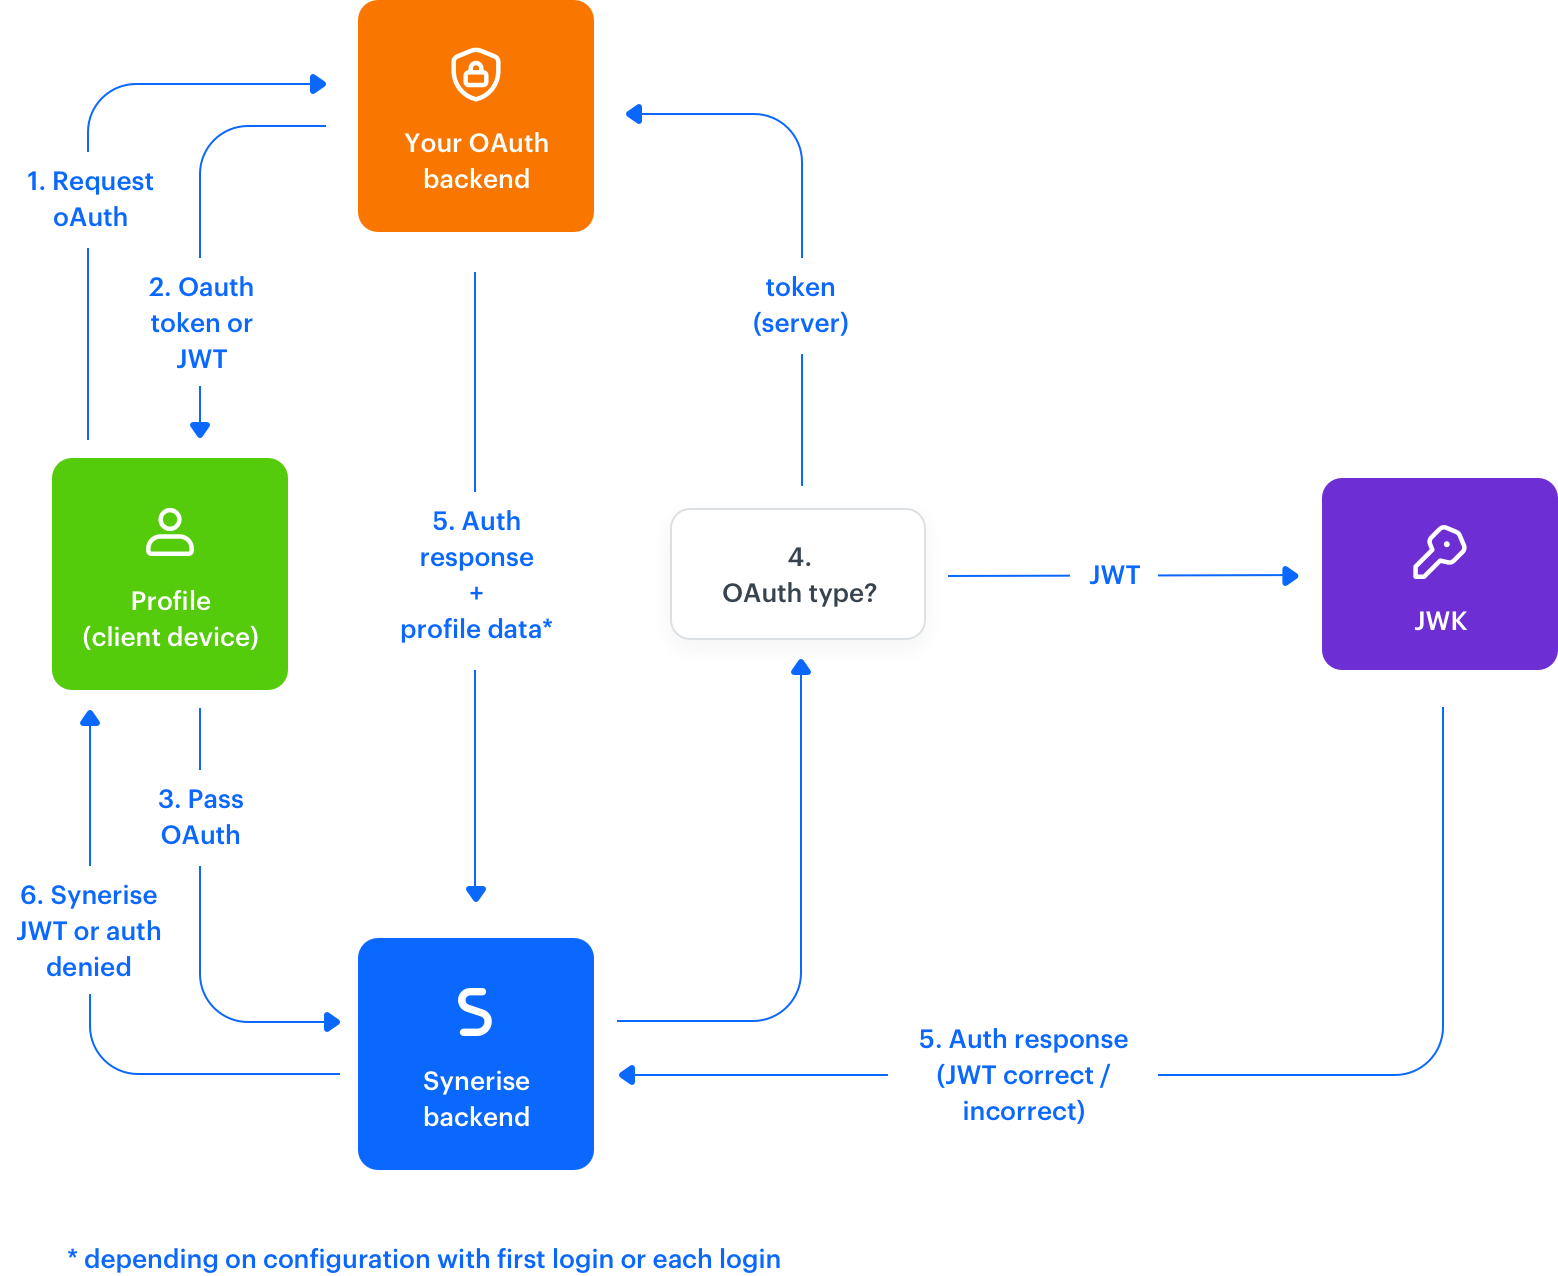
OAuth is not the actual OAuth as may be understood per RFC6749: The OAuth 2.0 Authorization Framework. This feature allows you to configure authentication through your existing IT systems that have RESTful APIs, allowing you to authenticate a person through an HTTP call to an endpoint (checking if the provided token is valid and returning a response with the user’s data).
Example response:
{
    "Response": {
        "PersonQCCode": "XXXXXXXX-XXXX-XXXX-XXXX-XXXXXXXXXXXX",
        "LoyaltyQCCode": "XXXXXXXX-XXXX-XXXX-XXXX-XXXXXXXXXXXX",
        "Email": "example.email@example.com",
        "CardNumber": "0000000000000",
        "Role": 8,
        "IsBusiness": false,
        "firstname": "john",
        "lastname": "doe"
    },
    "Success": true,
    "Errors": null
}
-
Go to
Settings > IAM for applications. -
In the OAuth section, click Show.
-
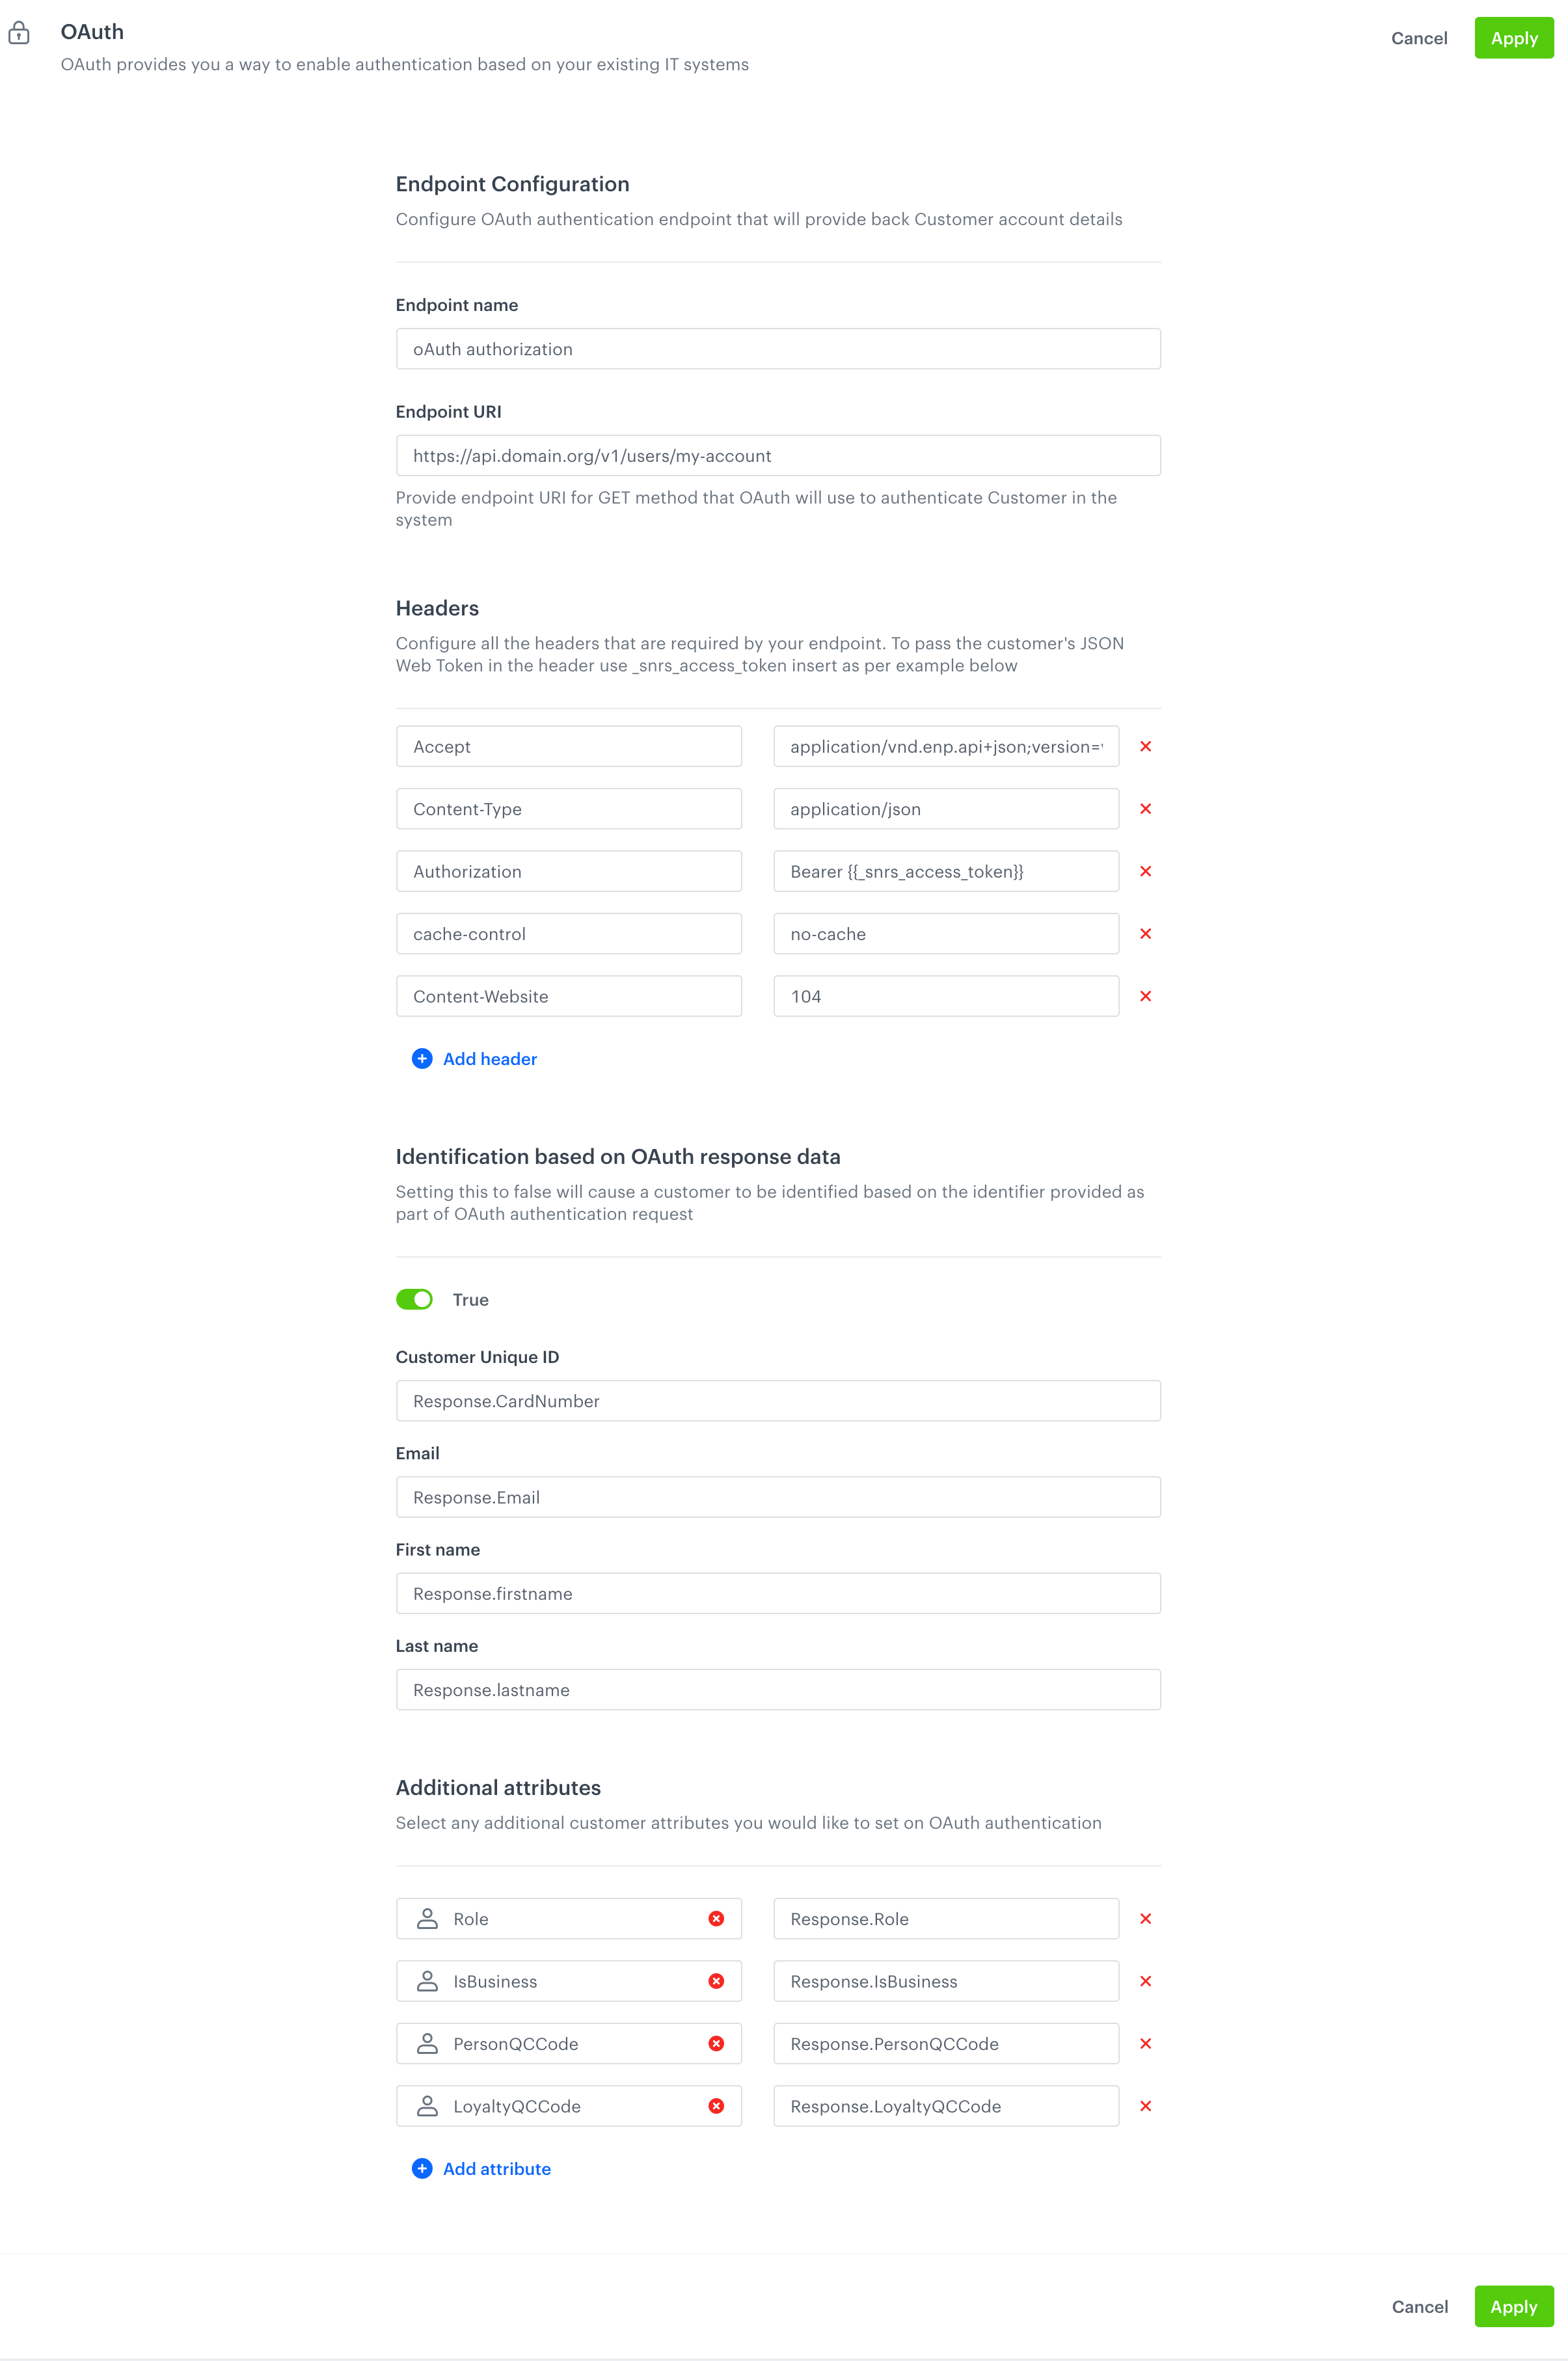
In the Endpoint Configuration, in the Endpoint name field, enter the name (it can be anything).
-
From the Authentication method dropdown, select how you want to confirm customer credentials:
- SERVER - A request with a token is sent to the external identity provider to confirm user credentials.
- JWT - Use JWT verified by JWK. When you use this option, in the Endpoint URI field. provide the URL from which the JWK will be retrieved.
-
Enter the URL of the endpoint (GET method).
-
In the Headers section, enter all headers which are required by the endpoint you entered in the previous step.
-
In the Identification based on OAuth response data section, you can:
- Leave the settings to default (True) - customID from the OAuth backend is used to authorize a user
- Set the toggle to False - customID from the application is applied
-
In the Additional attributes section, from the dropdown list, select the attributes to be passed to Synerise after the authorization and as the value enter the formula based on this pattern:
Response.AttributeName.
On the left side, you define the Synerise attributes, whereas on the left side, you receive the attributes from the OAuth response. The response from the field on the left will be saved in the attribute on the right.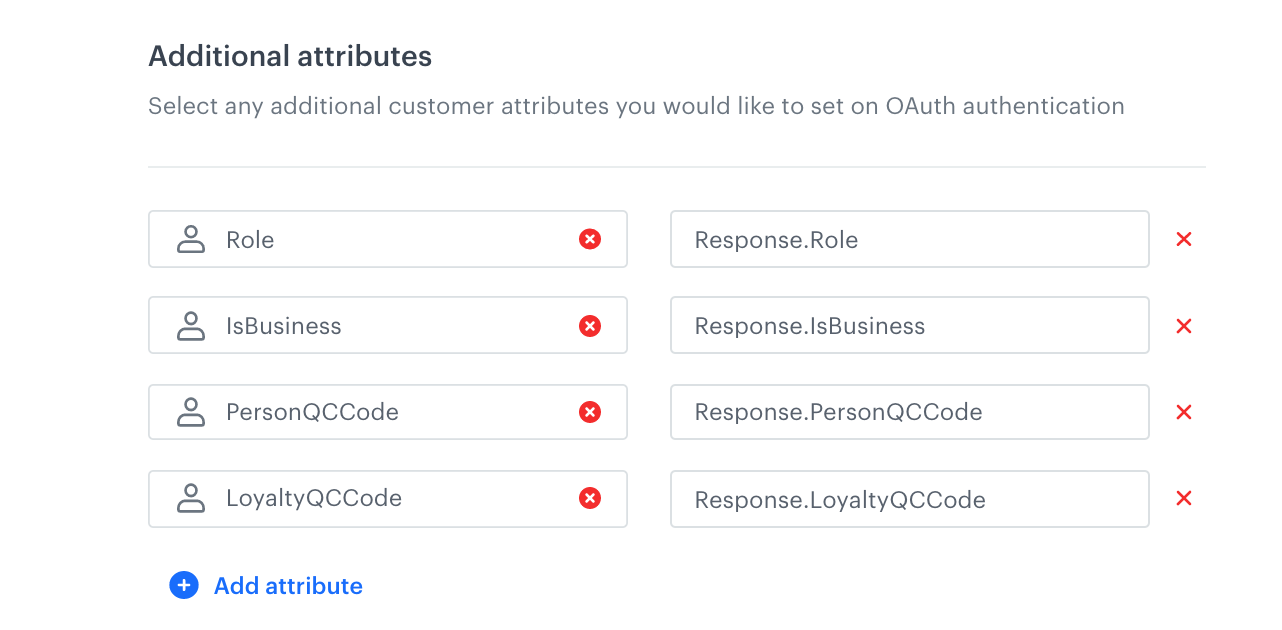
Example additional attributes -
In the Data synchronization while logging in section, you can enable data synchronization with the OAuth server every time a customer logs in. When this option is disabled, the data from the server is sent only during the first log-in.