First run in-app message
First-run in-app messages play a pivotal role in establishing a meaningful connection with customers from the outset of their interaction with a digital product or service. First-run in-app messages serve as a direct communication channel between the product and its users, allowing for personalized engagement. By conveying a brand’s personality and values, these messages can create an immediate sense of connection, fostering a positive relationship between the user and the product.
Welcome messages can be considered as one of the examples of this kind of messages. A “Warm Welcome” message serves as the virtual handshake of the digital realm, extending a friendly greeting to users as they embark on their journey with a new app. This type of in-app message is crucial for setting the tone and establishing a positive initial interaction.
In this use case, we will create the first run in-app message that will be displayed to users who are logging into the mobile app for the first time. We will be using predefined in-app template. Created message will not only greet users warmly but also offer a unique voucher code, adding an extra touch to enhance their first purchase experience.
Prerequisites
- Implement Synerise SDK in your mobile app.
- Implement a dedicated custom event that is sent to the customer’s profile when they first enter the mobile app. This event should be sent only one time, during first visit in the mobile application. In this use case, we use
app.firstVisitevent. - Create voucher pool for users who are logging to the mobile application for the first time.
Create an in-app message
Create an in-app campaign triggered by the app.firstVisit event for customers who logged into the mobile application for the first time. We will use a predefined template for this message, so there is no need to create a template from scratch.
- Go to
 Communication > In-app messages> Create in-app.
 - Enter the name of the in-app.
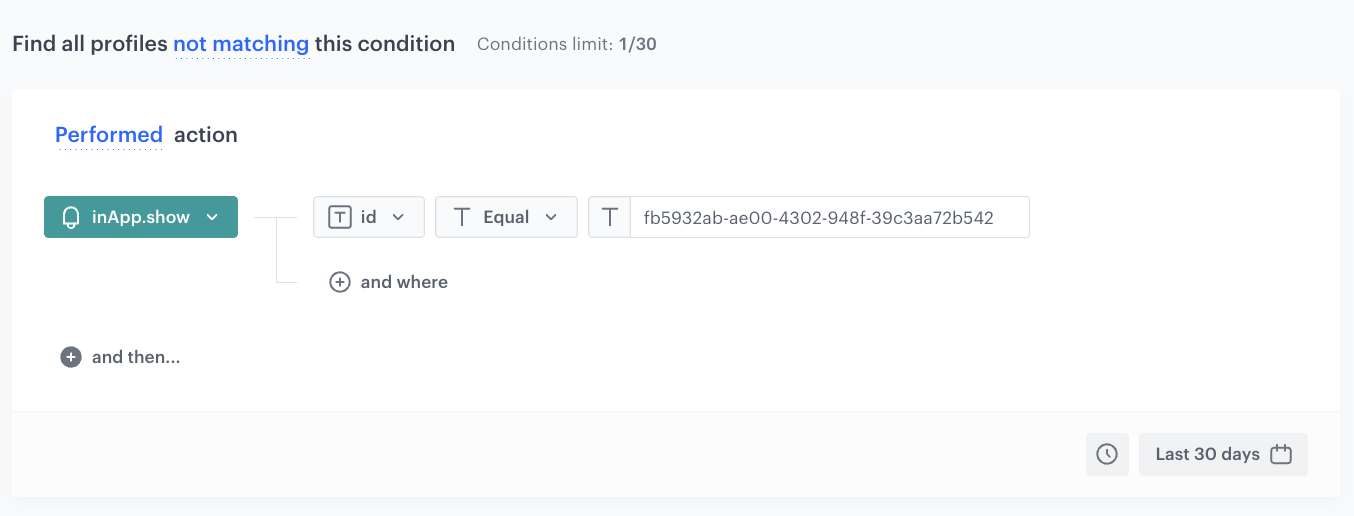
Define the audience
As the first step, define the target group of customers for the in-app message. In this use case, this segment acts as an additional security measure that helps to include only people who have never seen this in-app message before.
- In the Audience section, click Define.
- Click New Audience and then Define conditions.
- Click Performed action…, from the dropdown list, select the inApp.show event.
- Next to the inApp.show, click +where.
- From the dropdown list, select id.
- As the operator, choose Equal.
- Enter the In-app campaign ID in the text field. You can locate the ID in the campaign’s URL link.
For instance, in the URL https://app.synerise.com/communications/in-app/fb5932ab-ae00-4302-948f-39c3aa72b542 the ID isfb5932ab-ae00-4302-948f-39c3aa72b542. - Change matching condition to not matching to find all profiles that don’t meet the defined condition.
- Use the time filter to define analysed time period.
- Click Apply.
- To save the audience, click Apply.
Define content
In the next step, you will create the content of the in-app message that will appear in the mobile application with the help of ready-made template.
- In the Content section, click Define.
- Click Create message and from the list of template folders, select Predefined templates.
- Select the Fullscreen template.
Result: You are redirected to the code editor.
Edit form in the Config tab
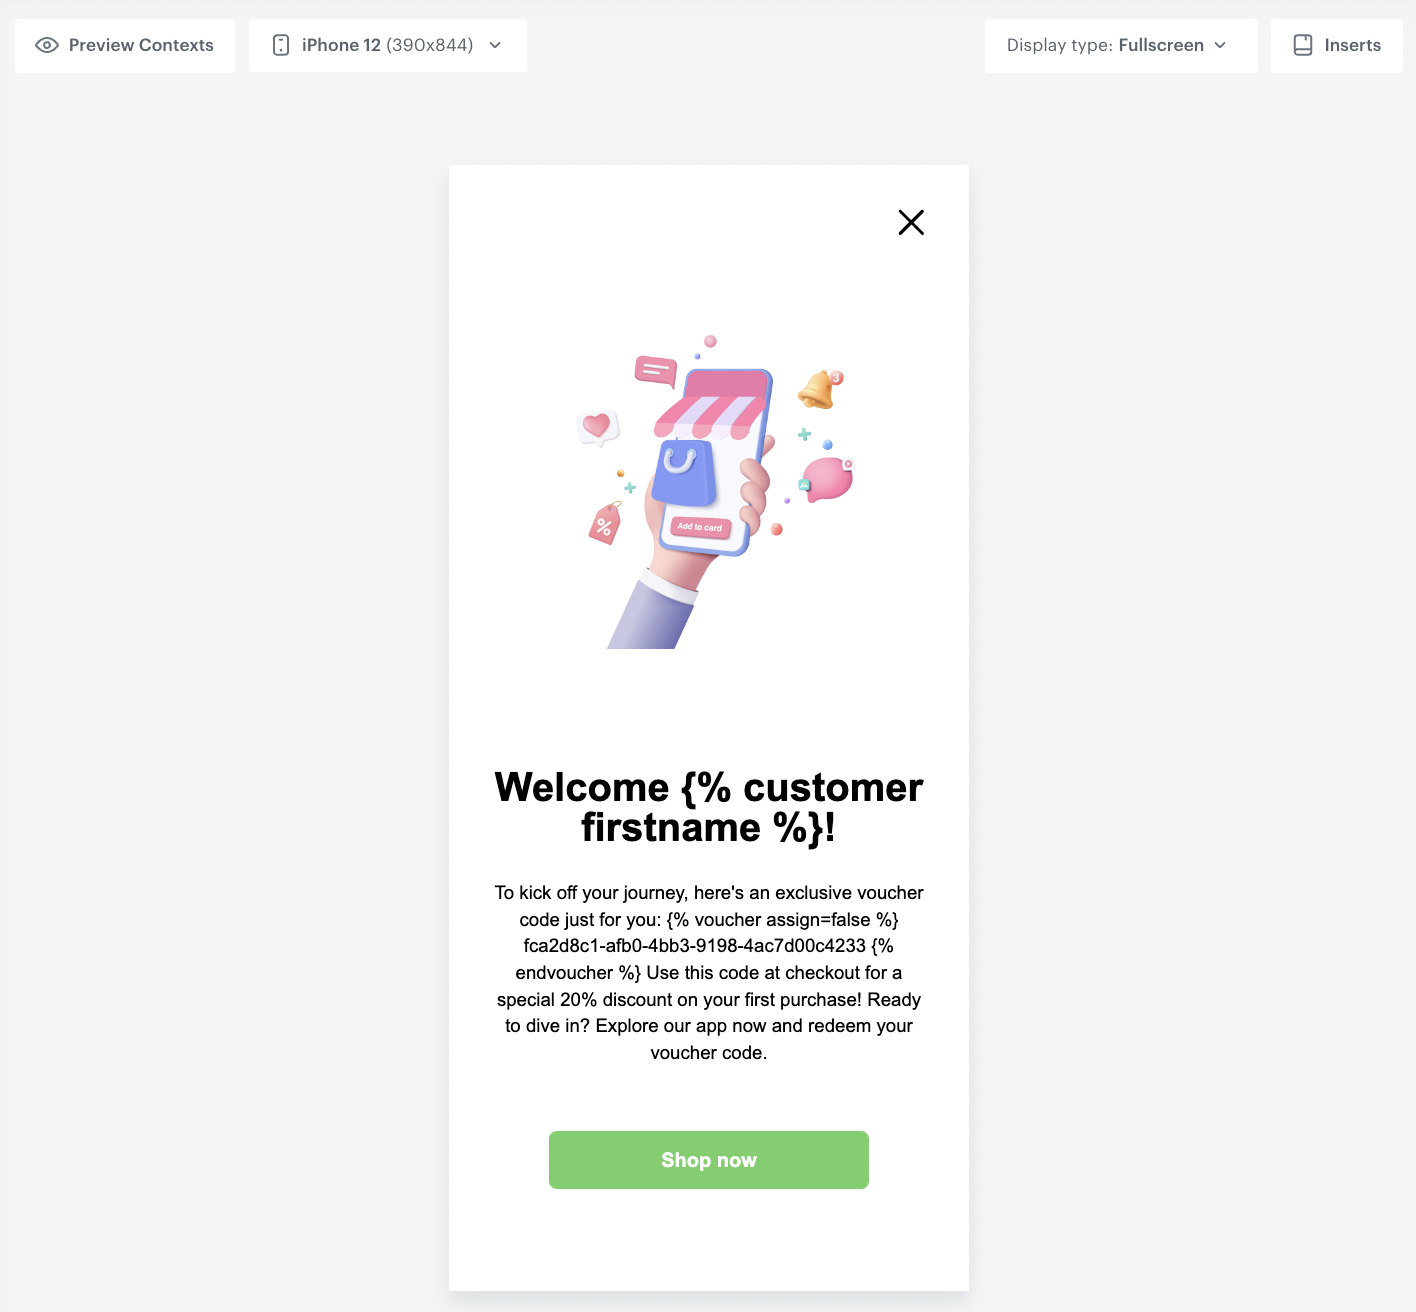
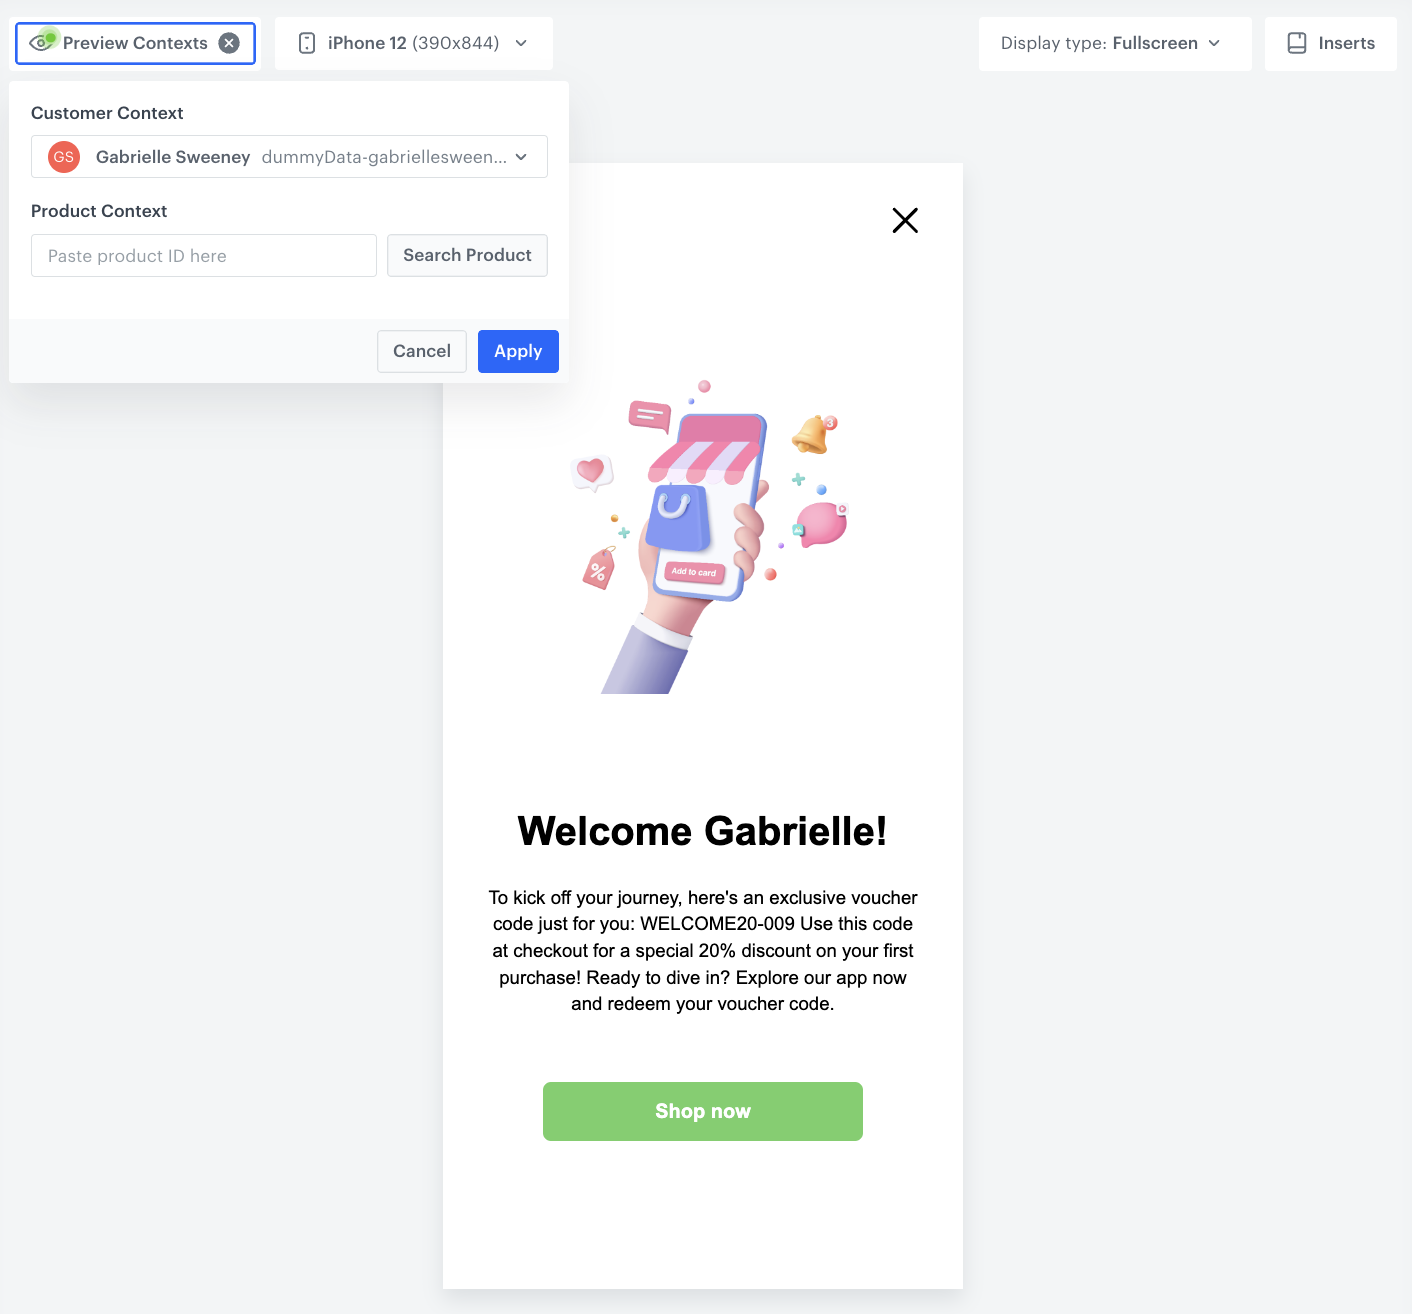
The form in the Config tab is already filled in with default values. You can keep them or change them to fit your business needs. In this use case, we will make changes to the graphic, header, description, and call to action button. We will also use inserts to personalize the displayed message.
- In the Background section, adjust the background color and background image if needed.
- In the Image section, leave the default image URL or change it to an image customized for your message (add the image to Data Management > Files and then you can find there the URL to this image).
- In the Header section, customize the header text, font size and color to your specifications.
Example of header used in this use case:
Welcome {% customer firstname %}! - In the Description section, customize the description text, font size and color to your specifications.
Example of the description used in this use case:
To kick off your journey, here's an exclusive voucher code just for you: {% voucher assign=false %} fca2d8c1-afb0-4bb3-9198-4ac7d00c4233{% endvoucher %} Use this code at checkout for a special 20% discount on your first purchase! Ready to dive in? Explore our app now and redeem your voucher code.
Whereis an insert that assigns a code from a pool to a customer (unless one is already assigned) and retrieves that same code for this customer every time. The value{% voucher assign=false %} pool-uuid {% endvoucher %}pool-uuidmust be replaced with the ID of your voucher pool. - In the CTA button section, customize the button text, corner radius, color, background color, and URL to which a user is redirected according to your needs.
- In the Close button section, select the position of the closing cross.
- In the Automatically Disappear section, you can enable the Automatically Disappear switch and define a timeout for this in-app message in seconds, or leave this switch disabled by default.
- You can also enable Use deep links option if you are using deep links as CTA links.
- When the template is ready, in the upper right corner click Save as.
- On the pop-up:
- In the Template name field, enter the name of the template.
- From the Template folder dropdown list, select the folder where the template will be saved.
- Confirm by clicking Save.
- To continue the process of configuring the in-app campaign, click Next.
- To save your content changes, click Apply.
In the screens below you can see a preview of the final in-app message configuration with and without contextual preview.
Select events that trigger the in-app message display
In this part of the process, you will define the event triggering the display of the in-app message.
- In the Trigger events section, click Define.
- Select Add event and from the dropdown list, choose
app.firstVisitevent. - Click the + where button and select
source. - As the logical operator, select MOBILE_APP.
- Click Apply.
Schedule the message and configure display settings
As the final part of the process, you will set the display settings of the in-app message such as schedule, capping, priority of the message among other in-app messages.
- In the Schedule section, click Define and set the time when the message will be active.
- In the Display Settings section, click Define.
- Define the Delay display, Priority index, Frequency limit and/or Capping limit.
In our case, we want to display the message once per user. To do this, we set the limit for displaying this in-app message to once per user. - Click Apply.
- Optionally, you can define the UTM parameters and additional parameters for your in-app campaign.
- Click Activate.
Check the use case set up on the Synerise Demo workspace
You can check the Voucher pool and In-app message configuration directly in Synerise Demo workspace.
If you don’t have access to the Synerise Demo workspace, please leave your contact details in this form, and our representative will contact you shortly.