Integration with Accredible
You can integrate a full-service digital credentialing solution, Accredible, with Synerise to issue digital certificates, diplomas, badges, and many other credentials to the users based on their profiles and activity in Synerise.
This use case presents the integration used for the purposes of user certification in Synerise. The workflows includes sending data of users who reached a certification level in Synerise to Accredible in order to issue their certificate and badge.
Prerequisites
- Access to Accredible.
- If you want to trigger the workflow by occurrence of a custom event, you must add one in Synerise in Data Management > Events and implement it in your application. You can read more about adding events here.
Process
In this use case, you will go through the following steps:
- Create credentials in Accredible.
- Create a schema that stores the certification questions.
- Create a catalog.
- Create a workflow .
- Test your integration.
Create credentials in Accredible
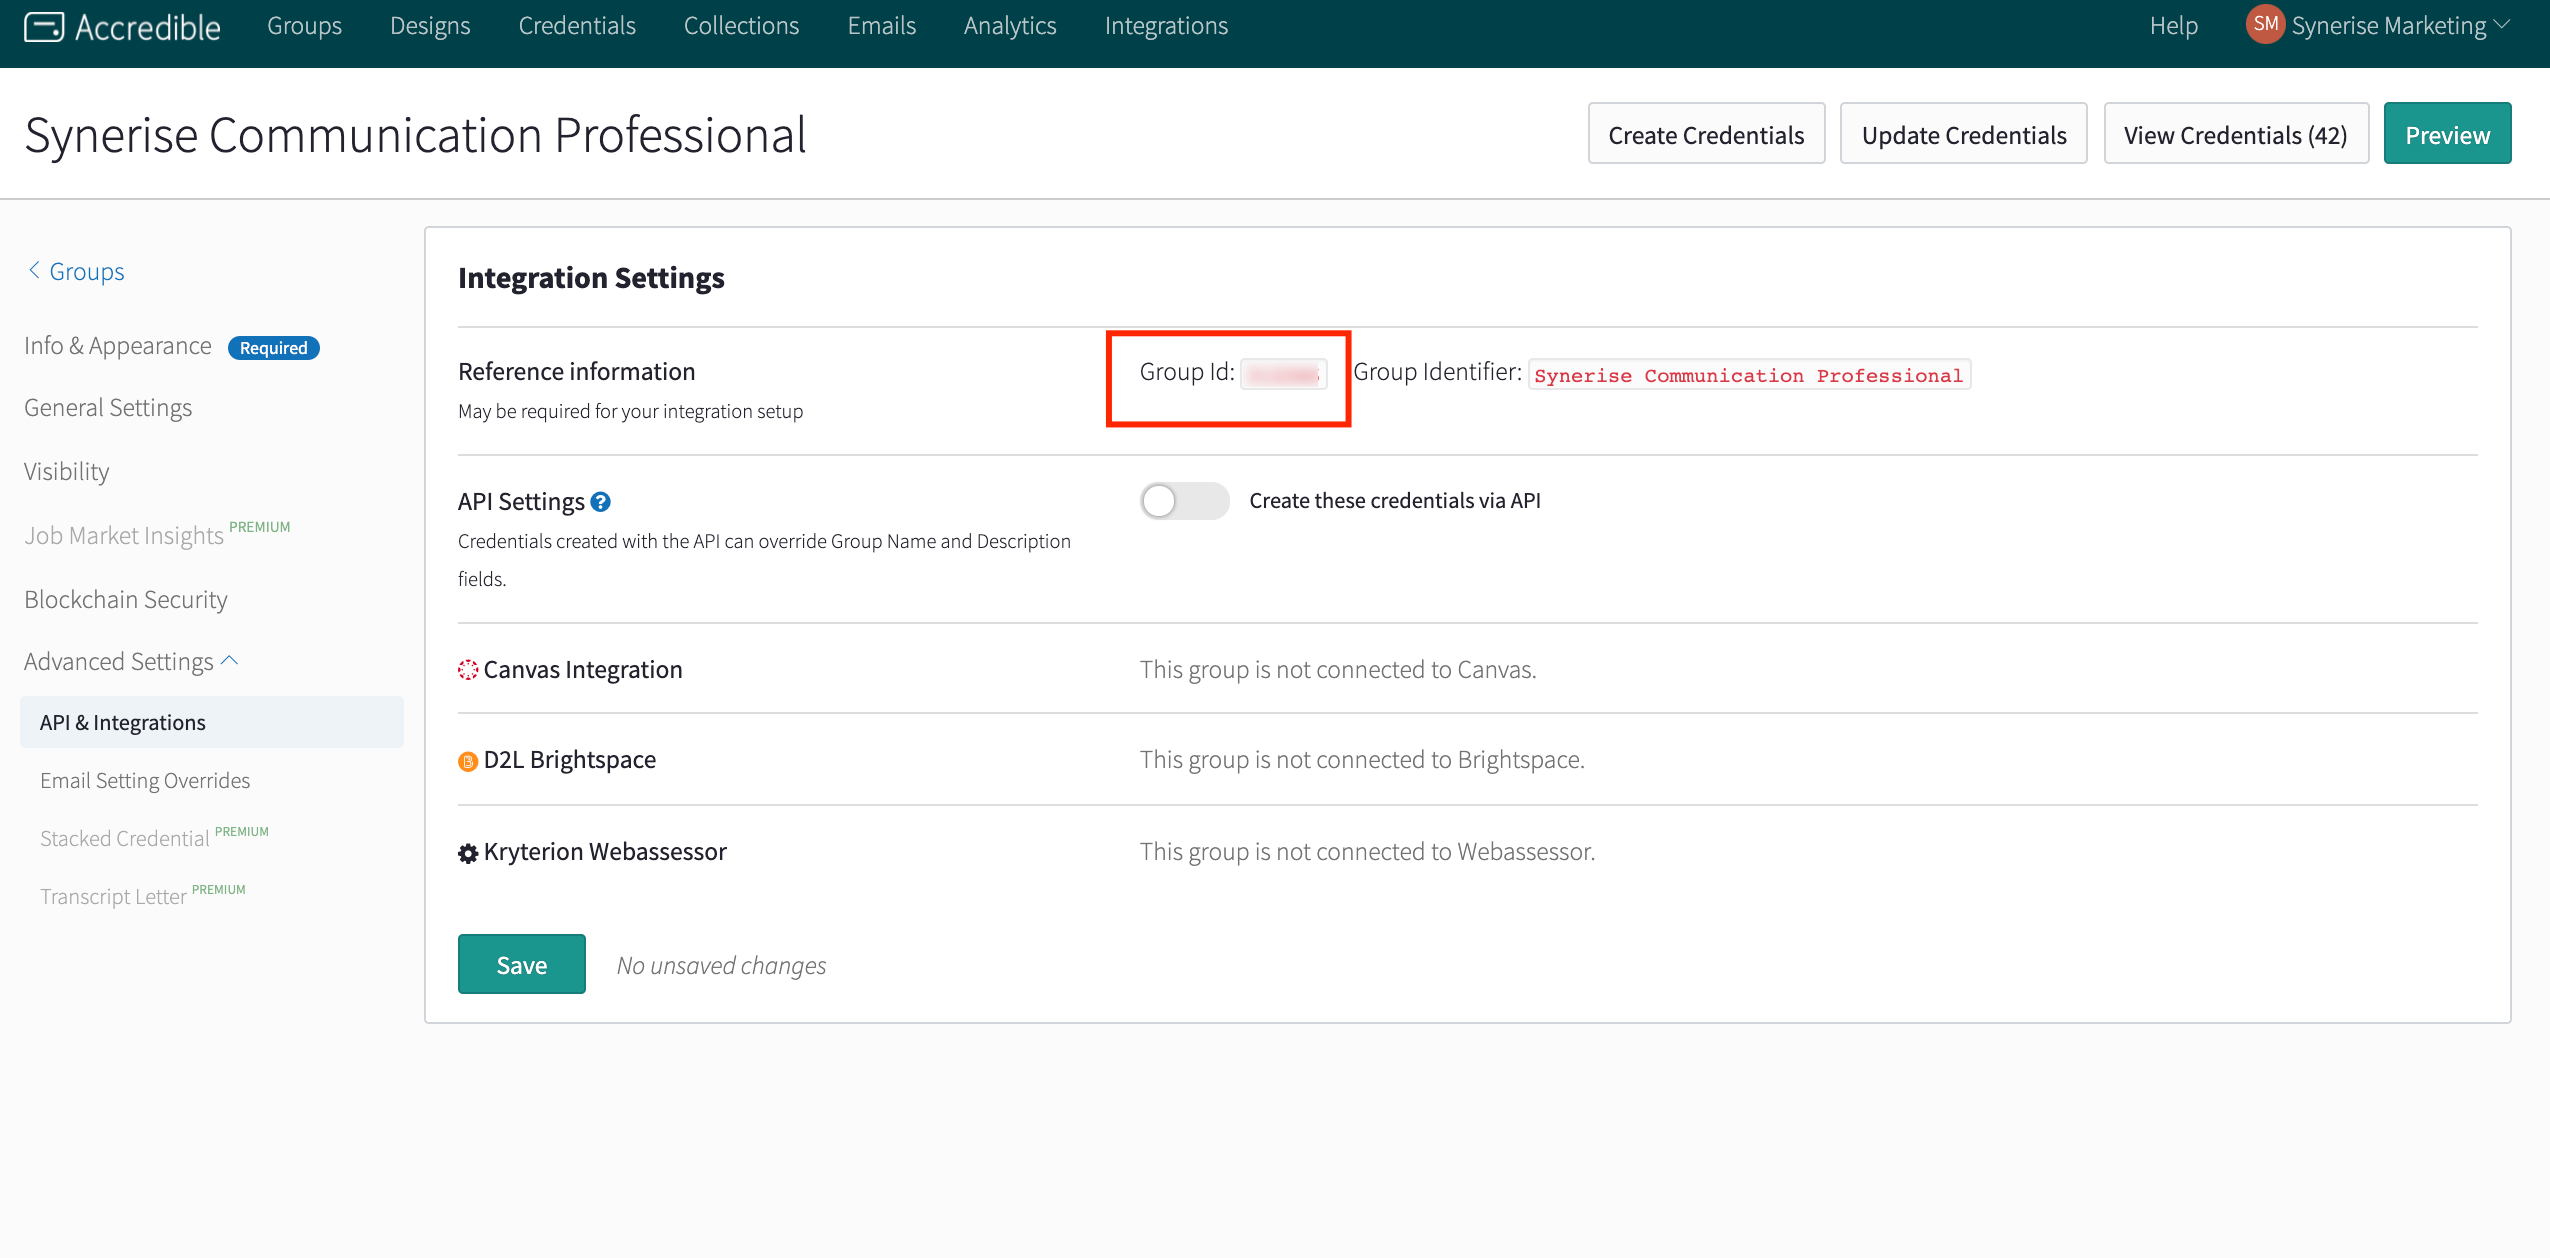
In this part of the process, in your Accredible account, create a group of credentials.
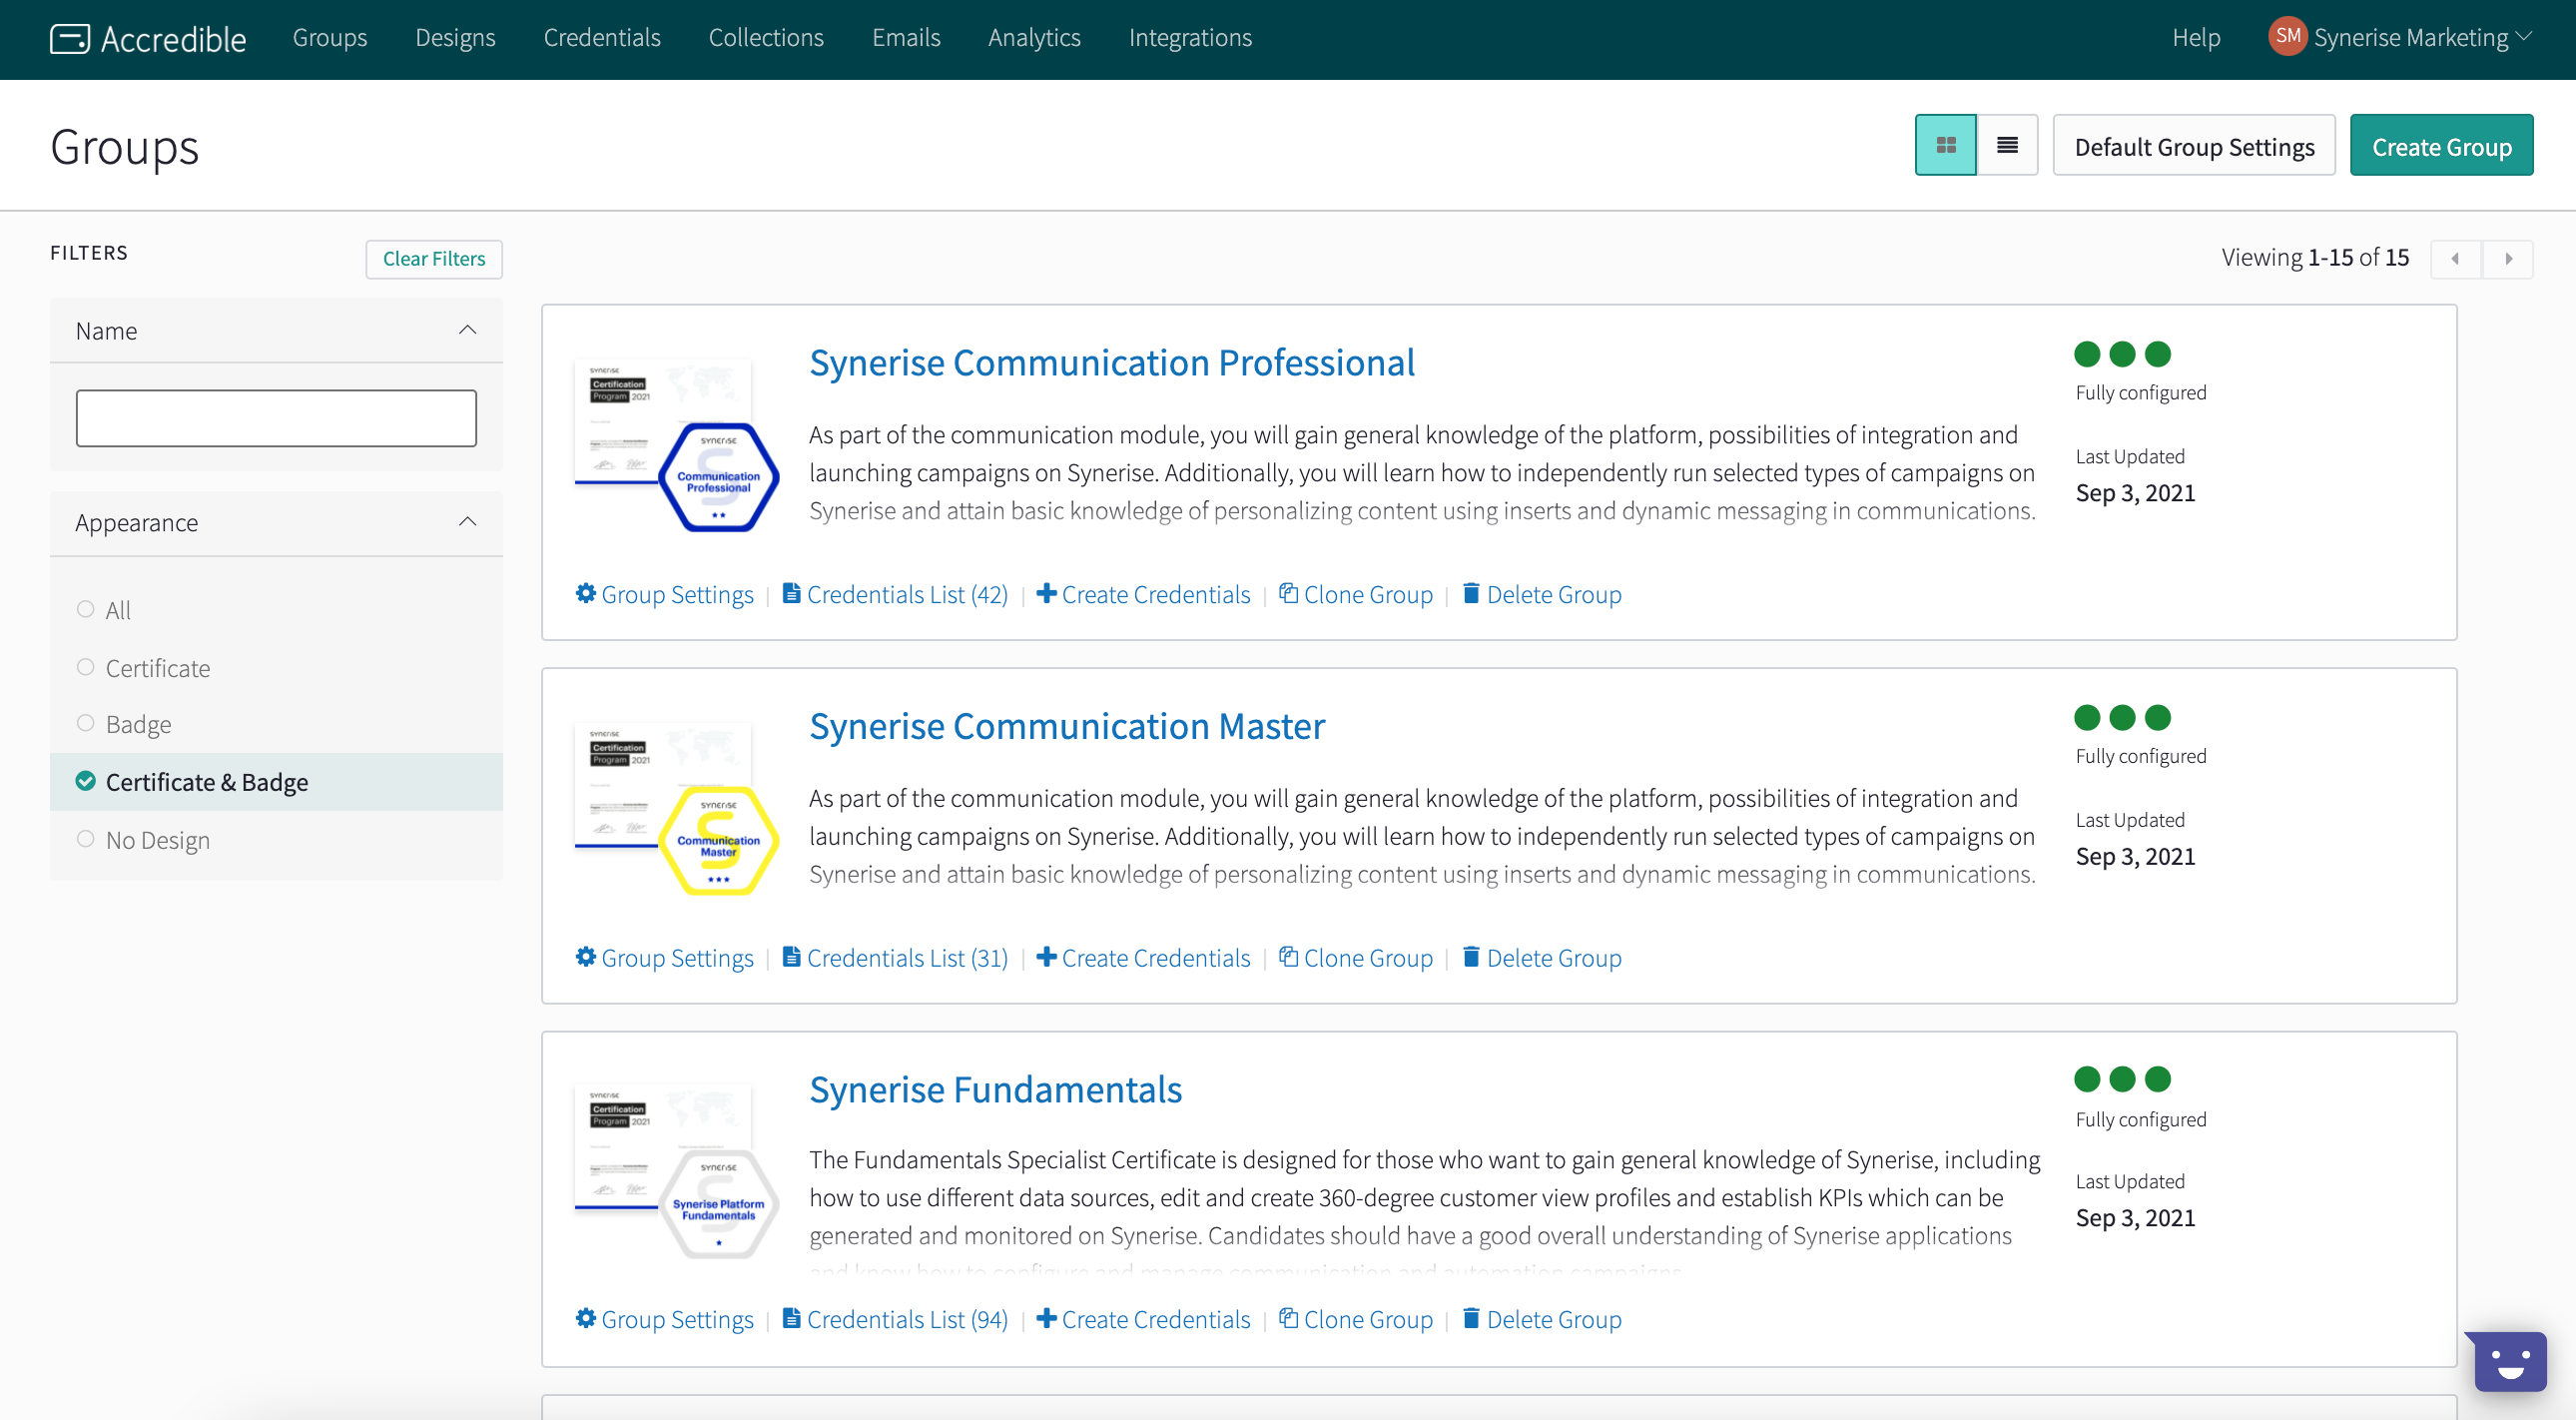
A group receives a unique identifier.
Create a schema that stores the certification questions
For the purpose of this use case, a schema was created as described in the blog post.
Create a catalog
In this part of the process, prepare a CSV file that contains Accredible group identifier and Synerise ID of the certificate level. Next, create a catalog to which you import the file.
- Go to Data Management > Catalogs > Create new.
- Enter the name of the catalog.
Important: Don’t use diacritical letters, underscores (_), and spaces. - Click Import CSV.
Warning for MacOS users
If you prepared a CSV file in Excel, open it in a text editor to check whether commas are used as separators. If not, replace them with commas. - Upload the file by clicking Upload file.
- In the Order key field, type the name of the column which values are treated as the key -
syneriseID.
- Complete the process by clicking Import.
Result: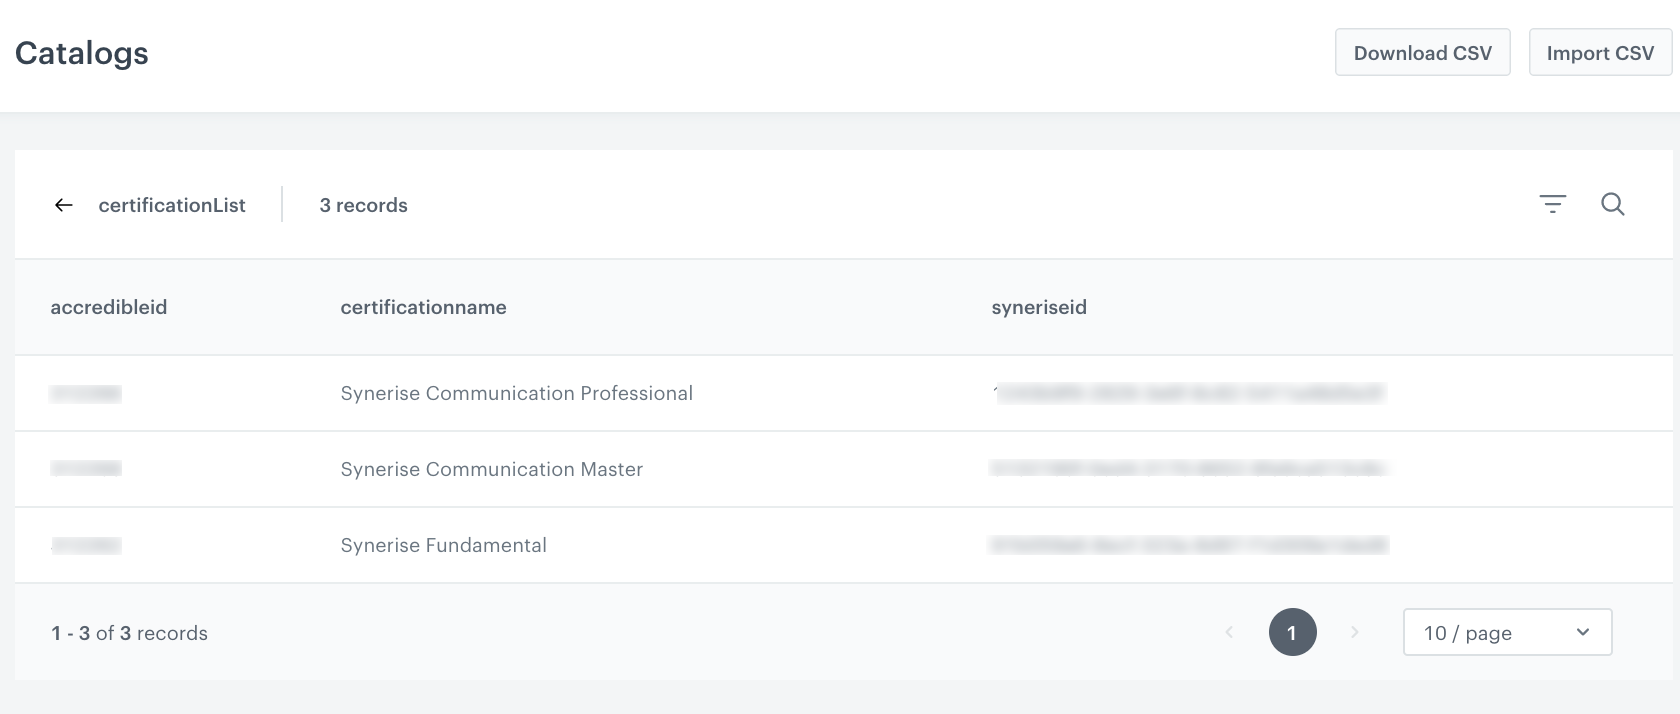
CSV file imported to catalog
Create a workflow
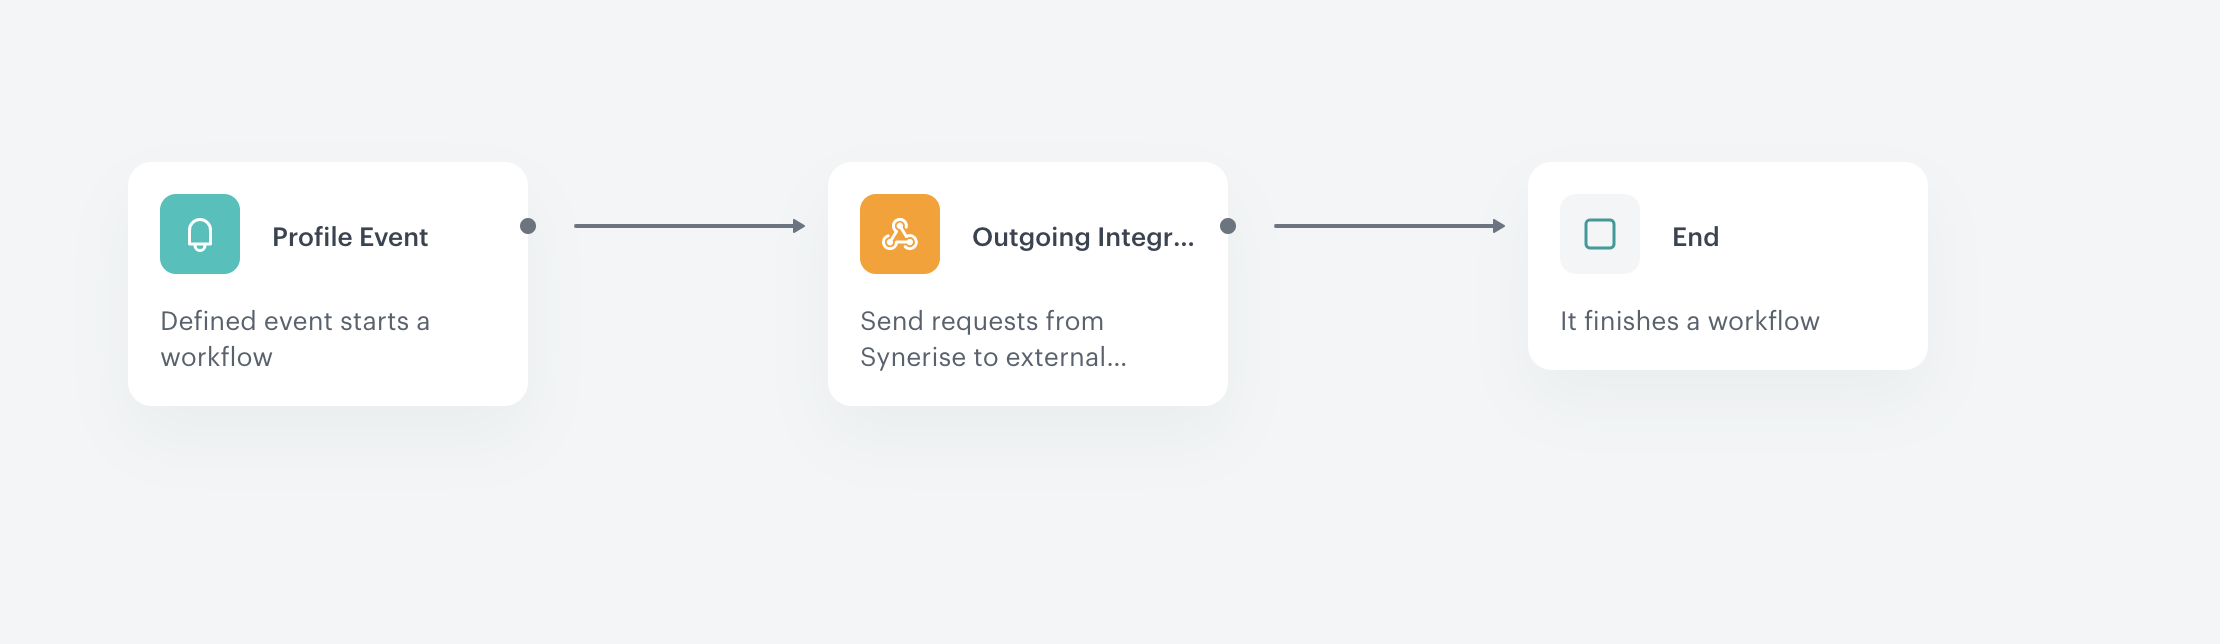
In this part of the process, create a workflow that is triggered by receiving a certification. Then, a request is sent to Accredible to issue credentials for the user who received the required score.
-
In Synerise, go to Automation > Workflows > New workflow.
-
Enter the name of the workflow.
-
As the first node, add Profile Event. In the configuration of the node, select the event that triggers the workflow. In this use case, it’s a custom event -
certification.acquired.
Tip: If it suits your business scenario, you may use default Synerise events, or instead of Profile Event, you may use the Audience node to trigger the workflow for the selected group. -
Confirm the settings by clicking Apply.
-
Add the Outgoing integration node. In the configuration of the node:
- Enter the name of the node.
- Enter the value of the
nameparameter that is sent in thewebhook.responseevent. - Select the POST method.
- In the URL field, enter
https://api.accredible.com/v1/credentials
Note: You can find more information about this endpoint here. - In the Headers section, use the following headers:
- Set
Content-typetoapplication/json. - Set
AuthorizationtoToken token=YOUR ACCREDIBLE API_KEY
- Set
- Enter the request body, you may reuse and modify the example request below according to your needs:
{ "credential": { "recipient": { "name": "{{ event.params.firstName }} {{ event.params.lastName }}", "email": "{% customer email %}", "group_id":"{% set key = event.params.certificationId %}{% catalogitem.certificationList(key) %}{% set object = catalog_result %}{{ object.get('accredibleid')}}{% endcatalogitem %}" } }Note:The example request contains three Jinjava inserts:
- Customer’s name sourced from Profile Event node, read more about reusing information in nodes
- Customer’s email address according to the context
- Reference to the catalog column
You can read more about inserts in Automation here.
- In the Authorization section, select None as the authorization is processed based on the headers.
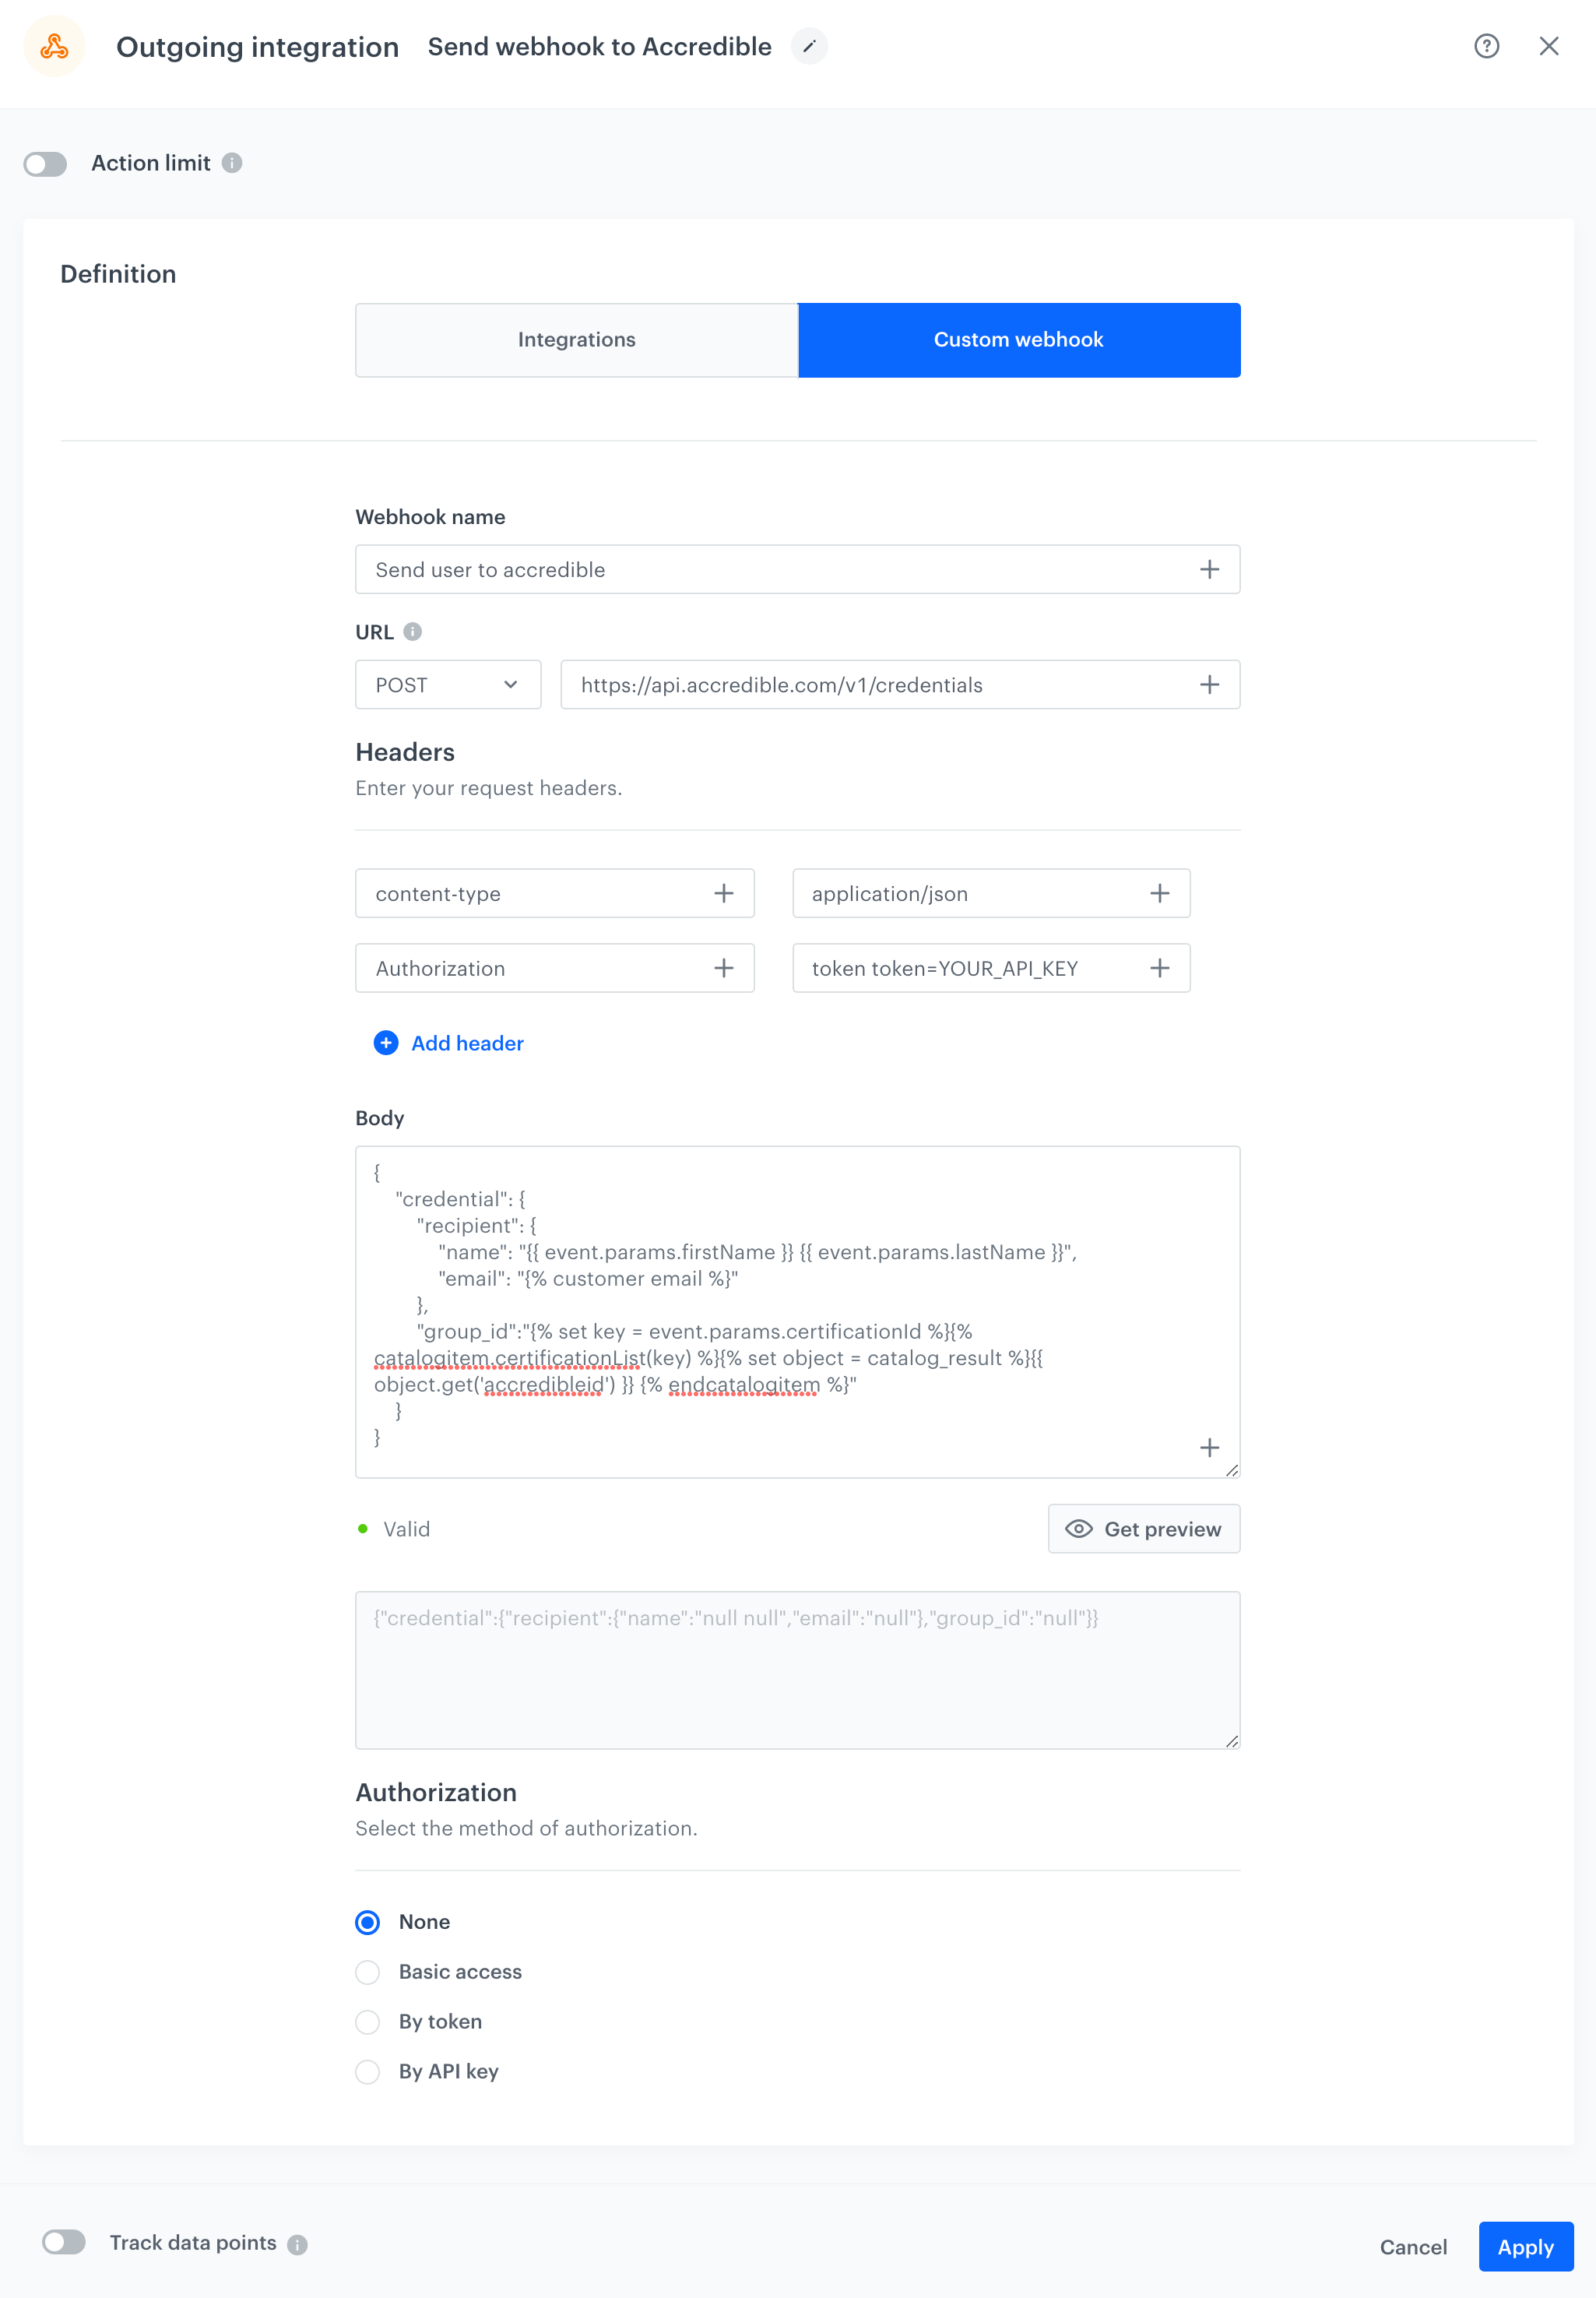
Configuration of the Outgoing integration node - Confirm by clicking Apply.
-
Add the End node.
-
Click Save&Run.
Testing
- Use the API to send a test event and simulate a user completing a certification
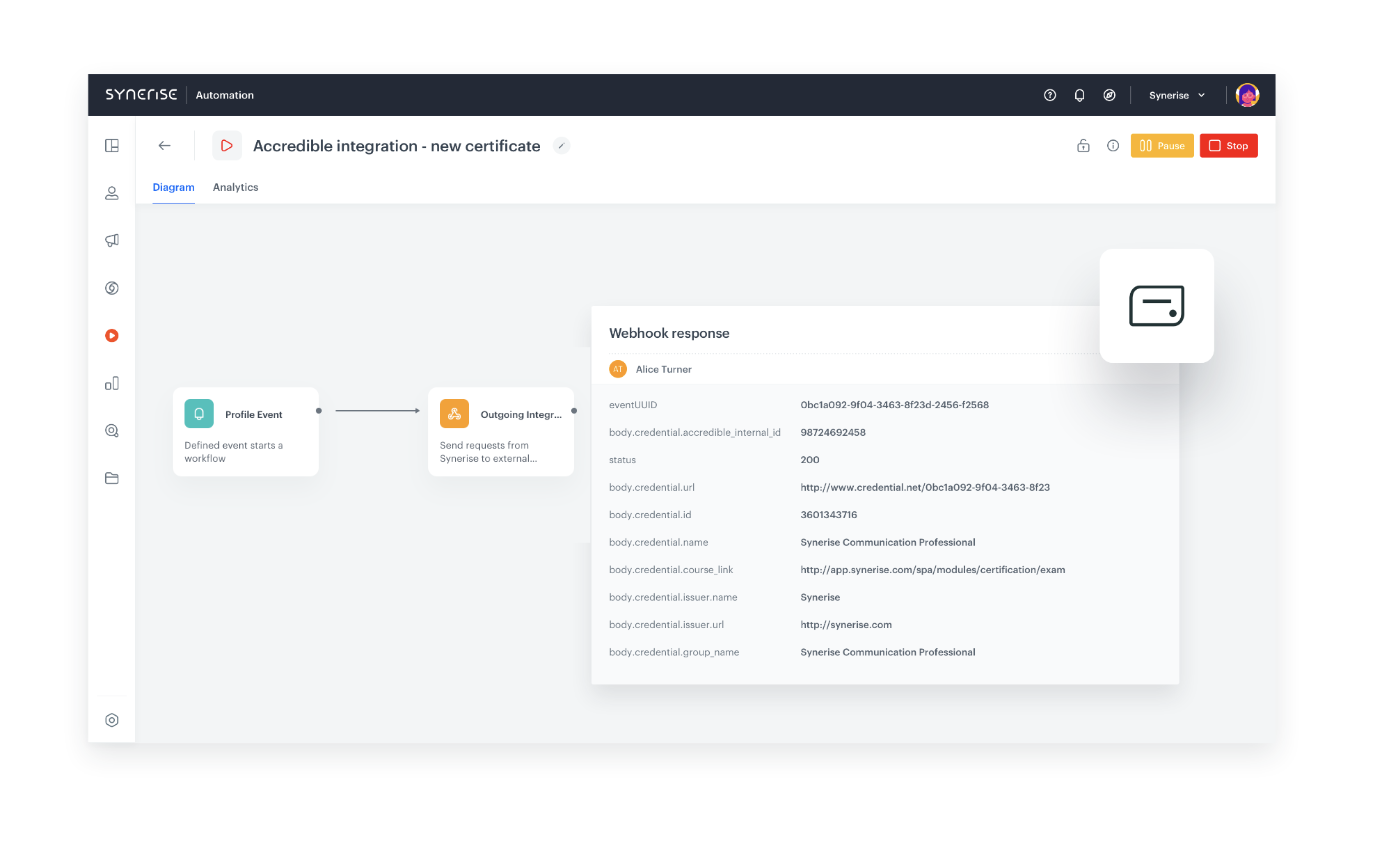
- Open the Statistics tab available in your workflow.
- Click the Outgoing integration node. If the Entered and Executed counters have incremented after you sent the test certification, your survey triggered the workflow and completed it.
- Go to the profile of the test user, look for the
automationevent. Double-click it to see the details. If thestatusparameter is200, the workflow works.
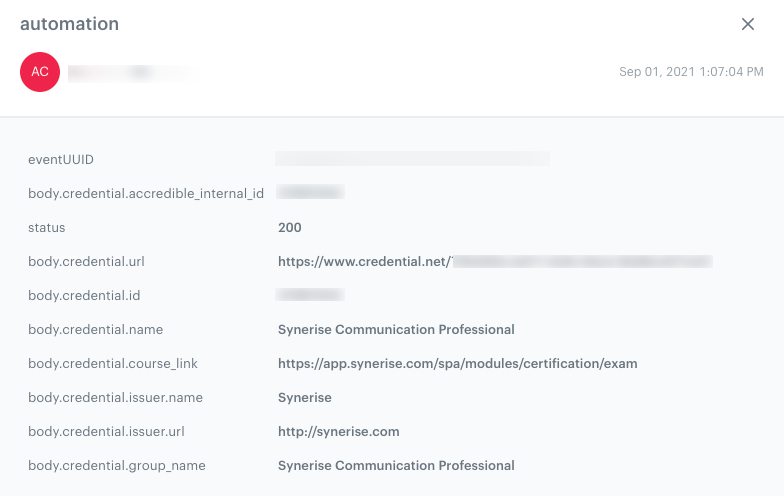
You can use this webhook response to trigger further campaigns to the user as well as create analytical dashboards with clear information on how many users received their credentials.