
Send NPS survey results to Google Cloud Pub/Sub
Google Could Pub/Sub is a messaging service for exchanging event data among applications and services. It lets you create systems of event producers and consumers, called publishers and subscribers. Publishers communicate with subscribers asynchronously by broadcasting events to a topic regardless of how or when these events are to be processed. Pub/Sub then delivers events to all the subscribers of that topic, and each subscriber has its own logic of reacting to the event.
Integrating Synerise with Google Cloud Pub/Sub provides a seamless solution for exporting data from Synerise to Pub/Sub through dedicated nodes, including the valuable NPS survey data.
With Google Cloud Pub/Sub integration, you can send selected data to this messaging service. This service makes data available to all subscribers, which can include any Google service or other third-party tools.
In this use case, we will create a workflow that sends information with NPS survey data to Google Cloud Pub/Sub using a dedicated node in our Automation.
Prerequisites
- Implement a custom event for NPS survey data, which will be available in the customer profile. In this example, the event is called
nps.sent. Implement custom events in your mobile application or website Web. You can learn more about NPS survey in this use case. - Check the requirements you must meet to integrate Synerise with Google Cloud Pub/Sub.
Create a workflow
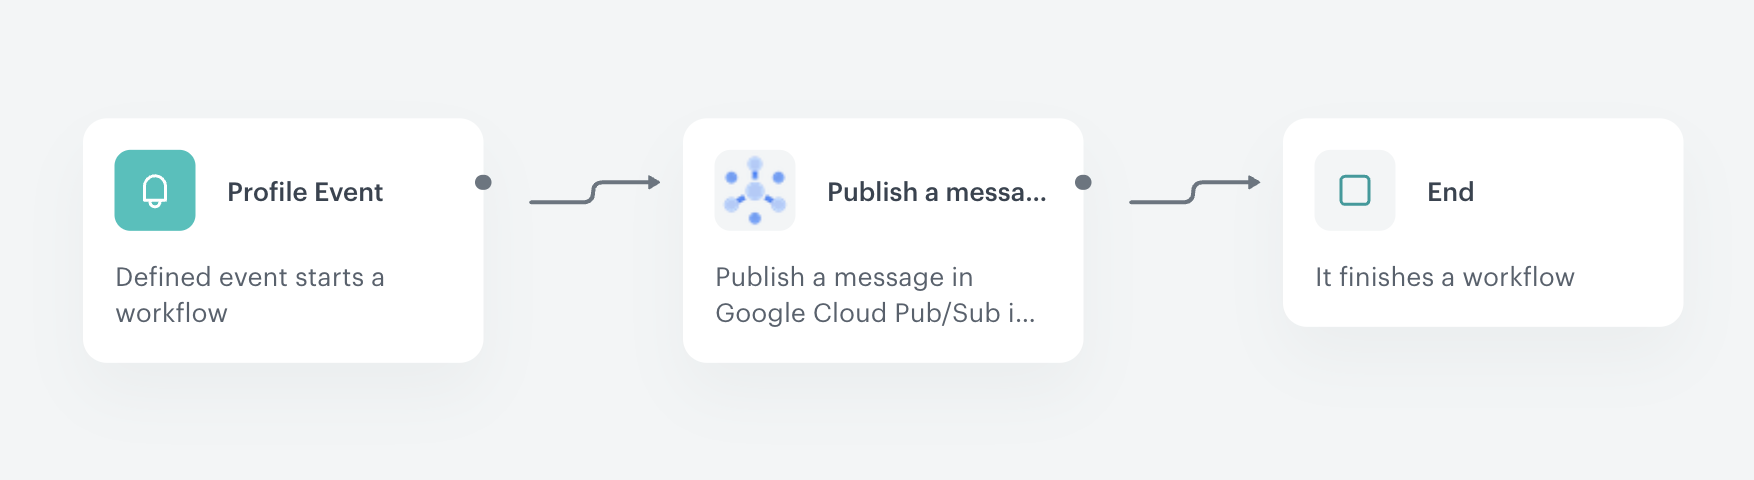
Create a workflow which sends information with NPS survey data to Google Cloud Pub/Sub. Every time the nps.sent event is generated, the data from the event is sent automatically to Pub/Sub.
- Go to
 Automation > Workflows > New workflow.
 - Enter the name of the workflow.
Define the Profile Event trigger node
At this stage, we will configure conditions that launch the workflow. As a trigger, we will use the nps.sent event.
  {
    "time": "2023-02-15T15:24:49Z",
    "action": "nps.sent",
    "label": "",
    "client": {
        "id": 5092159999,
        "email": "e0097757-d1e2-44ac-ba3c-d97979a354c1@anonymous.invalid",
        "uuid": "e0097757-d1e2-44ac-ba3c-d97979a354c1"
    },
    "params": {
        "eventCreateTime": "2023-02-15T15:25:08.861Z",
        "name": "John",
        "surname": "Doe",
        "location": "Warsaw",
        "age": "23",
        "feedback": "I am very satisfied with the service. The support team was responsive and helpful.",
        "product_id": "PROD123",
        "order_id": "ORD456",
        "nps_score": 9,
        "NPSsource": "mobile_app"
    }
}- As the first node of the workflow, add Profile Event. In the configuration of the node:
- Enter the name of the node.
- From the Choose event dropdown menu, choose the
nps.sentevent.
- Confirm by clicking Apply
Configure the Publish a message node
At this stage, we will configure the Google Cloud Pub/Sub Publish a message node.
-
As the next node, add Google Cloud Pub/Sub > Publish a message.
-
Click Select connection.
-
From the dropdown list, select the connection.
- If no connections are available or you want to create a new one, see Create a connection.
- If you selected an existing connection, proceed to defining the integration settings.
-
In the configuration of the node:
-
In the Project ID field, enter the unique identifier of your project in Google Cloud Console. You can learn how to find the project ID here.
-
In the Topic ID field, enter the unique identifier of the topic (a named resource that represents a feed of messages).
Learn more about creating and managing topics. -
In the Attributes (optional) field, enter a JSON key-value object with message attributes.
This can be used to filter messages in the subscription. Learn more about building the “attributes” object. The Attributes object can contain up to 100 attributes. In this use case, we will add source of the NPS event as an attribute. This will allow subscribers in Pub/Sub to filter the proper messages to be consumed. The example of Attributes object contains the Automation inserts that retrieve data from the event included in the Profile Event node.Click here to see an example of Attributes object used in this use case{ "NPSsource": "{{ event.params.NPSsource }}" } -
In the CloudEvent type field, enter the type of data sent in the CloudEvent.
Learn more about CloudEvent types. -
In the Data (optional) field, enter the event data.
It will be sent to Pub/Sub as thedataobject in a CloudEvent JSON Object. The CloudEvent object will be automatically encoded with base64 and sent as thedatafield in a Pub/Sub Message. In this use case, we will send values ofnps.sentevent parameters such as, among others, name, surname and feedback. The example of Data field contains the Automation inserts that retrieve data from the event included in the Profile Event node.Click here to see an example of the Data field used in this use case{ "eventCreateTime": "{{ event.params.eventCreateTime }}", "name": "{{ event.params.name }}", "surname": "{{ event.params.surname }}", "location": "{{ event.params.location }}", "age": "{{ event.params.age }}", "feedback": "{{ event.params.feedback }}", "product_id": "{{ event.params['product_id'] }}", "order_id": "{{ event.params['order_id'] }}", "nps_score": "{{ event.params['nps_score'] }}" }
-
-
Confirm the settings by clicking Apply.
Add the finishing node
- Add the End node.
The workflow configuration - In the upper right corner, click Save & Run.
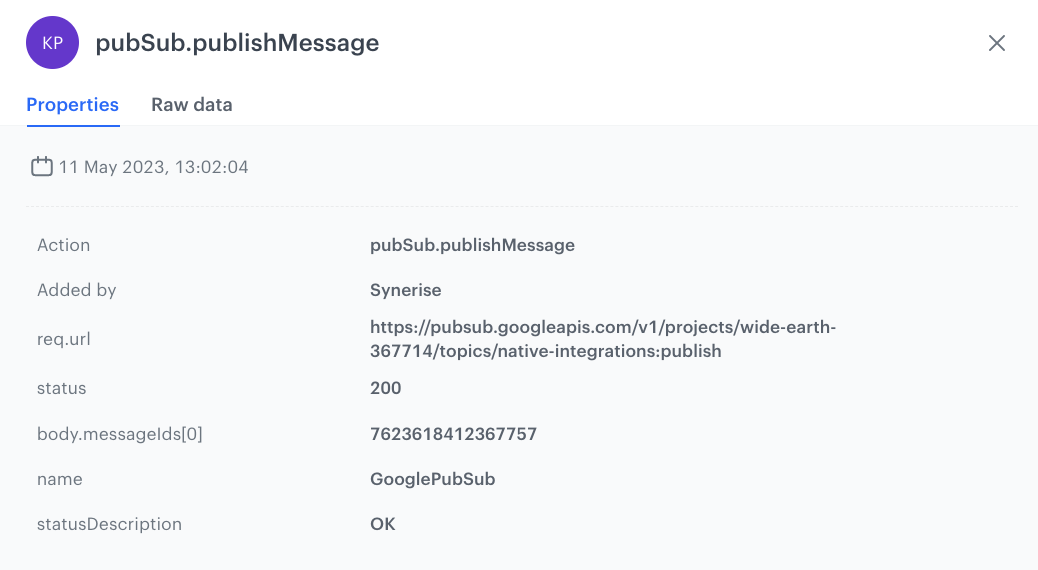
Result: Every time the
nps.sentevent is performed on the profil of customer, data from this event is streamed to Pub/Sub. After each such action, a response event (pubSub.publishMessage) is generated on the customer’s profile.
Check the use case set up on the Synerise Demo workspace
You can check the workflow configuration directly in Synerise Demo workspace.
If you don’t have access to the Synerise Demo workspace, please leave your contact details in this form, and our representative will contact you shortly.