


Send any event to Facebook
You can relay any events collected by Synerise to Facebook Conversion API in order to enrich the customer’s history and create more personalized ads in Facebook.
Example events:
- page visits
- adding a product to cart
- clicking a recommendation
- prediction results
- many more, including your own custom event types
In this use case, we will send page.visit events to Facebook using the dedicated integration node in Automation.
Prerequisites
- Create a Pixel in Facebook.
- Generate an access token in Facebook.
- In Synerise, you must have permissions that allow you to access Automation and create an outgoing integration and a workflow.
- In Synerise, implement tracking of events that you want to send to Facebook.
Create a workflow
In this part of the process, you will create a workflow that is triggered by an event. Through the outgoing integration, the system sends this event to Facebook.
Add the Profile Event trigger
In this part of the process, you will configure the trigger of workflow. Whenever the event in trigger happens, the system launches the workflow and performs action configured in it - in our case it will be sending event to Facebook.
- In the Synerise app, go to Automation > Workflows > New workflow.
- On the dashboard, click the plus button.
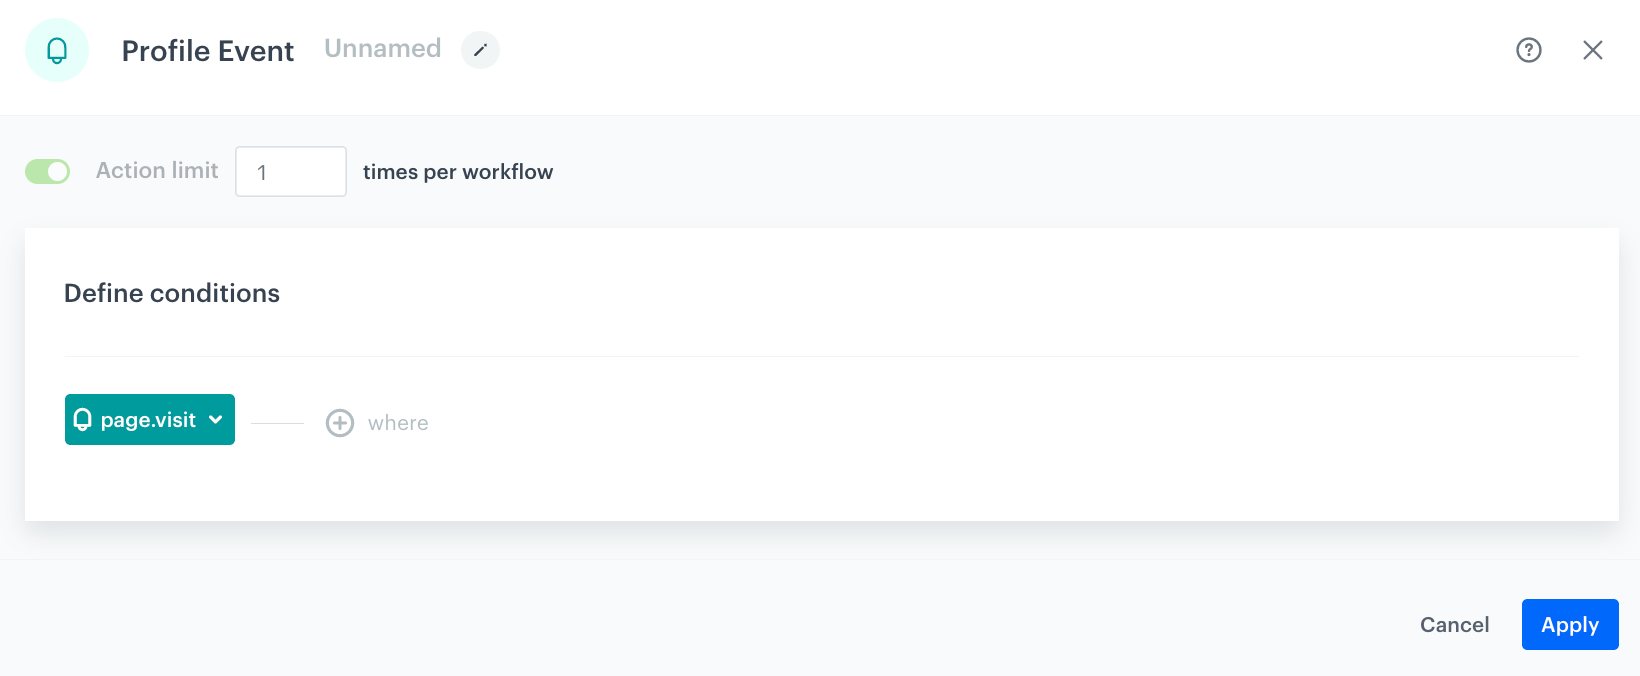
- From the dropdown list, select Profile Event.
- Double-click the Profile Event node.
- On the pop-up, from the Choose event list, select the page visit event. If you’re not sure of the event’s label in your system, search for
page.visit(or other event you want to send to Facebook). - Confirm by clicking Apply.
Configure Facebook Integration node
In this part of the process, you will configure an action that workflow performs - outgoing integration that sends the event to Facebook. Values of the event parameters will be dynamic and will be passed from the event trigger using inserts.
- On the Profile Event node, click the plus icon.
- From the dropdown list, select Facebook.
- From the dropdown list, select Send custom event.
- Click the node.
- Click Select connection.
- From the dropdown list, select the connection.
If you haven’t established a connection yet, see Create a connection.

Create a connection
Use an access token which allows you to send a request.
- At the bottom of the Select connection dropdown list, click Add connection.
- In the Access token field, enter the app access token.
Note: You can read more about access tokens in Facebook documentation. - Click Next.
- In the Connection name field, enter the name for the access token you generated.
- Click Apply.
Result: A connection is created and selected.
Define the integration settings
- In the Graph API version field, enter the currently used API version in Facebook.
You can find information about the currently used API version in the Facebook documentation. - In the Meta Pixel ID field, enter the identifier of the Pixel you use in Facebook.
You can find information about how to find ID of the Pixel in the Facebook documentation. - In the Event data input field, enter the JSON body of event. Use inserts to insert dynamic values and Facebook developer documentation to build the structure of event body.
Example of page.visit event body:
|
|
where:
| Line number | Description |
|---|---|
| 4 | Inserts event time from the trigger node and re-calculates it into seconds (this is required by Facebook). |
| 5 | Inserts URI from the trigger node as the event_source_url param. |
| 6-11 | If the visited page has product metadata, inserts that metadata. |
| 13 | Inserts customer’s IP from the trigger node. |
| 15 | Inserts email encoded using SHA-256 algorithm, if available. |
| 16 | Inserts phone number encoded using SHA-256 algorithm, if available. |
- Confirm by clicking Apply.
Add the End node
- On the Send custom event node, click the plus button.
- From the dropdown list, select End.
- Save and activate the automation by clicking Save&Run.
- Go to your Facebook Ad account, select Facebook Manager > Events Manager to see the events.

Result: After the customer performs event trigger, the webhook.response event is visible on the customer’s profile with 200 status. That means that the event has successfully been sent to Facebook.
Check the use case set up on the Synerise Demo workspace
You can also check the workflow configuration directly in Synerise Demo.
If you don’t have access to the Synerise Demo workspace, please leave your contact details in this form, and our representative will contact you shortly.