Send emails with dynamic attachments
There are various business cases in which personalized attachments need to be sent to customers through email. One reason for this is the specific nature of industries like finance, banking, insurance, or healthcare. Email communication in various industries often involves sending dedicated documents to customers, often due to legal requirements. Additionally, personalizing attachments can be beneficial for specific marketing campaigns aiming to meet particular business needs. Our Dynamic Attachments feature enables the process of sending customized attachments to each customer by email.
In this use case, we demonstrate how to add two dynamic attachments to an email communication, with each attachment tailored to individual customer. To do this, we create a workflow in which we upload selected files then attach them to an email and send them to customers. This use case illustrates a scenario where we send two requests with a single file.
Prerequisites
- Create an email account which you will use to send emails.
- Create an email template that you will use in your communication.
- You must integrate your system that generates files dedicated to customers and upload them to Synerise through the Synerise API (with content encoded in base64).
Create a workflow
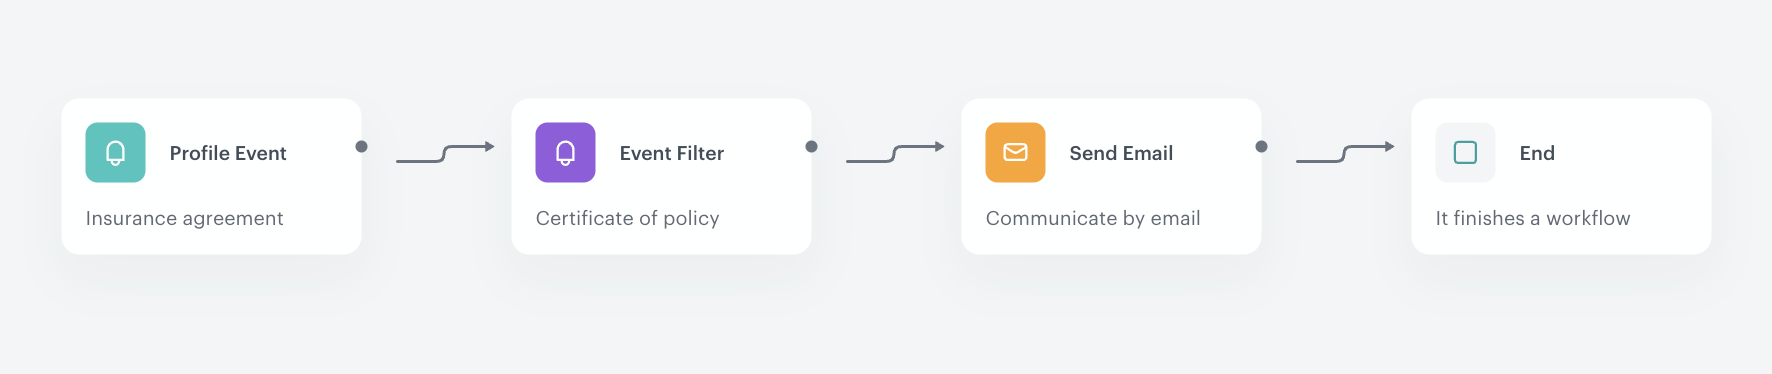
Create a workflow in which you specify the files you want to attach to the email communication. In this use case, we follow a scenario in which the workflow is triggered by the attachment.upload event, which retrieves information about the Insurance Agreement files. Then, we wait for the Policy Certificate to be uploaded, and then send email with both of these documents in attachments, where each attachment is dedicated to an individual customer.
Event attachment.upload can be extended with any custom attributes. In our case, we are sending an additional parameter docType, which contains information about the type of the uploaded file. We will use this parameter to specify the event from which we want to get the uploaded files.
- Go to Automation > Workflows > New workflow.
- Enter the name of the workflow.
Define the Profile Event trigger node
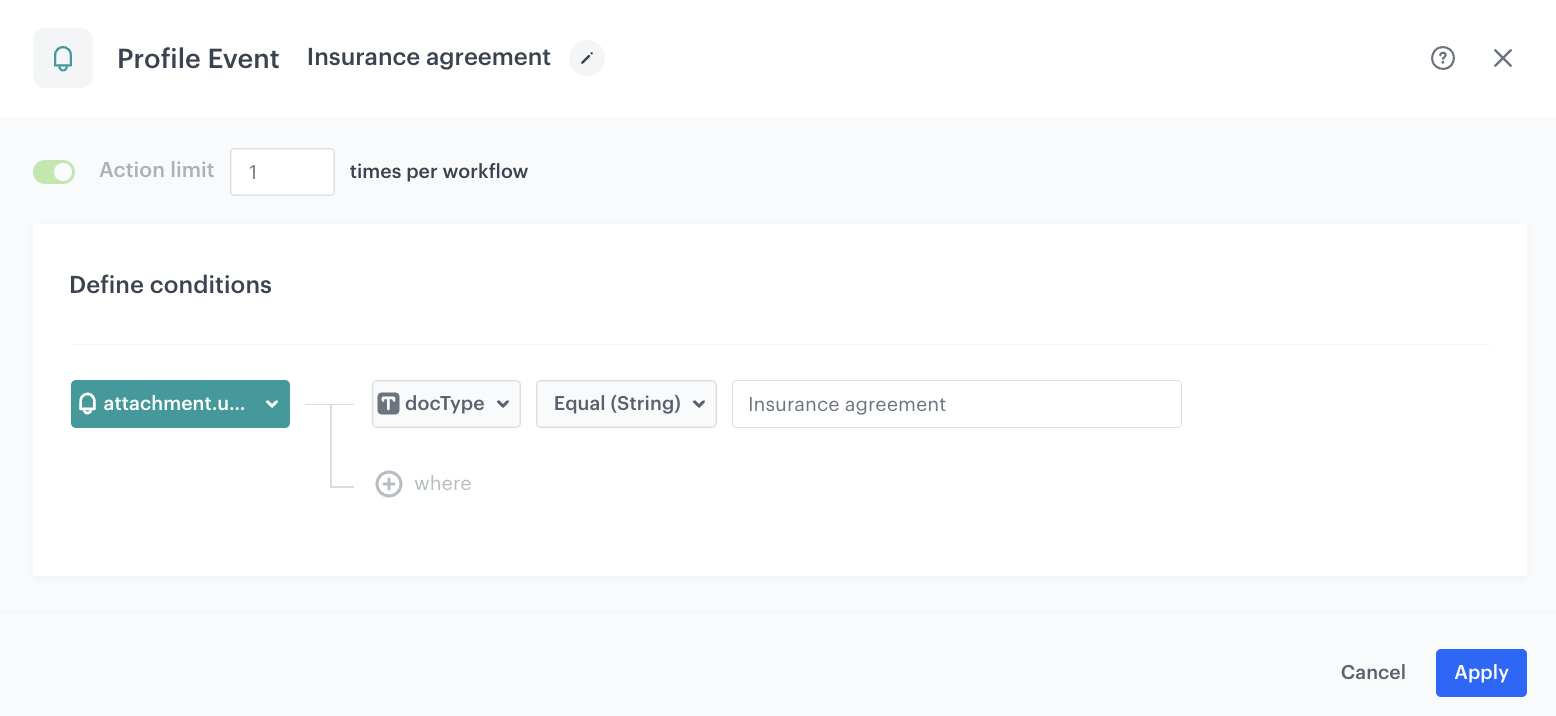
The trigger for starting this workflow is the attachment.upload event that appears in the customers profiles when files sent from the external source have been successfully uploaded and are ready to be used as a dynamic attachment. The first event from which we want to get file was send with docType parameter value - Insurance agreement.
- As the first node of the workflow, add Profile Event.
- Name this node with a unique name.
- From Choose event dropdown menu, choose the attachment.upload event.
- Click the + where button and from the dropdown list, choose the parameter that specify the type of uploaded file. In our case, it is the docType parameter.
- From the Choose operator dropdown, select Equal(String).
- In the text field, type the type of the file. In our case, it is
Insurance agreement. - Confirm by clicking Apply.
Define event filter
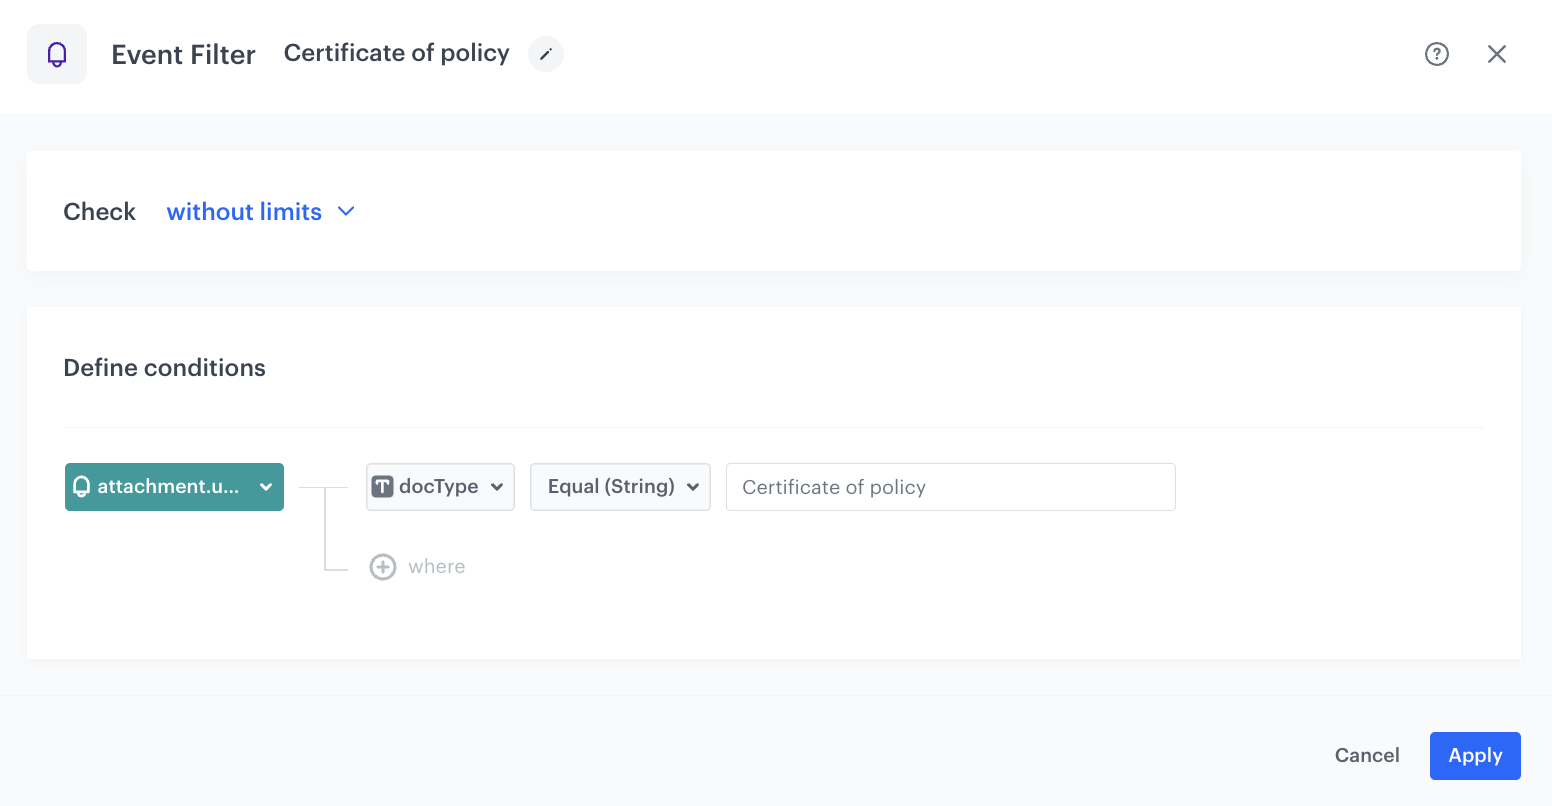
After the first file is uploaded, define the second event from which you want to upload file. We use attachment.upload event with the docType parameter value - Certificate of policy.
- Add the Event filter node.
- Name this node with a unique name.
- From Choose event dropdown menu, choose the attachment.upload event.
- Click the + where button and from the dropdown list, choose the parameter that specify the type of uploaded file. In our case, it is the docType parameter.
- From the Choose operator dropdown, select Equal(String).
- In the text field, type the type of the file. In our case, it is
Certificate of policy. - Confirm by clicking Apply.
Define the Send Email node
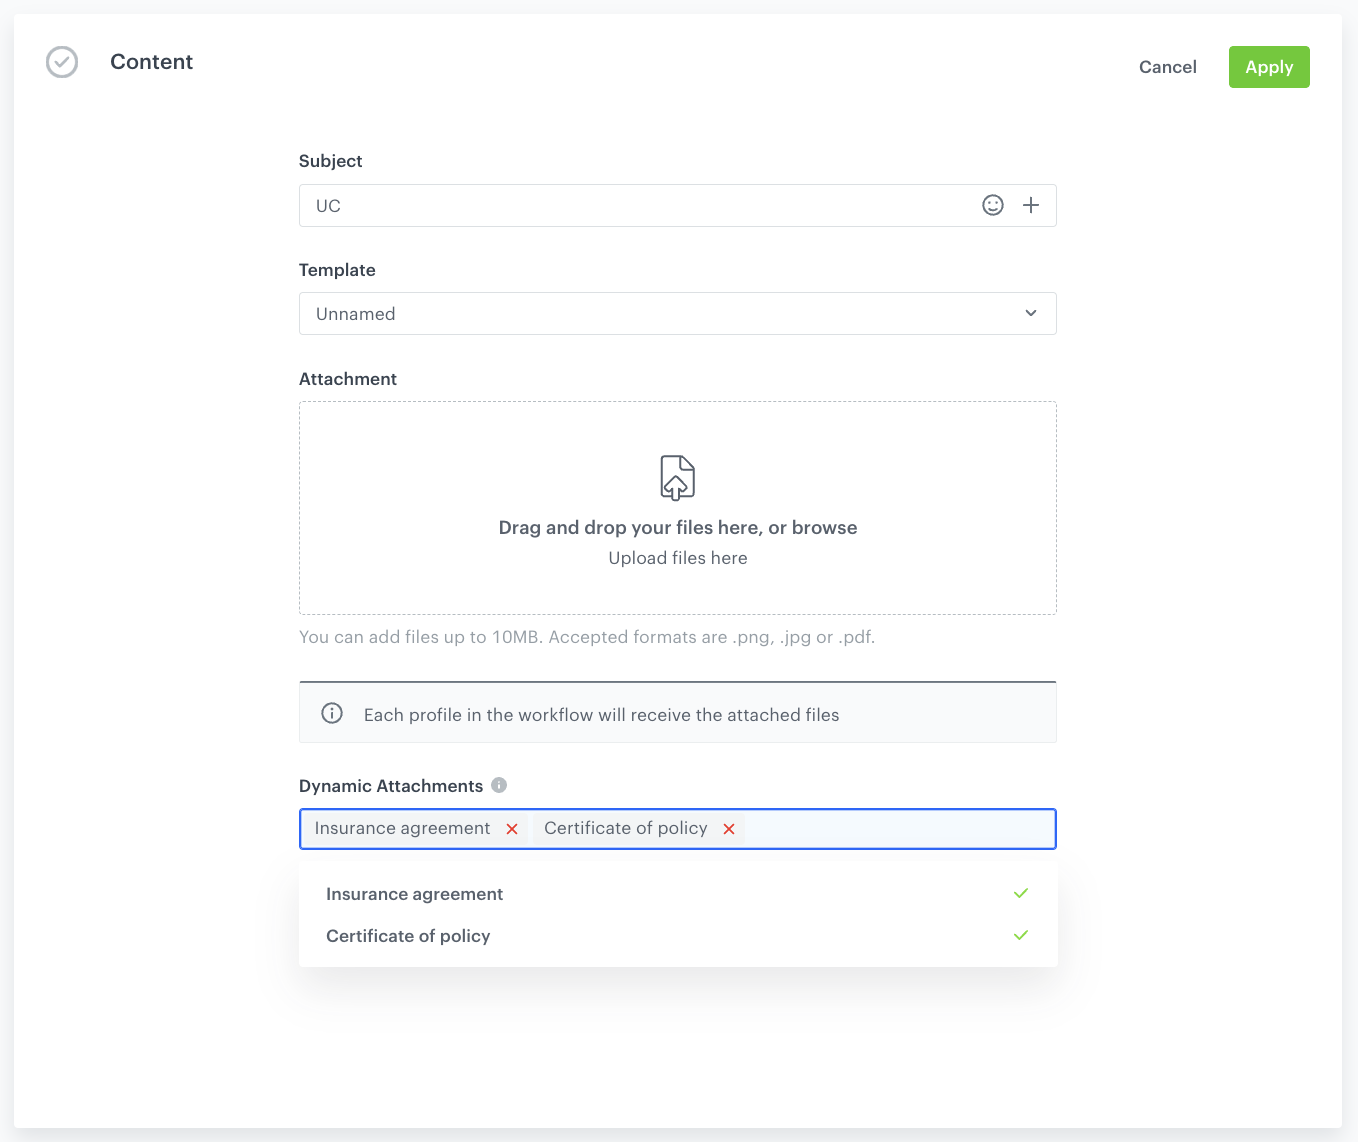
When all files are already uploaded, add them as attachments to the email communication.
- Add the Send Email node.
- In the Sender details section, choose the email account from which the email will be sent.
- In the Content section, in the Subject field, enter the subject of the email, and from the Template dropdown, select the template you created as part of the prerequisites.
- From the Dynamic Attachment dropdown list, select nodes from which the dynamic files will be sourced.
Send email node - In the UTM & URL parameters section, you can define the UTM parameters added to the links included in the email.
- In the Additional parameters section, you can optionally describe campaigns with additional parameters.
- Click Apply.
Add the finishing node
- Add the End node.
- In the upper right corner, click Save & Run.
Check the use case set up on the Synerise Demo workspace
You can check the configuration of the workflow directly in Synerise Demo workspace.
If you don’t have access to the Synerise Demo workspace, please leave your contact details in this form, and our representative will contact you shortly.