In-app banner campaign
In the fast-paced world of mobile applications, effective communication with users is key to ensure engagement and satisfaction. Imagine a scenario in which you want to inform users through a mobile app about an exclusive 20% discount on the electronics category. To effectively deliver such promotional message, implement a two-step approach: launch an automation that sends push notifications and display visually appealing in-app messages within the mobile application.
The described use case is an omni-channel case - the user navigates through the website and receives both push notifications and in-app messages in the application.
The first step is to set up a workflow that sends a simple push notification to mobile app users who have visited items in the electronics category on the website. After a user clicks the push notification, the fullscreen banner is displayed in the application. The core of this use case revolves around the new, pre-defined in-app template that is ready-to-use. You can easily tailor the content of the banner, add dynamic inserts to personalize the message further.
Prerequisites
- Implement Synerise SDK in your mobile app.
- Integrate JS SDK.
- Implement mobile pushes in your mobile application: iOS, Android.
- Implement customer identification on the website and in your mobile application.
Process
In this use case, you will go through the following steps:
- Create mobile push with information about the promotion.
- Create an in-app banner campaign based on the ready-to-use template.
- Create a workflow that sends a mobile push message to users who have visited items from the electronics category.
Create mobile push
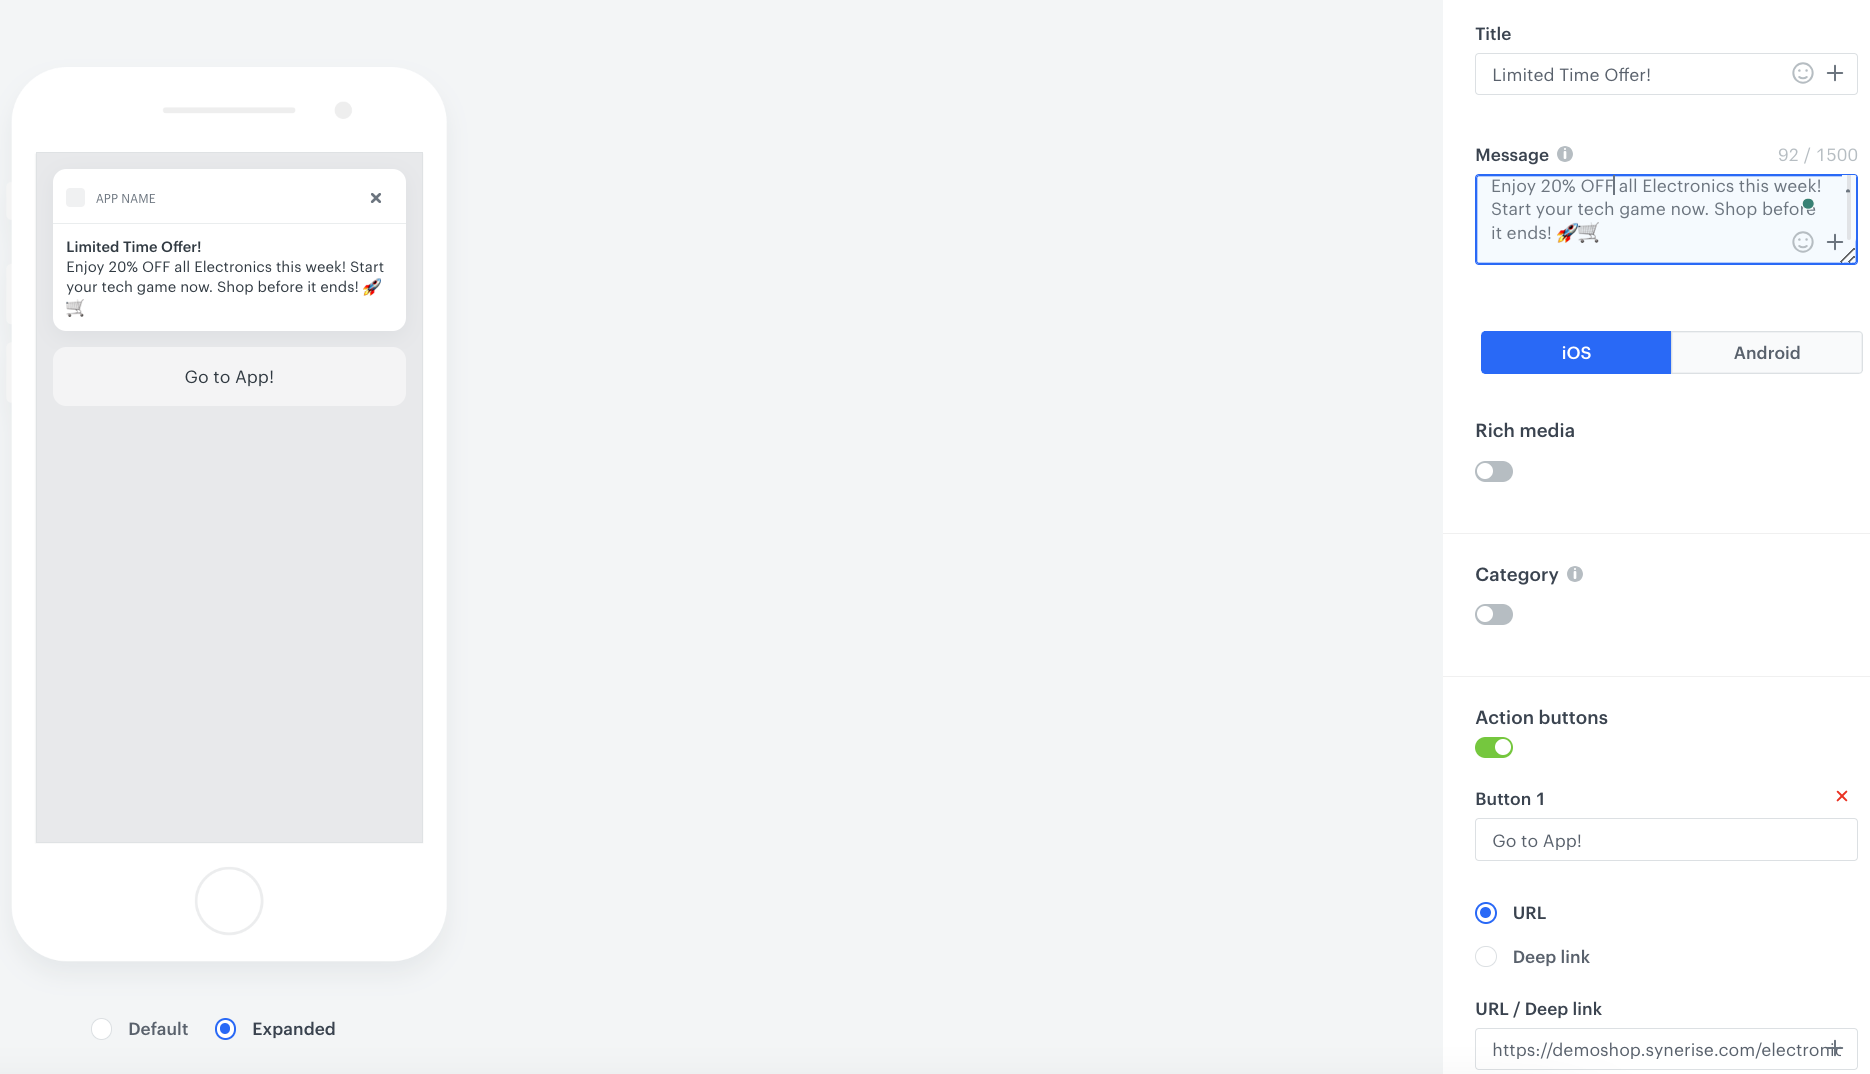
In this part of the process, you will create a mobile push template that contains information about the 20% discount for the electronics category and with the link that opens a mobile application.
- Go to Communication > Mobile > Templates.
- Create your mobile push in the code editor. In the content of the push notification:
- Add a message
- Add the link to mobile application
After a user clicks the link, the mobile application opens and an in-app message, which will be configured in the further part of the process, will be displayed
For more information on creating a simple mobile push, refer to the Simple push documentation.
Create an in-app banner campaign
In this part of the process, you will create an in-app banner campaign triggered by the push.click event. The campaign will be displayed after users clicked the link in the mobile push message sent to them.
- Go to
 Communication > In-app messages > Create new
 - Enter a meaningful name for the in-app campaign.
- In the Audience section:
- Click Define.
- Select the Everyone tab.
- Click Apply.
- In the Content section:
- Click Create message.
- Go to Predefined templates folder and choose Fullscreen template.
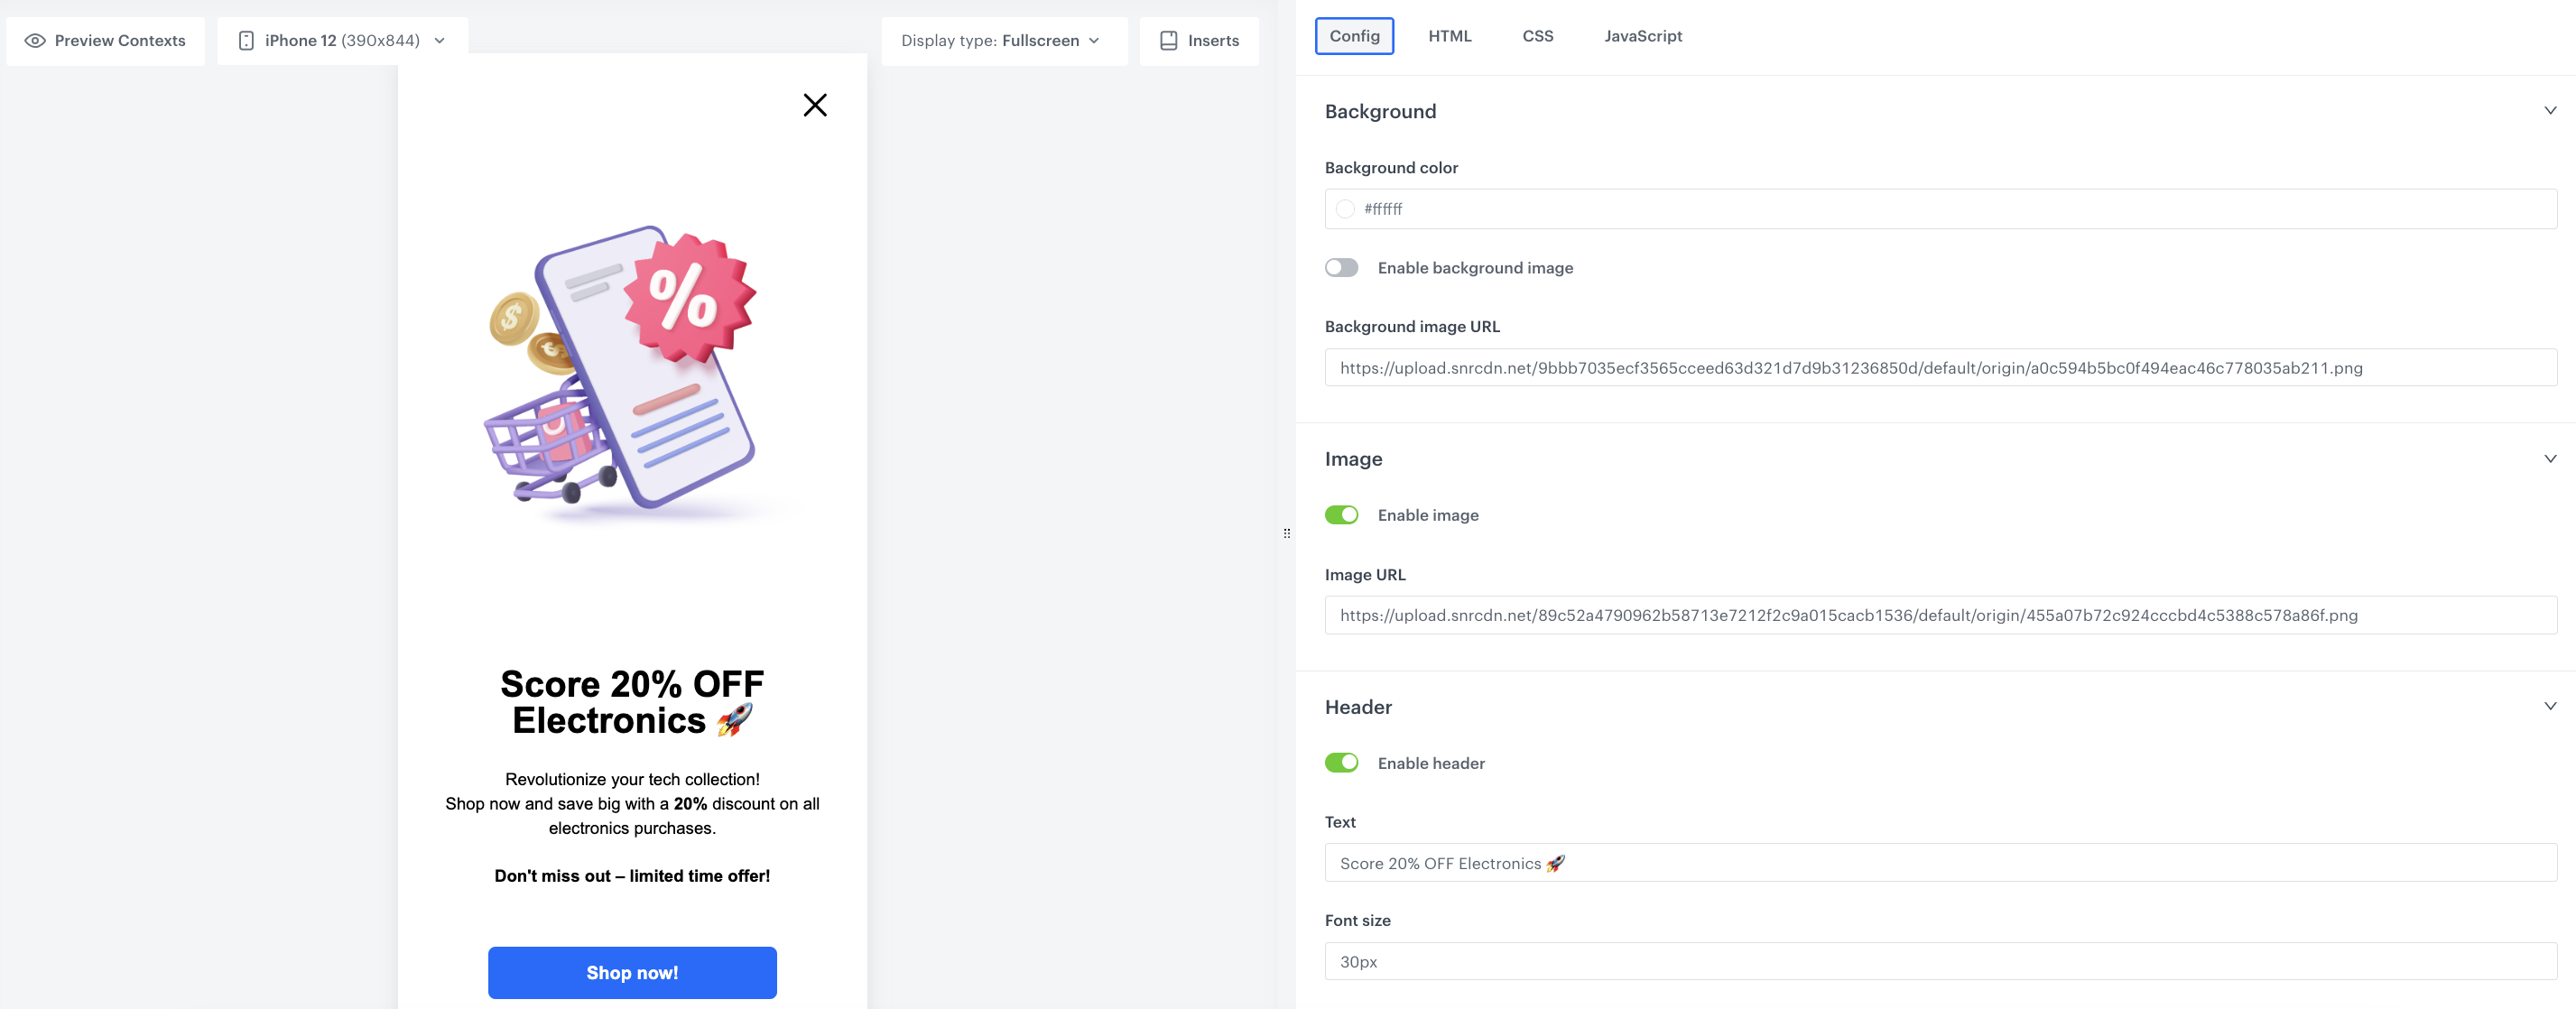
Edit form in the Config tab
The form in the Config tab is already filled in with default values. You can keep them or change them to fit your business needs.
The apperance fields in Config affect only the visual layer of the in-app message.
-
In the Background section, use the color picker to select the color of the background or enable background image and enter the link to this image (add the image to Data Management > Files and then you can find there the URL to this image).
-
In the Image section, enable the image in your banner campaign and add the link to this image (add the image to Data Management > Files and then you can find there the URL to this image).
-
In the Header section, enable header and add the text, font size and color of the header you want to display in the in-app message.
-
In the Description section, enable description and add the text, font size and color of the description you want to display in the in-app message.
-
In the CTA button section, enable the CTA and add the text, corner radius, color, background color and add the URL to which you want to redirect users afer clicking the button.
-
In the Close button section, enable this option and set up the close position.
-
In the Automatically disappear section, set up when the campaign banner will automatically disappear.
-
After you make changes to the template, you can check the preview.
- Click the Preview button on the upper left side.
- Enter the ID of a customer or a product.
- Click Apply.
-
To continue the process of configuring the in-app campaign, click Next.
-
To save your content changes, click Apply.
In-app campaign settings
Select events that trigger the in-app message display
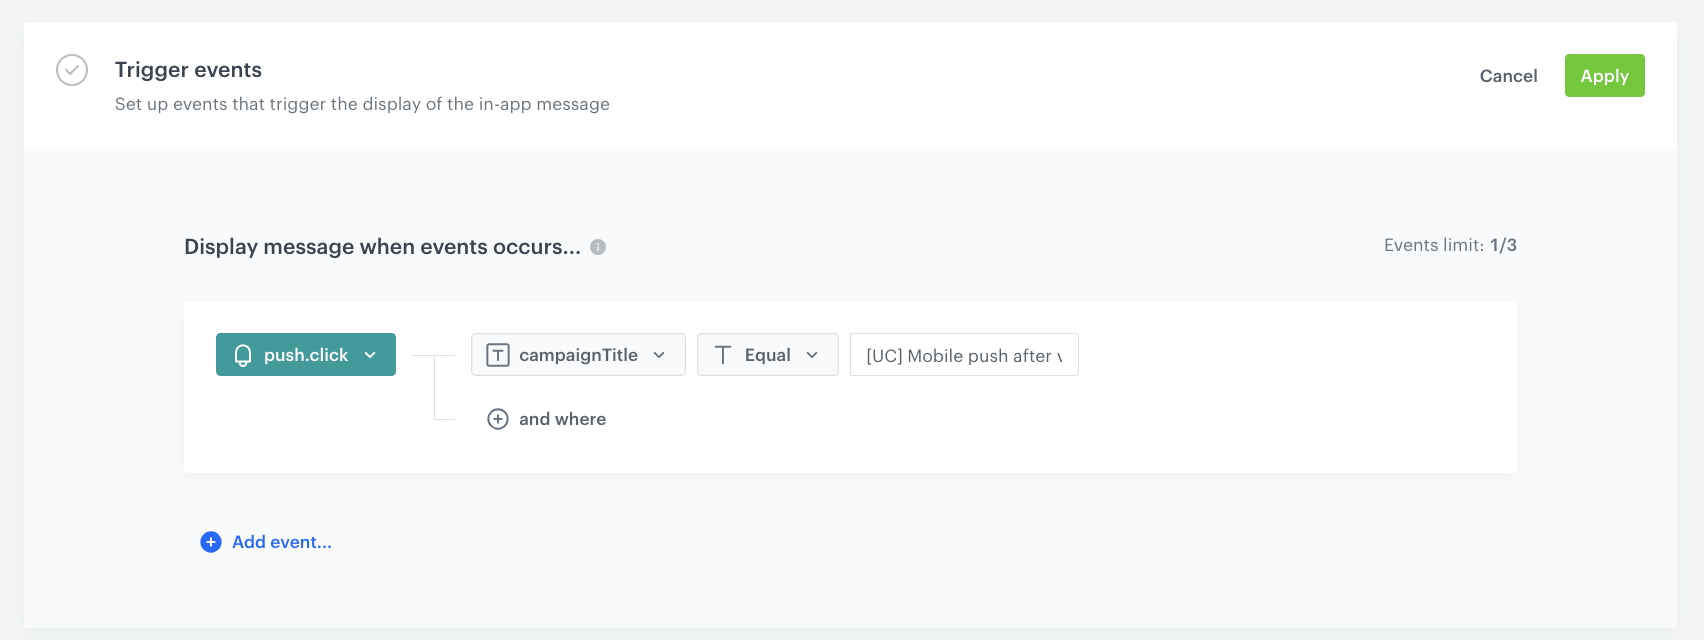
In this part of the process, define the event that triggers the display of the in-app message. In our case, the trigger is the click in the mobile push campaign created in the previous step.
-
In the Trigger events section:
- Click Define.
- Select Add event and from the dropdown list, choose the
push.clickevent. - Click the + where button and as the parameter, choose
campaignTitle. You can take its value from the name of the campaign visible on the list of all campaigns. - As the logical operator, select Equal and as the value add the campaign title of the mobile push campaign created in the previous step to analyze only clicks from this specific campaign.
- Click Apply.
Trigger event settings -
In the Schedule section:
- Click Define.
- Choose the Run immediately option.
- Click Apply.
-
In the Display settings section:
- Click Change.
- Define the Delay display as 0 and Priority index as 1.
Note: The mobile application can display one in-app message at a time. If the conditions allow the triggering of several in-apps at a time, the priority is a decisive factor for displaying the message. The messages with lower priority aren’t queued for displaying after the first one is closed.
- Enable the Frequency limit toggle to manage the frequency of in-app message display in the application.
In our case, we set it to once per day. - Click Apply.
-
Optionally, you can define UTM parameters. Otherwise, click Skip step.
-
Optionally, you can add the custom parameters in the Additional parameters section. Otherwise, click Skip step.
-
To start your campaign, click Activate.
Create a workflow
In this step, prepare a workflow that sends the push message that opens a mobile application to customers who have visite the electronics category. The workflow has capping set once per day, so the workflow can be launch towards a user only once a day.
- Go to
 Automation > Workflows > New workflow.
 - Enter the name of the workflow.
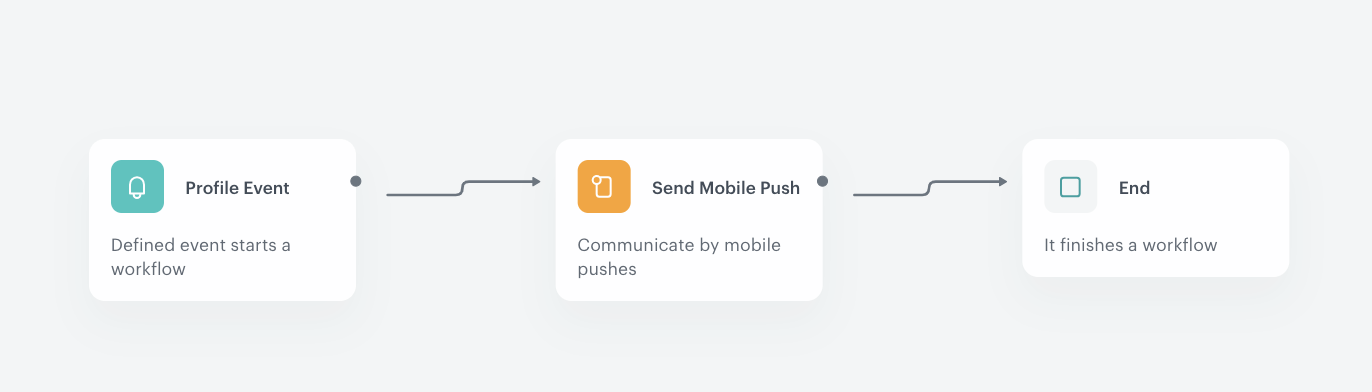
Define the Profile Event trigger node
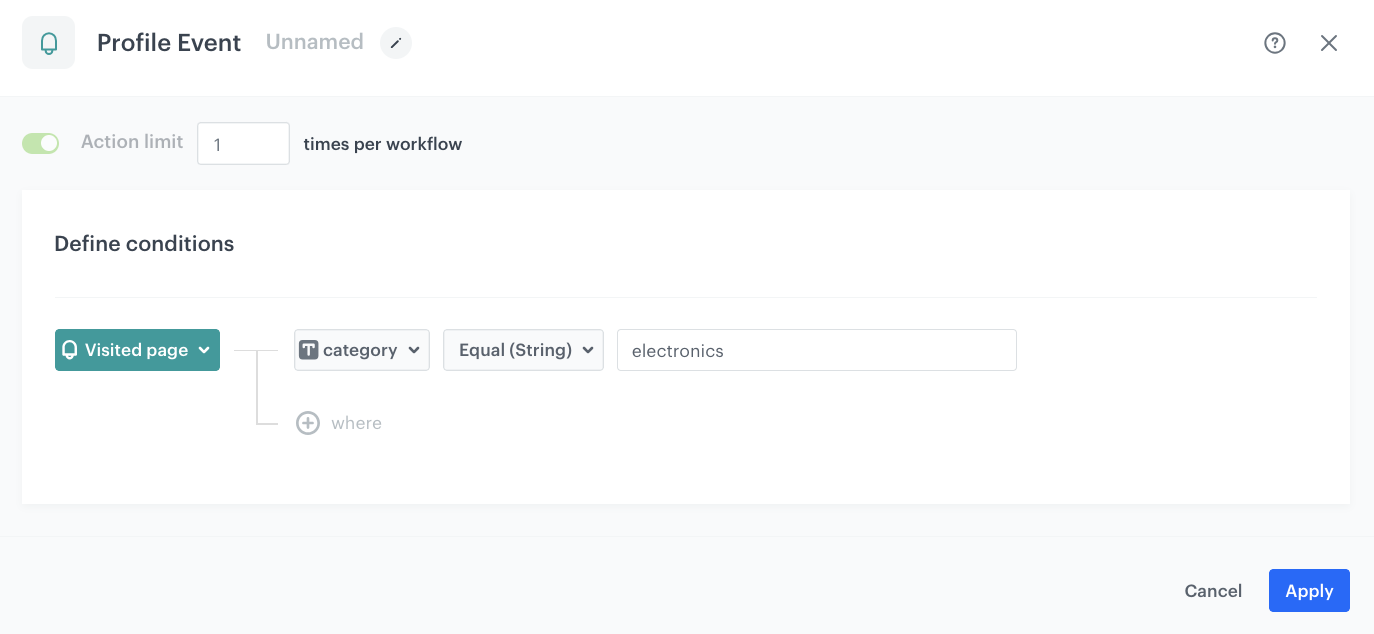
At this stage, we will configure conditions that launch the workflow. As a trigger, we will use the page.visit event in the electronics category.
- As the first node of the workflow, add Profile Event. In the configuration of the node:
- From the Choose event dropdown menu, choose the
page.visitevent. - Click the + where button, from the Choose parameter dropdown menu, choose category.
- From the Choose operator dropdown, choose String, and then select Equal (String).
- In the next field, type
electronicsto analyze only visits to the items from the electronics category.
- From the Choose event dropdown menu, choose the
- Confirm by clicking Apply.
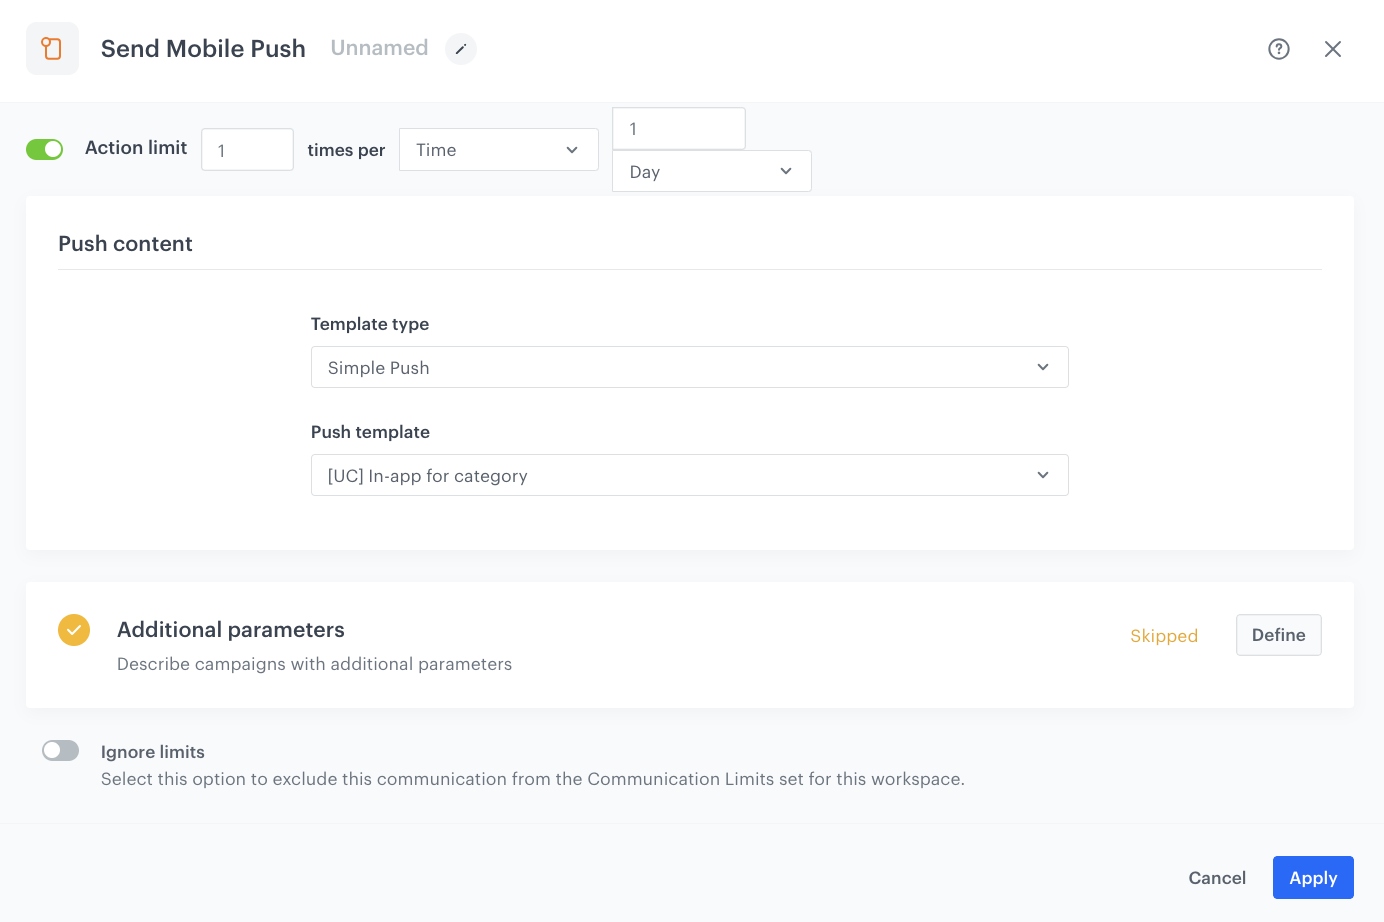
Configure the Send Mobile Push node
- As the next node, add the Send Mobile Push node.
- In the settings of the node, leave the template type at default (Simple Push).
- From the Template type dropdown list, select the template you have prepared in the previous step.
- Enable the Action limit toggle and set the limit to
1per workflow. - If you want to add parameters to the event generated by this message, in the Additional parameters, click Define. If not, click Skip step.
Note: You can read more about Additional parameters in the Define additional parameters section. - Click Apply.
Prepare the final settings
- After Send Mobile Push, add the End node.
- Optionally, add titles to each node so the workflow will be more understandable to your colleagues.
- To define capping, next to the workflow name, click Set capping and set it to
1 per 1 day. - Activate the workflow by clicking Save & Run.
Check the use case set up on the Synerise Demo workspace
You can check the configuration of the campaign components directly in Synerise Demo workspace:
If you don’t have access to the Synerise Demo workspace, please leave your contact details in this form, and our representative will contact you shortly.